Hey there, neighbors! Are you looking to turn your kitchen scraps and yard waste into garden gold but think you don’t have the space? Many city dwellers feel the same way. It’s easy to think composting is just for folks with big backyards, but I’m here to tell you that’s not true! You absolutely can compost, even in a small urban space. This guide is designed to make it super simple, step-by-step. We’ll walk through everything you need to know, from choosing the right bin to what you can — and can’t — toss in. Let’s get started and transform your waste into something wonderful!
Composting for Urban Areas: Your Essential Guide to City Soils
Welcome to the world of urban composting! It’s a fantastic way to reduce landfill waste, create nutrient-rich soil for your plants, and feel a little more connected to nature, right in the heart of the city. Don’t be intimidated; this guide is designed for you, the beginner, the apartment dweller, the balcony gardener. We’ll break down composting into easy, manageable steps, proving that you don’t need acres of land to be a successful composter.
Why Compost in the City? The Big Benefits
Composting isn’t just a trendy eco-habit; it’s a practical solution with real rewards, especially for urbanites. Think of it as a win-win-win:
- Reduces Waste: Your trash bin will suddenly seem less full! A significant portion of household waste is compostable material. Keeping it out of landfills is a huge environmental win, reducing methane gas production, a potent greenhouse gas. According to the U.S. Environmental Protection Agency (EPA), food waste is a major component of municipal solid waste.
- Creates Amazing Soil: Yep, you grow your own super-soil! Compost, sometimes called “black gold,” is packed with nutrients that help plants grow stronger, healthier, and more disease-resistant. It improves soil structure, aeration, and water retention, which are crucial, especially in pots or raised beds common in urban gardening.
- Saves Money: Imagine not having to buy bags of expensive potting soil or fertilizer every year. Your compost bin becomes your personal, free soil factory.
- Connects You to Nature: Even a small compost setup can make you feel more grounded and mindful of your impact. It’s a tangible way to participate in natural cycles.
- Improves Local Environment: Less waste going to landfills means cleaner air and water for your community.
Choosing Your Urban Composting Method
The “best” method really depends on your living situation, available space, and how much effort you want to put in. Here are the most popular options for city dwellers:
1. The Tumbler Composter: The Speedy Spinner
What it is: A sealed barrel or container, often mounted on a stand, that you can rotate or “tumble.” This mixing action aerates the compost material and speeds up decomposition.
Pros:
- Faster composting turnaround (weeks to a few months).
- Sealed design deters pests and contains odors.
- Easy to mix and aerate by turning.
- Many are designed to be relatively compact and aesthetically pleasing.
Cons:
- Can be more expensive upfront than static bins.
- Batch composting: You fill it up, then wait for it to finish before adding more.
- Can sometimes get too wet or too dry if not managed properly.
Best for: People with a small yard, patio, or balcony who want relatively quick results and are willing to invest a bit more. They are great for dealing with kitchen scraps and small amounts of yard waste.
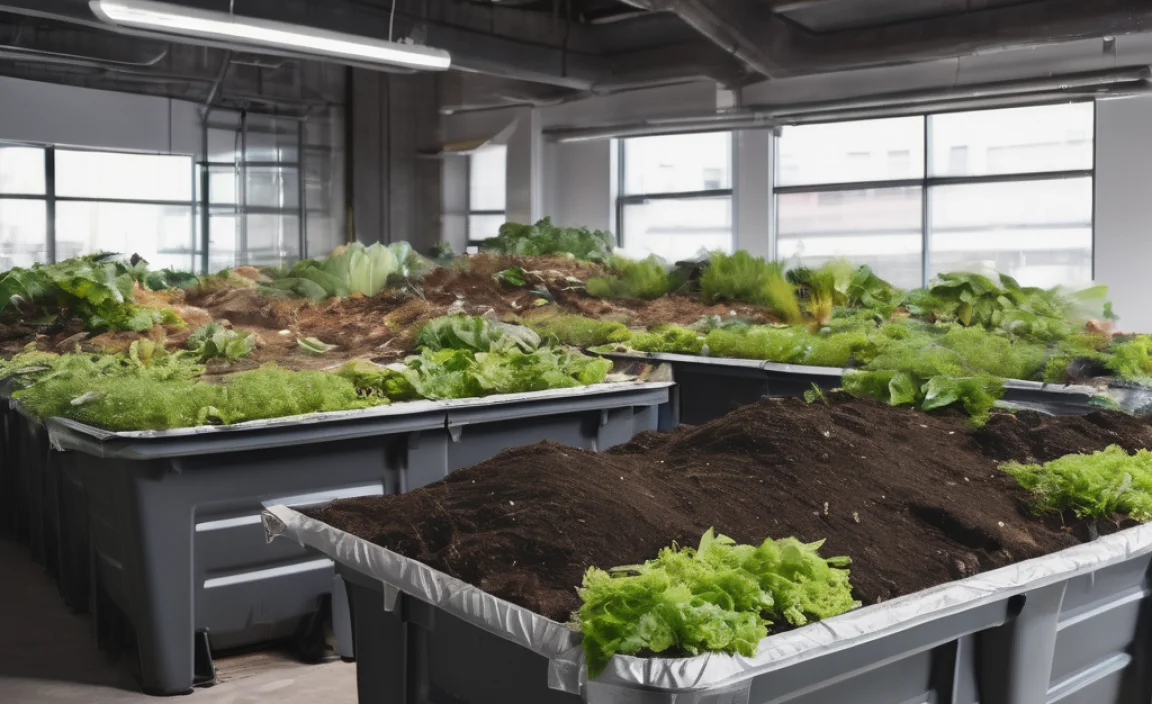
2. The Stationary/Bin Composter: The Classic Workhorse
What it is: A bin that sits in one place. These can be commercially bought plastic bins with lids and ventilation holes, or you can even build one yourself from wood pallets or wire mesh. Some have access doors at the bottom to easily remove finished compost.
Pros:
- Generally more affordable than tumblers.
- Can handle larger volumes of material.
- Continuous composting: You can add new materials as you go.
- Simpler to set up and maintain.
Cons:
- Slower composting process (several months to a year).
- Requires manual turning with tools like a pitchfork or compost aerator to introduce air and speed things up, which can be more labor-intensive.
- May be more susceptible to pests if not managed well or if the lid isn’t secure.
- Can sometimes develop odors if the balance of materials is off or it’s too wet.
Best for: Those with a bit more space (a small yard or a dedicated corner of a patio) who don’t mind a longer composting cycle and are okay with a bit of manual turning.
3. The Worm Composter (Vermicomposting): Tiny Farmers, Big Results
What it is: Using specific types of worms (like red wigglers, Eisenia fetida) in a specialized bin to break down food scraps. This is perfect for apartment dwellers with no outdoor space.
Pros:
- Ideal for small spaces like apartments, condos, or even indoors.
- Produces high-quality compost (worm castings) very quickly.
- Minimal odor if managed correctly.
- Engaging and fascinating to watch!
Cons:
- Requires purchasing specific composting worms (regular earthworms won’t do).
- Cannot compost meat, dairy, oily foods, or large amounts of citrus.
- Temperature sensitive; worms can die if the bin gets too hot or too cold.
- The “harvesting” of worm castings and liquid “worm tea” can be a bit messy for some.
Best for: Apartment dwellers, renters with no outdoor space, or anyone wanting to compost primarily kitchen scraps and produce super-rich fertilizer.
4. Bokashi Composting: The Fermentation Station
What it is: An anaerobic (without oxygen) fermentation process that uses a special inoculant (bran sprinkled with effective microorganisms) to pickle and ferment your food scraps, including meat and dairy. It’s done in an airtight bucket.
Pros:
- Can compost meat, dairy, and oily foods.
- Very compact and suitable for small kitchens.
- Fast initial processing (about two weeks).
- Produces a nutrient-rich liquid that can be diluted for fertilizer.
Cons:
- It’s actually fermentation, not true composting. The end product is still acidic and needs to be buried in soil or added to a traditional compost pile to fully break down.
- Requires purchasing the Bokashi bran.
- Can have a slightly pickled smell during the fermentation process.
- Requires an airtight container and involves a two-step process (ferment, then bury/compost).
Best for: Urban dwellers who want to compost almost all food waste, including items not suitable for other methods, and have a place to bury the fermented product afterward (a community garden, a friend’s yard, or even a large planter box). Check out BokashiUSA for more details on the process.
What You Can (and Can’t) Compost
This is crucial for successful, odor-free composting. The key is a good balance of “greens” (nitrogen-rich) and “browns” (carbon-rich). Think of it like making a healthy meal for your compost pile!
The “Greens” (Nitrogen-Rich)
These materials are typically moist and provide nitrogen, essential for microbial activity and heating up the pile.
- Fruit and vegetable scraps (peels, cores, rinds, etc.)
- Coffee grounds and paper filters
- Tea bags (remove staples, ensure no plastic lining)
- Grass clippings (add in thin layers to prevent matting)
- Plant trimmings (non-woody, diseased-free)
- Eggshells (crushed)
The “Browns” (Carbon-Rich)
These materials are typically dry and provide carbon, which feeds the microbes and helps with aeration and preventing the pile from getting too slimy or smelly.
- Dry leaves
- Shredded newspaper and cardboard (avoid glossy or colored inks)
- Straw or hay
- Wood chips or sawdust (in moderation)
- Pine needles (in moderation, can be acidic)
- Paper towels and napkins (unsoiled by grease or chemicals)
What to AVOID Composting (Especially in Urban Settings)
These items can cause odor problems, attract pests, or contain pathogens that you don’t want spreading in your compost.
- Meat, fish, and bones
- Dairy products (milk, cheese, yogurt)
- Oily foods and grease
- Diseased plants or weeds that have gone to seed (unless you have a very hot compost pile, which is rare in urban settings)
- Pet waste (dog and cat feces) – contains harmful pathogens.
- Treated wood or sawdust from treated wood
- Coal or charcoal ash
- Synthetic materials (plastics, styrofoam)
- Inorganic materials (glass, metal)
- Large branches or woody material (takes too long to break down)
Always remember: if you’re unsure, it’s better to leave it out! For vermicomposting, the “avoid” list is even stricter, generally excluding meat, dairy, citrus, onions, and a lot of starchy foods.
Getting Started: Step-by-Step Urban Composting
Let’s break down the process. We’ll focus on a stationary bin or tumbler, as they are common choices.
Step 1: Choose Your Location
For bins/tumblers: Select a spot that gets some sun (helps heat the pile) but isn’t baking hot all day. It should be easily accessible for adding materials and turning, and ideally not right under a window or near a busy patio area. A small yard, a sturdy balcony, or a patio corner can work.
For worm bins: Keep them in a stable temperature location, away from direct sun and extreme drafts. Indoors, in a cool basement, or a shaded, protected part of a balcony are good options.
Step 2: Set Up Your Composter
Stationary Bin: Place it directly on the soil if you have a yard, as this allows beneficial organisms to enter. If you’re on concrete or a patio, you might want to place a layer of soil or a cardboard base at the bottom to kickstart the process.
Tumbler: Assemble according to the manufacturer’s instructions. Ensure it’s on a stable surface.
Worm Bin: Follow the specific instructions for your worm bin. This usually involves preparing bedding material (shredded newspaper, coconut coir) and then adding the worms.
Step 3: Start Adding Materials (The Layering Game)
Begin with a base layer of “browns” (like shredded cardboard or dry leaves) at least 4-6 inches thick. This helps with drainage and airflow. Then, begin adding your kitchen scraps (“greens”) and more browns from your yard. A good starting ratio is roughly 2 parts browns to 1 part greens by volume. This isn’t an exact science, but it’s a good guideline to prevent a soggy, smelly pile.
Tip: Chop larger items into smaller pieces. This increases the surface area for microbes to work on, speeding up decomposition significantly.
Step 4: Maintain Moisture
Your compost pile should be as moist as a wrung-out sponge. Too dry, and decomposition slows to a crawl. Too wet, and it can become anaerobic (stinky!).
- If it’s too dry: Water it thoroughly, usually while turning.
- If it’s too wet: Add more “brown” materials (shredded cardboard, dry leaves) to absorb excess moisture. Ensure good airflow.
Step 5: Aerate (Add Air!)
Microbes need oxygen to do their work efficiently. This is where turning comes in!
- Tumblers: Turn the tumbler every few days or as recommended.
- Stationary Bins: Use a pitchfork, compost aerator, or sturdy shovel to turn the materials every 1-2 weeks. Try to move material from the outside to the inside and vice-versa.
- Worm Bins: Worms burrow and mix the material themselves, so manual turning isn’t usually needed. You just need to add food scraps periodically.
Step 6: Know When It’s Ready
Finished compost will be dark brown, crumbly, and smell earthy, like a forest floor. You shouldn’t be able to recognize the original materials. The time it takes varies greatly, from a few weeks in a highly managed tumbler to a year or more in a neglected static pile. For tumblers and well-managed bins, you might see finished compost in 2-6 months.
To harvest, you can either empty the entire compost bin/tumbler and separate finished from unfinished material, or, if your bin has an access door at the bottom, the material that has had the longest time to break down should be ready there.
Troubleshooting Common Urban Composting Problems
Even with the best intentions, you might run into a few hiccups. Don’t worry, these are usually easy to fix!
Problem: The Pile Smells Bad (Rotten Eggs, Ammonia)
Cause: Too much “green” material, too wet, or not enough air. This is anaerobic decomposition.
Solution:
- Add more “brown” materials (shredded paper, dry leaves) to absorb moisture and balance the carbon-to-nitrogen ratio.
- Turn the pile thoroughly to introduce air.
- If using a bin, ensure the lid is not airtight and there are plenty of ventilation holes.
Problem: The Pile Isn’t Heating Up or Decomposing
Cause: Too much “brown” material, too dry, or pile is too small to generate heat.
Solution:
- Add more “green” materials (kitchen scraps, grass clippings).
- Water the pile if it’s dry.
- Chop materials into smaller pieces.
- If using a static bin, try to make the pile at least 3x3x3 feet for best results (this can be challenging in urban settings, but still aim for a decent size).
- Ensure the pile is in a sunny spot to absorb heat.
Problem: Pests (Flies, Rodents)
Cause: Exposed food scraps, or the presence of meat/dairy/oily foods.
Solution:
- Bury all kitchen scraps deep within the pile, always covering them with a layer of browns.
- Avoid adding meat, dairy, and oily foods altogether, especially if rodents are a concern.
- Use a compost bin with a secure lid and fine mesh to deter insects.
- In a tumbler, the enclosed nature usually prevents pests quite effectively.
- For worm bins, ensure only appropriate foods are given and the bin is kept in a secure location.
For more detailed pest management in composting, the University of California Statewide Integrated Pest Management Program offers excellent, research-based advice.
Using Your Finished Urban Compost
Once your compost is ready, it’s time for the best part: using it! Your homemade compost is versatile and can significantly improve the health of your plants.
- Potting Mix: Mix compost with potting soil in a 1:1 or 1:2 ratio (compost to soil) for container plants. This adds vital nutrients and improves drainage and aeration.
- Top Dressing: Spread a 1-2 inch layer of compost around existing plants in pots or garden beds. The nutrients will slowly release into the soil.
- Seed Starting: Use a mix of compost and other soil amendments for starting
.lwrp.link-whisper-related-posts{
margin-top: 40px;
margin-bottom: 30px;
}
.lwrp .lwrp-title{}.lwrp .lwrp-description{
}
.lwrp .lwrp-list-container{
}
.lwrp .lwrp-list-multi-container{
display: flex;
}
.lwrp .lwrp-list-double{
width: 48%;
}
.lwrp .lwrp-list-triple{
width: 32%;
}
.lwrp .lwrp-list-row-container{
display: flex;
justify-content: space-between;
}
.lwrp .lwrp-list-row-container .lwrp-list-item{
width: calc(25% – 20px);
}
.lwrp .lwrp-list-item:not(.lwrp-no-posts-message-item){max-width: 150px;
}
.lwrp .lwrp-list-item img{
max-width: 100%;
height: auto;
object-fit: cover;
aspect-ratio: 1 / 1;
}
.lwrp .lwrp-list-item.lwrp-empty-list-item{
background: initial !important;
}
.lwrp .lwrp-list-item .lwrp-list-link .lwrp-list-link-title-text,
.lwrp .lwrp-list-item .lwrp-list-no-posts-message{}@media screen and (max-width: 480px) {
.lwrp.link-whisper-related-posts{}
.lwrp .lwrp-title{}.lwrp .lwrp-description{
}
.lwrp .lwrp-list-multi-container{
flex-direction: column;
}
.lwrp .lwrp-list-multi-container ul.lwrp-list{
margin-top: 0px;
margin-bottom: 0px;
padding-top: 0px;
padding-bottom: 0px;
}
.lwrp .lwrp-list-double,
.lwrp .lwrp-list-triple{
width: 100%;
}
.lwrp .lwrp-list-row-container{
justify-content: initial;
flex-direction: column;
}
.lwrp .lwrp-list-row-container .lwrp-list-item{
width: 100%;
}
.lwrp .lwrp-list-item:not(.lwrp-no-posts-message-item){max-width: initial;
}
.lwrp .lwrp-list-item .lwrp-list-link .lwrp-list-link-title-text,
.lwrp .lwrp-list-item .lwrp-list-no-posts-message{};
}


I am passionate about home engineering. I specialize in designing, installing, and maintaining heating, ventilation, and air conditioning systems. My goal is to help people stay comfortable in their homes all year long.