Living in the city doesn’t mean you can’t be a green thumb! Many folks think composting is only for sprawling backyards, but that’s just not true. You might be surprised how much food scrap and yard waste you create. And tossing it all in the trash? That’s a missed opportunity to create amazing soil. This guide will break down everything you need to know about composting in small spaces. We’ll explore easy methods and show you how to get started, even if you’ve never composted before. Ready to turn your kitchen scraps into garden gold?
Composting for Urban Areas PDF: Your Essential Guide to City Greenery
Hey there, I’m Troy D Harn, and I believe everyone can create a thriving garden, no matter where they live. Composting might sound complicated, but it’s really just nature’s way of recycling. Think of it as giving your organic waste a second life as super-powered plant food. In the city, where space is often tight, this can feel like a challenge. But don’t worry, we’ve got this! This guide is designed to be your easy-to-follow roadmap, whether you have a tiny balcony, a small patio, or even just a sunny windowsill.
We’ll cover the ‘what,’ ‘why,’ and ‘how’ of urban composting. You’ll learn about different methods that are perfect for apartments and small homes. We’ll also talk about what you can and can’t compost, how to avoid common mistakes, and what tools you might need. By the end, you’ll be ready to start your own composting journey and enjoy the benefits of rich, homemade compost for your plants, wherever you grow them.
Why Compost in the City? The Big Benefits
Composting in urban areas isn’t just a trend; it’s a smart, sustainable practice with plenty of perks. Let’s break down why it’s worth your time and effort, even with limited space.
- Reduces Landfill Waste: A huge chunk of what we throw away is organic material – food scraps, yard trimmings, paper. Composting diverts this from landfills, which are often overburdened and contribute to greenhouse gas emissions.
- Creates Nutrient-Rich Soil: Homemade compost is like a superfood for your plants. It’s packed with essential nutrients that improve soil structure, drainage, and water retention. This means healthier, happier plants for your small garden, balcony pots, or window boxes.
- Saves Money: Instead of buying bags of potting soil or fertilizer, you can create your own high-quality soil amendment for free! As you get more into gardening, this can add up to significant savings.
- Connects You to Nature: In a concrete jungle, composting offers a tangible way to engage with natural cycles. It’s rewarding to see waste transform into something valuable.
- Improves Air and Water Quality: By reducing methane emissions from landfills and creating healthier soil that can absorb more water, composting contributes to a cleaner environment.
Choosing Your Urban Composting Method
The best composting method for you really depends on your living situation, how much space you have, and how much organic waste you produce. For urban dwellers, some methods are far more practical than others. Here are the top contenders, explained simply.
1. Worm Composting (Vermicomposting)
This is a favorite for apartment dwellers! Worm composting uses special composting worms (like Red Wigglers) to break down food scraps. It’s quiet, odorless when done correctly, and you can do it indoors or on a balcony.
How it works: You fill a special bin with bedding material (like shredded newspaper or coconut coir), add your worms, and then feed them your kitchen scraps. The worms eat the scraps and their waste is the valuable compost, called “worm castings.”
Great for: Apartment balconies, kitchens, or even under a sink. Produces high-quality compost quickly.
What you need:
- A worm bin (you can buy one or DIY)
- Composting worms (Red Wigglers are common)
- Bedding material
- Your kitchen scraps
2. Bokashi Composting
Bokashi is a unique fermentation process that uses a special blend of microbes to pickle your food waste before it’s buried or added to another compost system. It can handle meat, dairy, and oily foods, which are usually a no-go for other methods.
How it works: You add food scraps to an airtight Bokashi bin and sprinkle it with an “activator” (a bran-like substance with effective microbes). Once the bin is full, you seal it and let it ferment for about two weeks. The fermented material then needs to be buried in soil or added to a traditional compost pile to finish breaking down.
Great for: Small spaces, especially if you want to compost meat and dairy. The fermented material can be added to larger outdoor compost bins or even buried in large potted plants.
What you need:
- A Bokashi bin (with a spigot to drain liquid)
- Bokashi activator (microbial inoculant)
- Food scraps (including meat, dairy, and oils)
3. Small-Scale Tumbler Composter
Tumbling composters are sealed bins that you can rotate or “tumble.” This mixes the contents, aerates them, and speeds up the composting process. They are designed to be neat and contained, making them suitable for patios or balconies.
How it works: You add your “greens” (nitrogen-rich scraps like food waste) and “browns” (carbon-rich materials like shredded paper) to the tumbler. You then periodically turn the tumbler to mix everything. Moisture and air are key to efficient composting.
Great for: Patios, balconies, or small yards. Keeps compost contained and can be faster than stationary bins.
What you need:
- A composting tumbler (various sizes available)
- Greens and browns
- Water for moisture
4. Continuous Composter Bin (Small Stationary Bin)
These are typically plastic bins where you add materials to the top, and finished compost is removed from a hatch at the bottom. They are a good option if you have a bit more space, like a small backyard or a larger patio.
How it works: You layer “greens” and “browns” into the bin. The composting process happens over time. As the material at the bottom breaks down, you can remove it, and you can continue adding fresh material to the top.
Great for: Small backyards, larger patios. A more traditional approach for small spaces.
What you need:
- A continuous compost bin
- Greens and browns
- Water
- A turning tool (optional, for aeration)
What Can You (and Can’t You) Compost? The Golden Rules
Knowing what to throw into your compost bin is crucial for success and avoiding smells or pests. Think of it as balancing your compost pile. There are two main types of materials: “Greens” and “Browns.”
Greens (Nitrogen-Rich Materials)
These are typically moist, nitrogen-rich materials that provide the “fuel” for microbes to do their work. They tend to break down quickly.
- Fruit and vegetable scraps
- Coffee grounds and tea bags
- Grass clippings (in moderation)
- Plant trimmings (non-diseased)
- Eggshells (crushed)
Browns (Carbon-Rich Materials)
These are dry, carbon-rich materials that provide bulk and allow air to circulate. They break down slower and prevent the pile from becoming too wet and smelly.
- Dry leaves
- Shredded newspaper and non-glossy cardboard
- Straw and hay
- Wood chips and sawdust (untreated wood only)
- Paper towel rolls and toilet paper tubes (shredded)
What to AVOID Composting
Some items can attract pests, create foul odors, or introduce diseases and unwanted chemicals into your compost.
- Meat, fish, and bones: Can attract pests and cause strong odors. (Exception: Bokashi can handle these).
- Dairy products: Similar to meat, can cause odor and attract pests. (Exception: Bokashi).
- Oily or greasy foods: Can slow down decomposition and attract pests. (Exception: Bokashi).
- Diseased plants: May spread diseases to your garden.
- Weeds that have gone to seed: Seeds might survive the composting process and sprout in your garden.
- Pet waste (dog and cat feces): Can contain harmful pathogens.
- Chemically treated wood or yard waste: Can introduce toxins.
- Glossy paper or magazines: Inks can be problematic, and the coating affects decomposition.
- Coal or charcoal ash: Can contain harmful substances.
Step-by-Step: Getting Your Urban Compost System Started
Ready to dive in? Here’s a general breakdown of how to set up and maintain your compost. Specifics will vary slightly depending on your chosen method (worm bin, tumbler, etc.), but the core principles are the same.
Step 1: Choose Your Location
Find a spot that gets some shade but also some sun, especially if you’re using a tumbler or bin that can dry out. It should be easily accessible for adding materials and harvesting compost. For indoor worm bins, a temperature-controlled area is best.
Step 2: Set Up Your Bin/System
Follow the manufacturer’s instructions for your specific bin. For DIY systems, ensure good airflow and drainage. For worm composting, prepare the bedding according to your worm supplier’s advice.
Step 3: Start Adding Materials (The Layering Technique)
Begin by adding a layer of “browns” at the bottom – this helps with drainage and airflow. Then, start alternating layers of “greens” and “browns.” Aim for roughly a 2:1 or 3:1 ratio of browns to greens. Don’t add too much of one thing at a time, especially kitchen scraps.
Step 4: Maintain Moisture
Your compost pile should be as damp as a wrung-out sponge. If it’s too dry, decomposition slows down. If it’s too wet, it can become anaerobic (lack of oxygen) and smelly. Add water if it’s dry, and add more browns if it’s too wet.
Step 5: Aerate (Turn Your Compost)**
This is vital for most methods to provide oxygen for the microbes. If you have a tumbler, simply give it a few turns every few days. For stationary bins, use a pitchfork or compost aerator to mix the contents every week or two. Worm bins don’t need turning, but you might gently fluff the bedding occasionally.
Step 6: Monitor and Troubleshoot
Keep an eye on your compost. Is it heating up? Is it too wet or dry? Does it smell bad? Most problems can be solved by adjusting the green/brown ratio or moisture level. For example, a bad smell often means too much green material or not enough aeration.
Step 7: Harvesting Your Compost
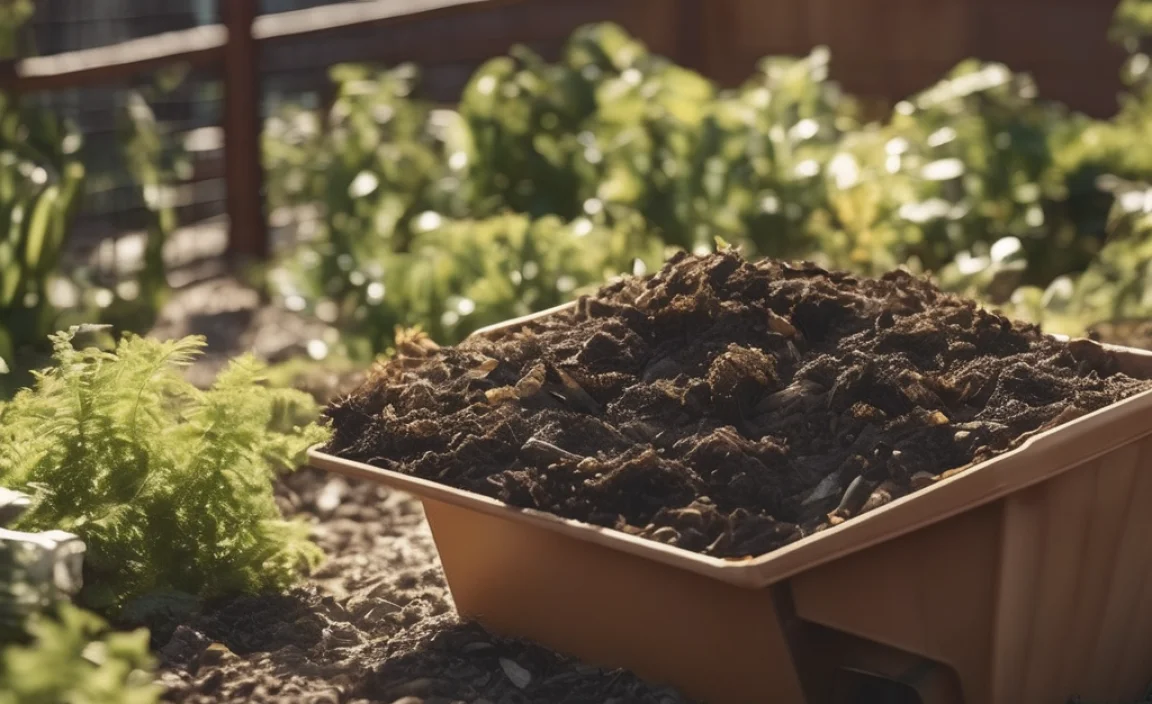
Finished compost will be dark, crumbly, and smell earthy, like a forest floor. The time it takes can vary from a few weeks to several months, depending on your method and how well you maintain it. For bins, you typically remove finished compost from the bottom. For worm bins, you can harvest the “worm castings” once the bin is full or when the worms have processed most of the material.
Common Urban Composting Challenges and Solutions
Even with the best intentions, you might run into a few snags. Here’s how to tackle them.
Challenge 1: Unpleasant Odors
Why it happens: Usually too much “green” material, not enough “browns,” or lack of oxygen (too wet and compacted).
Solutions:
- Add more dry, carbon-rich “browns” (shredded paper, leaves, sawdust).
- Turn or aerate the pile more frequently.
- Ensure good drainage.
- Avoid adding meat, dairy, or oily foods (unless using Bokashi).
Challenge 2: Pests (Flies, Rodents)
Why it happens: Primarily due to exposed food scraps, especially meat, dairy, or sweet items. Rodents are attracted to large compost piles that smell strongly of food waste.
Solutions:
- Always bury fresh food scraps under a layer of browns.
- Keep your compost bin/tumbler sealed.
- Avoid adding meat, dairy, or oily foods.
- For rodent issues, consider a sturdy metal compost bin or a worm bin kept indoors or in a secure location.
- Ensure your compost is not too wet, as this can attract flies.
For more on managing compost bin pests, the EPA offers some great common-sense advice.
Challenge 3: Slow Decomposition
Why it happens: Pile is too dry, not enough “greens,” lack of air, or the pieces of material are too large.
Solutions:
- Add water to moisten the pile.
- Add more nitrogen-rich “greens.”
- Turn or aerate the pile more often.
- Chop or shred larger items into smaller pieces to increase surface area for microbes.
- Ensure your compost worms (if vermicomposting) are healthy and active.
Challenge 4: Too Much Moisture
Why it happens: Too many “greens,” not enough “browns,” or excess rain.
Solutions:
- Add a generous amount of dry “browns” to absorb excess moisture.
- Turn the pile to help it dry out and allow air circulation.
- If using an open bin, consider covering it during heavy rain.
Tools and Must-Haves for Urban Composting
You don’t need a lot of fancy equipment to start composting. For most urban setups, especially worm composting or tumblers, the bin itself is the main item. However, a few simple tools can make the process much easier and more efficient.
Essential Items:
- Compost Bin/Worm Bin/Tumbler: Your primary container.
- Kitchen Countertop Scrape Bin: A small, lidded container to collect food scraps in your kitchen before taking them out to the main compost system.
- Shovel or Trowel: For moving compost and turning smaller piles.
- Garden Gloves: To keep your hands clean and protected.
Helpful Additions:
- Compost Aerator Tool: A specialized tool for turning and aerating stationary compost bins without a lot of heavy lifting.
- Shredder: If you have a lot of paper or cardboard to compost, a shredder can speed up the process.
- Watering Can or Hose: For adding moisture to the compost.
- Worm Food/Bedding (for vermicomposting): Coconut coir, shredded newspaper, or peat moss are common bedding materials.
- Bokashi Activator (for Bokashi): Essential for the fermentation process.
When selecting tools, think about durability and ease of use. For urban composting, compact and multi-functional items are often best. Resources like Gardeners’ World often review different types of compost bins that might suit urban needs.
How to Use Your Finished Urban Compost
Congratulations, you’ve made compost! This dark, crumbly material is pure gold for your plants. Here’s how to put it to good use:
- Potting Mix Amendment: Mix compost into your regular potting soil for containers. A common ratio is about 1 part compost to 3 or 4 parts potting mix. This adds nutrients and improves soil structure.
- Top Dressing Gardens: Spread a thin layer (about 1-2 inches) of compost on top of the soil in your garden beds or planters. The nutrients will leach down to the roots.
- Seed Starting: You can use a finely sifted compost mixed with other materials (like vermiculite or perlite) for starting seeds. It provides a gentle, nutrient-rich start for young seedlings.
- Lawn Care: If you have a small patch of lawn, you can top-

I am passionate about home engineering. I specialize in designing, installing, and maintaining heating, ventilation, and air conditioning systems. My goal is to help people stay comfortable in their homes all year long.