Got corn on the cob remnants after your last backyard BBQ or family dinner? Don’t toss those cobs straight into the trash! They’re a fantastic, often overlooked, addition to your compost bin. Many folks think only of kitchen scraps, but those sturdy corn cobs can actually boost your compost’s health and your garden’s future. I’m Troy D Harn, your go-to guy for making home projects and gardening simple. This guide will show you exactly how to turn those leftover cobs into garden gold, easily and effectively. Let’s get your compost pile working harder for you!
Corn Cobs Composting: Your Secret Weapon for Healthy Soil
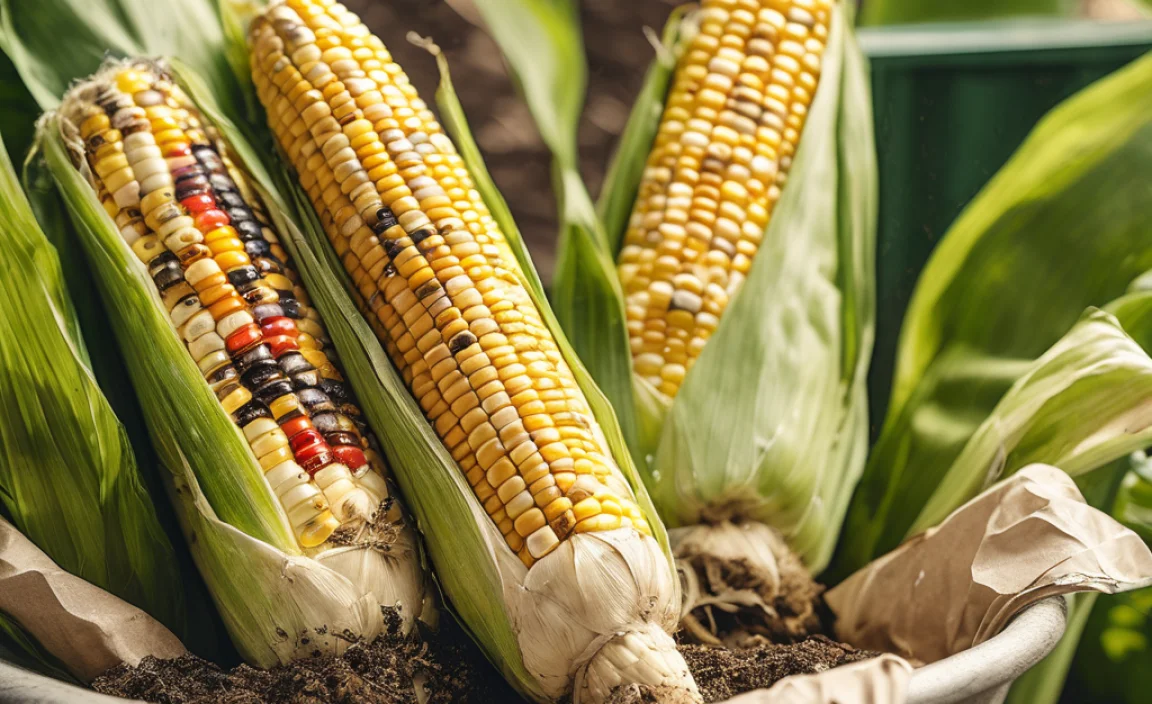
Welcome, fellow garden enthusiasts and eco-conscious folks! If you’re looking to give your garden the best possible start and reduce waste at the same time, composting is a brilliant move. And guess what? Those humble corn cobs you might be eyeing for the bin are actually a composting superstar. They might seem tough, but with a little know-how, they break down wonderfully and contribute valuable nutrients to your homemade fertilizer. I’m Troy D Harn, and I’m here to make composting as easy as pie – or should I say, as easy as corn on the cob!
Many beginners in the composting world stick to soft kitchen scraps like vegetable peels and coffee grounds. While those are great, they can sometimes overwhelm a compost pile, making it too wet or attracting unwanted critters. Harder, bulkier items like corn cobs are actually beneficial. They help create air pockets, which are crucial for the microbes that do the heavy lifting in your compost. Think of them as tiny aeration devices!
This guide is designed for you, the busy homeowner or renter who wants practical, no-fuss solutions. We’ll break down exactly why corn cobs are fantastic compost ingredients, the simple steps to get them composting, and what to expect. By the end, you’ll be confidently adding corn cobs to your compost and well on your way to a thriving garden, all thanks to your own rich, homemade compost.
Why Composting Corn Cobs is a Smart Garden Move
Let’s dive into why those corn cobs deserve a spot in your compost bin. It’s not just about reducing what goes into landfill; it’s about enriching your soil in a way that synthetic fertilizers just can’t match. Think of it as a natural, budget-friendly superhero for your garden.
1. Nutrient Powerhouse: Corn cobs are packed with organic matter. As they break down, they release essential nutrients like nitrogen, phosphorus, and potassium. These are the building blocks for healthy plant growth, leading to greener leaves, more vibrant flowers, and tastier vegetables. It’s like giving your garden a multivitamin, straight from your kitchen waste!
2. Improves Soil Structure: Unlike finely ground compost, the fibrous nature of corn cobs, especially before they fully decompose, helps to introduce air pockets into your compost pile and, eventually, into your garden soil. This aeration is vital for root development, allowing plant roots to breathe and access water and nutrients more easily. Good soil structure also helps with drainage, preventing waterlogged roots.
3. Balances “Greens” and “Browns” (Nitrogen and Carbon): Composting works best when you have a good mix of “green” materials (nitrogen-rich, like food scraps) and “brown” materials (carbon-rich, like dry leaves and cardboard). Corn cobs, while they have some nitrogen, are primarily considered a “brown” material due to their fibrous, woody structure. Adding them can help balance out a compost bin that might be leaning too heavily on kitchen scraps (greens), preventing it from becoming too soggy and smelly.
4. Biodegradable & Sustainable: Every corn cob composted is one less item heading to the landfill. Landfills produce methane, a potent greenhouse gas. Composting diverts waste and transforms it into something incredibly valuable for your garden, contributing to a more sustainable lifestyle. It’s a win for your garden and a win for the planet.
5. Reduces Your Composting Time Dramatically: This might sound counterintuitive because cobs are “tough,” but when chopped, they break down faster than you might think. Faster breakdown means you get usable compost sooner. Plus, the structure they create can speed up the overall decomposition process within the pile by allowing better airflow.
Getting Started: What You Need for Composting Corn Cobs

Before we get our hands dirty, let’s talk about the simple setup you’ll need. You don’t need fancy equipment to compost corn cobs. Most of these items are likely already in your home or easily and affordably obtainable.
Essential Tools and Materials
Here’s a quick rundown of what will make your corn cob composting journey smooth sailing:
- Compost Bin or Pile: This is where the magic happens! You can buy a ready-made compost bin (many different types are available, from tumblers to simple stationary bins) or create your own pile in a quiet corner of your yard. For beginners, a store-bought bin is often the easiest way to start. Check out resources from your local extension office for recommended bin types in your area; many offer guides specific to your climate.
- Gloves: Optional, but recommended, especially when handling food scraps and turning the compost.
- Shovel or Pitchfork: For turning your compost pile to aerate it and mixing materials.
- Water Source: A hose or watering can to keep your compost moist.
- Kitchen Pail with Lid: For collecting corn cobs and other kitchen scraps to transport to your compost bin.
- Pruners or Heavy-Duty Shears: To chop up those corn cobs, making them break down faster.
Where to Get a Compost Bin
If you don’t have a compost bin already, here are some common places to find one:
- Garden Centers and Hardware Stores: They offer a wide variety, from basic plastic bins to more elaborate tumblers.
- Online Retailers: Websites like Amazon, Home Depot, and specialized gardening sites have extensive selections.
- DIY Options: You can build your own compost bin from reclaimed wood pallets or wire mesh. Many DIY guides are available online, such as those from the EPA (Environmental Protection Agency).
- Community Programs: Some municipalities or community garden groups offer subsidized compost bins or host workshops on composting.
Choosing the right bin depends on your space, how much waste you generate, and how hands-on you want to be. A simple stationary bin is generally the easiest for beginners.
Step-by-Step: How to Compost Corn Cobs Effectively
Alright, let’s get down to business! Composting corn cobs is straightforward, but a few simple steps will ensure they break down efficiently and contribute positively to your compost. We want to avoid any potential hiccups and ensure you get the best compost possible.
Step 1: Prepare Your Corn Cobs
This is arguably the most crucial step for corn cob composting. While they will break down on their own, doing a little prep work speeds things up significantly and helps them integrate better into your compost pile.
- Remove Kernels: If you still have kernels stuck to the cob, it’s a good idea to scrape or brush them off. These kernels are nutrient-rich “greens” and can be added to your compost separately.
- Chop Them Up: This is key! Whole corn cobs can take a very long time to decompose. Use heavy-duty kitchen shears, pruners, or even a small saw to break the cobs into smaller pieces. Aim for pieces that are a few inches long, or even smaller if you can manage. The smaller the pieces, the faster they will break down as more surface area is exposed to the composting microbes.
Step 2: Add Cobs to Your Compost Bin
Now that your cobs are prepped, it’s time to add them to the main event – your compost system.
- Layer Them: Don’t just dump all your chopped cobs in one spot. Mix them in with other compostable materials. Aim to layer them with “greens” (like food scraps, grass clippings) and “browns” (like dry leaves, shredded paper, small twigs). A good rule of thumb is to aim for roughly 2 parts browns to 1 part greens. Chopped corn cobs lean towards the “brown” side.
- Bury Them (Optional but Recommended): To help them break down and deter pests, it’s a good idea to bury your chopped cobs within the compost pile, rather than leaving them exposed on top. You can do this by digging a small hole, adding the cobs, and then covering them with other compost materials.
Step 3: Maintain Your Compost Pile
To get the best results from your corn cob compost (and all your compost!), consistent care is important.
- Moisture Check: Your compost pile should be as damp as a wrung-out sponge. Too dry, and decomposition slows down. Too wet, and it can become anaerobic (lacking oxygen) and smelly. If it’s dry, water it. If it’s too wet, add more “brown” materials like shredded cardboard or dry leaves.
- Aeration is Key: About once a week, or every two weeks, give your compost pile a good turn with your shovel or pitchfork. This mixes everything, introduces oxygen, and helps the decomposition process along. Turning also helps distribute moisture and heat evenly throughout the pile.
- Balance Your Materials: Keep adding a variety of organic materials. Remember the “greens” and “browns.” While corn cobs are great, they’re just one part of a balanced diet for your compost.
Step 4: Wait for the Magic to Happen
Composting isn’t instantaneous, but with proper care, your corn cobs will break down beautifully. Depending on the size of your pieces, how well you’ve managed moisture and aeration, and the other materials in your bin, it typically takes anywhere from 2 months to a year for materials to fully decompose into finished compost.
- Signs of Finished Compost: You’ll know your compost is ready when it’s dark, crumbly, and smells earthy and pleasant – like a forest floor after rain. You shouldn’t be able to recognize the original materials, including the corn cobs.
Troubleshooting Common Composting Issues (with Corn Cobs)
Even with the best intentions, sometimes compost piles can be a little quirky. Don’t get discouraged! Most common composting problems are easy to fix. Let’s look at a few things you might encounter when composting corn cobs and how to sort them out.
Smelly Compost
Problem: Your compost smells like rotten eggs or ammonia. This usually means it’s too wet and lacks oxygen (anaerobic conditions).
Solution:
- Add more “brown” materials like dry leaves, sawdust, shredded cardboard, or straw. These will help absorb excess moisture and introduce air pockets.
- Turn your compost pile thoroughly to aerate it. Ensure there’s good airflow.
- Avoid adding too many “green” materials (like fresh grass clippings or food scraps) until the smell dissipates. If you’ve added a lot of corn, and it’s got kernels on it, that can contribute to a smell if it gets too wet.
Slow Decomposition
Problem: Your compost isn’t breaking down, or things are taking forever. The corn cobs are still recognizable after many months.
Solution:
- Chop Smaller: If you haven’t been chopping your cobs small enough, do so in the future. For current cobs, try to break them up further if possible.
- Check Moisture: Is the pile too dry? Add water until it’s like a wrung-out sponge. Is it too wet? Add bulking “browns.”
- Aerate: Turn the pile more frequently to introduce oxygen.
- Add Activators (Optional): Sometimes, a handful of finished compost or some nitrogen-rich material (like coffee grounds or fresh grass clippings in moderation) can help kickstart the microbial action.
Attracting Pests
Problem: You’re seeing rodents or other unwanted visitors around your compost bin.
Solution:
- Bury Food Scraps: Always bury fresh kitchen waste (including any corn kernels you scraped off) deep within the compost pile. Don’t leave them sitting on top.
- Use a Sturdy Bin: Ensure your compost bin has a lid and is made of sturdy material. Well-maintained bins with enclosed sides and secure lids are least likely to attract pests. Some bins have fine mesh at the bottom to deter rodents.
- Avoid Problematic Foods: While corn cobs themselves are fine, be mindful of other kitchen scraps. Meats, dairy, and oily foods are more likely to attract pests and can cause odors. Stick to plant-based materials and your corn cobs.
- Maintain Properly: A hot, actively decomposing compost pile is less attractive to pests than a cool, stagnant one.
Remember, composting is a natural process. A little patience and these simple troubleshooting tips will keep your corn cobs (and everything else!) breaking down beautifully.
Balancing Your Compost: Corn Cobs in the Mix
Understanding the “greens” and “browns” is fundamental to successful composting. It’s all about achieving the right carbon-to-nitrogen ratio. Let’s see where corn cobs fit in and how they help create that perfect balance.
The “Greens” and “Browns” Explained
Think of it this way:
- “Greens” provide Nitrogen: These are typically moist, fresh materials. They heat up the compost pile and provide the nitrogen that microorganisms need to thrive and multiply. Examples include:
- Fruit and vegetable scraps
- Coffee grounds and tea bags
- Grass clippings (in moderation)
- Plant trimmings (green parts)
- “Browns” provide Carbon: These are typically dry, woody materials. They provide the energy source for the microorganisms and help with aeration, preventing the pile from becoming too dense and waterlogged. Examples include:
- Dry leaves
- Shredded newspaper and cardboard (avoid glossy paper)
- Twigs and small branches
- Sawdust (from untreated wood)
- Corn cobs!
Where Corn Cobs Fit In
Corn cobs are fibrous and woody, making them excellent “brown” materials. They are rich in carbon, which is often what compost piles lack when they become too wet and smelly from too many nitrogen-rich “greens.”
Adding chopped corn cobs helps to:
- Improve Aeration: Their structure creates spaces in the pile, allowing air to circulate.
- Prevent Over-Nitrogenation: They help balance out nitrogen-heavy kitchen scraps.
- Add Bulk: They contribute volume without adding too much moisture.
Ideal Ratio for Optimal Composting
While it’s not an exact science, a commonly recommended ratio for compostable materials is approximately 2 to 3 parts “browns” to 1 part “greens” by volume. So, for every bucket of vegetable scraps you add, try to add two or three buckets’ worth of dry leaves, chopped yard “browns,” and your chopped corn cobs.
Materials to Avoid
It’s just as important to know what NOT to compost. These items won’t break down effectively, can cause odors, or attract pests:
| What to Avoid | Why |
|---|---|
| Meat, fish, bones | Attract pests, can smell bad, slow decomposition |
| Dairy products (milk, cheese, yogurt) | Attract pests, can smell bad |
| Oily or greasy foods | Slow decomposition, can smell bad, attract pests |
| Diseased plants | Can spread disease to your garden |
| Weeds that have gone to seed | Seeds can survive composting and sprout in your garden |
| Pet waste (dog, cat feces) | May contain pathogens harmful to humans |
| Treated wood or processed lumber | Contains chemicals that are harmful |
| Coal or charcoal ash | Can contain harmful compounds for plants |
By focusing on a good mix of “greens” and “browns” like chopped corn cobs, and avoiding the “don’t compost” list, you’re well on your way to creating nutrient-rich compost for your garden!</
.lwrp.link-whisper-related-posts{
margin-top: 40px;
margin-bottom: 30px;
}
.lwrp .lwrp-title{
}.lwrp .lwrp-description{
}
.lwrp .lwrp-list-container{
}
.lwrp .lwrp-list-multi-container{
display: flex;
}
.lwrp .lwrp-list-double{
width: 48%;
}
.lwrp .lwrp-list-triple{
width: 32%;
}
.lwrp .lwrp-list-row-container{
display: flex;
justify-content: space-between;
}
.lwrp .lwrp-list-row-container .lwrp-list-item{
width: calc(25% – 20px);
}
.lwrp .lwrp-list-item:not(.lwrp-no-posts-message-item){
max-width: 150px;
}
.lwrp .lwrp-list-item img{
max-width: 100%;
height: auto;
object-fit: cover;
aspect-ratio: 1 / 1;
}
.lwrp .lwrp-list-item.lwrp-empty-list-item{
background: initial !important;
}
.lwrp .lwrp-list-item .lwrp-list-link .lwrp-list-link-title-text,
.lwrp .lwrp-list-item .lwrp-list-no-posts-message{
}@media screen and (max-width: 480px) {
.lwrp.link-whisper-related-posts{
}
.lwrp .lwrp-title{
}.lwrp .lwrp-description{
}
.lwrp .lwrp-list-multi-container{
flex-direction: column;
}
.lwrp .lwrp-list-multi-container ul.lwrp-list{
margin-top: 0px;
margin-bottom: 0px;
padding-top: 0px;
padding-bottom: 0px;
}
.lwrp .lwrp-list-double,
.lwrp .lwrp-list-triple{
width: 100%;
}
.lwrp .lwrp-list-row-container{
justify-content: initial;
flex-direction: column;
}
.lwrp .lwrp-list-row-container .lwrp-list-item{
width: 100%;
}
.lwrp .lwrp-list-item:not(.lwrp-no-posts-message-item){
max-width: initial;
}
.lwrp .lwrp-list-item .lwrp-list-link .lwrp-list-link-title-text,
.lwrp .lwrp-list-item .lwrp-list-no-posts-message{
};
}

I am passionate about home engineering. I specialize in designing, installing, and maintaining heating, ventilation, and air conditioning systems. My goal is to help people stay comfortable in their homes all year long.