Quick Summary: Dealing with plumbing clogs caused by toilet paper? A “Do Not Throw Toilet Paper in the Toilet” sign is a simple solution. Choose a clear, multilingual sign with universal symbols. Place it visibly above or near the toilet. For extra clarity, provide alternative disposal methods like a waste bin. Consistent reminders can save you from costly plumbing repairs.
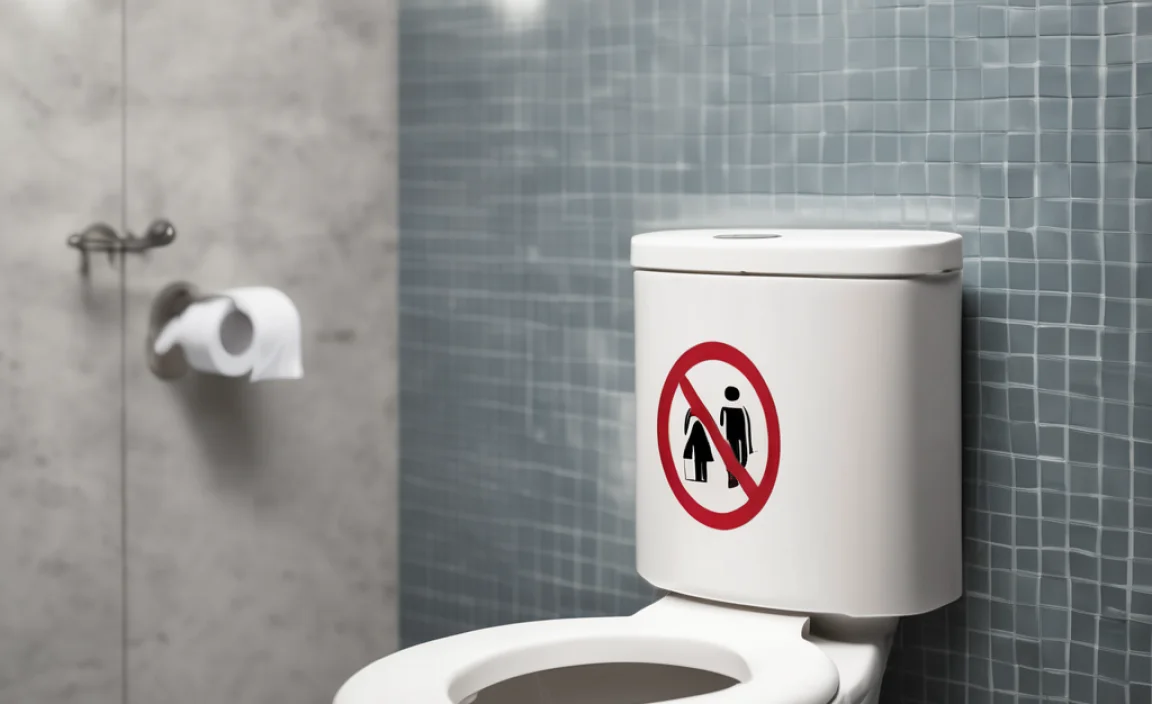
Ever had a plumbing nightmare because someone flushed something they shouldn’t have? It happens all the time, and toilet paper is a frequent culprit, especially in older plumbing systems or septic tank setups. It’s frustrating, messy, and can be expensive to fix. But don’t worry, there’s a straightforward way to tackle this problem: a clear, well-placed “Do Not Throw Toilet Paper in the Toilet” sign.
This guide will walk you through everything you need to know to choose the right sign, install it effectively, and reinforce the message. By the end, you’ll have a simple, reliable system to keep your plumbing flowing smoothly. Let’s get started!
Why You Need a “Do Not Throw Toilet Paper in the Toilet” Sign
Before diving into the “how-to,” let’s understand why these signs are so important. It’s not just about being polite; it’s about preventing real problems.
- Preventing Clogs: Older plumbing systems, RV toilets, and septic tanks often struggle with even small amounts of toilet paper.
- Reducing Plumbing Costs: Fewer clogs mean fewer plumber visits and lower maintenance costs.
- Maintaining Hygiene: When used with a proper disposal bin, these signs encourage better hygiene practices.
- Clear Communication: Signs provide a clear, visual reminder for guests, renters, or anyone unfamiliar with the plumbing system.
Choosing the Right Sign
Not all signs are created equal. Here’s what to look for to maximize effectiveness.
Material Matters
The material of your sign should match the environment. Here are a few common options:
- Plastic: Affordable and water-resistant, great for most bathrooms.
- Metal: Durable and professional-looking, suitable for commercial settings.
- Vinyl Stickers: Easy to apply and remove, good for temporary solutions.
Size and Visibility
The sign needs to be easily seen and read. Consider these factors:
- Size: Aim for at least 4×6 inches for good visibility.
- Font Size: Use a clear, bold font that’s easy to read from a distance.
- Color Contrast: Choose colors that stand out against the background (e.g., black on white or white on dark blue).
Language and Symbols
To reach a wider audience, use multiple languages and universal symbols.
- Multilingual Options: Include English, Spanish, and any other languages common in your area.
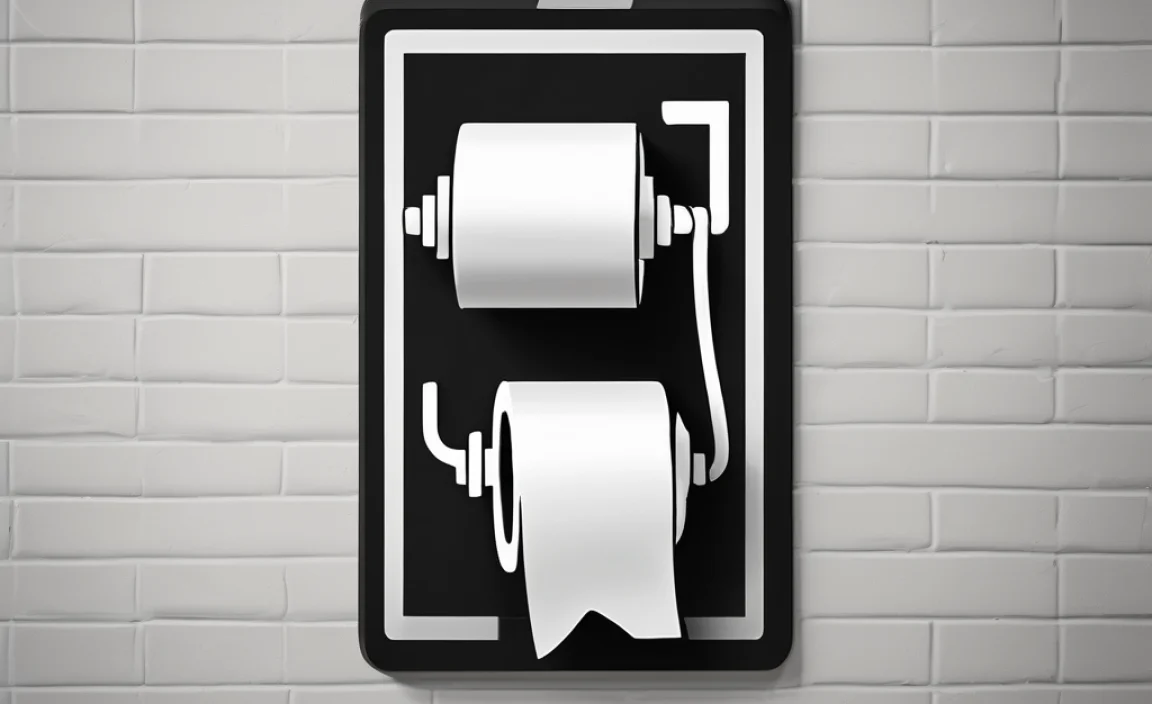
- Universal Symbols: Use internationally recognized symbols for “no toilet paper” to overcome language barriers.
Durability and Maintenance
A good sign should last and be easy to clean.
- Water Resistance: Essential for bathroom environments.
- Easy to Clean: Choose materials that can be wiped down easily.
- Fade Resistance: Look for UV-resistant materials to prevent fading over time.
Step-by-Step: Installing Your Sign
Now that you’ve chosen the perfect sign, let’s get it installed. Here’s a simple, step-by-step guide.
Step 1: Gather Your Supplies
You’ll need a few basic items:
- Your “Do Not Throw Toilet Paper in the Toilet” sign
- Cleaning supplies (e.g., disinfectant wipes, cleaner)
- Measuring tape or ruler
- Pencil
- Adhesive strips or screws (depending on the sign and surface)
- Screwdriver (if using screws)
- Level (optional, but recommended)
Step 2: Prepare the Surface
A clean, dry surface is essential for proper adhesion.
- Clean the Area: Wipe down the wall or surface where you’ll be placing the sign with a cleaner or disinfectant wipe.
- Dry Thoroughly: Make sure the surface is completely dry before proceeding.
Step 3: Determine the Placement
Optimal placement ensures the sign is easily visible.
- Eye-Level Placement: Position the sign at eye level for most adults.
- Above or Near the Toilet: The best location is directly above the toilet or on the adjacent wall.
- Consider Viewing Angles: Make sure the sign is visible from all angles in the bathroom.
Step 4: Mark the Position
Use a pencil to mark where the sign will go.
- Measure and Mark: Use a measuring tape to ensure the sign is centered and at the correct height.
- Use a Level: If you want to be extra precise, use a level to make sure the sign will be straight.
Step 5: Attach the Sign
Follow the manufacturer’s instructions for attaching the sign.
- Adhesive Strips:
- Peel off the backing from the adhesive strips.
- Carefully align the sign with your pencil marks.
- Press firmly for 30 seconds to ensure a strong bond.
- Screws:
- Hold the sign in place and mark the screw holes with a pencil.
- Pre-drill pilot holes (if necessary, depending on the surface).
- Align the sign and insert the screws, tightening until secure.
Step 6: Double-Check and Adjust
Make sure the sign is securely attached and properly aligned.
- Check Alignment: Use a level to ensure the sign is straight.
- Test Adhesion: Gently tug on the sign to make sure it’s securely attached.
- Adjust if Needed: If the sign is crooked or loose, make adjustments immediately.
Reinforcing the Message
A sign is a great start, but sometimes you need to reinforce the message to ensure everyone understands and complies.
Provide Alternative Disposal Methods
Make it easy for people to do the right thing.
- Waste Bin: Place a small, lidded waste bin next to the toilet for easy disposal of toilet paper.
- Bin Liners: Use disposable bin liners for easy cleaning.
Verbal Reminders
A friendly reminder can go a long way.
- Inform Guests: Let guests know about the toilet paper disposal policy when they arrive.
- Gentle Reminders: If you see someone about to flush toilet paper, politely remind them of the proper disposal method.
Clear Explanations
Explain why the policy is in place.
- Explain the Reason: Let people know that the plumbing system is sensitive and can be easily clogged by toilet paper.
- Highlight the Benefits: Explain that following the policy helps prevent costly plumbing repairs and ensures the system works efficiently.
Regular Maintenance
Keep the message fresh and visible.
- Clean the Sign: Regularly wipe down the sign to keep it clean and legible.
- Check the Waste Bin: Empty the waste bin regularly to prevent overflow and maintain hygiene.
Dealing with Resistance
Sometimes, despite your best efforts, people may still ignore the sign. Here’s how to handle it:
- Stay Calm and Polite: Avoid getting angry or confrontational.
- Reiterate the Reason: Gently explain why the policy is important for the plumbing system.
- Offer Solutions: Make sure the waste bin is easily accessible and well-maintained.
- Escalate if Necessary: If the problem persists, consider having a more formal conversation with the person or involving a building manager or landlord.
DIY Sign Options
Want to save some money or add a personal touch? Here are some DIY sign ideas.
Handwritten Signs
A simple, handwritten sign can be surprisingly effective.
- Materials: Use a piece of cardstock or laminated paper and a permanent marker.
- Keep it Simple: Write “Please Do Not Flush Toilet Paper” in clear, bold letters.
- Add a Personal Touch: Decorate the sign with simple drawings or designs.
Printable Signs
There are many free printable sign templates available online.
- Online Resources: Search for “printable do not flush toilet paper sign” on Google or Pinterest.
- Customization: Customize the template with your own text and images.
- Laminate for Durability: Laminate the sign to protect it from water damage.
Repurposed Materials
Get creative and repurpose old materials to make a unique sign.
- Old Wood: Use a piece of scrap wood and paint or stain it.
- Metal Sheets: Cut a piece of metal sheet and use stencils to create the message.
- Frames: Place your sign in an old picture frame for a polished look.
Troubleshooting Common Issues
Even with a sign in place, you might encounter some challenges. Here’s how to troubleshoot them.
Sign Not Visible
If people are still flushing toilet paper, the sign might not be visible enough.
- Relocate the Sign: Try moving the sign to a more prominent location.
- Increase Size: Use a larger sign with bolder text.
- Add Lighting: Install a small light to illuminate the sign.
Waste Bin Overflowing
If the waste bin is constantly overflowing, it’s not serving its purpose.
- Larger Bin: Use a larger waste bin with a lid.
- Empty Regularly: Empty the bin more frequently.
- Use Bin Liners: Use disposable bin liners for easy cleanup.
Language Barriers
If you have guests who speak different languages, communication can be a challenge.
- Multilingual Signs: Use signs with multiple languages.
- Universal Symbols: Use internationally recognized symbols.
- Verbal Communication: Explain the policy verbally to guests.
Cost-Benefit Analysis
Let’s break down the costs and benefits of implementing a “Do Not Throw Toilet Paper in the Toilet” sign policy.
| Category | Costs | Benefits |
|---|---|---|
| Signage | $5 – $20 for a pre-made sign; minimal cost for DIY | Clear communication, reduces confusion |
| Waste Bin | $10 – $30 for a suitable waste bin | Provides an alternative disposal method, improves hygiene |
| Maintenance | Minimal – cost of bin liners and cleaning supplies | Ensures long-term effectiveness, prevents overflow |
| Plumbing Repairs | Potential cost of plumber visits and repairs due to clogs | Significant savings by preventing clogs and damage |
As you can see, the benefits far outweigh the costs. A small investment in signage and a waste bin can save you hundreds or even thousands of dollars in plumbing repairs.
Real-World Examples
Here are a few examples of how “Do Not Throw Toilet Paper in the Toilet” signs have helped people prevent plumbing problems.
- Apartment Buildings: Many apartment buildings use these signs to prevent clogs in shared plumbing systems.
- RV Parks: RV parks often require guests to dispose of toilet paper in a waste bin to protect septic systems.
- International Travel: In many countries with older plumbing systems, it’s common practice to dispose of toilet paper in a bin.
Expert Tips
Here are some additional tips from plumbing experts to help you maintain a clog-free plumbing system.
- Use Septic-Safe Toilet Paper: If you have a septic system, use toilet paper that is specifically designed to break down quickly.
- Avoid Flushing Other Items: Never flush anything other than toilet paper and human waste. This includes feminine hygiene products, wipes, and cotton balls.
- Regular Plumbing Inspections: Have your plumbing system inspected regularly by a professional to identify and address any potential problems.
- Consider a Bidet: A bidet can reduce the amount of toilet paper needed, which can help prevent clogs.
Resources and Further Reading
Want to learn more about plumbing and waste disposal? Here are some useful resources:
- Environmental Protection Agency (EPA): Provides information on wastewater management and septic systems.
- International Association of Plumbing and Mechanical Officials (IAPMO): Offers resources on plumbing codes and standards.
- The Family Handyman: Offers articles and tutorials on plumbing repairs and maintenance.
FAQ: “Do Not Throw Toilet Paper in the Toilet” Signs
Why can’t I flush toilet paper in some places?
Older plumbing systems, RV toilets, and septic tanks often can’t handle toilet paper. It can cause clogs and damage the system.
What should I do with toilet paper if I can’t flush it?
Dispose of it in a small, lidded waste bin placed next to the toilet. Use bin liners for easy cleaning.
Where should I place the “Do Not Throw Toilet Paper” sign?
Place the sign at eye level, either directly above the toilet or on the adjacent wall, where it’s easily visible.
What if guests ignore the sign?
Politely remind them of the policy and explain why it’s important. Make sure the waste bin is easily accessible and well-maintained.
Can I make my own “Do Not Throw Toilet Paper” sign?
Yes! You can create a handwritten sign, print a template from online, or repurpose materials to make a unique sign.
What if the waste bin keeps overflowing?
Use a larger waste bin with a lid and empty it more frequently. Using bin liners can also make cleanup easier.
Are there specific types of toilet paper I should use if I have a septic system?
Yes, use toilet paper specifically designed to break down quickly in septic systems. It’s often labeled as “septic-safe.”
Conclusion
Implementing a “Do Not Throw Toilet Paper in the Toilet” policy might seem like a small change, but it can have a significant impact on your plumbing system and your wallet. By choosing the right sign, installing it effectively, and reinforcing the message, you can prevent costly clogs and maintain a healthy, efficient plumbing system. Remember, clear communication, alternative disposal methods, and regular maintenance are key to success. So, take the first step today and say goodbye to plumbing nightmares!