Feeling like your kitchen scraps are just adding to the trash heap? You’re not alone! Many of us want to be a little kinder to the planet but don’t know where to start with composting. It can seem a bit like a science experiment, but what if I told you it’s actually super simple? We’re going to break down exactly how to get started with eco-friendly composting, the easy way. You’ll be turning kitchen waste into garden gold in no time. Let’s get your compost pile cooking!
Your Top-Notch Guide to Eco-Friendly Composting: Simple Steps for Everyone
Hey there, neighbor! Troy D Harn here, your go-to guy for making home projects, gardening, and yes, even composting, feel like a piece of cake. If you’ve ever looked at your fruit peels and coffee grounds and wondered, “Can I do something better with this?” then you’re in the right place. Composting might sound complex, but I promise, it’s one of the most rewarding and straightforward things you can do for your garden and the environment. We’re talking about turning your everyday kitchen and yard waste into nutrient-rich “black gold” that your plants will absolutely love. Let’s dive into how you can start easily, without any fuss.
Why bother with composting? Well, think about it. About 30% of what we throw away could actually be composted. That’s a huge amount of stuff that doesn’t need to end up in a landfill, contributing to greenhouse gases. Plus, homemade compost is like a superfood for your garden. It improves soil structure, helps retain moisture (so you water less!), and feeds your plants naturally, reducing the need for chemical fertilizers. It’s a win-win for your wallet and Mother Earth!
What Exactly is Composting?
At its core, composting is nature’s way of recycling. It’s a process where organic materials—like food scraps and yard waste—are broken down by tiny living things like bacteria, fungi, and invertebrates. These microscopic helpers feast on the organic matter and transform it into a dark, crumbly, nutrient-rich substance that’s perfect for enriching your soil. It’s like a natural decomposition party happening right in your backyard, all thanks to nature’s clean-up crew!
Getting Started: What You’ll Need
The beauty of composting is that you can start with very little or go all-in if you wish. For beginners, keeping it simple is key. Here’s a look at the essentials:
Composting Bins vs. Piles: Choosing Your Warrior
You have a couple of main options for where to put your compostables. Think of these as your composting headquarters.
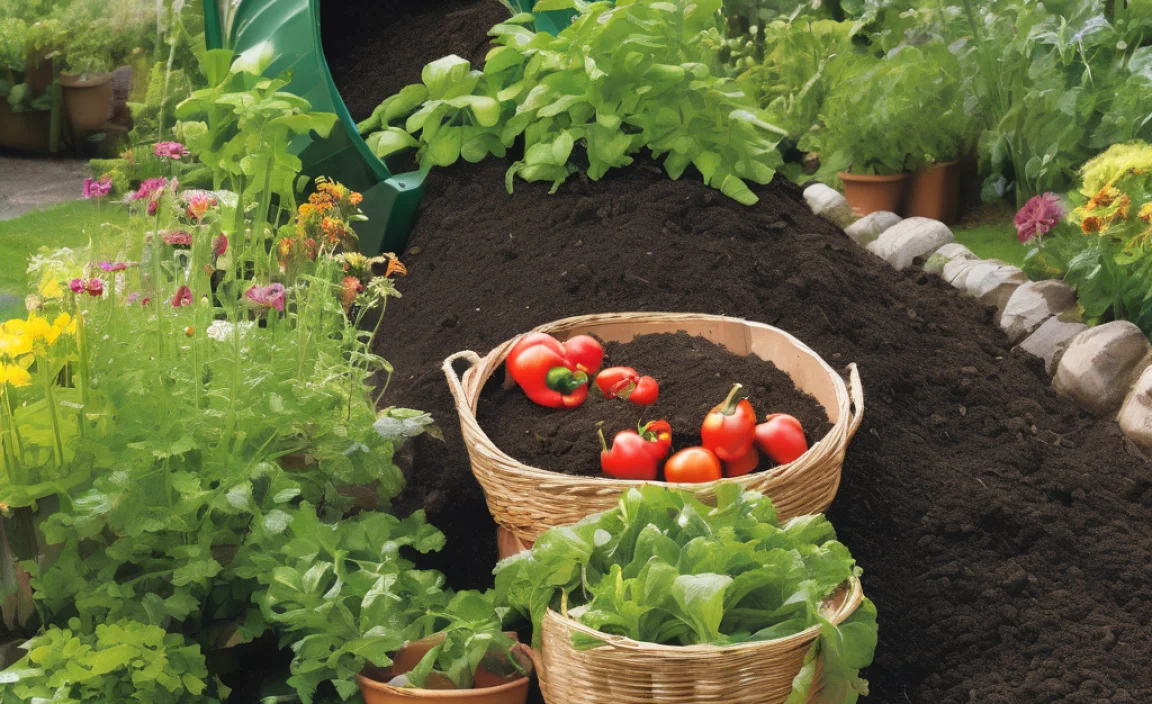
- Compost Piles: This is the most basic approach. You simply designate a spot in your yard and start piling up your compostable materials. It’s simple and requires no upfront cost for a container. It’s best if you have ample yard space and aren’t too concerned about aesthetics. Ensure the pile is in a well-drained spot that gets some sunlight (but not baking hot all day). Aim for a pile that’s at least 3 feet by 3 feet by 3 feet to get the decomposition process going efficiently.
- Compost Bins: These are enclosed containers that help keep things tidy and can speed up the composting process. They can be purchased or even built yourself!
Types of Compost Bins to Consider:
There are many kinds of bins, each with its own perks. Here are a few popular choices for beginners:
- Stationary Bins: These are typically made of plastic, wood, or wire mesh. They’re often rectangular or cylindrical, with a lid and sometimes a door at the bottom for easy access to finished compost. They’re great for keeping things neat and contained.
- Tumblers: These are enclosed drums that rotate on an axis. Tumbling helps to aerate the compost and mix materials, which can significantly speed up decomposition. They are often pest-resistant and can have a cleaner look.
- Worm Bins (Vermicomposting): While a bit different, this uses special composting worms to break down food scraps. It’s fantastic for apartment dwellers or those with limited space, and it produces an incredibly rich compost (worm castings).
Tools to Make Life Easier (But Not Essential to Start!)
While not strictly necessary for your first compost pile, a few tools can help things along:
- Pitchfork or Shovel: For turning and aerating your compost pile. This helps the microbes get the air they need.
- Garden Hose or Watering Can: To keep your compost pile moist, like a wrung-out sponge.
- Kitchen Compost Pail: A small container with a lid for collecting scraps inside your home before taking them out to the main bin.
- Gloves: To keep your hands clean when handling compost.
The “Greens” and “Browns”: Your Composting Recipe
This is where many beginners get a little confused, but it’s actually quite simple! For successful composting, you need a good balance of “green” materials (nitrogen-rich) and “brown” materials (carbon-rich). Think of it like a balanced diet for your compost pile.
What are “Greens”?
Greens are typically moist materials that are rich in nitrogen. They help heat up the compost pile and provide the nitrogen that microbes need to break down the organic matter.
- Fruit and vegetable scraps
- Coffee grounds and tea bags
- Grass clippings (in moderation, as they can mat down)
- Plant trimmings and green leaves
- Eggshells (crushed)
What are “Browns”?
Browns are dry, carbon-rich materials. They provide the energy source for the microbes and help create air pockets in the compost pile, preventing it from becoming too dense and smelly.
- Dry leaves
- Shredded newspaper and cardboard (avoid glossy paper and colored inks if possible)
- Straw and hay
- Twigs and small branches (chopped up)
- Sawdust (from untreated wood only)
The Magic Ratio: Aim for Balance!
The ideal ratio is roughly 2 parts browns to 1 part greens by volume. Don’t stress too much about exact measurements; it’s more of a guideline. If your compost seems too wet and starts to smell bad, add more browns. If it’s too dry and not breaking down, add more greens and a little water.
Here’s a quick way to visualize it:
| Greens (Nitrogen-Rich) | Browns (Carbon-Rich) |
|---|---|
| Fruit & Veggie Scraps | Dry Leaves |
| Coffee Grounds & Tea Bags | Shredded Newspaper/Cardboard |
| Grass Clippings | Straw/Hay |
| Plant Trimmings | Small Twigs & Branches |
| Eggshells (Crushed) | Sawdust (Untreated wood) |
What NOT to Compost
This is just as important as knowing what to compost. Putting the wrong things in can attract pests, create foul odors, or introduce diseases to your garden.
- Meat, bones, and dairy products: These attract pests and can create really unpleasant odors.
- Oily or greasy foods: Similar to meat products, they can smell bad and attract pests.
- Diseased plants: You don’t want to spread plant diseases to your healthy garden!
- Weeds that have gone to seed: You’ll just end up spreading weeds around your garden.
- Pet waste (dog/cat feces): These can contain harmful pathogens.
- Chemically treated wood or yard waste: The chemicals can contaminate your compost.
- Coal or charcoal ash: Contains sulfur and iron in amounts that can be harmful to plants, and can also raise soil pH.
Effortless Steps to Start Composting Today
Ready to get your hands dirty (but not too dirty!)? Here’s your simple, step-by-step plan:
Step 1: Choose Your Composting Location and Container
Find a convenient spot for your compost bin or pile. It should be:
- Accessible: Easy to get to from your kitchen and garden.
- Well-drained: You don’t want your compost sitting in a puddle.
- Partially Shaded: Full sun can dry it out too quickly, while deep shade might keep it too wet.
- Away from direct contact with wooden structures if using a bin to prevent rot.
If you’re using a bin, set it up according to the manufacturer’s instructions. If you’re making a pile, simply mark out your chosen spot.
Step 2: Start with a Base Layer
Begin by adding a few inches of “brown” materials to the bottom of your bin or the base of your pile. Twigs, straw, or shredded cardboard work great. This helps with air circulation and drainage from the get-go.
Step 3: Add Your “Greens” and “Browns” Layer by Layer
Now, start adding your kitchen scraps (greens) and yard waste (browns). Aim for that rough 2:1 brown to green ratio. Chop larger items into smaller pieces—they’ll break down faster. It’s like building a layered cake!
- When you add kitchen scraps, try to bury them slightly under a layer of brown material. This helps prevent odors and discourage pests.
- Don’t have a lot of one material? That’s okay! Just keep adding what you have, trying to maintain that balance over time.
Step 4: Keep it Moist (But Not Soggy!)
Your compost pile needs moisture to work. Think of the consistency of a wrung-out sponge. If it feels dry, add some water with your hose or watering can. If it gets too wet (you’ll know by a funny smell), layer in more brown materials to absorb excess moisture.
Step 5: Aerate Your Compost (Turn it!)
This is probably the most “active” part of composting, but it’s crucial for speeding things up and preventing smells. Oxygen is needed by the decomposers. Every week or two (or whenever you remember!), use your pitchfork or shovel to turn the pile. Mix the outer layers into the center and the inner layers to the outside. Tumbler bins make this super easy – just give them a spin!
For those of you who like the science behind things, a good aeration strategy helps introduce oxygen, which is vital for aerobic decomposition. Anaerobic decomposition, which happens without enough oxygen, is what leads to those smelly, swampy conditions. Turning also helps distribute moisture and heat evenly throughout the pile, creating the ideal environment for our microbial friends.
Step 6: Be Patient and Harvest Your Gold!
Composting isn’t an overnight process. Depending on your materials, weather, and how often you turn it, it can take anywhere from a few weeks to several months. You’ll know your compost is ready when it’s dark, crumbly, and smells earthy, like a forest floor. You shouldn’t be able to recognize the original materials anymore.
To harvest, you can either dig from the bottom of a stationary bin (if it has an access door) or simply scoop the finished compost from the bottom of your pile. You might want to sift it through a screen to remove any larger, undecayed pieces, which can go back into your new compost batch.
The U.S. Environmental Protection Agency (EPA) has some fantastic resources on composting, including detailed guides on the science and best practices. You can learn more on their Composting at Home page. Understanding the basics from a reputable source like the EPA can give you even more confidence as you start your composting journey!
Troubleshooting Common Composting Issues
Even with the best intentions, you might run into a few snags. Here’s how to fix them:
- Smelly Compost: This is usually a sign of too much nitrogen (too many greens) or not enough air.
- Fix: Add more brown materials (like shredded paper or dry leaves) and turn the pile thoroughly to aerate it.
- Pile is Too Dry: It’s not breaking down, or it’s taking forever.
- Fix: Add water. If you have a lot of dry leaves or straw, you might need to lightly water them as you add them.
- Pile is Too Wet and Slimy: This can lead to anaerobic conditions and bad smells.
- Fix: Add more dry brown materials and turn the pile to introduce air.
- Attracting Pests (Rodents, Flies): This usually happens when prohibited items are added or when food scraps are left exposed.
- Fix: Ensure you are not composting meat, dairy, or oily foods. Bury kitchen scraps deep within the pile and cover them with browns. Use a pest-proof bin if necessary.
- No Heat / Slow Decomposition: The pile isn’t getting warm, and nothing seems to be happening.
- Fix: Check your green-to-brown ratio (you might need more greens), ensure adequate moisture, and make sure the pile is large enough to retain heat (at least 3x3x3 feet is ideal for a hot compost pile). Turning can also help kickstart activity.
Benefits of Composting You Might Not Have Thought Of
Beyond creating fantastic plant food, composting offers even more perks:
- Reduces Landfill Waste: As mentioned, a significant portion of household trash can be composted, diverting it from landfills and reducing methane emissions.
- Improves Soil Health: Compost adds organic matter to the soil, which is crucial for healthy plant growth. Over time, it can improve soil structure, making it more friable (easier to work), better at draining in clay soils, and better at retaining water in sandy soils.
- Supplies Nutrients: Compost is packed with nutrients that your plants need to thrive, acting as a slow-release fertilizer.
- Promotes Beneficial Microbes: Introducing compost helps increase the population of beneficial microorganisms in your soil, which can help plants fight off diseases and pests.
- Saves Money: You’ll buy fewer fertilizers and soil amendments for your garden.
- Conserves Water: Compost improves soil’s ability to hold water, meaning you’ll need to water your garden less frequently.
For a deeper dive into the benefits and science of composting, you can check out resources from university extension offices, like those affiliated with University Extension programs. They often provide practical, region-specific advice.
Composting for Apartment Dwellers: Vermicomposting!
Think you can’t compost because you don’t have a yard? Think again! Vermicomposting, or worm composting, is perfect for small spaces. You can use a compact, multi-tiered bin indoors. Red wiggler worms are excellent at breaking down food scraps, and their “castings” are some of the finest compost you can get. It’s a tidy and efficient way to compost when space is limited.
Frequently Asked Questions About Eco-Friendly Composting
Q1: How long does it take to make compost?
A: It varies! Depending on the materials, temperature, and how often you turn it, compost can be ready in anywhere from 6 weeks to a year. A frequently turned, well-managed “hot” compost pile can yield results faster than a passively managed “cold” pile.
Q2: My compost smells bad. What did I do wrong?
A: A strong, unpleasant smell usually means your compost is too wet or doesn’t have enough air (anaerobic). Try adding more “browns” (like dry leaves or shredded cardboard) and turn your pile to introduce oxygen. Make sure you aren’t adding prohibited items like meat or dairy.
Q3: Can I compost everything from my kitchen?
A: Mostly! You can compost fruits, vegetables, coffee grounds, tea bags, and crushed eggshells. However, avoid meat, bones, dairy products, and oily foods, as these can attract pests and create odors.

I am passionate about home engineering. I specialize in designing, installing, and maintaining heating, ventilation, and air conditioning systems. My goal is to help people stay comfortable in their homes all year long.