Hey, I’m Troy D Harn from TopChooser! Ever look at your kitchen scraps and think, “There’s got to be a better use for this than the trash can”? You’re right! Composting is a fantastic way to turn everyday waste into super-rich food for your garden. But sometimes, getting started can seem like a big, expensive project. Don’t worry! I’m going to show you how to make garden compost affordable and easy, even if you’re new to all this. We’ll break it down step-by-step so you can start composting without breaking the bank.
Garden Compost Affordable: Start Feeding Your Plants for Free!
Turning your kitchen and yard waste into fantastic garden compost doesn’t have to cost a fortune. In fact, one of the best things about composting is its affordability. You’re essentially using what you already have to create something incredibly valuable for your plants. Think of it as a magic trick for your garbage can, turning unwanted bits into black gold for your garden beds. This guide will walk you through simple, budget-friendly ways to start composting right away.
Why Bother with Compost? It’s a Gardener’s Best Friend!
Before we dive into the “how-to,” let’s quickly chat about why compost is such a big deal. It’s like a multivitamin for your soil! Adding compost improves your soil’s structure, helping it hold onto water better (which means less watering for you!) and drain well so roots don’t get waterlogged. It also introduces beneficial microbes and nutrients that make your plants grow stronger and healthier, making them more resistant to pests and diseases. Plus, you’re diverting waste from landfills, which is great for the planet!
The “Green” vs. “Brown” Secret to Great Compost
The magic behind composting is balancing two types of materials: “greens” and “browns.” It’s like a recipe, and getting the mix right is key. Don’t let the names fool you – “green” materials are usually wet and nitrogen-rich, while “brown” materials are dry and carbon-rich.
What are “Green” Materials? (Nitrogen-Rich)
- Vegetable and fruit scraps (peels, cores, etc.)
- Coffee grounds and tea bags
- Grass clippings (don’t pile them too deep or they’ll get slimy!)
- Plant trimmings (non-diseased)
- Eggshells (crushed)
What are “Brown” Materials? (Carbon-Rich)
- Dry leaves
- Shredded newspaper and plain cardboard (avoid glossy or heavily inked paper)
- Straw and hay
- Wood chips and sawdust (use sparingly, they break down slowly)
- Twigs and small branches (chopped up)
The ideal ratio is roughly 2 parts browns to 1 part greens by volume. This helps the compost pile heat up properly and break down efficiently without smelling bad or becoming a soggy mess.
Getting Started: Affordable Composting Systems
You don’t need fancy equipment to start composting. Many effective methods use materials you might even have lying around. The goal is to create a space where your organic materials can break down. This involves airflow, moisture, and a good mix of greens and browns.
Option 1: The Open Pile – Free and Easy!
This is the most basic and often the cheapest way to compost. It’s perfect if you have a bit of yard space. You simply create a pile in a corner of your yard.
- Choose a spot: Pick a level, well-drained area, preferably somewhere that gets some sun but isn’t baking hot all day.
- Start layering: Begin with a base layer of coarse brown material like twigs or straw for aeration. Then, start adding alternating layers of greens and browns.
- Keep it moist: The pile should feel like a damp sponge. Water it if it gets too dry.
- Turn it occasionally: Using a pitchfork or shovel, turn the pile every week or two to mix the materials and introduce air. This speeds up decomposition.
Pros: Absolutely free, requires no building, great for large volumes of yard waste.
Cons: Can look messy, might attract pests if not managed well, can take longer to break down.
Option 2: DIY Pallet Bin – Reclaimed and Sturdy
This is a fantastic way to compost using recycled materials. Wooden pallets are often available for free from local businesses, construction sites, or online marketplaces. You can build a simple, effective compost bin with just a few pallets and some basic tools.
- Gather pallets: Find 3 or 4 wooden pallets of similar size.
- Assemble the sides: Stand three pallets up to form three sides of a square. Use screws, zip ties, or wire to connect them securely at the corners.
- Add the front (optional): You can leave the front open for easy access or attach a fourth pallet, perhaps with hinges or by simply tying it on, so you can open it to turn or harvest compost.
- Position and fill: Place your bin in its chosen spot and start adding your greens and browns.
Pros: Very affordable (often free materials), sturdy, good airflow, keeps compost tidy.
Cons: Requires some basic DIY skills, needs pallets which might take a little searching.
Option 3: Wire Mesh Bin – Quick and Cost-Effective
A simple bin made from hardware cloth or chicken wire is another excellent budget-friendly option. It’s quick to set up and provides excellent aeration.
- Get your supplies: You’ll need a roll of hardware cloth or chicken wire (about 3-4 feet tall), wire cutters, and some sturdy wire or zip ties.
- Cut to size: Cut a length of mesh to create a cylinder of your desired diameter. A diameter of about 3 feet is good.
- Form a cylinder: Overlap the ends of the mesh and secure them tightly with wire or zip ties to form a free-standing cylinder.
- Place and fill: Set your wire bin in place and start layering your compost materials.
Pros: Very affordable, excellent aeration, easy to move, quick to assemble.
Cons: Might not look as neat as a pallet bin, can dry out faster, smaller critters might be able to get in/out.
For more detailed instructions on building a pallet compost bin, check out this guide from the Ohio State University Extension.
What NOT to Put in Your Compost Pile
Not everything belongs in a compost bin. Some items can attract pests, spread disease, or simply won’t break down properly. Here’s a quick list:
- Meat, fish, bones, and fatty foods (attract pests and can smell)
- Dairy products (attract pests and can smell)
- Diseased plants or weeds that have gone to seed (you’ll just spread the problem)
- Pet waste (dog or cat feces can contain pathogens)
- Chemically treated wood products
- Synthetic materials (plastics, certain fabrics)
- Coal ash or charcoal briquettes
Tips for Speedy and Odor-Free Composting
Nobody wants a stinky compost pile! Here are a few tricks to keep things running smoothly and smelling fresh:
- Balance is Key: As we discussed, getting the right mix of greens and browns is the most crucial step. Too many greens can lead to a slimy, smelly mess. Too many browns can make the pile too dry and slow to decompose.
- Chop it Up: Smaller pieces break down much faster. Chop up large vegetable scraps, shred newspaper, and break twigs into smaller bits.
- Aerate Regularly: Turning your pile every 1-2 weeks with a pitchfork or compost aerator is essential. It introduces oxygen, which the microbes need to do their work efficiently and without stinking.
- Maintain Moisture: Your compost pile should be as moist as a wrung-out sponge. If it’s dry, add water. If it’s too wet, add more brown materials and turn it.
- Location, Location, Location: While not strictly a “smell” tip, placing your bin in a spot that gets some sun can help it heat up, speeding decomposition. If it’s too hot, it might dry out too fast.
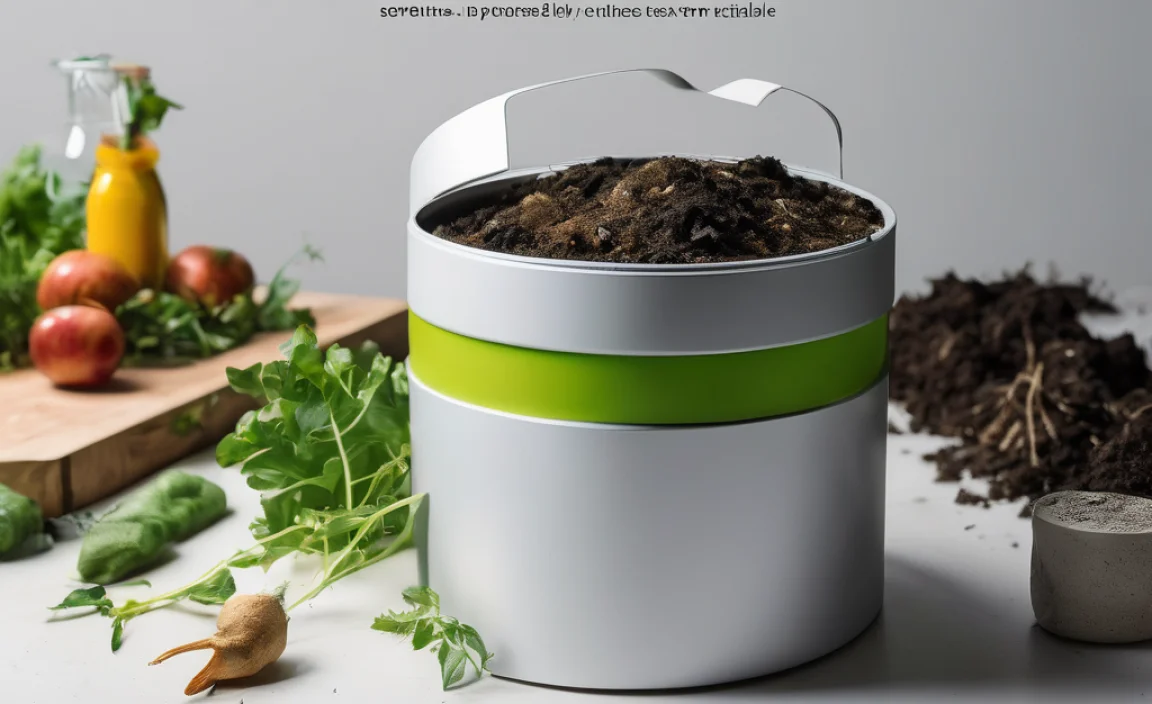
When is Compost Ready?
Patience is a virtue when composting! Your compost is ready when it looks and smells like dark, crumbly soil. You shouldn’t be able to recognize the original materials. Depending on your methods, the materials you use, and how often you turn it, compost can be ready anywhere from a few months to a year.
A good way to tell if it’s ready:
- It will be dark brown and crumbly.
- It will have a pleasant, earthy smell.
- You won’t be able to identify the original food scraps or yard waste.
What Can I Use My Compost For?
Once you’ve got your finished compost, you’ve struck black gold! Here are some ways to use this amazing soil amendment:
- Mix into garden beds: Before planting, dig compost into your vegetable and flower beds to enrich the soil.
- Top-dress existing plants: Spread a layer of compost around the base of established plants in spring or fall.
- Potting mix: Mix compost with other ingredients like peat moss or perlite to create a nutrient-rich potting mix for container plants.
- Lawn care: Rake a thin layer of compost over your lawn in the spring to improve soil health.
- Worm bins: Finished compost is perfect food for red wigglers in a vermicomposting setup.
Composting vs. Buying Soil Amendments: A Cost Comparison
Let’s talk numbers for a moment. Buying bags of compost or soil amendments can add up very quickly. Consider the cost of bags of compost, soil conditioners, or fertilizers.
| Item | Typical Cost (per unit) | DIY Compost Cost (per unit) |
|---|---|---|
| Bag of Composted Manure/Soil Amendment | $5 – $15 | $0 (using your own waste) |
| Bag of Peat Moss/Coconut Coir | $6 – $10 | $0 (if you don’t need it, though compost can often replace some of these) |
| Bag of Fertilizer | $10 – $30+ | $0 (compost provides natural nutrients) |
| Initial Cost for Basic Bin Materials (e.g., wire mesh, zip ties) | N/A | $10 – $30 (one-time purchase for basic setup) OR $0 (for open pile/recycled pallets) |
| Ongoing Cost | Continuous | $0 (just your time and kitchen/yard scraps) |
As you can see, the savings over time are substantial. Even if you buy a basic wire mesh bin, your upfront cost is minimal compared to purchasing soil amendments year after year. For those who can source free pallets and rely on the open pile method, the cost for starting compost is virtually zero, making it the ultimate affordable gardening solution.
Beyond the Pile: Other Affordable Composting Methods
While a compost pile or bin is the most common, there are other ways to compost affordability, especially for smaller spaces:
1. Worm Composting (Vermicomposting)
This is a fantastic method for apartment dwellers or those with very little outdoor space. You can buy special worm composting bins, or even build one yourself using plastic storage containers! Red wiggler worms do the work, turning kitchen scraps into nutrient-rich worm castings. It’s incredibly efficient and produces a super potent fertilizer.
You can find starter kits and information from reputable sources like the Oregon State University Extension, which offers helpful guides on setting up a worm bin without breaking the bank.
2. Bokashi Composting
Bokashi is a fermentation process that can handle even meat and dairy scraps (unlike traditional composting). It uses a special Bokashi bran inoculant. While the bran has a cost, it’s a small, ongoing expense, and the system itself can be simple DIY bins. The end product is a fermented material that then needs to be buried to finish decomposing. It’s a great option for breaking down all your food scraps, but requires a place to bury the fermented product eventually.
Troubleshooting Common Composting Issues
Even with the best intentions, compost piles can sometimes act up. Here are a few common problems and how to fix them:
Problem: My compost pile smells bad (like ammonia or rotten eggs).
Likely Cause: Too much “green” material (high nitrogen) and not enough “brown” material (high carbon), or it’s too wet.
Fix: Add a generous amount of brown materials like shredded newspaper, dry leaves, or straw. Turn the pile thoroughly to mix everything and aerate it. Make sure it’s not waterlogged.
Problem: My compost pile isn’t heating up and nothing is happening.
Likely Cause: Too dry, needs more greens, or not enough aeration.
Fix: Add some water if it’s dry, turning it as you go. Add a layer of fresh green materials (like kitchen scraps or grass clippings). Ensure you’re turning it regularly to introduce air.
Problem: My compost pile is attracting flies or other pests.
Likely Cause: You’re adding materials that attract pests (like meat or dairy), or the compost is too wet and exposed.
Fix: Remove any offending materials. Bury kitchen scraps deep into the center of the pile, always covering them with a layer of brown material. Ensure your bin is enclosed or that your pile is well-managed and turned regularly. A wire mesh bin or a pallet bin with smaller gaps can help deter critters.
For more in-depth troubleshooting, resources like the U.S. Environmental Protection Agency (EPA) offer excellent, reliable advice.
Conclusion: Happy Composting on a Budget!
See? Creating fantastic garden compost doesn’t need to be complicated or expensive. By understanding the balance of greens and browns and choosing a simple bin system (or even just an open pile!), you can turn your daily waste into a gardener’s dream. You’ll save money, improve your soil, and do your bit for the environment. Start small, be patient, and don’t be afraid to experiment. Before you know it, you’ll be reaping the rewards of your own homemade black gold!
Frequently Asked Questions About Affordable Garden Compost
Q1: What is the absolute cheapest way to start composting?
A: The absolute cheapest way is the open pile method. If you have space, you can simply start layering your kitchen and yard waste in a designated spot without any bin or container. Sourcing free wooden pallets to build a simple enclosure is also very cost-effective.
Q2: How long does it take for compost to be ready?
A: It varies greatly! A well-managed compost pile that is frequently turned and has a good green-to-brown ratio can produce compost in as little as 2-3 months. A less actively managed pile or one with larger materials might take 6 months to a year or even longer.
Q3: Can I compost in a small apartment with no yard?
A: Yes! Worm composting (vermicomposting) is ideal for small spaces like apartments. You can create a worm bin using simple storage containers. Some people also use Bokashi composting, which is a fermenting process suitable for indoor use.
Q4: My compost pile smells bad. What did I do wrong?
A: A bad smell in compost usually means there’s too much nitrogen (“green” material) or it’s too wet. Try adding more “brown” materials like shredded paper or dry leaves, and turn the pile to aerate it. Ensure it’s not soggy.

I am passionate about home engineering. I specialize in designing, installing, and maintaining heating, ventilation, and air conditioning systems. My goal is to help people stay comfortable in their homes all year long.