Hey there! Ever looked at your kitchen scraps and garden waste and thought, “There’s got to be a better way than just throwing this away?” You’re not alone! Many of us want to give our gardens a boost without spending a fortune.
Making your own compost is like a secret superpower for your plants. It can seem a little tricky at first, but I promise, it’s totally doable. We’ll break it down step-by-step to get you composting like a pro in no time. Ready to turn that waste into garden gold?
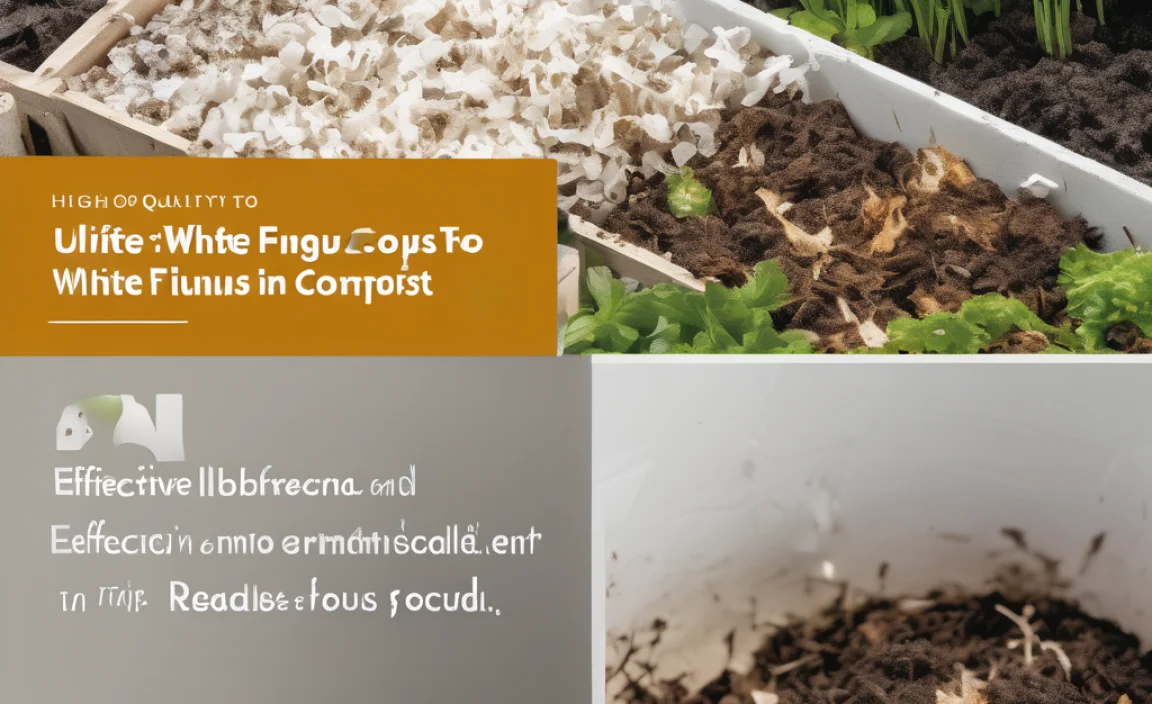
Garden Compost In Asia: Your Easy-Peasy Guide
Welcome, fellow gardeners! I’m Troy D Harn from TopChooser, and I’m here to tell you that turning your kitchen and yard scraps into amazing plant food is simpler than you think. We’re diving into the world of garden compost right here in Asia. Think of compost as nature’s super-fertilizer, and best of all, you can make it yourself! It’s a fantastic way to reduce waste, save money, and give your plants a healthy, vibrant life. We’ll cover everything you need to know, from what to put in your compost bin to how often you need to turn it. Let’s get started!
Why Compost? It’s a Win-Win-Win!
Composting is one of those home projects that just keeps giving. It’s good for your wallet, great for your garden, and even better for the planet. Here’s why it’s such a smart move:
- Boosts Soil Health: Compost adds essential nutrients and organic matter to your soil. This makes it richer, more fertile, and better at holding moisture.
- Reduces Waste: Think about all those food scraps and yard trimmings you toss. Composting diverts a significant amount of waste from landfills, which is great for the environment.
- Saves Money: Buying fertilizers and soil amendments can add up. Making your own compost means you’re getting top-quality garden supplies for free!
- Improves Drainage and Aeration: Healthy soil needs good airflow and drainage. Compost helps break up heavy clay soils and improve the structure of sandy soils.
- Supports Beneficial Microorganisms: Your compost pile becomes a mini ecosystem, teeming with helpful bacteria and fungi that your plants will love.
Understanding Compost Ingredients: The “Greens” and “Browns”
The magic of composting is all about balancing two main types of materials: “greens” and “browns.” Getting this balance right is key to a happy compost pile that breaks down efficiently without getting smelly or soggy. Think of it like a recipe!
What are “Greens”?
Greens are nitrogen-rich materials. They provide the moisture and protein that microorganisms need to get to work. They tend to break down quickly.
- Fruit and vegetable scraps (peels, cores, wilted leaves)
- Grass clippings
- Coffee grounds and tea bags
- Plant trimmings (non-woody)
- Eggshells (crushed for faster breakdown)
What are “Browns”?
Browns are carbon-rich materials. They provide the bulk and air pockets for your compost pile. They break down more slowly and help prevent the pile from becoming too wet and dense.
- Dry leaves
- Straw and hay
- Cardboard and paper (shredded, avoid glossy or colored inks)
- Small twigs and branches (chopped or shredded)
- Sawdust (from untreated wood)
- Wood chips
What NOT to Compost
Just as important as knowing what to add is knowing what to leave out. Certain items can attract pests, spread diseases, or simply won’t break down properly.
- Meat, fish, and dairy products (can attract pests and create odors)
- Oily or greasy foods
- Diseased plants or weeds that have gone to seed (unless you’re sure your compost pile gets hot enough to kill them)
- Pet waste (dog and cat feces can contain harmful pathogens)
- Treated wood or sawdust from treated wood
- Coal or charcoal ash
Choosing Your Composting Method in Asia
Different climates and living situations call for different composting methods. In Asia, with its diverse environments, you have several excellent options. Let’s explore them:
1. The Basic Compost Bin (Heap or Pile)
This is the most straightforward method. You simply create a pile or use simple fencing (like chicken wire or wooden pallets) to contain your materials in a corner of your yard. It’s simple to start and requires minimal investment.
- Pros: Easy to set up, can handle larger volumes of material, good for larger gardens.
- Cons: Can look a bit unmanaged, may take longer to break down if not turned regularly, can attract some pests if not managed well.
2. Enclosed Compost Bins
These are manufactured bins, often made of plastic or wood, with lids and sometimes aeration features. They help keep things tidy and contained, making them popular for urban and suburban gardens.
- Pros: Neat appearance, helps retain heat and moisture, deter pests, available in various sizes.
- Cons: Can be more expensive, capacity is limited, may require more effort to turn and mix materials.
You can find many affordable and effective enclosed bins online or at local garden centers. For example, many national environmental agencies offer resources on home composting and recommended bin types. Check out resources from your local municipal waste management or environmental department for recommendations specific to your area.
3. Tumbler Composters
These are rotating drums that make turning the compost incredibly easy. You just spin the drum every few days, and your compost mix gets thoroughly aerated and mixed. They are often faster than static bins.
- Pros: Fast composting time, very easy to turn and mix, reduces the chance of pests, neat and contained.
- Cons: Can be expensive, capacity is usually smaller than other bins, can become heavy when full.
4. Vermicomposting (Worm Composting)
This method uses specific types of worms (like red wigglers) to break down food scraps. It’s ideal for smaller spaces, such as balconies or apartments, and produces a nutrient-rich compost called “worm castings.”
- Pros: Great for small spaces, quick processing of kitchen scraps, produces high-quality “worm tea” (liquid fertilizer) and castings, minimal odor.
- Cons: Requires specific types of worms, needs careful temperature control, cannot handle large amounts of yard waste.
For more on setting up a worm farm, look for guides on vermicomposting from reputable university agricultural extension sites. They often have detailed plans and tips for success. For instance, the NC State University’s Compost Facility has excellent resources on vermicomposting.
5. Bokashi Composting
This is an anaerobic (without oxygen) fermentation process. You layer food scraps with a special Bokashi bran (inoculated with effective microorganisms) in an airtight container. It pickles the waste, and then the fermented material is buried in soil or added to a traditional compost pile to finish decomposing. It can handle meat and dairy, unlike traditional methods.
- Pros: Can compost meat, dairy, and oily foods; reduces waste volume significantly; takes up little space; fast initial fermentation.
- Cons: Requires purchasing Bokashi bran; the fermented material needs further decomposition (burying or adding to a compost pile); not technically “compost” until the second stage.
The Ideal Compost Ratio: Greens to Browns
Getting the right mix of greens and browns is crucial for efficient composting. A good starting point is a ratio of roughly 2 parts browns to 1 part greens by volume. This can be adjusted based on how your pile is performing.
Why the ratio matters:
- Too many greens: The pile can become too wet, dense, and smelly.
- Too many browns: The pile will be too dry and won’t heat up or break down effectively.
Don’t worry too much about getting this perfect from day one. You’ll learn to “read” your compost pile. If it’s too wet and mushy, add more browns. If it’s dry and slow, add more greens or water.
Setting Up Your Compost Bin: A Step-by-Step Approach
Let’s assume you’ve chosen a method like an enclosed bin or created a simple pile. Here’s how to get it going:
Step 1: Choose the Right Location
Find a convenient spot in your yard. Ideally:
- Accessibility: Easy to reach with kitchen scraps and yard waste.
- Drainage: Not in a low-lying area that floods.
- Sunlight/Shade: Partial shade is good. Full sun can dry it out too quickly, while full shade might keep it too damp.
- Airflow: Some air circulation around the bin is beneficial.
Step 2: Start with a Base Layer of Browns
Begin by putting a layer of coarse brown material at the bottom of your bin. This could be twigs, straw, or shredded cardboard. This layer helps with drainage and airflow from the start.
Step 3: Add Your First Layers of Greens and Browns
Now, start adding your kitchen scraps (greens) and yard waste (browns). Aim to layer them, just like making a cake, or mix them as you add them. Chop or shred larger items to speed up decomposition.
- Add a layer of greens (e.g., fruit peels, coffee grounds).
- Cover it with a thicker layer of browns (e.g., dry leaves, shredded paper).
- Repeat this layering process.
- Chop or shred materials like large vegetable scraps, cardboard, or twigs for quicker breakdown.
Step 4: Maintain Moisture Levels
Your compost pile needs to be moist, like a wrung-out sponge. If it’s too dry, things won’t break down. If it’s too wet, it can get smelly. Water your compost pile as needed, especially during dry spells. If you’re adding a lot of dry materials (browns), you’ll need more water. If you’re adding a lot of wet kitchen scraps (greens), you might need more browns to absorb moisture.
Step 5: Aerate and Turn Your Compost
Oxygen is vital for the microorganisms that do the composting work. Turning your pile regularly provides this oxygen and helps mix materials. The frequency depends on your method and how quickly you want compost.
- For faster compost: Turn every 1-2 weeks. This is best for heaps or bins where you can access all materials.
- For slower, no-fuss compost: Turn every 4-6 weeks, or even less.
You can use a garden fork, a compost aerator tool, or if you have a tumbler, just give it a good spin!
Step 6: Be Patient and Observe
Composting is a natural process, and it takes time. Depending on the materials, temperature, moisture, and turning frequency, compost can be ready in anywhere from a few months to a year.
- What to look for: The compost is ready when it’s dark, crumbly, and smells earthy. You shouldn’t be able to recognize the original materials.
- Troubleshooting: If it smells bad (like ammonia or rotten eggs), it’s likely too wet or needs more browns and turning for air. If it’s not breaking down, it might be too dry or needs more greens for nitrogen.
What Can You Compost from Your Asian Garden & Kitchen?
Asia’s rich agricultural traditions mean we have a bounty of organic materials. Here’s a look at common items you’ll find:
| Material Type | Examples | Type (Green/Brown) | Notes for Composting |
|---|---|---|---|
| Kitchen Scraps | Fruit peels (banana, mango, papaya), vegetable scraps (cabbage, onion, potato peels), leftover rice, tea leaves, used coffee grounds | Mostly Greens | Chop large pieces. Avoid oily foods or meat/dairy. |
| Yard Waste | Fallen leaves (coconut, palm, deciduous), grass clippings, small twigs, garden trimmings (non-woody), straw | Mostly Browns (leaves, straw, twigs) or Greens (grass, fresh trimmings) | Ensure leaves aren’t diseased. Chop twigs. Dry grass clippings in thin layers to prevent matting. |
| Household Items | Shredded newspaper, plain cardboard (egg cartons, toilet paper rolls), natural fiber paper towels | Browns | Avoid glossy paper or colored inks if possible. Shred well. |
| Other Organic Materials | Crushed eggshells, sawdust (from untreated wood), animal manure (chicken, cow, rabbit – aged) | Browns (sawdust), Greens (manure) | Eggshells add calcium. Manure must be well-rotted or from herbivores. |
Composting Challenges and Easy Fixes in Tropical Climates
Living in Asia often means dealing with tropical weather. High humidity and heat can present unique composting challenges, but there are simple solutions.
Challenge 1: Your Pile is Too Wet and Smelly
This is common in humid, rainy seasons. Too much moisture and not enough airflow can lead to anaerobic conditions, causing foul odors.
- Fix: Dig in plenty of dry brown materials. Think fallen leaves, shredded cardboard, straw, or sawdust. Turn the pile thoroughly with a garden fork to introduce air. Open up the sides of your bin if it’s enclosed and not getting enough ventilation. Consider a more porous bin or a tumbler that’s easier to mix.
Challenge 2: Your Pile is Dry and Slow to Decompose
This can happen during very hot, dry periods, or if you have too many brown materials. The microorganisms need moisture to work!
- Fix: Water the pile thoroughly. It should feel like a damp sponge. While watering, gently turn or aerate the pile to help the moisture penetrate. Add more “green” materials, like fresh kitchen scraps or grass clippings, which are higher in nitrogen and moisture.
Challenge 3: Pests (Insects, Rodents)
While a well-managed, hot compost pile usually deters pests, sometimes they can show up.
- Fix: Ensure you avoid prohibited items like meat, dairy, and oily foods. Bury kitchen scraps deep within the pile, covering them with brown materials. Use an enclosed bin or a tumbler to make access difficult. If rodents are a persistent problem, consider a bin with a secure lid and a wire mesh bottom to place on the ground. A hot compost pile, which is a sign of good microbial activity, is the best deterrent.
For more about managing compost in different environments, resources from organizations like the U.S. Environmental Protection Agency (EPA) offer universal principles that apply anywhere.
When is Compost Ready?
Patience is a virtue, especially with composting! Your compost is ready to use when it has transformed into a dark, crumbly, and earthy-smelling material. You shouldn’t be able to identify the original food scraps or yard waste anymore. It should smell like a rich forest soil, not like the ingredients you put in.
The time it takes varies based on several factors:
- Materials Used: Smaller, shredded materials break down faster.
- Temperature: Warmer temperatures speed up decomposition. Compost piles that reach high “hot composting” temperatures (50-70°C or 120-160°F) break down much faster.
- Moisture: Consistent, ideal moisture is key.
- Aeration: Regular turning significantly speeds up the process.
A general guideline is that a “hot” compost pile, managed actively, can be ready in 2-4 months. A “cold” or passively managed pile might take 6 months to a year or more.

I am passionate about home engineering. I specialize in designing, installing, and maintaining heating, ventilation, and air conditioning systems. My goal is to help people stay comfortable in their homes all year long.