Dreaming of a lush garden but wincing at the cost of soil amendments and fertilizers? It’s a common pickle many enthusiastic gardeners find themselves in. The good news? You don’t need to break the bank to give your plants the best. We’re ditching expensive store-bought bags and diving into the wonderfully simple world of DIY garden compost. It’s easier and cheaper than you think, and incredibly rewarding for both your wallet and the planet. Ready to turn your kitchen scraps and yard waste into gardening gold? Let’s get started!
Garden Compost Cheap: Genius Eco-Savings
Hey there, fellow garden enthusiasts and budget-savvy homeowners! Troy D Harn here from TopChooser, and I’m here to show you how to create amazing garden compost without spending a fortune. Think of this as your friendly guide to turning everyday waste into fertile black gold for your plants. It’s a fantastic way to save money, reduce what goes into landfills, and boost your garden’s health naturally. We’ll cover it all, from what you can compost to easy methods that won’t require a fancy setup.
Why Go for Cheap Garden Compost?
Let’s be honest, bagged compost and soil conditioners can add up. If you’re just starting out or have a growing garden, those costs can quickly become a garden chore in themselves. Making your own compost is one of the most effective ways to slash gardening expenses. It’s like having a magic money tree, but instead of money, it grows nutrient-rich soil!
The ‘Green’ Benefits Beyond Your Garden
Beyond saving cash, composting is a champion of environmental responsibility. Every bit of food waste and yard trimmings you divert from the landfill is a win for our planet. Landfills produce methane, a potent greenhouse gas. By composting, you’re actively reducing these emissions and creating a sustainable cycle. It’s a small action with a big impact, and it feels good knowing you’re contributing to a healthier environment.
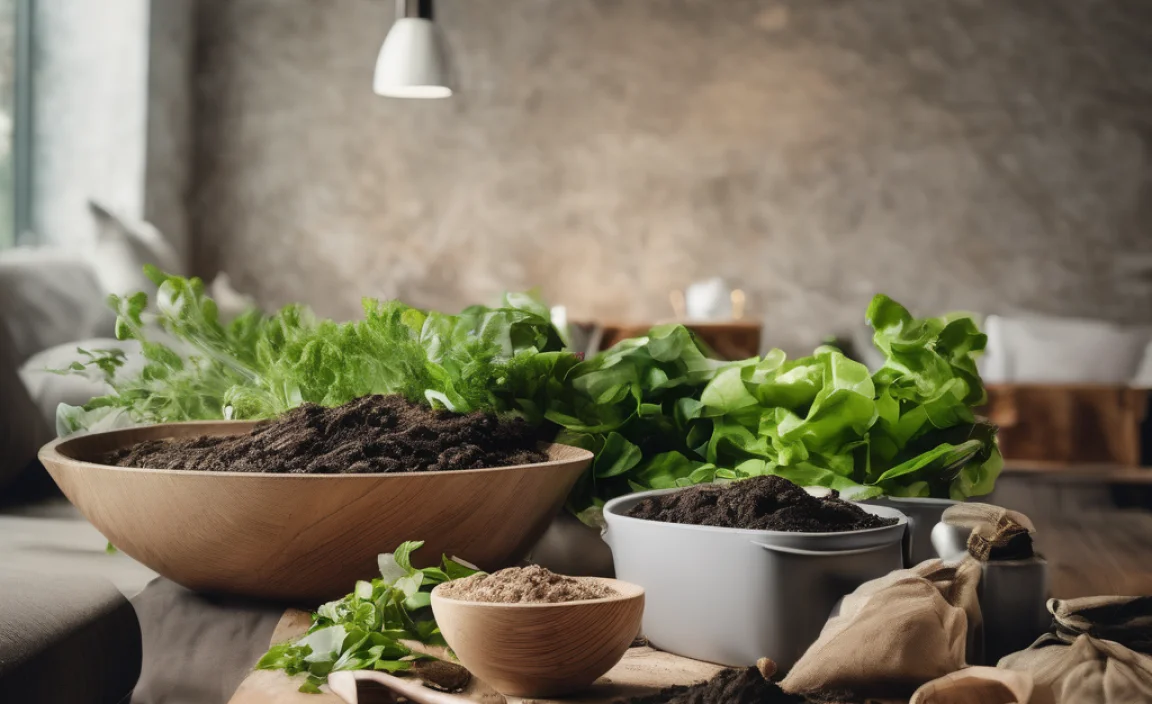
What You CAN Compost: Your Kitchen & Yard’s Secret Weapons
The beauty of homemade compost is its inclusiveness. Many things you might toss in the trash can actually become fantastic ingredients for your compost pile. The key is to achieve a good balance of “greens” and “browns.”
“Greens” – The Nitrogen-Rich Stuff
These are typically moist materials that break down quickly. They provide nitrogen, which is essential for the microorganisms doing the composting work.
- Fruit and vegetable scraps (peels, cores, rinds, wilted produce)
- Coffee grounds and paper filters
- Tea bags (remove staples if any)
- Grass clippings (in thin layers, or they can mat up)
- Plant trimmings (non-diseased, non-woody material)
- Eggshells (crushed finely)
“Browns” – The Carbon-Rich Stuff
These materials are drier and provide carbon, which acts as the energy source for the decomposers. They also help aerate the pile.
- Dry leaves (a composter’s best friend!)
- Shredded newspaper and cardboard (avoid glossy or colored inks)
- Straw and hay
- Wood chips and sawdust (from untreated wood, use sparingly)
- Paper towels and napkins (if not soiled with grease or harsh chemicals)
- Pine needles (use in moderation as they can be acidic)
What to AVOID Composting: Keeping Your Pile Healthy
There are a few things that are best left out of your compost bin to prevent attracting pests, creating odors, or introducing diseases.
- Meat, fish, and bones
- Dairy products (milk, cheese, yogurt)
- Oily or greasy foods
- Diseased plants or weeds that have gone to seed
- Pet waste (dog and cat feces can contain harmful pathogens)
- Treated wood, coal ash, or synthetic materials
- Invasive weeds that might survive the composting process
Super Simple & Cheap Composting Methods
You don’t need a fancy contraption. Here are a few ways to get started with minimal investment, using materials you likely already have or can get for free.
Method 1: The Simple Pile (aka The “Ditch It and Forget It” Method)
This is the easiest way to start. Find a convenient spot in your yard, preferably in partial shade. Just start piling your green and brown materials together. It might not be the neatest or fastest method, but it works!
- Choose a Location: Pick a spot that’s accessible and not too visible if aesthetics are a concern. Partial shade is ideal to prevent it from drying out too quickly.
- Start Layering: Begin with a base layer of coarse brown material like twigs or straw for drainage. Then, start adding your kitchen scraps (greens) and yard waste (browns). Aim for a rough balance – roughly two parts browns to one part greens.
- Turn Occasionally (Optional but Recommended): If you want faster compost, give the pile a turn with a pitchfork every few weeks. This introduces air, which the composting microbes love. If you don’t turn it, it will still compost, it will just take longer.
- Wait and Watch: It can take anywhere from six months to a year or more, depending on what you add and how often you turn it.
Pros: Absolutely free, requires no special equipment, very low effort.
Cons: Can be slower, might look a bit messy, may attract pests if not managed carefully (especially with food scraps).
Method 2: The DIY Bin from Pallets
Want something a bit more contained? Reclaimed wooden pallets are fantastic for building a simple compost bin. Many businesses give these away for free!
- Source Pallets: Look for heat-treated (marked ‘HT’) pallets, usually available for free from local businesses, garden centers, or online marketplaces. Avoid chemically treated pallets (marked ‘MB’).
- Assemble the Bin: You’ll need about four pallets. Stand them upright and create a square. Secure them together using screws, bolts, or heavy-duty zip ties. You can leave one side open for easy access or create a hinged door.
- Start Composting: Begin adding your greens and browns as described in Method 1. The enclosed structure helps retain heat and moisture, speeding up decomposition.
- Maintain Moisture and Air: Keep the pile moist like a wrung-out sponge and turn it every few weeks to aerate.
Pros: Very cheap (often free materials), relatively easy to build, creates a neater appearance than an open pile, helps retain heat and moisture.
Cons: Requires some basic tools and effort to assemble, can still be slow if not managed well, might decompose unevenly.
Method 3: The “Two-Bin” System (for Faster Compost)
If you’re a bit more serious about composting and want a continuous supply of finished compost, consider a two-bin system. You can build this from reclaimed lumber or even more free pallets!
- Build Two Bins: Create two adjoining bins, each roughly 3x3x3 feet. One bin is for actively adding new material, and the other is for the compost that’s curing and finishing.
- Fill Bin 1: Start filling your first bin with greens and browns. Turn this active pile regularly (every week or two) to introduce air and speed up decomposition.
- Transfer to Bin 2: Once Bin 1 is full and the material has broken down significantly (looks like dark, matted-down material), fork it over into Bin 2. This is the “curing” phase.
- Continue with Bin 1: While the material in Bin 2 finishes, you can start filling Bin 1 again. This way, you always have a batch actively decomposing and another batch ready to use or finishing up.
Pros: Produces compost much faster, allows for continuous composting, results in higher quality compost. You can find great plans and tips from university extension offices, like Cornell’s, which focuses on efficient compost systems.
Cons: Requires more space and a bit more effort to build and manage, needs regular turning.
What About Compost Tumblers?
Compost tumblers are popular because they make turning easy and can speed up the process, often within weeks. While you can buy them new, they can be pricey. For a cheap approach:
- Buy Used: Check online marketplaces for people selling used compost tumblers.
- DIY Tumbler: Some ambitious DIYers create their own tumblers using large drums or plastic barrels mounted on a frame. This requires more ingenuity and tools but can be incredibly rewarding.
If you’re on a tight budget, starting with a simple pile or pallet bin is usually the most cost-effective route. You can always upgrade later!
Achieving the Perfect Compost Mix: The 50/50 Rule (ish)
The secret to speedy, odor-free compost is the balance between “greens” (nitrogen-rich) and “browns” (carbon-rich). It’s not an exact science, but think of it as aiming for about:
- 50% Browns
- 50% Greens
However, this is a very general guideline. Many successful composters aim for a ratio closer to 2 parts browns to 1 part greens by volume. This is because greens are often denser and wetter, so you’ll end up using more volume of browns to balance it out.
If your compost smells like ammonia, you likely have too many greens. Add more browns! If it’s slow to break down and smells musty, you might need more moisture or more greens.
The Composting Process: Simple Steps to Black Gold
Regardless of the method you choose, the basic principles of decomposition are the same. You need the right ingredients, moisture, and air.
- Start Your Pile/Bin: Begin with a layer of carbon-rich “browns” for drainage and aeration.
- Add Your Materials: Layer your “greens” and “browns.” Chop or shred larger items to speed up breakdown. Burying fresh kitchen scraps in the middle of the pile helps deter pests and odors.
- Maintain Moisture: Compost needs to be as moist as a wrung-out sponge. If it’s too dry, decomposition slows. If it’s too wet, it can become anaerobic and smelly. Water it if it’s dry, and add more browns if it’s too soggy.
- Aerate (Turn): Turning the pile introduces oxygen, which is critical for the aerobic bacteria that do the work efficiently. This also helps mix materials and regulate moisture. Aim to turn every 1-4 weeks.
- Be Patient: Composting takes time. Depending on your materials, your method, and how often you turn it, it can take anywhere from a few months to a year.
- Harvest Your Compost: Finished compost will be dark brown, crumbly, and smell earthy, like a forest floor. You’ll no longer be able to identify the original ingredients. You can sift it to remove any larger, uncomposted bits, which can go back into your next batch.
Troubleshooting Common Compost Problems
Even with the best intentions, you might run into a few snags. Here’s how to fix them:
Problem: The compost pile smells bad (like rotten eggs or ammonia).
- Cause: Too much nitrogen (greens) or it’s too wet, leading to anaerobic conditions.
- Solution: Add more carbon-rich “browns” like shredded leaves, straw, or cardboard. Turn the pile thoroughly to introduce air. If it’s waterlogged, try to drain it and add dry browns.
Problem: The pile isn’t breaking down (or is breaking down very slowly).
- Cause: Too dry, not enough nitrogen/greens, or lack of air.
- Solution: Add water until it’s moist like a wrung-out sponge. Add more nitrogen-rich materials like grass clippings or kitchen scraps. Turn the pile to introduce air. Chop materials into smaller pieces.
Problem: Pests (flies, rodents).
- Cause: Exposed food scraps, meat/dairy in the pile.
- Solution: Ensure food scraps are buried well within the pile, covered by at least 6 inches of other material. Avoid adding meat, dairy, and oily foods entirely. A well-maintained compost bin (like a pallet bin or a tumbler) can also help deter pests.
When is Compost Ready? Visual and Olfactory Cues
You’ll know your compost is ready when it:
- Is dark brown or black.
- Has a crumbly texture.
- Smells like fresh earth.
- No longer resembles the original materials (you can’t see recognizable food scraps or leaves).
If you still see large chunks, toss them back into your active compost bin for further decomposition. You can sift your finished compost through a screen (hardware cloth attached to a wooden frame) to get a finer, more consistent texture, perfect for seed starting or top-dressing delicate plants.
Cost Comparison: DIY vs. Store-Bought
Let’s look at the raw numbers to see why DIY compost is such a win. Prices are approximate and vary by region.
| Item | DIY Compost Cost (per cubic yard) | Store-Bought Compost Cost (per cubic yard) |
|---|---|---|
| Materials | Mostly Free (kitchen scraps, yard waste), minimal cost for structure (if any: ~$0-$20 for screws/ties for DIY bin) | $40 – $100+ (depending on type and quality) |
| Labor | Your time (which is rewarding and saves money!) | None (unless you count visiting the store) |
| “Finished Product” | High-quality soil amendment, nutrient-rich, eco-friendly | Variable quality, often good, but requires purchase |
The savings are clear: By using free resources and minimal investment in a structure, you can produce nutrient-rich compost for a fraction of the cost of buying it. This allows you to amend larger areas of your garden, start more seedlings, or simply use compost more generously without the financial strain. It’s amazing how much value you can unlock from things that would otherwise be discarded!
Tips for Maximizing Your Cheap Compost Efforts
- Shred Everything: The smaller the pieces, the faster they break down. Use a shredder for leaves and twigs, or a lawnmower.
- Chop Up Food Scraps: Cut up large fruit and vegetable peels.
- Balance Greens and Browns: This is the golden rule. Too much of one will slow things down or cause odors.
- Keep it Moist: Think damp sponge, not soaking wet.
- Turn Regularly: It speeds up the process dramatically by adding oxygen.
- Be Patient: Nature takes time. Enjoy the process!
- Recycle Your Greens and Browns: Collect yard waste like leaves in the fall and store them (e.g., in compostable bags) for use throughout the year.
Where to Get Free “Browns”
Leaves are the ultimate free brown material, especially in the fall. Many municipalities offer leaf collection, or you can ask neighbors if they are willing to let you take their fallen leaves. Some garden centers might also give away excess leaves or wood chips. Always ensure wood products are untreated.
The “Lasagna” Gardening Approach
Also known as no-dig gardening, this method involves layering organic materials directly onto your garden bed. You can use this for starting new beds:
- Start with a Base Layer: Cardboard or newspaper (several layers) to suppress weeds.
- Layer Greens and Browns: Alternate layers of kitchen scraps, grass clippings, leaves, straw, etc., just like building a compost pile directly in place.
- Top with Finish Compost: Add a layer of finished compost or good topsoil.
- Plant: You can plant directly into this, or let it break down over a few months.
This method is fantastic for building soil fertility directly where you want it and uses the exact same principles as composting, just in situ. For more on building healthy soil through organic methods, the Environmental Protection Agency (EPA) offers excellent resources on home composting and its environmental benefits.
Conclusion: Your Garden’s Future is Fertile (and Affordable!)
See? Creating fantastic garden compost doesn’t require a huge budget or a complex setup. By embracing the simple methods we’ve discussed – from the humble pile of kitchen scraps and yard waste to a DIY pallet bin – you’re not just saving money; you’re actively participating in a cycle that benefits your garden and the planet immeasurably.
You’re transforming what many consider trash into a rich, organic powerhouse that will make your plants thrive. So, start collecting those coffee grounds and those fallen leaves. Your garden, your wallet, and Mother Earth will thank you for it. Happy composting, and happy gardening!
Frequently Asked Questions About Cheap Garden Compost
Can I compost all my kitchen waste?
While you can compost most fruit and vegetable scraps, coffee grounds, and eggshells, it’s best to avoid meat, dairy, and oily foods. These can attract pests and create odors. Always ensure your compost pile is properly managed to break down materials safely.
How long does it take to make compost?
It varies greatly! A fast-acting, well-managed compost pile that is regularly turned and has a good green/brown balance might produce usable compost in as little as 2-3 months. A slower, less actively managed pile could take 6-12 months or even longer.
Do I need a special bin?
No! You can start with a simple open pile in a corner of your yard. Pallets can be used to create a free or very low-cost bin. Tumblers and manufactured bins are convenient but not necessary for creating great compost on a budget.
What if my compost smells bad?
A foul smell usually indicates too much moisture or too much nitrogen (greens), leading to anaerobic conditions. Add more dry brown materials (leaves, cardboard) and turn the pile to aerate it. Ensure good drainage.
Can I add grass clippings?
Yes, but in moderation and in thin layers! Grass clippings are a rich source of nitrogen (“greens”). If added in thick layers, they can mat together, block airflow, and become slimy and smelly. It’s best to mix them with “browns” or let them dry slightly before adding.
How do I know when the compost is ready to use?
Finished compost will be dark brown, crumbly, and have an earthy smell. You shouldn’t be able to recognize the original food scraps or yard waste. It should feel cool to the touch, not hot like it might be during active decomposition.
Will composting attract rodents?
Improperly managed compost piles—especially those with meat, dairy, or exposed food scraps—can attract rodents. To minimize this risk, always bury food scraps deep within the pile, maintain a healthy balance of greens and browns, keep the pile moist but not soggy, and avoid adding prohibited items like meat and fats.

I am passionate about home engineering. I specialize in designing, installing, and maintaining heating, ventilation, and air conditioning systems. My goal is to help people stay comfortable in their homes all year long.