Composting is a fantastic way to turn your kitchen scraps and yard waste into nutrient-rich goodness for your garden. It’s eco-friendly and saves you money! But sometimes, things don’t go as planned. You might end up with a smelly pile, or maybe it just won’t break down. Don’t worry, composting isn’t rocket science, and most problems come down to a few common slip-ups. We’ll walk through these easily fixable mistakes so you can create amazing compost, hassle-free.
Garden Compost Mistakes: Avoid These Essential Blunders
Hey there, fellow garden enthusiasts! Troy D Harn here from TopChooser, and I’m excited to talk about something near and dear to my gardener’s heart: composting. Turning kitchen scraps and yard trimmings into black gold for your plants feels incredibly rewarding. It’s a natural cycle that benefits your garden immensely. However, many folks, especially when they’re just starting out, run into a few snags. These aren’t huge, scary problems, but small errors that can lead to a sluggish pile, a stinky mess, or even attract unwanted guests. The good news? They’re all preventable and surprisingly easy to fix. Let’s dig into the most common garden compost mistakes and how you can easily steer clear of them. Your compost pile will thank you, and so will your garden!
What is Compost? The Super Simple Version
Before we dive into what not to do, let’s quickly touch on what composting actually is. Think of it as nature’s recycling program. You gather organic materials – things that were once alive – and give them the right conditions to break down. Tiny organisms, like bacteria and fungi, along with larger helpers like worms and insects, munch away on this material. Over time, it transforms into compost, a dark, crumbly, earthy-smelling material that is packed with nutrients. This “black gold” is a fantastic soil amendment that improves soil structure, drainage, and aeration, making it a dream for your plants.
Why Your Compost Might Be Acting Up: Common Mistakes to Avoid
Let’s get down to business. It’s easy to make a few missteps when you’re starting out. Recognizing these common garden compost mistakes is the first step to composting success. We’ll break them down so you can tackle them head-on.
Mistake 1: The “Everything But the Kitchen Sink” Mentality – Unbalanced Ingredients
One of the biggest hurdles for new composters is understanding what goes in the pile. Compost is essentially a balance of “greens” and “browns.”
- Greens: These are nitrogen-rich materials. Think food scraps (fruit and veggie peels, coffee grounds, tea bags), grass clippings, and manure. They provide the nitrogen needed for the microorganisms to multiply and do their work.
- Browns: These are carbon-rich materials. Think dry leaves, shredded paper or cardboard, straw, and small twigs. They provide the energy source for the decomposition process and help with airflow.
The Mistake: Loading your compost pile with too many greens without enough browns. This is a surefire way to create a slimy, smelly, anaerobic (oxygen-deprived) mess. It smells like rotten eggs or ammonia because the decomposition process is happening without enough air. Another common slip-up is adding “browns” too exclusively, leading to a pile that dries out and sits there without breaking down much.
The Fix: Aim for a ratio of roughly 2-3 parts browns to 1 part greens by volume. It doesn’t have to be exact science! A good rule of thumb is that if your materials are really wet and compacted, you need more browns. If they seem dry and aren’t heating up or breaking down, you might need more greens. Mix your greens and browns as you add them to the pile for the best results.
Mistake 2: Ignoring the Air – Lack of Oxygen
The microscopic organisms that break down your organic matter need to breathe! Just like us, they need oxygen to thrive and do their job efficiently. When compost piles become too dense or compacted, air can’t circulate, and the process slows down significantly, often leading to foul odors.
The Mistake: Piling materials too tightly without any aeration, or letting the pile become waterlogged and matted. This starves the beneficial aerobic bacteria.
The Fix: Turn your compost pile regularly! This is crucial for aeration. Aim to turn it at least once every 1-2 weeks, though more frequent turning will speed up the process. You can use a garden fork or a compost aerator tool. Even simply poking holes into the pile with a stick can make a difference if turning the whole thing feels too daunting. This also helps mix the materials, ensuring even decomposition.
Mistake 3: The Moisture Meltdown (or Drought)
Water is essential for composting. Microorganisms need moisture to live and work. However, too much or too little can halt the process. Your compost pile should feel like a wrung-out sponge – damp, but not soaking wet.
The Mistake:
- Too Wet: A pile that is constantly soggy or sitting in standing water. This leads to anaerobic conditions and that unpleasant rotten-egg smell.
- Too Dry: A pile that looks and feels like sawdust. Decomposition will stall because the microorganisms can’t survive or move around.
The Fix:
- If it’s too wet: Add more “brown” materials like dry leaves, straw, or shredded cardboard. These absorb excess moisture and help aerate the pile. If the pile is in a bin, ensure it has good drainage and isn’t collecting water.
- If it’s too dry: Gradually add water. You can use a hose or a watering can. As you turn the pile, slowly introduce moisture until it reaches that “wrung-out sponge” consistency. Covering the pile during very dry or hot spells can help retain moisture.
Mistake 4: Size Matters (Too Much) – Not Chopping Materials
The smaller the pieces of organic material you add to your compost pile, the faster they will break down. Larger items, like entire corn stalks or thick branches, can take a very long time to decompose, even in a well-managed pile.
The Mistake: Tossings whole fruits, large vegetable stalks, or big chunks of cardboard into the compost bin without breaking them down first.
The Fix: Chop, shred, or tear larger items into smaller pieces. This increases the surface area available for microorganisms to attack, significantly speeding up decomposition. Kitchen scraps like avocado pits or large melon rinds can be chopped. Yard waste like twigs and branches can be run through a chipper/shredder or simply snapped into smaller segments. Torn-up cardboard and shredded newspaper are much more effective than whole sheets.
Mistake 5: The Wrong Stuff – Adding Problematic Items
While many things can be composted, some items can cause problems. These include things that can introduce diseases, attract pests, or simply won’t break down effectively.
The Mistake: Composting things that aren’t suitable, such as:
- Meat, fish, bones, and greasy foods: These are attractive to pests like rodents and can create foul odors. While some advanced composting methods can handle these, they are generally best avoided by beginners.
- Diseased plants: If you’re composting plants from your garden that were affected by fungal or bacterial diseases, you risk spreading those diseases back into your garden when you use the finished compost.
- Weeds that have gone to seed: Unless your compost pile gets very hot (which can kill seeds), you’ll end up spreading weed seeds throughout your garden.
- Pet feces (from cats and dogs): These can contain pathogens that are harmful to humans and should not be introduced into compost meant for edible gardens. (Manure from herbivores like rabbits and chickens is generally fine.)
- Glossy or coated papers: These often contain plastics or inks that are not good for compost.
- Chemically treated wood or yard waste: Any residue from pesticides or herbicides can harm your garden soil and plants.
The Fix: Stick to the basics for your initial composting journey and research any questionable items. When in doubt, leave it out! A good rule is to compost only plant-based materials and the appropriate manures. Always ensure your compost pile gets hot enough if you’re concerned about killing weed seeds or pathogens (though avoiding these items is easier).
Mistake 6: Too Much of a Good Thing (or Not Enough Heat)
A hot compost pile is a fast compost pile. The internal temperature can reach 130-160°F (54-71°C). This heat is generated by the rapid activity of microorganisms and is crucial for breaking down materials quickly and killing off weed seeds and pathogens. If your pile isn’t heating up, it’s a sign something’s amiss.
The Mistake: A compost pile that remains cool and stagnant. This is often due to an imbalance of greens and browns, lack of moisture, poor aeration, or simply not enough material to generate heat.
The Fix:
- Check your Green-to-Brown Ratio: If it’s too heavy on browns, add more nitrogen-rich greens.
- Check Moisture: Make sure it’s damp, not dry.
- Aerate: Turn the pile to introduce oxygen.
- Add More Material: A pile needs a certain volume to generate and retain heat. If your pile is too small, add more materials. A general guideline is to aim for at least a 3x3x3 foot pile.
Getting the balance right can take a little practice with each new batch you add. Don’t get discouraged; observing what happens is part of the learning process!
Mistake 7: Impatience – Expecting Instant Results
Composting is a natural process, and nature doesn’t always operate on our schedules. Depending on the materials used, the size of the pile, and how often it’s turned and maintained, compost can take anywhere from a few weeks to several months to mature.
The Mistake: Giving up too soon or expecting finished compost within days or weeks when the conditions aren’t perfect for rapid decomposition.
The Fix: Be patient and observe your pile. Understand the signs of finished compost: it should be dark brown or black, crumbly, and have a fresh, earthy aroma. It shouldn’t contain recognizable food scraps or plant matter. If you want compost faster, you can:
- Chop materials smaller (Mistake 4).
- Ensure a proper green-to-brown ratio (Mistake 1).
- Turn the pile regularly for aeration (Mistake 2).
- Maintain proper moisture levels (Mistake 3).
- Ensure the pile generates heat (Mistake 6).
Using a tumbler composter can also speed things up due to easier turning and heat retention.
Composting Essentials: What You Need
You don’t need a lot of fancy gear to start composting. Here’s a quick rundown of helpful items:
Compost bin Options:
| Type | Pros | Cons | Best For |
|---|---|---|---|
| Open Pile | Simple, no cost, easy to add to | Can look messy, may attract pests more easily, dries out faster | Large yards, those with lots of space |
| Enclosed Bins (Plastic) | Neat, contains contents well, retains moisture/heat | Can be costly, harder to turn, limited airflow without design | Smaller yards, homeowners wanting a tidy look |
| Tumbler Composters | Easy to turn, speeds up process, contains materials | Can be expensive, limited capacity, may not get as hot as a large pile | Busy individuals wanting faster compost, those with limited physical space for turning |
| DIY Bins (Wood Pallets, Wire Mesh) | Cost-effective, customizable size | Requires some effort/skill to build, may not be as aesthetically pleasing | DIY enthusiasts, budget-conscious gardeners |
Tools for the Job:
- Garden Fork or Pitchfork: Essential for turning and aerating the compost pile. This is your primary tool for mixing.
- Compost Aerator Tool: A specialized tool that helps aerate the pile without extensive turning.
- Shovel: For moving finished compost and adding materials.
- Watering Can or Hose: To maintain the correct moisture level.
- Gloves: To keep your hands clean and protected.
- Optional: Chipper/Shredder: If you have a lot of woody yard waste, this can save a lot of time.
The Magic Ratio: Browns vs. Greens
Understanding the balance of carbon-rich “browns” and nitrogen-rich “greens” is the bedrock of successful composting. Getting this right helps your pile heat up, decompose efficiently, and avoid those nasty smells. As we mentioned, the ideal ratio is often cited as between 25:1 and 30:1 carbon to nitrogen (C:N) by weight. However, for home composters, a simpler volume-based approach is usually sufficient.
Here’s a handy visual guide:
| Good “Greens” (Nitrogen) | Good “Browns” (Carbon) |
|---|---|
| Fruit and vegetable scraps | Dry leaves |
| Coffee grounds and tea bags | Shredded newspaper or cardboard (non-glossy) |
| Grass clippings (in thin layers) | Straw or hay |
| Plant trimmings (non-diseased) | Small twigs and branches (chopped) |
| Eggshells (crushed) | Sawdust or wood chips (untreated) |
| Manure (from herbivores like chickens, cows, rabbits) | Paper towels and napkins (unsoiled by grease/chemicals) |
Volume Rule of Thumb: For every 1 bushel of greens you add, try to add 2-3 bushels of browns. It sounds like a lot of browns, but they are bulkier and lighter. Think of it this way: a small amount of wet kitchen scraps needs a good amount of dry leaves or shredded paper to balance its moisture and carbon content.
Why is this balance important?
- Microbial Food: Greens are the fuel, browns are the essential energy source and structure.
- Airflow: Bulky brown materials create air pockets.
- Moisture Control: Browns absorb excess moisture from greens.
If your pile is too green-heavy, it will get soupy and smelly. If it’s too brown-heavy, it won’t heat up and will decompose very slowly. It’s all about finding that happy medium, and a little trial and error is perfectly normal!
Troubleshooting Common Composting Odors
Bad smells are often the first sign that something’s not quite right. Let’s break down the common culprits and how to fix them:
Smell: Rotten Eggs or Ammonia (Sulfur/Nitrogen Odor)
- Cause: Too much nitrogen (greens) and not enough airflow (anaerobic conditions). The pile is too wet and compacted.
- Solution:
- Immediately add a generous amount of “brown” materials (dry leaves, shredded cardboard, straw).
- Turn or aerate the pile thoroughly to introduce oxygen.
- If the pile is waterlogged, try to lift it and add dry browns underneath.
Smell: Sour or Vinegary
- Cause: Often caused by an overabundance of acidic materials, though sometimes it can be a sign of insufficient airflow.
- Solution:
- Add more “brown” materials to balance the acidity and aid carbon.
- Ensure good aeration by turning the pile.
Smell: Earthy and Pleasant
- Cause: This is the smell of healthy, well-functioning compost! It means your microorganisms are happy, and the decomposition is happening aerobically.
- Solution: Keep doing what you’re doing! Continue to maintain the balance of greens and browns, proper moisture, and aeration.
Remember, a slightly less-than-perfect smell at times is normal, especially when adding new materials. The key is to address strong, persistent, unpleasant odors quickly by adjusting your compost’s conditions.
Fast-Tracking Compost with “Hot Composting” (Optional, but Good to Know)
For those of you who like to speed things up, the concept of “hot composting” is worth exploring. This method focuses on creating ideal conditions for microbial activity to generate high temperatures.
Key elements for hot composting:
- Size: A minimum volume of 3x3x3 feet is usually needed to build and retain heat effectively.
- Material Size: Materials are chopped very small (1-2 inches) to maximize surface area.
- Active Aeration: Frequent turning (daily or every few days) is essential.
- Precise Ratio: A carefully managed balance of greens (nitrogen) and browns (carbon), often closer to a 30:1 C:N ratio.
- Moisture: Consistent, “wrung-out sponge” dampness.
When done correctly, a hot compost pile can reach temperatures of 130-160°F (54-71°C). This high heat rapidly breaks down organic matter and effectively kills weed seeds and pathogens, often producing finished compost in as little as 4-8 weeks. It requires more attention and effort than passive “cold composting,” but the results are impressive.
If you’re interested in learning more about the science behind this, you can explore resources from university extension offices, which often have detailed guides. For instance, the University of Massachusetts Amherst offers valuable information on composting practices and principles.
Conclusion: Your Composting Journey Awaits!
Composting is a deeply satisfying practice that benefits your garden and the planet. While it’s easy to make a few initial mistakes, as we’ve seen, they are almost always simple to fix. By understanding the importance of balancing your greens and browns, ensuring proper moisture and aeration, chopping your materials, and knowing what not to compost, you’re well on your way to creating beautiful, nutrient-rich compost. Don’t be afraid to experiment and learn from your observations. Each pile is a little different, and with a bit of practice, you’ll become a composting pro in no time. Happy composting, and enjoy the bounty your garden provides!
Frequently Asked Questions About Garden Compost Mistakes
Q1: Why is my compost pile not breaking down at all?
A1: This is usually because it’s too dry, lacks nitrogen (greens), or there isn’t enough of it to generate heat. Try adding water, a layer of greens (like grass clippings or kitchen scraps), and ensuring your pile is at least 3x3x3 feet if possible. Turning it also helps.
Q2: My compost smells really bad. What did I do wrong?
A2: A strong, rotten smell usually means your pile is too wet and lacks air (anaerobic). You’ve likely added too many greens without enough browns to balance them. Add plenty of dry brown materials (leaves, shredded paper/cardboard) and turn the pile thoroughly to get air in.
Q3: Can I compost meat scraps or dairy products?
A3: For beginners, it’s best to avoid meat scraps, bones, fish, dairy products, and oily foods. These can attract pests like rodents and cause strong, unpleasant odors. While advanced composting methods can handle them, they’re usually not recommended for home compost bins.
Q4: How long does it take to make finished compost?
A4: It varies! A passively managed pile can take 6 months to a year. A well-managed “hot” compost pile that’s turned regularly might be ready in 4-8 weeks. The key is to look for finished compost that is dark, crumbly, and smells earthy, with no recognizable food or yard waste.
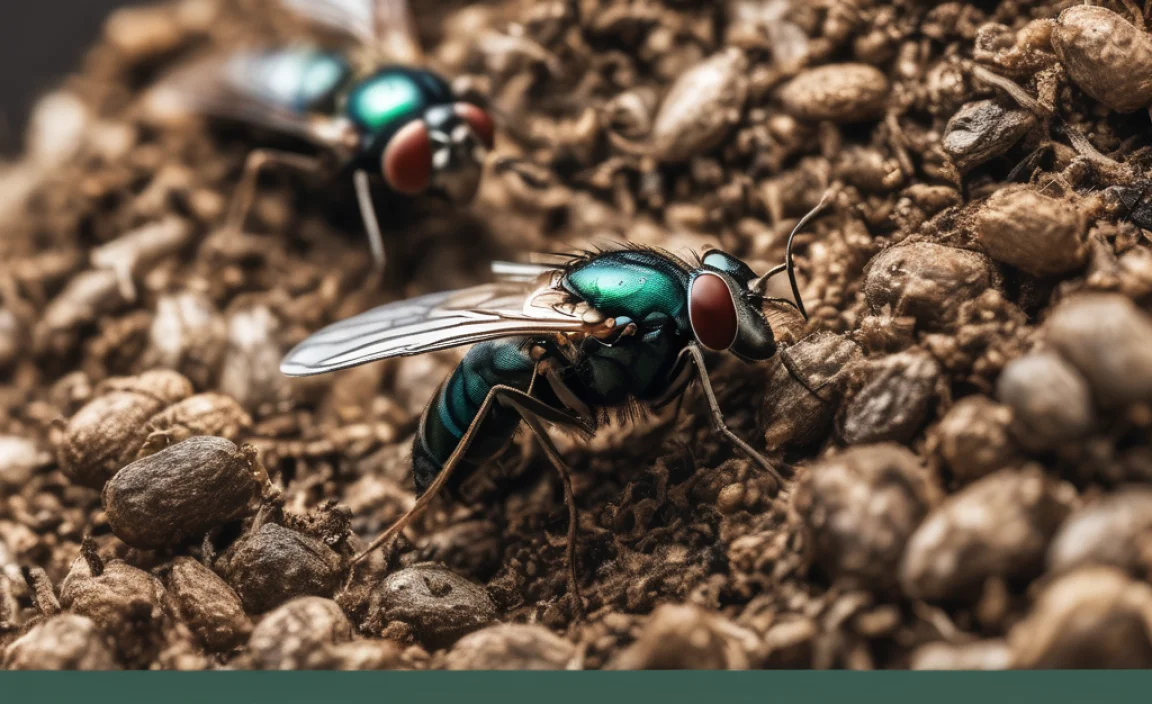
Q5: I’m worried about attracting flies or other pests to my compost. How can I prevent this?
A5: Pests are usually attracted by easily accessible food scraps, especially meats and dairy. Always bury fresh kitchen scraps in the center of the pile and cover them with brown materials. Using an enclosed bin or tumbler can also help deter pests. Avoid adding prohibited items like meat and oily foods.
Q6: What should I do if my compost pile is too wet and soggy?
A6: If your compost feels like mud or there’s standing water, it’s defintiely too wet and lacking air. Add a generous amount of dry “brown” materials like shredded cardboard, dry leaves, or straw. Then, turn the pile thoroughly to mix in the browns and introduce air. If your bin is collecting water, ensure it has good drainage holes.

I am passionate about home engineering. I specialize in designing, installing, and maintaining heating, ventilation, and air conditioning systems. My goal is to help people stay comfortable in their homes all year long.