Ever wonder when it’s really time to use your garden compost? It can feel like a guessing game. You’ve put in the work building your compost pile, and now you want maximum benefit for your plants. Getting the timing right means healthier soil and happier growth. Don’t worry, it’s simpler than you might think!
This guide will walk you through exactly how to know when your compost is ready and how to use it best. We’ll break it down into easy steps so you can transform your kitchen scraps and yard waste into black gold for your garden, and feel confident you’re doing it right.
When Is Compost Ready? The Essential Signs

Knowing when your compost is “done” is key to getting the most out of it. It’s not just about waiting a certain number of days; it’s about what has happened within the compost pile. Ready compost has gone through a transformation, much like cooking a delicious meal. The heat, tiny organisms, and time have broken down your initial materials into something new and incredibly beneficial for your garden.
Think of it like baking bread. You can’t just take it out of the oven after 10 minutes and expect it to be good. You need to watch for specific signs – like a golden-brown crust and a hollow sound when tapped. Compost is similar. You’re looking for visual cues and a change in texture and smell that tells you nature’s work is complete.
Visual Cues: What to Look For
The most straightforward way to tell if your compost is ready is by looking at it. What was once recognizable as kitchen scraps and yard waste should have fundamentally changed. Here’s what to keep an eye out for:
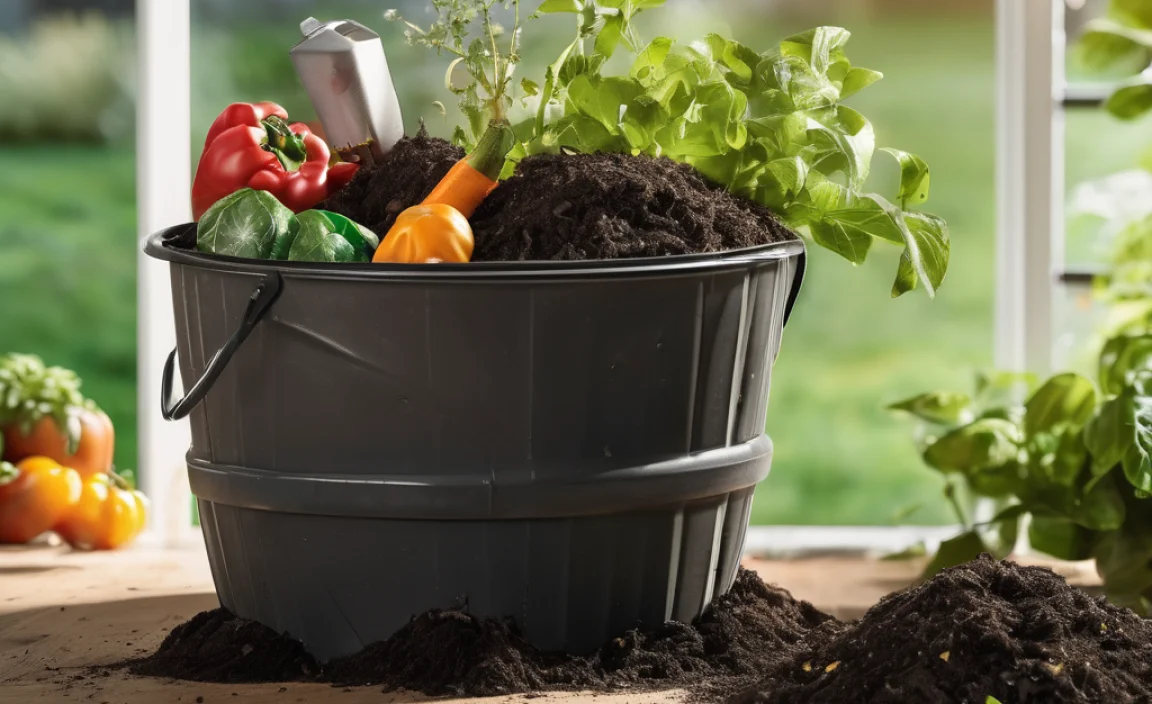
- Dark and Crumbly Texture: Ready compost will look like rich, dark soil. It won’t be slimy or clumpy. When you pick it up, it should feel loose and crumbly, like potting soil.
- Uniform Appearance: You shouldn’t be able to easily identify the original materials. No more whole banana peels, eggshells, or obvious leaves. Everything should be broken down into small particles.
- No “Greens” or “Browns”: The distinct layers or types of organic matter should be indistinguishable. It all blends together into a homogenous mixture.
Smell Test: The Aroma of Success
The smell of your compost is a big indicator of its readiness and health. A successful compost pile, when mature, should smell earthy and pleasant, like the forest floor after a rain. This is a sign that beneficial microbes have done their job.
If your compost smells:
- Ammoniacal or like decaying meat: This usually means there’s too much nitrogen (“greens”) or not enough air. It’s not ready and might need turning or adding “browns.”
- Like rotten eggs or sour: This suggests it’s too wet and anaerobic (lacking oxygen). This pile needs aeration and possibly more “browns” to soak up moisture.
A healthy, ready compost pile should never smell bad. If it does, don’t use it yet! Addressing the issues will bring it back to good health.
Temperature Check: Cool Down is Key
A key part of the composting process is the “hot” phase, where temperatures rise significantly due to microbial activity. This heat is great for killing weed seeds and pathogens. However, when your compost is ready to use, this heating phase will have finished, and the pile will have cooled down.
If you have a compost thermometer, you’ll notice that after the initial heating, the temperature gradually drops over weeks. When the temperature of the compost matches the ambient air temperature, it’s a strong sign that the active decomposition is over and the material is curing.
For beginners, simply waiting until it feels cool to the touch is usually sufficient. The other visual and smell cues will also be present by this time.
The “How-To” Garden Compost Time: Proven Essential Method

Building and using compost is a cycle. You start with materials, nurture them through decomposition, and then apply the finished product to benefit your garden. Knowing “garden compost time” means understanding when that finished product is perfect for your plants.
Here’s the breakdown of the proven essential method:
Step 1: Gather Your Materials (Greens & Browns)
Composting works best when you have a good mix of nitrogen-rich “green” materials and carbon-rich “brown” materials. This balance fuels the microbes that break everything down.
“Green” Materials (Nitrogen-rich):
- Fruit and vegetable scraps
- Coffee grounds and tea bags
- Grass clippings (in thin layers to avoid matting)
- Plant trimmings (non-diseased)
- Manure from herbivores (cow, horse, chicken – aged is best)
“Brown” Materials (Carbon-rich):
- Dry leaves
- Shredded newspaper (avoid glossy inserts)
- Cardboard (torn into small pieces)
- Straw or hay
- Wood chips or sawdust (in moderation)
- Pine needles (in moderation)
Tip: Aim for a ratio of roughly 2 parts browns to 1 part greens by volume. This isn’t an exact science, but it’s a good starting point.
Step 2: Build Your Compost Pile or Bin
You can compost in a simple pile or use a bin. For beginners, a bin (purchased or DIY) can help keep things tidy and retain moisture and heat better.
- Location: Choose a spot that’s convenient, has good drainage, and gets some sun (but not baking all day).
- Layering: Start with a base layer of coarse brown material (like twigs) for airflow. Then, alternate layers of greens and browns, lightly watering each layer. It doesn’t have to be perfectly neat!
- Size: A pile that is at least 3 feet x 3 feet x 3 feet (1 cubic yard) is ideal because it will generate and retain enough heat for efficient decomposition.
Step 3: Manage Your Compost Pile
This is where the magic happens, and a little intervention speeds things up.
Aeration (Turning):
Microbes need oxygen. Turning your pile mixes materials and brings fresh air in. Aim to turn it every 1-4 weeks. For a faster compost, turn it more often. For a slower, “set it and forget it” method, turn it less.
Tools for turning can be as simple as a garden fork or a specialized compost aerator. A good garden fork from a reputable retailer like Garden Supply Online can make this task much easier.
Moisture:
Your compost pile should be as damp as a wrung-out sponge. If it’s too dry, decomposition slows down. If it’s too wet, it can become anaerobic and smelly.
- Too dry: Water thoroughly, especially when turning.
- Too wet: Add more dry brown materials and turn to improve airflow.
Step 4: Monitor for Readiness
This is where we revisit the signs discussed earlier. Be patient! Depending on the method, temperature, and materials, compost can be ready anywhere from 2-3 months to a year or more.
Keep checking:
- Does it look dark and crumbly?
- Can you no longer identify the original food or yard waste?
- Does it smell earthy and pleasant?
- Is the temperature of the pile close to the ambient outside temperature?
Once all these signs are present, your compost is ready for garden use!
Understanding Compost Maturity Levels

Not all compost is created equal, and sometimes “finished” compost still has different levels of maturity. For most home gardeners, this distinction is subtle, but it can affect how you use it.
Immature Compost
This compost is still in the early stages of decomposition. You can still recognize many of the original materials. It might still have a slightly sharp odor. While it’s not fully broken down, it’s starting to work.
- Best Use: Generally, avoid using immature compost directly around sensitive young plants. It can continue to decompose in your soil, potentially tying up nitrogen that your plants need. It’s better suited for adding to a compost bin to continue breaking down or used in deep mulching applications away from plant roots.
Mature Compost
This is the ideal compost you’ve been aiming for. It’s dark, crumbly, smells earthy, and is no longer hot. All recognizable materials have broken down into humus.
- Best Use: This is your “black gold”! Mix it into garden beds before planting, use it as a top dressing for existing plants, add it to potting mixes, or use it as a mulch. It’s incredibly versatile and beneficial.
A Note on Curing vs. Maturing:
Some people differentiate between “curing” (the final stage where microbial activity slows and beneficial fungi and bacteria thrive, leading to stable humus) and simply being “mature” (meaning decomposition has stopped). For the home gardener, the practical outcome is the same: the compost is stable, nutrient-rich, and ready to use.
According to the Environmental Protection Agency (EPA), compost maturity is a key factor in determining its suitability for different applications.
How to Use Your Ready Compost

So, you’ve confirmed your compost is ready! Congratulations! Now, how do you best incorporate this nutrient-rich material into your garden? There are several effective ways to use it, and the best method often depends on what you’re growing and the condition of your soil.
1. Soil Amendment
This is perhaps the most common and beneficial way to use compost. Mixing compost into your garden beds before planting improves soil structure, aeration, drainage, and water retention. It’s like giving your soil a superfood boost.
- For new beds or planting areas: Spread a layer of finished compost 2-4 inches deep over the soil surface.
- Incorporate: Gently work the compost into the top 6-8 inches of soil using a garden fork or tiller. Avoid over-tilling, which can damage soil structure.
- For existing beds: If you’re not planting immediately, you can simply spread it on top. The worms and weather will gradually incorporate it.
2. Top Dressing
This involves spreading a layer of compost on the surface of the soil around existing plants. It’s a great way to provide a slow-release of nutrients and improve soil health without disturbing plant roots.
- When to use: Spring and fall are ideal times for top dressing.
- How to apply: Apply a 1-2 inch layer around the base of plants, keeping it a few inches away from the stems to prevent rot.
- Benefits: It helps suppress weeds, retains soil moisture, and gradually enriches the soil as it breaks down.
3. Potting Mix Component
Finished compost is an excellent ingredient for homemade potting mixes. It adds essential nutrients, improves drainage, and provides beneficial microbes for container plants.
- Ratio: Mix compost with other ingredients like peat moss, coco coir, and perlite or vermiculite. A common starting ratio is 1 part compost to 1 part peat/coir and 1 part perlite/vermiculite.
- Why it works: It provides aeration and drainage that is often lacking in plain potting soil, and adds a slow release of food for your plants.
4. Mulch
A layer of compost can function as a mulch. Mulching helps retain soil moisture, regulate soil temperature, and reduce weed growth.
- Application: Apply a 1-3 inch layer around plants.
- Considerations: While compost is a great mulch, using heavier materials like wood chips or straw might be more effective for significant weed suppression and moisture retention over a longer period. Compost can be used for a finer finish or as an alternative for vegetable gardens where you might eventually want the mulch to break down and enrich the soil further.
5. Lawn Dressing
A thin layer of sieved compost can be spread over your lawn. This is excellent for improving soil structure and providing nutrients to your turf.
- Method: Rake a thin layer (about 1/4 inch) over the lawn, especially after aeration. Brush or rake it in so it doesn’t smother the grass.
- Timing: Best done in spring or fall when grass is actively growing.
Caution: Always ensure your compost is fully mature (as described earlier) before using it, especially around delicate plants or for lawn applications. Immature compost can harm plants.
Troubleshooting Common Compost Problems
Even with the best intentions, compost piles can sometimes present challenges. Don’t get discouraged if your pile isn’t perfect right away. Most issues can be resolved with a few simple adjustments.
Here’s a look at common problems and their solutions:
| Problem | Cause | Solution |
|---|---|---|
| Smelly Compost (Ammonia/Rotten Eggs) | Too much nitrogen (greens), too wet, lack of airflow. | Turn the pile thoroughly. Add more carbon-rich brown materials (leaves, shredded paper). Ensure good drainage and airflow. |
| Pile Not Heating Up | Not enough nitrogen (greens), too dry, pile too small, or needs turning. | Add more green materials. Water the pile if dry. Turn the pile to introduce air and mix materials. Ensure the pile is at least 3x3x3 feet. |
| Pile is Too Dry | Insufficient moisture, too much sun, or too many brown materials. | Water the pile thoroughly while turning. Add more water than you think it needs. Cover if necessary to retain moisture. |
| Slow Decomposition | Lack of moisture, insufficient nitrogen, large unbroken materials, pile too small, or too cold. | Add moisture and nitrogen (greens). Break down or shred materials before adding. Turn the pile. Ensure adequate size. Consider insulation in very cold weather. |
| Attracting Pests (Rodents, Flies) | Exposed food scraps, meat/dairy/oily foods with high odor. | Bury kitchen scraps deep within the pile. Avoid adding meat, dairy, and oily foods. Cover finished compost with a layer of browns. Use a secure compost bin with a lid. |
Remember, composting is a natural process that involves microorganisms. Sometimes, it just needs a little time and the right conditions. If you’re using a well-designed compost bin, it can often help manage some of these issues more easily. A good quality bin can be found at many garden centers and online retailers.
FAQ: Your Compost Readiness Questions Answered
Q1: How long does it typically take for compost to be ready?
A1: It varies! With regular turning and a good mix of greens and browns, compost can be ready in as little as 2-3 months. Without much turning (passive composting), it can take 6-12 months or longer. The key is the signs of maturity, not just the time.
Q2: Can I use compost that still has some recognizable bits in it?
A2: For most uses, it’s best to wait until the compost is dark, crumbly, and earthy-smelling, with no recognizable food scraps or yard waste. Immature compost can tie up nitrogen in your soil, harming plants. However, you can add it back to your compost bin to continue decomposing.
Q3: What does “earthy smell” really mean?
A3: It means it smells like healthy soil or the forest floor after rain. It’s a pleasant, rich, slightly damp aroma. A sour or pungent smell indicates an issue, usually a lack of air or too much moisture.
Q4: My compost pile smells like ammonia. What should I do?
A4: Ammonia smell usually means too much nitrogen (greens) or not enough air. Turn your pile well to aerate it and add a generous amount of carbon-rich “brown” materials like dry leaves or shredded cardboard to balance the nitrogen.
Q5: Can I put diseased plants in my compost?
A5: It’s generally recommended to avoid putting diseased plants in a home compost pile unless your pile consistently reaches high temperatures (above 140°F or 60°C) during its active phase

I am passionate about home engineering. I specialize in designing, installing, and maintaining heating, ventilation, and air conditioning systems. My goal is to help people stay comfortable in their homes all year long.