Want to turn your kitchen scraps and yard waste into black gold for your garden? You’re in the right place! Many folks find starting a compost pile a bit confusing, wondering what goes in, what stays out, and how to get it working right. It feels like there’s a secret handshake to composting, doesn’t it? Well, good news! It’s not complicated at all. We’ll break down the essential garden compost training skills you need, step-by-step, so you can build a thriving compost ecosystem quickly and easily. Get ready to boost your garden’s health!
What is Garden Compost Training, Really?
When we talk about “garden compost training,” it’s not like teaching a dog new tricks. Instead, it’s all about understanding the natural process of decomposition and learning how to create the ideal environment for those hardworking microbes and microorganisms to do their job. Think of yourself as the conductor of an orchestra, making sure all the right instruments (ingredients) are playing in harmony to produce beautiful music (finished compost).
Essentially, garden compost training teaches you how to manage your compost pile. This involves understanding what materials are good to add, how to balance them, and how to maintain the right conditions. It’s about knowing the “why” behind each step so you can confidently manage your compost and achieve fantastic results for your garden.
Why Should You Bother with “Training”?
Investing a little time in understanding the basics of composting pays off big time. Here’s why:
- Healthier Garden: Compost is packed with nutrients that feed your plants, leading to stronger growth, brighter flowers, and tastier vegetables.
- Less Waste: You’ll significantly reduce the amount of trash going to the landfill by recycling your organic waste.
- Saves Money: Instead of buying expensive soil amendments and fertilizers, you’ll be making your own.
- Environmentally Friendly: Composting reduces greenhouse gas emissions associated with landfill waste and enriches the soil, helping it retain water better.
- Satisfying Hobby: There’s a unique sense of accomplishment in turning what looks like waste into something incredibly valuable for your garden.
The Two Main “Dancers” in Your Compost: Greens and Browns
The secret to a happy compost pile lies in balancing two types of materials: “greens” and “browns.” These aren’t just colors; they represent the nutrient content and purpose of the materials you add.
What are “Greens”?
Greens are materials that are rich in nitrogen. Nitrogen is like the protein shake for your compost microbes, helping them multiply and get to work quickly. These materials tend to be moist and break down faster.
- Fresh grass clippings
- Vegetable and fruit scraps (avoiding meat, dairy, and oily foods)
- Coffee grounds and tea bags
- Plant trimmings (from non-diseased plants)
- Manure from herbivores (like cows, horses, rabbits, chickens – but not pets like cats or dogs)
What are “Browns”?
Browns are materials that are rich in carbon. Carbon provides the energy source for the microbes. They also add bulk and allow air to circulate through the pile, which is super important. Browns are usually dry and break down more slowly.
- Dry leaves
- Straw or hay
- Shredded newspaper or cardboard (remove glossy pages and tape)
- Wood chips or sawdust (use sparingly, as they break down very slowly)
- Twigs and small branches (chopped up)
- Paper towels and napkins (if not contaminated with grease or chemicals)
The magic happens when you get the ratio right – a common guideline is about 2 to 3 parts browns to 1 part greens by volume. This balance helps prevent your pile from becoming a stinky, slimy mess or a dry, inert lump.
Essential Compost Training Skills: Step-by-Step Mastery
Let’s get down to the practical skills you need. Don’t worry, we’ll keep it simple and actionable.
Step 1: Choosing Your Compost Setup
You don’t need fancy equipment to start. Your choice depends on your space, how much material you generate, and your aesthetic preferences.
Different Bin Types:
- Open Piles: The simplest method. Just pile materials in a designated spot in your yard. Best for larger yards with plenty of space.
- Enclosed Bins: These can be store-bought plastic bins with lids or homemade structures. They help retain heat and moisture and can look tidier. Many have doors at the bottom for easy access to finished compost.
- Tumblers: These are rotating bins that allow you to mix the compost easily by simply turning the drum. They can speed up the composting process and are generally neater and pest-resistant. They are great for smaller spaces.
Factors to Consider:
- Size: A compost pile needs to be at least 3 feet by 3 feet by 3 feet (a cubic yard) to generate enough heat to break down materials efficiently. Smaller bins might work for specific composting methods, but for traditional composting, size matters.
- Location: Choose a relatively sunny spot that’s convenient to access from your kitchen and garden. It should also have decent drainage so your pile doesn’t become waterlogged. Avoid placing it directly against wooden structures, as the moisture can cause rot.
- Airflow: Your compost pile needs oxygen! Ensure whatever bin or pile setup you choose allows for good air circulation.
Step 2: Gathering Your “Ingredients” (Greens & Browns)
Start collecting your kitchen scraps and gather yard waste. It’s a good idea to have a small bin with a lid on your kitchen counter for food scraps to make collection easy. Keep a separate pile or bin for yard waste like leaves and grass clippings.
What to Avoid:
- Meat, fish, and bones (attract pests and can smell bad)
- Dairy products
- Oily or greasy foods
- Diseased plants (to avoid spreading disease)
- Weeds that have gone to seed (they might survive the composting process)
- Pet waste (from cats and dogs – can contain harmful pathogens)
- Treated wood or sawdust from treated wood
- Coal or charcoal ash (can contain harmful substances)
Step 3: Layering for Success
When you start your pile, begin with a layer of bulky brown material, like twigs or straw. This helps with drainage and airflow from the bottom up. Then, you can start alternating layers of greens and browns.
A Good Starting Layer:
- Start with a 4-6 inch layer of coarse brown material (twigs, straw, shredded cardboard) at the bottom for aeration and drainage.
- Add a 2-4 inch layer of green material (kitchen scraps, fresh grass clippings).
- Cover the green layer with a 4-6 inch layer of brown material (dry leaves, shredded newspaper).
- Continue alternating layers as you add new materials.
- Finish with a top layer of brown material to help deter pests and reduce odors. Sprinkle in a handful of finished compost or garden soil if you have it; this introduces beneficial microbes to kickstart the process.
Step 4: The Importance of Moisture
Your compost pile needs to be moist, but not waterlogged. Think of a wrung-out sponge. If it’s too dry, the decomposition process slows down dramatically. If it’s too wet, it can become anaerobic (lack of oxygen) and start to smell unpleasant.
How to Check and Adjust:
- Stick your hand into the pile (about six inches deep). If it feels dry, water it.
- If it seems too wet and mushy, add more brown material to absorb excess moisture and improve airflow.
- Rain can sometimes make the pile too wet, so cover it during prolonged rainy periods if needed.
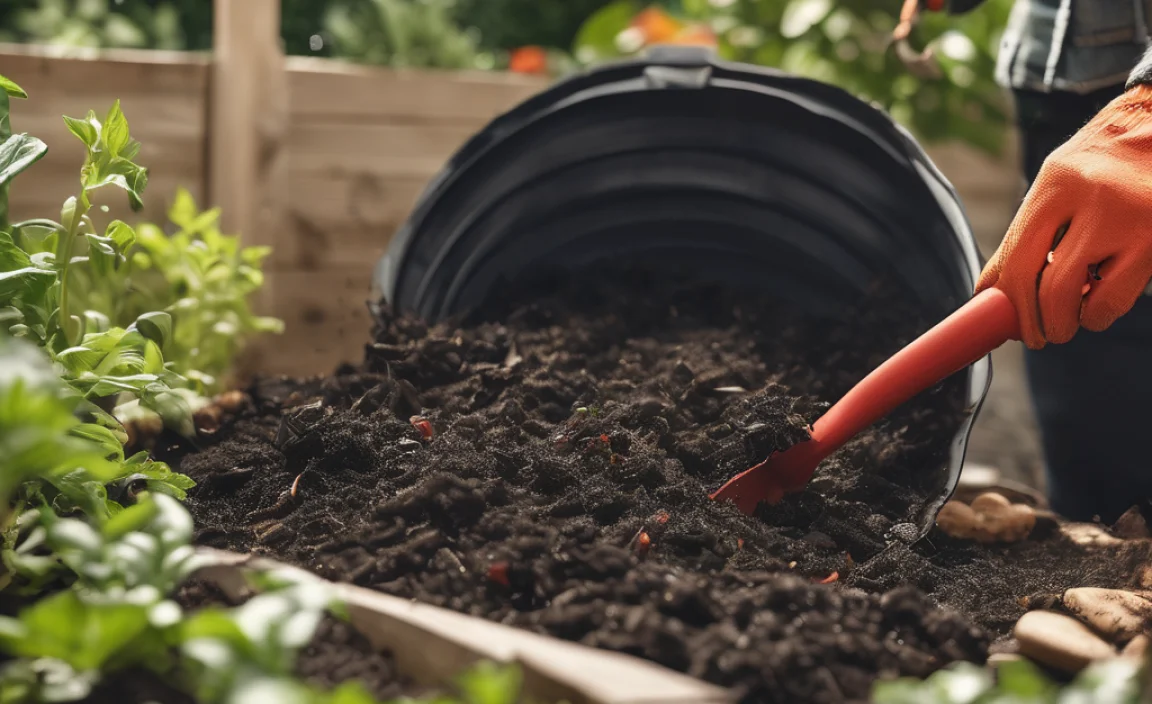
Step 5: Aeration – Giving Your Pile a Breath
Microbes need oxygen to thrive and break down organic matter efficiently. Turning your compost pile regularly introduces fresh air and helps everything mix together, speeding up decomposition and preventing anaerobic conditions (and smells!).
Turning Frequency:
- Active Composting: If you want compost quickly, turn your pile every 1-2 weeks.
- Passive Composting: If you’re less concerned about speed, turning once a month or even every few months is fine. Your compost will still happen, just more slowly.
How to Turn:
- Use a pitchfork or a compost aerator tool to mix the materials from the outside of the pile into the center and vice versa.
- Break up any clumps.
- If you have a tumbler, simply rotate it several times every few days.
Step 6: Monitoring and Troubleshooting
Your compost pile is a living ecosystem. Regularly checking on it will help you spot potential issues before they become problems.
Common Compost Problems and Solutions
It’s rare to get it perfect the first time, and that’s okay! Here are some common hiccups and how to fix them:
| Problem | Cause | Solution |
|---|---|---|
| Smells like ammonia | Too much nitrogen (too many “greens”) | Add more carbon-rich “brown” materials (leaves, cardboard, straw). Turn the pile to aerate. |
| Smells like rotten eggs or sewage | Too wet and/or not enough air (anaerobic conditions) | Turn the pile thoroughly to introduce air. Add dry “brown” materials to absorb excess moisture. Ensure good drainage. |
| Pile isn’t heating up or decomposing | Too dry, not enough “greens,” or pile is too small. | Check and add moisture. Add more nitrogen-rich “greens.” Ensure your pile is at least 3x3x3 feet. Turn the pile to mix materials. |
| Pests (flies, rodents) | Exposed food scraps, wrong materials added. | Always bury fresh kitchen scraps deep within the pile and cover with a layer of brown material. Avoid adding meat, dairy, and oily foods. Use an enclosed bin or a tumbler. Keeping the pile moist and turned can also deter pests. |
| Materials are finely shredded and compacting | Lack of air pockets. | Add coarser brown materials like small twigs or straw to create air pockets. Turn the pile regularly. |
The key is to observe your pile. Does it feel warm in the center? Does it smell fresh like earth, or something unpleasant? These observations are your indicators.
When is Compost Ready?
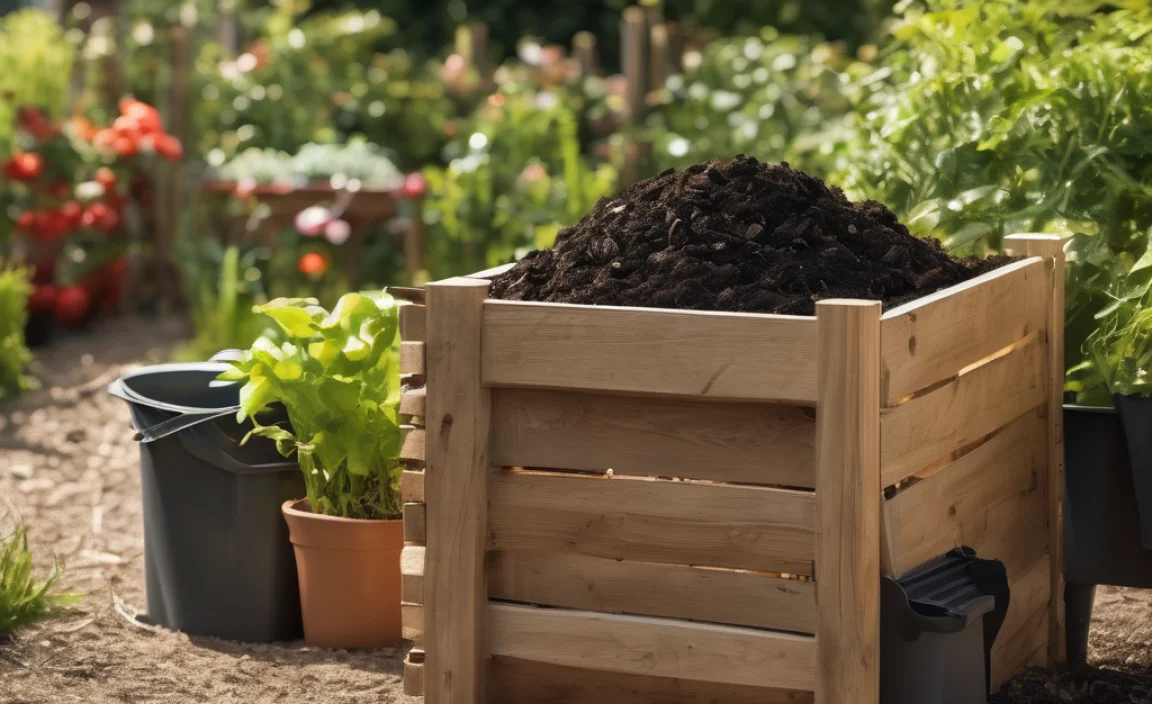
This is the exciting part! Finished compost is dark, crumbly, and smells earthy, like a forest floor after rain. You shouldn’t be able to recognize the original materials you put in.
Signs of Ready Compost:
- Appearance: Dark brown or black, uniform texture.
- Smell: Pleasant, earthy aroma.
- Texture: Crumbly and loose.
- Temperature: Cool to the touch (it will have lost its heat from the decomposition process).
The time it takes for compost to be ready can vary widely, from as little as 1-3 months for a very actively managed, hot compost pile, to 6-12 months or even longer for a slower, cooler pile. Factors like the size of your materials, how often you turn it, moisture levels, and ambient temperature all play a role.
Quick Tips for Effective Composting
Here are some of my favorite go-to tips that make composting a breeze:
- Chop it Up: Smaller pieces of material break down much faster. So, chop up large vegetable scraps, shred cardboard, and break down twigs.
- Mix it Well: Don’t just let kitchen scraps sit on top. Bury them in the middle of the pile and mix them thoroughly with browns.
- Start Small: Don’t feel like you need to create a huge pile all at once. Start with what you have and add to it over time.
- Be Patient: Nature takes its course. While you can influence the speed, some materials naturally take longer to break down.
- Use the Finished Product: Once your compost is ready, you can mix it into your garden beds, use it as a top dressing around plants, or add it to potting mixes. Your plants will thank you!
Understanding Compost Actively
For those who want to dive a little deeper, understanding the science behind composting can further enhance your “training.” It boils down to the work of various microorganisms:
- Bacteria: These are the primary decomposers. Thermophilic (heat-loving) bacteria are active in the hot phases of composting, while mesophilic bacteria work in cooler temperatures.
- Fungi: These help break down tougher materials like lignin (found in wood) and cellulose.
- Actinomycetes: These bacteria look like fungi and are responsible for the earthy smell of compost. They break down a wide range of materials, including tough plant fibers.
- Larger Organisms: While not strictly “micro,” mites, springtails, nematodes, earthworms, and insects also play crucial roles in breaking down larger pieces and aerating the pile.
The “training” you do is essentially creating the optimal conditions for these organisms to multiply and work efficiently. This means providing them with the right balance of food (greens and browns), air, and moisture. For more detailed information on the science of composting and the different stages, you can explore resources from organizations like the U.S. Environmental Protection Agency (EPA). Their guidelines offer a solid foundation for understanding the beneficial processes at play.
Composting Methods: Beyond the Basic Pile
While the layered approach is fundamental, there are a few composting methods you might encounter. Knowing about them can help you choose what fits your lifestyle best.
Hot Composting vs. Cold Composting
This refers to the management style and desired speed of decomposition.
| Feature | Hot Composting | Cold Composting |
|---|---|---|
| Temperature | Reaches high temperatures (130-160°F or 55-70°C) killing weed seeds and pathogens. | Remains at ambient temperatures, slower process. |
| Speed | Fast (as little as 1-3 months). | Slow (6-12 months or more). |
| Management | Requires frequent turning, precise layering, and moisture management. | Little to no turning required; more of a “set it and forget it” approach. |
| Materials | Can handle a wider range of materials efficiently. | Best for yard waste; kitchen scraps may decompose slowly and attract pests if not managed carefully. |
| Space | Requires a pile of at least 3x3x3 feet to generate heat effectively. | Can work with smaller piles or bins. |
Most beginners naturally fall into a “cold” or “warm” composting style, which is perfectly fine! The “training” is about finding a rhythm that works for you.
Vermicomposting (Worm Composting)
This is an advanced but incredibly rewarding method using specific types of worms (red wigglers, not earthworms found in your garden) in a bin to break down food scraps. It’s fantastic for apartment dwellers or those with limited outdoor space, as it can be done indoors or on a balcony. You’ll need a special worm bin and a bedding material. You feed the worms kitchen scraps, and they produce rich worm castings—a super-powered fertilizer.
Bokashi Composting
This is an anaerobic (oxygen-free) fermentation process that uses a special inoculated bran to pickle your food waste. It can handle items that traditional composting can’t, like meat and dairy (though it’s still best to avoid in large quantities out of habit). The fermented material then needs to be buried in the soil or added to a conventional compost pile to finish breaking down. It’s a faster pre-composting method, great for reducing food waste quickly, but requires an initial purchase of the Bokashi bran and a special airtight bucket system.
For most home gardeners, mastering the basics
.lwrp.link-whisper-related-posts{
margin-top: 40px;
margin-bottom: 30px;
}
.lwrp .lwrp-title{
}.lwrp .lwrp-description{
}
.lwrp .lwrp-list-container{
}
.lwrp .lwrp-list-multi-container{
display: flex;
}
.lwrp .lwrp-list-double{
width: 48%;
}
.lwrp .lwrp-list-triple{
width: 32%;
}
.lwrp .lwrp-list-row-container{
display: flex;
justify-content: space-between;
}
.lwrp .lwrp-list-row-container .lwrp-list-item{
width: calc(25% – 20px);
}
.lwrp .lwrp-list-item:not(.lwrp-no-posts-message-item){
max-width: 150px;
}
.lwrp .lwrp-list-item img{
max-width: 100%;
height: auto;
object-fit: cover;
aspect-ratio: 1 / 1;
}
.lwrp .lwrp-list-item.lwrp-empty-list-item{
background: initial !important;
}
.lwrp .lwrp-list-item .lwrp-list-link .lwrp-list-link-title-text,
.lwrp .lwrp-list-item .lwrp-list-no-posts-message{
}@media screen and (max-width: 480px) {
.lwrp.link-whisper-related-posts{
}
.lwrp .lwrp-title{
}.lwrp .lwrp-description{
}
.lwrp .lwrp-list-multi-container{
flex-direction: column;
}
.lwrp .lwrp-list-multi-container ul.lwrp-list{
margin-top: 0px;
margin-bottom: 0px;
padding-top: 0px;
padding-bottom: 0px;
}
.lwrp .lwrp-list-double,
.lwrp .lwrp-list-triple{
width: 100%;
}
.lwrp .lwrp-list-row-container{
justify-content: initial;
flex-direction: column;
}
.lwrp .lwrp-list-row-container .lwrp-list-item{
width: 100%;
}
.lwrp .lwrp-list-item:not(.lwrp-no-posts-message-item){
max-width: initial;
}
.lwrp .lwrp-list-item .lwrp-list-link .lwrp-list-link-title-text,
.lwrp .lwrp-list-item .lwrp-list-no-posts-message{
};
}

I am passionate about home engineering. I specialize in designing, installing, and maintaining heating, ventilation, and air conditioning systems. My goal is to help people stay comfortable in their homes all year long.