Ever wondered what to do with leftover hay from your garden or perhaps a small animal? Don’t let it go to waste!
Composting hay is a fantastic way to turn this organic material into rich, nutrient-filled soil for your plants. It might seem a bit tricky at first, but it’s actually quite straightforward. I’m here to walk you through it, step-by-step, so you can create your own garden gold without any fuss. Let’s get started on making your garden even happier!
Why Compost Hay? Your Garden Will Thank You!
Composting hay might not be the first thing that springs to mind when you think about creating compost, but it’s a surprisingly good addition to your compost pile. Why? Well, hay is packed with carbon – a key ingredient for healthy composting. While fresh grass clippings bring nitrogen, drier materials like hay offer that essential carbon “browns” matter.
When hay breaks down, it releases valuable nutrients that plants love. Think of it as supercharging your soil. This helps improve soil structure, making it better at holding moisture and air, which is a win-win for your garden. Plus, by composting hay, you’re diverting waste from landfills and creating a sustainable way to feed your plants. It’s a win for your garden and a win for the planet!
Understanding Hay: Not All Hay is Created Equal
Before you go tossing every bale of hay into your compost bin, it’s important to know that not all hay is ideal for composting. The key is to use hay that hasn’t been treated with persistent herbicides.
Herbicides are chemicals used to kill weeds. Some of these chemicals can linger in the hay and, when added to your compost, can then be transferred to your garden soil, potentially harming your plants. This is especially true for vegetable gardens.
What to Look For:
- Clean, Untreated Hay: The best hay to compost is typically clean, field-cured hay that hasn’t been treated with any chemicals. If you buy hay, ask the supplier if it contains any herbicides.
- Grass Clippings vs. Hay: Hay is dried grass or legumes (like alfalfa or clover), harvested when mature. What’s often called “hay” in a gardening context might actually be straw (dried stalks of cereal plants like wheat, barley, or oats). Both can be composted, but they have slightly different properties. Straw is generally higher in carbon than hay.
- Avoid Alfalfa Hay if Treated: Alfalfa hay can sometimes be treated with herbicides that are particularly persistent. If you’re unsure about the source of your alfalfa hay, it’s best to avoid it for composting, especially if you plan to use the compost on edible plants.
- Manure is Different: Hay used for animal bedding is mixed with manure. While composted manure is excellent for gardens, when composting hay, we’re primarily talking about the dried plant material itself. If you’re using straw bedding that’s mixed with manure, that’s a different composting scenario, often referred to as “manure composting,” and can heat up faster due to the nitrogen in the manure.
When in doubt, it’s always best to err on the side of caution. If you have concerns about herbicide contamination, consider using the hay for mulch instead, or compost it in a separate pile that you might not use for your vegetable garden.
Getting Started: What You’ll Need for Hay Composting
Setting up for composting hay is pretty simple. You don’t need fancy equipment. The goal is to create a welcoming environment for the microorganisms that do the hard work of breaking down organic matter.
Essential Components:
- A Compost Bin or Pile: This can be anything from a store-bought tumbler or bin to a simple pile you create in a corner of your yard. The key is to contain the materials.
- Hay: Your primary ingredient!
- “Greens”: These are nitrogen-rich materials. Think fresh grass clippings, vegetable scraps, coffee grounds, and fruit peels.
- “Browns”: These are carbon-rich materials. Hay falls into this category! Other “browns” include dry leaves, shredded newspaper, cardboard, and small twigs.
- Water: Composting needs moisture.
- Air: Microbes need oxygen to thrive.
- A Pitchfork or Shovel: For turning the compost.
Having a good mix of “greens” and “browns” is crucial. This balance creates the ideal “food” for your compost-making microbes. We’ll get more into the right ratios later, but for now, know that hay is your star “brown” player in this composting saga!
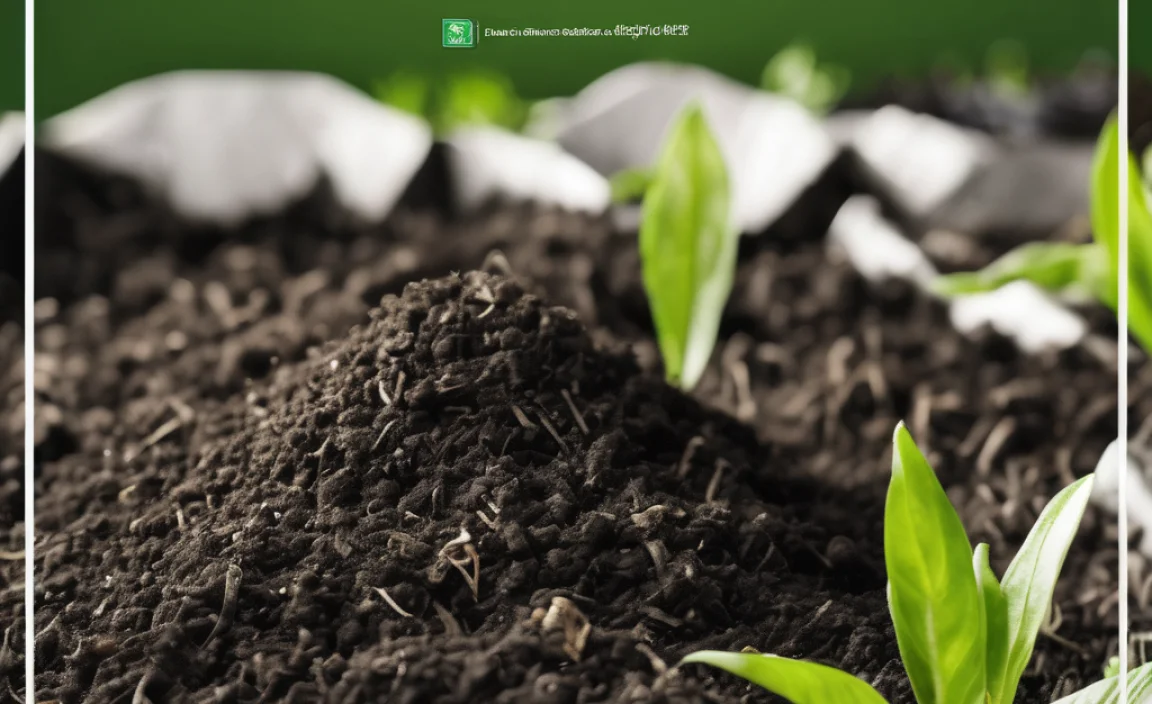
Creating Your Hay Compost: The “How-To”
Composting hay is all about creating the right conditions for decomposition. It’s a natural process, and you’re just helping it along. Think of yourself as the coordinator of a tiny, busy ecosystem in your backyard!
Step 1: Choose Your Location and Container
Find a convenient spot for your compost. It should be well-drained, have some sun (which can help heat things up), and be accessible for adding materials and turning. You can use:
- An Open Pile: Simple and requires no investment. Just pile materials in a designated spot.
- A Bin: These can be made from wood, wire mesh, or purchased plastic bins. They help keep things tidy.
- A Tumbler: These rotating bins make turning easier and can speed up the composting process.
Step 2: Layer Your Materials (The “Browns” and “Greens”)
This is where the magic starts. You want to create alternating layers of “browns” (like your hay) and “greens.” A good starting ratio is roughly 2 to 3 parts “browns” to 1 part “greens” by volume. Since hay is a “brown,” we’ll focus on that.
Start with a base layer of coarse “browns” like small twigs or straw. This helps with aeration at the bottom. Then:
- Add a layer of hay. Break it up a bit if it’s in a dense bale.
- Add a layer of “greens” (e.g., kitchen scraps, grass clippings).
- Sprinkle a thin layer of nitrogen-rich material like coffee grounds or a bit of manure on top of the greens. This helps “activate” the compost.
- Add another layer of hay.
- Repeat the layers, aiming for that 2-3:1 brown-to-green ratio.
Pro-Tip: If your hay is very dry, lightly moisten it as you add it. You want it damp, like a wrung-out sponge, not soaking wet.
Step 3: Introduce Moisture
Composting microbes need water to live and work. Your compost pile should be consistently moist. If it’s too dry, decomposition will slow down dramatically. If it’s too wet, it can become anaerobic (lack of oxygen) and start to smell rank.
Water your pile whenever you add new materials, especially the dry hay. A good test is to grab a handful of compost: it should feel damp, and a few drops of water might come out when you squeeze it tightly. If water streams out, it’s too wet. If it feels dry and crumbly, it needs more water.
Step 4: Ensure Aeration (Oxygen is Key!)
Composting is an aerobic process, meaning it requires oxygen. Without enough air, the microbes can’t break down the material efficiently, and your pile might become smelly and slimy. This is where turning comes in.
- Turn Regularly: Aim to turn your compost pile every one to two weeks. Use a pitchfork or shovel to mix the materials, bringing the outer layers into the center and vice versa.
- What Turning Does: Turning redistributes moisture, mixes greens and browns, and introduces oxygen. It also helps to break down larger pieces.
- Signs of Trouble: If your compost starts to smell like ammonia or rotten eggs, it’s likely too wet or not getting enough air. Turning it well and adding more dry “browns” (like more hay or shredded cardboard) can help.
For more detailed guidance on compost turning and aerations, resources like the Environmental Protection Agency’s composting basics can offer further insights.
Step 5: Patience and Monitoring
Composting takes time! The speed depends on various factors like the temperature, the size of your materials, and how often you turn it. A hot compost pile can be ready in a few months, while a cooler pile might take six months to a year or even longer.
You’ll know your compost is ready when it’s dark, crumbly, and smells earthy and pleasant. You shouldn’t be able to recognize the original materials (like the hay itself).
Hay vs. Straw for Composting: What’s the Difference?
It’s common to confuse hay and straw, but they are different, and understanding the difference helps with your composting efforts. Both are valuable materials for your compost bin.
Here’s a quick breakdown:
| Feature | Hay | Straw |
|---|---|---|
| What it is | Dried grass, legumes, or other herbaceous plants. It includes the leaves, stems, and sometimes seeds of the plant. | Dried stalks of cereal grain plants (like wheat, barley, oats, rye) after the grain has been harvested. It’s primarily the stem. |
| Nutrient Content | Generally higher in nitrogen and protein than straw, as it’s harvested when the plant is still green and growing. Can also contain seeds. | Higher in carbon, lower in nitrogen. It’s more fibrous and woody. |
| Ideal Use in Compost | Good “brown” material, but if it’s very fresh and from legumes (like alfalfa), it might have a higher nitrogen content, acting closer to a “green.” Can break down faster. | Excellent “brown” material, providing structure and carbon. Breaks down slower than hay due to its woody nature. Great for aeration. |
| Potential Issues | Can contain seeds that might sprout in your garden if not fully composted. Can be treated with persistent herbicides. | Less likely to contain weed seeds. Generally less concern about herbicide residue unless specifically treated. |
Which is Better for Composting?
Both are excellent for composting. If you have a choice, using a mix is ideal. Straw, being higher in carbon, is fantastic for adding bulk and ensuring good airflow within your compost pile. Hay, with its slightly higher nitrogen, can help speed up decomposition, especially if you have a lot of “brown” materials. Just remember the herbicide caution mentioned earlier, which is more often a concern with hay.
Common Hay Composting Challenges and How to Solve Them
Even with the best intentions, sometimes compost piles can be a bit stubborn. Don’t get discouraged! Most common issues with hay composting are easily fixed.
Challenge 1: The Pile Isn’t Heating Up
This usually means you have too many “browns” (like hay) and not enough “greens” (nitrogen). Microbes need nitrogen to reproduce and generate heat. The pile might also be too dry or too compacted.
- Solution: Add more nitrogen-rich “greens.” This could be kitchen scraps, coffee grounds, fresh grass clippings, or even a small amount of chicken manure if you have it. Make sure the pile has enough moisture and is turned to allow airflow. Aim for that 2-3:1 brown-to-green ratio.
Challenge 2: The Pile is Smelly (Ammonia or Rotten Egg Smell)
A bad smell typically indicates an imbalance, usually too much moisture and not enough air (anaerobic conditions). Ammonia smell means too much nitrogen, while a rotten egg smell points to anaerobic decomposition.
- Solution: Turn the pile thoroughly to introduce air. Add more dry “browns” like shredded cardboard, dry leaves, or more hay to absorb excess moisture and balance the nitrogen. If it smells like ammonia, adding more carbon-rich browns is a good fix.
Challenge 3: It’s Taking Too Long to Decompose
Decomposition speed depends on several factors, but slow breakdown is often due to material size, lack of moisture, poor aeration, or insufficient “greens.”
- Solution: Chop or shred larger pieces of hay and other materials. Ensure the pile is consistently moist. Turn it more frequently to introduce oxygen. Double-check your green-to-brown ratio; a bit more “green” might be needed.
Challenge 4: Weeds or Weed Seeds Sprouting in Your Garden
If you used hay that contained viable weed seeds, they might survive the composting process if your pile doesn’t get hot enough. This is why using weed-free hay or ensuring your compost pile reaches high temperatures (hot composting) is important.
- Solution: For cooler composting, it’s best to use hay you know is free of weed seeds or to compost it in a separate pile that you might use for ornamental gardens rather than vegetable beds. Hot composting (reaching temperatures of 130-160°F for several weeks) will kill most weed seeds. You can also try a “solarization” method by covering a compost pile for a few weeks with clear plastic during hot weather, which can kill seeds and pathogens.
Remember, composting is a learning process. Observe your pile, make adjustments, and you’ll soon get a feel for what it needs. For more expert advice on troubleshooting, the Penn State Extension Service provides excellent, detailed resources on managing compost piles effectively.
Using Your Finished Hay Compost
Once your compost is ready – dark, crumbly, and smelling earthy – it’s time to reap the rewards! Finished compost is a gardener’s treasure trove.
How to Use Your Compost:
- Soil Amendment: The most common use! Mix compost into your garden beds before planting. It improves soil structure, drainage, and aeration, while also slowly releasing nutrients. Aim to incorporate about 2-4 inches of compost into the top 6-8 inches of soil.
- Top Dressing: Spread a layer of compost of about 1-2 inches around established plants, shrubs, and trees. This feeds the soil and helps retain moisture.
- Potting Mix: You can create or augment your own potting mixes by combining compost with other ingredients like peat moss, perlite, or vermiculite. This is great for container plants.
- Starting Seeds: Sift your compost to remove any larger pieces for a finer texture. This fine compost can be mixed with seed-starting mix to give young seedlings a nutrient boost.
- Mulch: A layer of compost can act as mulch, helping to suppress weeds and conserve soil moisture.
Be patient if your compost isn’t perfectly uniform. Small twigs or larger hay pieces that haven’t fully broken down are fine to use; they’ll continue to decompose in your garden soil.
Hay Composting vs. Other Compost Materials
When you decide to compost, you’ll notice there are many things you can add. Hay is a fantastic “brown” material, but it’s good to see how it fits into the bigger picture.
Hay as a “Brown”:
Hay is rich in carbon. This is essential for balancing out the “green” materials (nitrogen-rich items like kitchen scraps and grass clippings) that tend to make up a large portion of household compost. Without enough browns, your compost pile can become dense, wet, and smelly. Hay provides that carbon structure and helps create airflow.
Comparing Hay to Other “Browns”:
- Dry Leaves: Similar to hay, dry leaves are excellent carbon sources. They break down a bit faster than straw but can be a bit flatter, potentially leading to less airflow if not mixed well.
- Shredded Cardboard/Newspaper: Also great browns! Cardboard is excellent for structure and airflow, but make sure it’s plain, not glossy or heavily inked. Newspaper is good, but black and white ink is preferable.
- Wood Chips/Sawdust: These are very carbon-rich but break down slowly. They are best used in smaller quantities to avoid slowing down the compost too much.
- Straw: As we discussed, straw is very similar to hay but is the stalk rather than the whole plant. It’s highly fibrous, excellent for airflow, and a superb “brown.”
Hay vs. “Greens”:
Materials like vegetable scraps, fruit peels, coffee grounds, tea bags, and fresh grass clippings are “greens.” They are rich in nitrogen, which is the fuel for the composting microbes. A good balance is key: too many greens can make the pile wet and smelly (ammonia), while too many browns will slow decomposition.
A common mistake is adding too much of one thing. Hay is great, but it shouldn’t be the only thing. A diverse mix of greens and browns from various sources usually leads to the best, most nutrient-rich compost. Think of it as a balanced diet for your compost microbes!
Conclusion: Your Hay, Your Harvest!
So there you have it! Composting hay is a simple yet incredibly effective way to boost your garden’s fertility while reducing waste. By understanding the “browns” and “greens,” maintaining the right moisture and air balance, and being patient, you’re well on your way to creating the richest compost your plants have ever seen.
Don’t be afraid to experiment and observe. Your compost pile is a living thing, and with a little care and attention, it will reward you with dark, crumbly, nutrient-dense goodness. Happy composting, and here’s to a healthier, happier garden!
Frequently Asked Questions About Hay Composting
Q1: Can I compost hay that has been used for animal bedding?
A1: Yes, but be aware that hay used for animal bedding will likely be mixed with manure. This is actually a good thing for composting, as manure is rich in nitrogen (“greens”) and will help heat up your pile. However, if the animals have ingested any chemically treated hay or medications, these could potentially end up in your compost. It’s generally safe, especially for ornamental gardens, but use caution for vegetable gardens if you have concerns.
Q2: Will composting hay attract pests?
A2: If managed properly, compost piles are less likely to attract pests. Proper layering, turning, and burying food scraps (greens) within the pile helps. If you have issues, ensure your bin is secure, and turn the compost regularly. A mature compost pile is less attractive to pests than a fresh, food-rich one.
Q3: How much hay can I add to my compost at once?
A3: You can add a good amount, but always in conjunction with “greens.” If you’re adding a large bale of hay, balance it with a significant amount of kitchen scraps, grass clippings, or other nitrogen-rich materials. Remember the 2-3 parts browns to 1 part greens ratio.
Q4: Can I compost moldy hay?
A4: Yes, moldy hay can usually be composted. The composting process itself will break down the mold. In fact, the heat generated in a well-functioning compost pile is often enough to kill off most molds and undesirable microbes. The key is to ensure it’s balanced with enough greens and moisture and that the pile heats up sufficiently.
Q5: How long does hay take to compost?
A5: The time it takes for hay to fully compost varies greatly. A “hot” compost pile that is frequently turned and has the right balance of materials can break down in 2-4 months. A “cold” compost pile, with less turning and a less ideal mix, can take 6-12 months or even longer. Hay itself, especially if well-broken down, can decompose relatively quickly compared to woody materials but slower than fresh grass clippings.
Q6: What’s the difference between hay and straw for composting?
A6: Hay is the dried grass and legumes (leaves and stems), harvested when green. It includes seeds and is higher in nutrients. Straw is the dried stalk left after grain harvest; it’s mostly stem, higher in carbon, and breaks down slower, providing better airflow. Both are excellent “browns” for composting.
Q7: Should I wet the hay before adding it to the compost?
A7: If your hay is very dry and “dusty,” it’s a good idea to lightly moisten it before adding it to the pile. You want the hay to be damp like a wrung-out sponge, not soaking wet. This helps the composting microbes get to work immediately and prevents the hay from becoming a dusty, airy barrier in your pile.

I am passionate about home engineering. I specialize in designing, installing, and maintaining heating, ventilation, and air conditioning systems. My goal is to help people stay comfortable in their homes all year long.