Do you want to create less waste and help the planet? Imagine turning your kitchen scraps into nutrient-rich soil right on your balcony! It’s true, you can start a home composting balcony project. This is a fun and easy way to reduce waste and grow healthier plants. Let’s explore how you can do this and why it’s a great idea.
Key Takeaways
- Home composting reduces waste and helps the environment.
- Even small balconies can support composting efforts.
- Compost bins are easy to set up and manage.
- Composting enriches soil and boosts plant health.
- Your home composting balcony project can inspire others.
Benefits of Home Composting on a Balcony
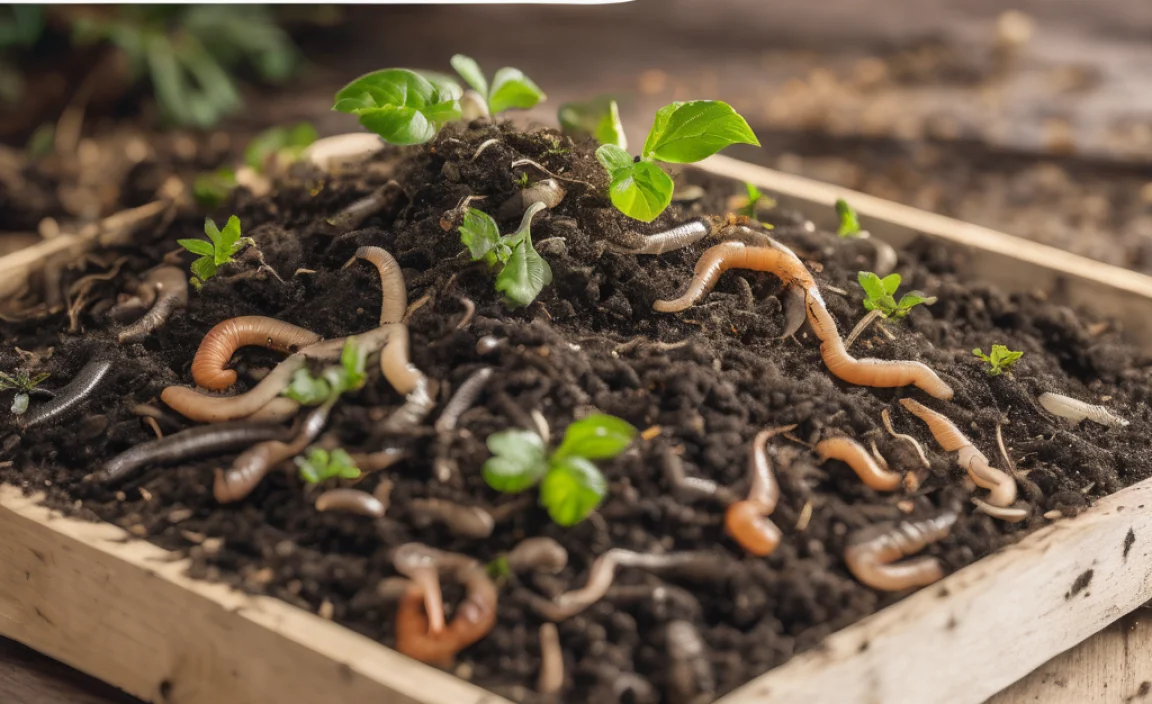
Starting a home composting balcony project might sound tricky, but it’s quite simple. Composting is about turning waste into valuable soil. You can use kitchen scraps like fruit peels and vegetable waste. This process helps reduce what goes to landfills and creates a natural fertilizer for plants. It’s a great way to recycle, even in small spaces like balconies. With a little effort, you can see the magic of nature at work right outside your window.
- Reduces landfill waste.
- Improves plant growth.
- Saves money on fertilizers.
- Encourages sustainable living.
- Teaches about natural cycles.
Home composting on a balcony is not only practical but also beneficial. It allows you to play a part in protecting the environment. Plus, your plants will love the rich nutrients that compost provides. You can start small and learn as you go. Soon, you’ll see how your waste turns into black gold. This can make your plants healthier and your balcony greener.
Fun Fact or Stats : Composting can reduce household waste by up to 30%!
Why Composting Matters
Have you ever wondered where your trash goes? Most of it ends up in landfills. This creates mountains of trash and harmful gases. By composting, you can help reduce these problems. Composting is like recycling, but for food scraps and yard waste. It turns waste into something useful. It helps plants grow stronger and keeps the earth healthy. Everyone can do their part by composting, even on a balcony!
Getting Started: Easy Tips
Ready to try composting on your balcony? First, get a small compost bin. You can buy one or make your own. Next, gather your kitchen scraps. Things like fruit peels, veggie scraps, and coffee grounds work well. Avoid meat and dairy as they can smell bad. Mix your scraps with dry leaves or paper to balance it out. Place the bin on your balcony and stir occasionally. Soon, you’ll see the magic happen!
Compost Bins: What to Know
Choosing the right compost bin is important. Some bins are small and fit perfectly on a balcony. Look for one with a lid to keep the smell in. It helps keep pests away too. Some bins even have special layers to speed up the composting process. With the right bin, your home composting balcony project will be easy and smell-free. Always remember to add equal parts of green and brown material.
Choosing the Right Compost Bin for Your Balcony
Not all compost bins are created equal. When you’re limited on space, choosing the right one is crucial. Balcony bins are typically compact and designed to minimize odors. They often come with lids to keep pests out. Some are even designed to look like decorative pots. Remember, the size of your bin should match the size of your balcony. You want enough room to move around while your compost quietly works its magic.
- Compact design fits small spaces.
- Lids help control odors.
- Decorative options available.
- Consider space for bin access.
- Look for easy-to-use features.
Once your bin is set up, you can start adding your kitchen scraps. Make sure to balance “green” materials like veggie peels with “brown” materials like dry leaves. Over time, this mix will break down into rich compost. You can use this to feed your plants or garden. Choosing the right bin helps make the process simple and enjoyable. You’ll soon be an expert in balcony composting.
Fun Fact or Stats : Some compost bins can produce compost in just a few weeks!
Types of Compost Bins
There are several types of compost bins to choose from. Some are tumbling bins, which you spin to mix the compost. Others are stackable, allowing you to add layers as you go. There are also bokashi bins that use special fermentation. Each type has its own advantages. Tumblers speed up the process. Stackables let you manage different stages. Bokashi keeps it neat and odor-free. Think about your needs and choose what fits your balcony best.
Maintaining Your Compost Bin
It’s easy to keep your compost bin working well. First, balance green and brown materials. Second, keep the compost moist but not too wet. Stir it every now and then to add air. This helps the compost break down faster. If you notice a bad smell, check if there’s too much green material. Add more brown like dry leaves to fix it. With a little care, your bin will turn waste into wonderful compost.
Simple Troubleshooting
Is your compost bin not working as expected? Don’t worry, it happens! If it’s too smelly, add more brown material. If it’s too dry, sprinkle a little water. If you see pests, ensure the lid is secure. Most issues have simple fixes. By paying attention and making small adjustments, your compost bin will thrive. Remember, composting is a natural process that takes time. Be patient and enjoy learning along the way.
Best Practices for Fast Composting
Want to speed up your composting process? Follow these best practices. First, chop your food scraps into small pieces. This helps them break down faster. Use a 50/50 balance of green and brown materials. Turn or mix your compost every week. This adds air, which helps microbes work faster. Keep your compost moist, like a damp sponge. These steps will help you create rich compost more quickly.
- Chop scraps into small pieces.
- Balance green and brown materials.
- Turn compost weekly for air.
- Maintain moisture levels.
- Be patient and consistent.
Fast composting is possible with the right strategies. Small scraps mean more surface area for microbes to work on. Balancing materials ensures that microbes have the nutrients they need. Turning your pile regularly keeps air circulating. This speeds up the process. Keeping the compost damp helps microbes stay active. By following these tips, you’ll have rich, ready-to-use compost in no time.
Fun Fact or Stats : Well-maintained compost can be ready in as little as two months!
Troubleshooting Slow Compost
Is your compost taking longer than expected? It might be due to a few reasons. Check if your scraps are too large. If so, chop them smaller. Make sure there’s a 50/50 mix of green and brown materials. Too much of one can slow things down. Ensure your compost is damp but not soggy. If everything seems right and it’s still slow, give it more time. Composting is a natural process and patience is key.
The Power of Microbes
Did you know microbes are superheroes in composting? These tiny creatures break down organic matter. They turn scraps into rich soil. When you add scraps to your compost, these microbes get to work. They need oxygen, moisture, and the right balance of materials. If you provide them with the right conditions, they work faster. Knowing this can help you manage your compost pile better and speed up the process.
Enhancing Compost with Additives
Some people use additives to boost compost. Items like coffee grounds or egg shells add nutrients. Coffee grounds add nitrogen, while egg shells add calcium. These help plants grow stronger. You can also add a few garden soil scoops. This introduces more microbes to your pile. By adding these, you can enhance your compost and make it even richer. Just remember, balance is key to a successful compost pile.
Using Your Compost for Gardening
Now that you have rich compost, how can you use it? Compost is excellent for gardens. It’s full of nutrients that help plants grow. You can mix it with soil in pots or garden beds. This improves soil quality and helps retain moisture. Add a layer of compost to the top of your soil. This feeds plants as it breaks down. Your home composting balcony project will help your garden thrive.
- Mix with potting soil.
- Use as a top layer.
- Improves soil structure.
- Enhances plant growth.
- Retains soil moisture.
Using compost in gardening has many benefits. It enriches the soil, makes plants healthier, and boosts growth. By mixing it with potting soil, you give plants a head start. Adding it as a top layer protects plant roots and keeps moisture in. Composting is truly recycling at its best. Your plants will thank you, and you’ll see the rewards of your efforts in a greener, healthier garden.
Fun Fact or Stats : Composting can improve soil health and increase crop yields by 20%!
Planting with Compost
Planting with compost is easy and effective. To start, mix compost into your soil before planting. This gives new plants a boost. As plants grow, add more compost to the top layer. This continues to feed them. For potted plants, replace some of the old soil with fresh compost each season. You’ll see healthier plants with more blooms or fruits. How exciting to know your waste becomes a garden’s treasure!
Compost Tea Basics
Have you heard of compost tea? It’s a liquid fertilizer made from compost. To make it, steep compost in water for a few days. Strain the liquid and use it to water plants. Compost tea provides an instant nutrient boost. It’s like a natural energy drink for your garden! It helps plants fight disease and grow stronger. With compost tea, you can nourish plants easily and naturally.
Sharing the Compost Love
Have extra compost? Share it with friends or neighbors! They might welcome the extra nutrients for their gardens. Community gardens also appreciate donations. By sharing, you spread the benefits of composting. It’s a wonderful way to connect with others and promote sustainability. You can even inspire others to start their own home composting balcony project. Together, you can make a bigger impact on the environment.
Conclusion
Home composting on a balcony is a rewarding adventure. It turns waste into valuable soil, reduces landfill waste, and supports plant growth. With the right tools and tips, anyone can compost, even in small spaces. Get started today and enjoy a greener, more sustainable lifestyle. Your home composting balcony project will not only benefit you but also inspire others to make a positive change.
FAQs
Question: Can I compost on a small balcony?
Answer: Yes, you can! A small balcony can host a compact compost bin. Choose a bin that fits your space. Make sure it has a lid to control odors and pests. With proper management, even tiny balconies can support effective composting.
Question: What can I put in my compost bin?
Answer: You can add fruit peels, veggie scraps, coffee grounds, and eggshells. Avoid meat, dairy, and oils as they can attract pests and smell bad. Balance greens (like scraps) with browns (like leaves) to help it break down properly.
Question: How do I maintain my compost bin on a balcony?
Answer: Keep your compost balanced with greens and browns. Stir it weekly to add air. Ensure it’s damp but not soggy. If it smells, add more browns. Secure the lid to prevent pests. Your home composting balcony project can thrive with regular care.
Question: How long does it take to make compost?
Answer: Composting time varies, usually taking two to six months. Factors include the size of scraps, balance of materials, and how often it’s turned. By following best practices, you can speed up the process and have usable compost sooner.
Question: What if my compost smells bad?
Answer: If your compost smells, it might be too wet or lack browns. Add more dry leaves or shredded paper to balance it. Stir it well to add oxygen. Check the lid is on to deter pests. Proper management will keep smells in check.
Question: Can composting attract pests?
Answer: Properly managed compost doesn’t attract pests. Use a bin with a secure lid and avoid adding meat or dairy. Keep the compost balanced and lid closed. Your home composting balcony project can stay pest-free with these simple precautions.