Got kitchen scraps and yard waste piling up? It’s a common problem! You want to do your part for the planet, but the thought of messy bins and smelly piles can be a bit much. Don’t worry, I’ve got your back. Today, we’re diving into home composting with a super-simple review that proves it can be genius and give you effortless results. Ready to turn trash into garden treasure? Let’s get started!
Home Composting Review: Genius, Effortless Results
Hey everyone, Troy D Harn here from TopChooser! If you’re like me, you love a tidy yard and a healthy garden. But what about those food scraps and garden trimmings? Tossing them in the garbage just feels… well, wasteful. It’s a shame, really, because these organic materials are like gold for your soil! They can enrich your garden, reduce your waste, and help the environment. But let’s be honest, the idea of composting can sometimes sound complicated or even a little gross. Many folks imagine smelly piles and lots of work. That’s where a good home composting system comes in – making it easy, clean, and surprisingly effective. We’re going to break down what makes composting a “genius” move and how you can achieve “effortless” results, even if you’ve never touched a compost bin before.
Why Home Composting is a Game-Changer
Think of your kitchen scraps – apple cores, banana peels, coffee grounds – and your yard waste – leaves, grass clippings. These aren’t just trash! They are packed with valuable nutrients that your garden plants crave. When you compost them, you create a rich, dark material called humus. This humus does wonders for your soil. It improves its structure, making it easier for plant roots to grow and for water to penetrate. It also helps retain moisture, meaning you’ll need to water your garden less often – a big win for busy gardeners!
According to the U.S. Environmental Protection Agency (EPA), composting food scraps and yard waste could potentially reduce the amount of waste sent to landfills by more than 30 percent. That’s a massive impact we can make right from our own homes!
On top of the environmental benefits, composting saves you money. You’ll buy fewer fertilizers and soil amendments for your garden. Plus, you’re keeping perfectly good organic matter out of the landfill, where it contributes to harmful methane gas emissions. It’s a true win-win-win: good for your garden, good for your wallet, and great for the planet.
Types of Home Composting Systems
When we talk about home composting systems, there are a few main players. Each has its own way of doing things, and the “best” one often depends on your space, how much waste you produce, and how much effort you’re willing to put in. Don’t let the variety overwhelm you; we’ll keep it simple!
1. Compost Bins (Tumbler and Stationary)
These are probably what most people picture when they think of composting. They are enclosed containers designed to hold your organic materials and help them break down. You can get different kinds:
- Stationary Bins: These are typically larger, often made of plastic or wood, and sit in one spot. You add materials to the top and often have a door at the bottom to access the finished compost. They can handle a good volume of material but might require a bit more manual turning (mixing) to speed up the process.
- Tumbler Bins: These are genius for ease of use! They are enclosed barrels or drums mounted on a base, allowing you to easily spin or “tumble” them. This makes turning the compost effortless – just a few spins a day can aerate the mixture and speed up decomposition significantly. They are also usually neater and less prone to attracting pests than open piles.
2. Vermicomposting (Worm Bins)
This method uses special composting worms (like red wigglers) to break down your organic waste. It’s fantastic for apartment dwellers or those with very limited outdoor space, as worm bins can be kept indoors or on a balcony. The worms eat the food scraps and excrete nutrient-rich worm castings, which are an amazing fertilizer. It’s a bit different from traditional composting, as you don’t add yard waste, but it’s incredibly efficient for kitchen scraps.
3. Compost Piles
The most basic method is simply creating a pile of organic materials in a corner of your yard. This requires no special equipment, just a designated spot. However, it can take longer to break down and might be more susceptible to pests or looking a bit untidy if not managed well. For those looking for “effortless” and “genius” results, a bin or tumbler is often a better starting point.
What to Compost (and What to Avoid) – The “Greens” and “Browns”
The secret to successful composting, especially an “effortless” one, lies in getting the right balance of materials. Compost scientists like to talk about “greens” and “browns.” Think of it like a recipe for great compost!
“Greens” are nitrogen-rich materials. They provide the moisture and nitrogen that the tiny microbes need to get to work. Generally, they are moist and break down quickly.
- Fruit and vegetable scraps
- Coffee grounds and tea bags
- Grass clippings (in moderation)
- Plant trimmings (soft, green ones)
- Manure from herbivores (cow, horse, rabbit – not dog or cat)
“Browns” are carbon-rich materials. They provide energy for the microbes and are crucial for aeration, preventing your compost from getting too wet and smelly. They tend to be dry and break down more slowly.
- Dry leaves
- Straw or hay
- Shredded newspaper or cardboard (avoid glossy ink)
- Twigs and small branches (chopped up)
- Sawdust (from untreated wood)
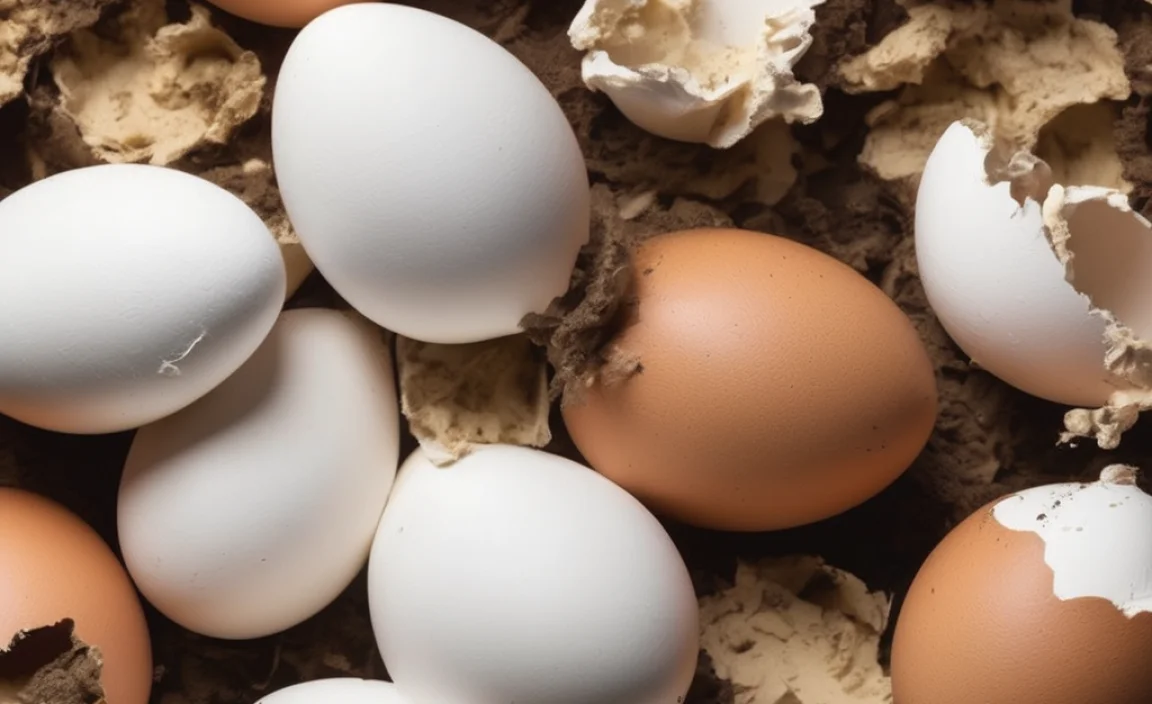
- Eggshells (crushed)
What to AVOID composting:
- Meat, fish, and dairy products (can attract pests and create odors)
- Oily or greasy foods
- Diseased plants or weeds that have gone to seed (you don’t want to spread them)
- Pet waste (dog and cat feces can contain harmful pathogens)
- Treated wood
- Coal or charcoal ash
- Inorganic materials (plastic, metal, glass)
Aim for a ratio of about 2 to 3 parts Browns to 1 part Greens. This might sound like a lot of “browns,” but trust me, getting this balance right is key to efficient, odor-free composting. If your compost starts to smell sour or ammonia-like, you likely have too many greens. Add more browns! If it’s not breaking down and seems dry, add more greens and moisture.
Setting Up Your Home Composting System: A Simple Guide
Ready to get started? It’s easier than you think! Let’s walk through the steps for setting up a popular and effective option: a tumbler compost bin.
Step 1: Choose Your Spot
Find a convenient location for your compost bin. It should be:
- Accessible: You’ll be adding scraps regularly and want to harvest compost easily.
- Level: To ensure stable operation, especially for tumblers.
- Sun/Shade: Some sun can help heat the bin, but too much direct, hot sun can dry it out quickly. A mix is usually ideal.
- Near a water source: You might need to add moisture.
Step 2: Gather Your Tools and Materials
For a tumbler system, you’ll primarily need the bin itself. You might also find these helpful:
- Compost Tumbler Bin: Choose one that suits your space and budget.
- Kitchen Compost Caddy: A small, lidded container to collect scraps indoors before taking them out.
- Shredding Tool: A garden shredder for larger yard waste, or scissors/paper shredder for cardboard.
- Watering Can or Hose: To add moisture.
- Compost Thermometer (Optional): To monitor temperature for faster decomposition.
- Pitchfork or Shovel: Useful for aeration or moving finished compost.
- Balancing Materials: Have a stash of dry leaves or shredded cardboard ready.
Here’s a quick look at some popular tumbler features:
| Feature | Description | Benefit |
|---|---|---|
| Material | Usually durable, UV-resistant plastic. | Long-lasting and eco-friendly. |
| Capacity | Varies from 10-70 gallons (approx. 40-265 liters). | Choose based on your household waste volume. |
| Dual Chamber | Two separate sides to hold compost at different stages. | Allows you to have compost actively cooking in one side while filling the other. |
| Tumbling Mechanism | Crank handle, wheel, or simply a central axis to rotate. | Makes mixing easy and fast. |
| Ventilation Holes | Crucial for airflow. | Prevents anaerobic conditions (smelly!). |
| Easy-to-Open Doors | For adding materials and harvesting. | Convenience is key to effortless composting! |
Step 3: Start Layering
Begin by adding an initial layer of “browns” (like dry leaves or shredded cardboard) to the bottom of your empty tumbler. This helps with drainage and airflow from the start.
Step 4: Add “Greens” and “Browns”
Collect your kitchen scraps in your caddy. When you’re ready to add them to the tumbler:
- Add your fruit and vegetable peels, coffee grounds, etc.
- Immediately follow with a generous layer of “browns.” This is critical! Cover the greens completely.
- Chop larger items into smaller pieces. This speeds up decomposition.
- If adding a lot of grass clippings (which are “greens”), be sure to mix them well with plenty of browns to avoid a matted, smelly mess.
Step 5: Turn and Wait
This is the genius part of a tumbler!
- Tumblers: After adding materials and closing the door, give the bin a good spin for a minute or two. Aim to do this once a day, or at least a few times a week. This mixes everything, adds oxygen, and speeds up the process dramatically.
- Stationary Bins: You’ll need to use a pitchfork or shovel to turn the material every week or two. It’s more manual effort but still effective.
Step 6: Monitor Moisture
Your compost should feel like a damp sponge – moist but not soaking wet. If it’s too dry, add some water (a splash is usually enough for tumblers). If it’s too wet, add more dry “browns” and make sure the ventilation holes aren’t blocked.
Step 7: Harvest Your Compost
Depending on the method, temperature, and materials, compost can be ready in as little as 4-8 weeks, or it might take a few months. You’ll know it’s ready when it’s dark, crumbly, and smells earthy. If you have a dual-chamber tumbler, one side will be finishing while you fill the other. For single-chamber tumblers, you might need to stop adding new materials once the bin is full and let it finish decomposing. Harvest the finished compost from the bottom door (for stationary bins) or by emptying the entire tumbler.
Tips for “Effortless” Composting
Achieving those effortless results is all about working smarter, not harder. Here are some tips:
- Chop it Up: Smaller pieces break down much faster. If you enjoy gardening, a small chipper/shredder can make quick work of yard waste. For kitchen scraps, a quick dice.
- Keep a Caddy Handy: Having a small, dedicated bin in your kitchen makes it easy to collect scraps throughout the day. Empty it into the main compost bin whenever it’s convenient.
- Always Cover Your Greens: This is the golden rule for preventing odors and pests. After adding kitchen scraps (greens), always top them with a layer of browns.
- Location, Location, Location: A compost bin close to your kitchen and garden makes it less of a chore to use.
- Don’t Overfill: Especially with tumblers, leave some room for air to circulate and for easy turning.
- Know Your Ratios: Roughly 2-3 parts carbon (browns) to 1 part nitrogen (greens) is a great starting point. It’s a guideline more than a strict rule.
- Embrace the Tumbler: Seriously, the ease of turning a tumbler is a game-changer for truly effortless composting. A quick spin is all it takes!
- Be Patient: Sometimes things take a little longer. If it’s not breaking down, reassess your green/brown ratio and moisture levels.
Pros and Cons of Home Composting Systems
Every method has its ups and downs. Here’s a quick rundown to help you decide what might be best for you:
| System Type | Pros | Cons |
|---|---|---|
| Compost Tumbler |
|
|
| Stationary Bin |
|
|
| Vermicomposting (Worm Bin) |
|
|
| Compost Pile |
|
|
When is Composting “Genius”?
Composting is more than just a way to deal with waste; it’s a brilliant system. It’s genius because:
- It Closes the Loop: It takes what we often consider waste and turns it into a valuable resource, mimicking natural cycles.
- It Builds Healthy Soil: Instead of depleting soil, it enriches it, making plants healthier and more resilient. Healthy soil also sequesters carbon, helping combat climate change.
- It Reduces Landfill Load: Less waste in landfills means fewer methane emissions and less strain on disposal sites.
- It Saves Money: You buy fewer fertilizers, less soil, and potentially reduce your trash bill.
- It’s Empowering: It’s a tangible way for anyone, anywhere, to make a positive environmental impact.
Troubleshooting Common Composting Issues
Don’t get discouraged if you hit a small snag. Most composting problems are easily fixed. Here are a few common ones:
- Smelly Compost:

I am passionate about home engineering. I specialize in designing, installing, and maintaining heating, ventilation, and air conditioning systems. My goal is to help people stay comfortable in their homes all year long.