Ever look at your kitchen scraps and think, “There’s got to be a better way than just tossing this”? You’re not alone! So many of us want to be kinder to the planet, but figuring out where to start can feel overwhelming. Home composting is a fantastic way to reduce waste and create amazing fertilizer for your garden, but it might seem complicated.
Don’t worry, I’m here to break it all down, step-by-step. We’ll cover everything you need to know to go from compost curious to compost pro, making your home life a little greener and a lot more rewarding. Ready to turn trash into treasure? Let’s dig in!
Why Go Compost-Crazy? The Super Simple Benefits
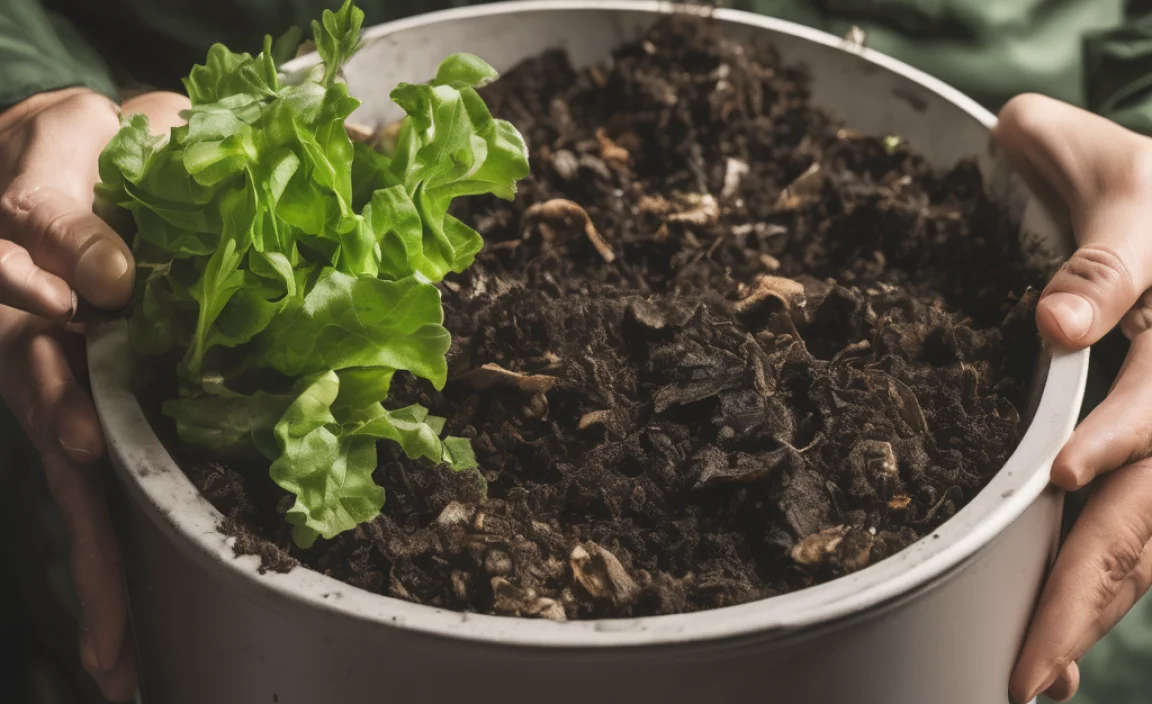
Composting at home is like giving your trash a second life. Instead of ending up in a landfill, your food scraps and yard waste become something incredibly valuable: compost! This dark, crumbly stuff is pure gold for your garden. It feeds your plants, improves your soil, and helps everything grow beautifully. Plus, by composting, you’re sending less to the landfill. That’s a win for your wallet and a big win for Mother Earth. It’s a simple habit that makes a real difference.
Less Trash, More Treasure
Did you know that food scraps and yard waste make up a huge chunk of what we throw away? The Environmental Protection Agency (EPA) points out that yard trimmings and food scraps together make up more than 30 percent of what we discard. Imagine cutting out that much from your trash bin! That means fewer trips to the curb and a smaller impact on landfills, which can also reduce harmful greenhouse gas emissions.
Supercharged Soil & Happy Plants
Compost is often called “black gold” by gardeners, and for good reason. When you add compost to your soil, you’re basically giving it a superfood shake. It improves the soil’s structure, helping it hold water better (meaning you might need to water less!) and improving drainage so plant roots don’t get waterlogged. It also adds essential nutrients that your plants will absolutely love, leading to healthier, more vibrant growth. Think of your plants saying “thank you” with bigger blooms and tastier veggies.
Saving Green by Going Green
Beyond the environmental perks, composting can also save you money. If you’re a keen gardener, you know that buying good quality soil amendments and fertilizers can add up. Making your own compost means you’re producing these valuable resources for free! You might also find that your plants are healthier and more productive, leading to a bigger harvest from your vegetable garden or more beautiful flowers to enjoy.
It’s Easier Than You Think!
The idea of composting might sound like a lot of work, but it doesn’t have to be. There are many simple ways to get started, whether you have a big backyard or a small apartment balcony. We’ll walk through the basics, so you can feel confident and start turning your kitchen waste into garden goodness in no time.
Getting Started: Your Composting Toolkit
Before you dive in, let’s talk about what you’ll need. The good news is, you don’t need a whole lot of fancy gear. Depending on your space and how you plan to compost, a few key items will make the process smooth sailing. Think of this as gathering your ingredients before baking a cake – getting it right upfront makes the whole thing better.
Choosing Your Composting Method
The first big decision is where and how you’ll compost. Your living situation will play a big role here. Here are the most popular beginner-friendly options:
1. The Outdoor Compost Bin (The Classic)
This is what most people picture when they think of composting. You can buy ready-made bins in various styles (tumblers, stationary bins) or even build one yourself using pallets or wire mesh. They’re great for yards where you have a bit more space.
2. The Open Pile (No Bin Needed!)
If you have plenty of yard space and aren’t bothered by a rustic look, you can simply create a pile in a corner of your yard. This is perhaps the simplest method, requiring no initial investment in materials, though it can sometimes be a bit slower to break down and might attract more pests if not managed carefully.
3. The Worm Farm (Vermicomposting)
This is perfect for small spaces like balconies or even indoors (if you’re brave!). Worm farms use special composting worms (like red wigglers) to break down food scraps. They’re super efficient and produce high-quality worm castings, which are an amazing fertilizer.
4. The Bokashi Bin (Indoor Fermenting)
This is a more advanced indoor method that ferments food scraps using beneficial microbes. It involves no smell if done correctly and can handle meat and dairy, which aren’t ideal for traditional composting. The fermented material then needs to be buried in soil or added to a traditional compost pile to finish breaking down.
Essential Tools for Success
Once you’ve picked your method, here are some handy things that will make your composting journey a breeze:
-
- A Kitchen Compost Caddy: This is a small bin that sits on your counter to collect food scraps throughout the day before you take them out to your main compost bin. Look for one with a lid to keep smells contained and maybe a charcoal filter.
- A Pitchfork or Compost Aerator: To turn and mix your compost pile. This helps introduce oxygen, which is vital for the microorganisms doing the breaking down.
- Gardening Gloves: To keep your hands clean and protect them.
- A Water Source: Your compost needs to be about as damp as a wrung-out sponge. A hose, watering can, or even just splashing some water from a bucket will do.
- A Pitcher or Shovel: For moving finished compost from your bin to your garden.
The specific bin or container you choose will depend on your space, budget, and how much compostable material you generate. For example, a simple DIY compost bin can be made with readily available materials, while a tumblers offers easier turning but comes with a higher price tag. For apartment dwellers, a small, sealed worm bin is often the most practical choice.
The Magic Recipe: What Goes In?
Composting is all about balancing “greens” and “browns.” Think of it like cooking – you need the right mix of ingredients for the best result. Getting this balance right is the secret to fast, efficient composting. Too much of one, and things can get sludgy or take forever.
The “Greens” (Nitrogen-Rich)
These items are generally moist and add nitrogen to your compost pile. They’re like rocket fuel for the microorganisms.
- Fruit and vegetable scraps
- Coffee grounds and paper filters
- Tea bags (check for plastic in staples/strings)
- Grass clippings (in moderation, they can mat down)
- Plant trimmings (non-woody bits)
- Eggshells (crushed)
The “Browns” (Carbon-Rich)
These items are usually dry and add carbon. They provide structure and help with airflow in the pile.
- Dry leaves
- Shredded newspaper and cardboard (avoid glossy paper)
- Straw and hay
- Twigs and small branches (chopped up)
- Sawdust (from untreated wood)
- Paper towels and napkins (plain, not greasy or from cleaning chemicals)
What to Keep Out (The “Don’ts”)
Some things are best avoided in a home compost bin, especially if you’re a beginner. These can attract pests, create odors, or contain pathogens.
- Meat, fish, and bones (attract pests, can smell)
- Dairy products (attract pests, can smell)
- Oily or greasy foods
- Diseased plants (can spread disease)
- Weeds that have gone to seed (you’ll just spread them)
- Pet waste (dog and cat feces can contain pathogens)
- Treated wood or coal/charcoal ash
- Non-biodegradable materials (plastics, metals, glass)
The Ideal Ratio: Greens to Browns
The magic ratio is often cited as roughly two to three parts browns to one part greens by volume. This doesn’t have to be exact, especially when you’re starting. A good rule of thumb is to layer your materials. Start with a layer of browns, then add your greens, and top it off with another layer of browns. This helps with airflow and keeps things from getting too wet or smelly.
| Category | Examples | Role in Compost |
|---|---|---|
| Greens (Nitrogen) | Fruit & veg scraps, coffee grounds, grass clippings | Provide nitrogen, heat up the pile, activate microbes |
| Browns (Carbon) | Dry leaves, shredded paper/cardboard, straw | Provide carbon, add bulk, allow airflow |
Step-by-Step: Building Your Compost Pile (or Bin)
Let’s get hands-on! Following these steps will help you set up your composting system and start turning waste into wonderful soil amendment.
For Outdoor Bins or Piles:
- Choose Your Spot: Find a convenient location that’s relatively flat, well-drained, and has some sun (though dappled shade is also fine). It should be accessible so you can add materials and turn the pile easily.
- Start at the Bottom: Begin with a layer of coarse brown material, like twigs or straw. This helps with drainage and airflow from the start.
- Layer Your Materials: Add your “greens” and “browns” in alternating layers. Aim for that 2-3 parts browns to 1 part greens ratio. Chop or shred larger items to help them break down faster.
- Add Water: Lightly moisten each layer as you add it. The goal is for the compost to be damp like a wrung-out sponge, not soaking wet.
- Turning is Key: Every week or two, use your pitchfork or aerator to turn and mix the materials in the bin. This introduces oxygen, speeds up decomposition, and prevents the pile from becoming anaerobic (smelly). If it’s a tumbler, just give it a spin!
- Be Patient and Observe: Composting can take anywhere from a few weeks to a few months, depending on the method, materials, and how often you turn it. You’ll know it’s ready when it looks dark, crumbly, smells earthy, and you can no longer identify the original materials.
For Worm Farms (Vermicomposting):
Worm farms are a bit different and require a specific approach. You can buy or build a worm bin, which typically has multiple trays.
- Set Up Your Bin: Place a layer of bedding material (like shredded newspaper, coco coir, or aged leaves) in the bottom tray. Moisten it so it’s damp but not soggy.
- Introduce the Worms: Add your composting worms (red wigglers are best). They’ll normally burrow down into the bedding.
- Feed Your Worms: Start by burying small amounts of chopped-up fruit and vegetable scraps under the bedding. Avoid overfeeding. Let them eat what you give them before adding more.
- Manage Moisture and Air: Worm bins need to stay moist. The bedding should feel like a damp sponge. Ensure there’s

I am passionate about home engineering. I specialize in designing, installing, and maintaining heating, ventilation, and air conditioning systems. My goal is to help people stay comfortable in their homes all year long.