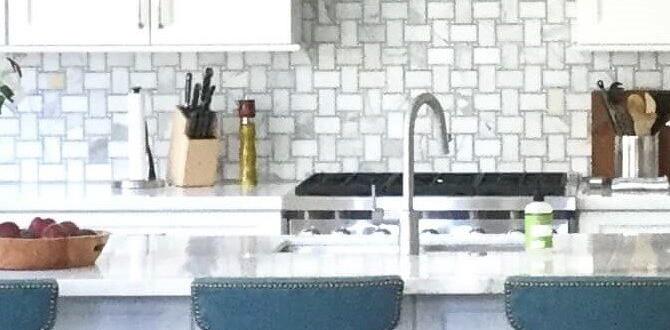
Have you ever struggled with a soap dispenser that won’t work? It’s frustrating, isn’t it? You go to wash your hands, only to find it empty or clogged. It’s a common problem in many kitchens and bathrooms. But don’t worry! You can fix a soap dispenser in a sink with just a few simple steps.
Imagine hosting a party and your guests can’t wash their hands easily. Not fun, right? Knowing how to fix a soap dispenser can save you from awkward moments. Plus, it helps keep your sink area tidy and functional. Did you know that a soap dispenser can last for years with the right care? It’s true!
Let’s dive into some easy tips and tricks. You’ll learn how to quickly identify issues and make your soap dispenser work like new again. Fixing it yourself can be rewarding and a great way to show off your handy skills!
How To Fix A Soap Dispenser In A Sink: A Step-By-Step Guide

How to Fix a Soap Dispenser in a Sink
Many people struggle when their soap dispenser stops working. Learning how to fix a soap dispenser can save time and money. Start by checking the soap level; it may just be empty. If it’s not, inspect the pump for clogs or air bubbles. Clean these areas carefully. Did you know a simple twist of the pump can often solve the problem? Fixing your soap dispenser can be easy and satisfying!Common Issues with Soap Dispensers
Identify the most frequent problems (e.g., leaks, clogs, pump failure). Discuss the consequences of these issues.Soap dispensers, like sneaky ninjas, can sometimes fail us. Common problems include leaks, causing soap to escape when we least expect it. Clogs can steal our precious soap, leaving us grappling with dried-up pumps. Pump failure can make it seem as if the soap is in a secret hideaway. Ignoring these issues can turn your kitchen into a slippery adventure!
| Issue | Consequence |
|---|---|
| Leaks | Soap waste and messy counters |
| Clogs | No soap when you need it! |
| Pump Failure | Soap stuck in the bottle |
Fixing these problems can save soap and keep your sink neat. Who wants to dive for soap in a puddle? Not me!
Tools and Materials Required
List essential tools for fixing a soap dispenser (e.g., screwdrivers, pliers). Include necessary materials (e.g., replacement pumps, seals, soap).To fix a soap dispenser, you need some basic tools and materials. Having the right items makes the job easier and faster. Here’s what you will need:
- Screwdrivers
- Pliers
- Replacement pumps
- Seals
- Liquid soap
These tools help you take apart and repair your dispenser. It’s like putting together a simple puzzle. Make sure to gather everything before you start!
What tools are necessary for fixing a soap dispenser?
Essential tools include screwdrivers and pliers. You also need replacement pumps and seals to replace old or broken parts.
Step-by-Step Guide to Fixing a Soap Dispenser
Detail the process of removing the soap dispenser from the sink. Provide instructions for troubleshooting common problems. Offer stepbystep repair procedures for different issues.To fix a soap dispenser in a sink, start by turning off the water supply. Next, remove the dispenser by unscrewing it from the sink. Carefully pull it out. Check if the soap is clogged or if the pump is broken.
If the pump isn’t working, clean it with hot water. For leaks, tighten loose screws. If the dispenser is damaged, you may need to replace it. Follow these steps:
- Turn off water supply.
- Unscrew from sink.
- Inspect for clogs or damage.
- Replace or repair parts as needed.
Following these steps can help you fix your soap dispenser quickly.
What are common problems with soap dispensers?
Common problems include clogs, leaks, and broken pumps. These issues can often be fixed by cleaning or tightening parts.
Preventative Maintenance Tips
Suggest routine cleaning and maintenance practices. Discuss how to avoid common problems in the future.Keeping your soap dispenser in great shape is easy. Regular cleaning helps prevent many problems. Here are some simple tips:
- Clean the dispenser weekly with warm, soapy water.
- Check for clogs every month; clear any soap build-up.
- Inspect seals and connections to avoid leaks.
- Use gentle soap to prevent sticky deposits.
Following these steps can save you from future headaches. Remember, a little care goes a long way!
What should I check for common soap dispenser problems?
Start by checking for clogs and leaks. Clean the nozzle and make sure all parts fit well. This helps your dispenser work smoothly.
When to Replace Instead of Repair
Highlight signs that indicate it’s time for a new dispenser. Provide recommendations for selecting a new soap dispenser.Not all soap dispensers can be saved. If you see cracks, leaks, or your soap turns into a science experiment, it may be time for a change. A new dispenser can solve these issues and also brighten up your sink. When shopping, choose one that fits your style and is easy to refill. Consider material—plastic is light, but metal is sturdy. Remember, a good dispenser is like a trusted friend: it should take care of you without causing a mess!
| Signs You Need a New Dispenser | Replacement Suggestions |
|---|---|
| Visible Cracks | Look for a durable material. |
| Soap Leaks | Choose a model with a good seal. |
| Clogged Mechanism | Opt for easy-clean designs. |
FAQs about Soap Dispenser Repairs
Answer frequently asked questions regarding soap dispenser issues. Clarify common misconceptions about soap dispenser maintenance.Many people have questions about fixing soap dispensers. Here are some common ones:
What should I do if my soap dispenser won’t pump?
Check for clogs or air bubbles. These can block soap. If not, check if the dispenser is properly installed.
How often should I clean my soap dispenser?
Clean it every month. This keeps soap from getting thick and helps it work better.
Is it okay to use different soaps?
Yes, but be careful. Some soaps can cause issues. It’s best to stick to recommended types.
Can I fix a broken dispenser myself?
Most of the time, yes. Many repairs are simple. Just replace broken parts or tighten screws.
Understanding these tips can make soap dispenser maintenance easier. Keep your dispenser clean and in good shape!
Conclusion
In summary, fixing a soap dispenser in your sink is simple. Start by checking the pump and cleaning it. If it’s broken, replace the parts or the entire dispenser. Always make sure connections are tight. Now that you know how to fix it, gather your tools and get started! For more tips, check out our other articles on home repairs.FAQs
What Tools Are Needed To Repair A Soap Dispenser In A Sink?To fix a soap dispenser in a sink, you need a few simple tools. First, grab a screwdriver to open any screws. You might also need pliers to grip tough parts. A small bucket can help catch any water that spills out. Finally, a cloth can be handy for cleaning up.
How Can I Troubleshoot A Soap Dispenser That Is Not Dispensing Soap?First, check if the soap dispenser is empty. If it is, refill it with soap. Next, make sure the pump is not blocked. You can clean it by washing the tip with warm water. Finally, press the pump a few times to see if it starts working again.
What Common Issues Can Cause A Soap Dispenser To Leak, And How Can They Be Fixed?Soap dispensers can leak for a few reasons. First, the pump might be damaged or broken, so we need to replace it. Second, the seal or gasket might be worn out; replacing it can help stop the leak. Lastly, too much soap may be clogging it, so we should clean the dispenser often. Fixing these issues will make sure your soap dispenser works well!
How Do I Remove And Replace The Pump Mechanism Of A Sink Soap Dispenser?To remove the pump mechanism, first, unscrew the top part. You can pull it straight up. Next, take out the tube that reaches the soap. Now, get the new pump and put the tube back in. Finally, screw the top part back on. You’re done!
Are There Any Maintenance Tips To Prevent Future Problems With A Soap Dispenser?Yes, there are some easy tips to keep your soap dispenser working well. First, clean it regularly to prevent soap buildup. You can use warm water and a cloth. Second, refill it before it gets empty. This helps it pump soap easily. Lastly, check the nozzle for clogs and clean it if needed.