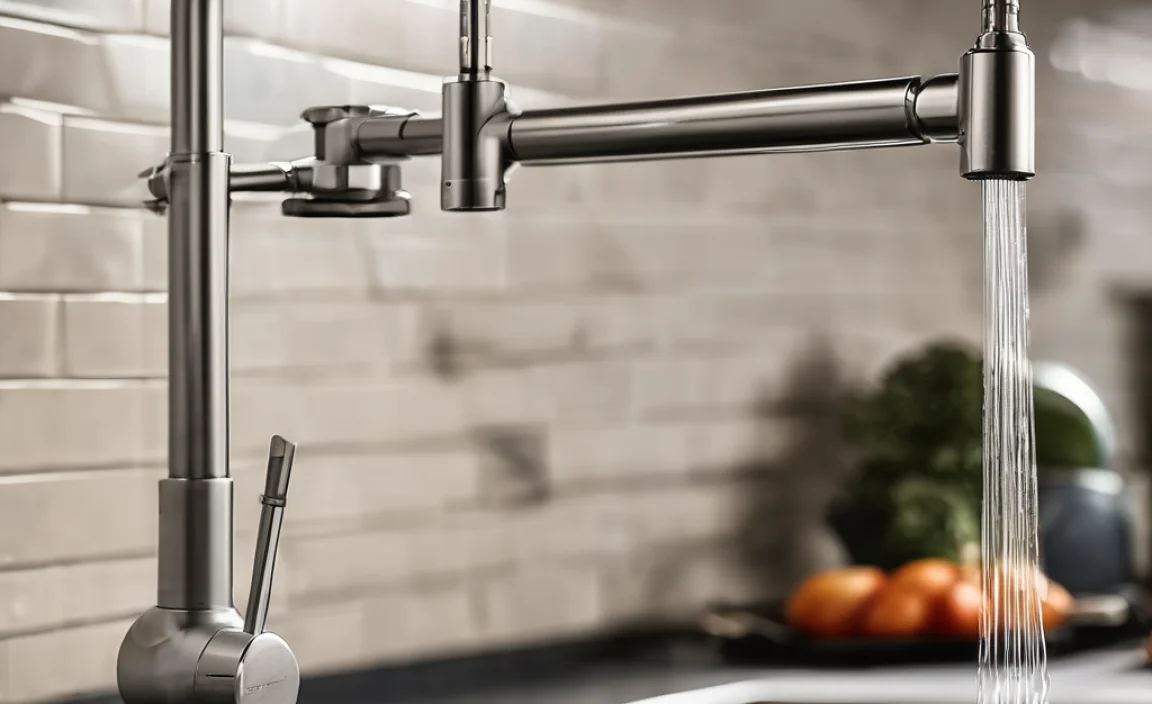
Do you love to cook? Imagine filling big pots right at your stove. No more heavy lifting from the sink! That’s what a pot filler faucet does. It makes cooking easier. Have you ever wondered {how to install a pot filler faucet}? It might seem hard, but it’s not impossible. Let’s find out how!
It is important to be safe. If you aren’t sure, ask for help. An adult can help you install it. Are you ready to learn? Let’s get started!
Key Takeaways
- Installing a pot filler faucet makes cooking easier and saves time.
- You must turn off the water supply before starting any plumbing work.
- Proper tools like pipe wrenches and Teflon tape are needed for the job.
- Knowing {how to install a pot filler faucet} adds value to your kitchen.
- Always check for leaks after installation to prevent water damage.
Planning How to Install a Pot Filler Faucet
Before you even think about touching a wrench, you need a plan. Think of it like building with LEGOs. You wouldn’t just start sticking bricks together, would you? No! You’d look at the instructions first. Installing a pot filler is the same. First, check your water supply. Can you easily turn off the water to your kitchen? This is super important! You don’t want water spraying everywhere. Next, look at where you want the faucet. Is there a water pipe nearby? Pot fillers need a cold water line. If not, you might need to call a plumber to run a new pipe. That’s a bigger job. Make sure you have all the tools. You’ll need things like pipe wrenches, Teflon tape, and maybe a drill. Having everything ready will make the job much smoother. Finally, read the instructions that came with your faucet. Every faucet is a little different. Knowing the steps ahead of time will save you time and trouble.
- Turn off the main water supply.
- Locate the nearest cold water pipe.
- Gather all necessary tools and materials.
- Read the manufacturer’s instructions carefully.
- Ensure the wall can support the faucet’s weight.
Imagine trying to bake a cake without a recipe. You might end up with a sticky mess! Planning {how to install a pot filler faucet} is like having that recipe. It guides you step-by-step. It helps you avoid mistakes. Think about the height of the faucet. You want it to reach over your tallest pot. Measure the height of your pots. This will help you decide where to place the faucet. Also, consider the reach of the faucet. Can it reach all the burners on your stove? A pot filler that’s too short won’t be very useful. Planning is key to a successful installation. It will save you time, money, and frustration. It will ensure that your new pot filler is both useful and beautiful.
Fun Fact or Stat: Did you know that proper planning can reduce installation time by up to 50%? A little preparation goes a long way!
Checking Your Water Supply
Ever tried to change a lightbulb without turning off the power? Yikes! That’s a recipe for a shock. Checking your water supply is just as important. First, find your main water shut-off valve. It’s usually in the basement or near your water meter. Turn it off. Then, open a faucet in your kitchen. This will drain any water left in the pipes. You want to make sure no water comes out. If water still comes out, the valve might not be working right. You might need to call a plumber to fix it. Next, check the pipes near where you’ll install the pot filler. Are they copper or PEX? Copper pipes need soldering. PEX pipes need special fittings. Make sure you have the right tools for the job. Finally, think about adding a shut-off valve just for the pot filler. This will make it easier to fix or replace the faucet later. You won’t have to turn off the water to the whole house.
Gathering the Right Tools
Imagine trying to build a treehouse with just your bare hands. You wouldn’t get very far, would you? You need tools! Installing a pot filler is the same. You’ll need a few key tools. First, get a pipe wrench. This is for tightening and loosening pipes. You’ll also need Teflon tape. This helps seal the threads on the pipes. It prevents leaks. A drill might be needed to make holes in the wall. A level will help you make sure the faucet is straight. A measuring tape will help you measure the distance between pipes. Safety glasses are important to protect your eyes. Work gloves will protect your hands. Having the right tools will make the job easier and safer. It will also help you do a professional-looking job.
Considering Faucet Placement
Have you ever seen a painting hanging crooked on the wall? It just doesn’t look right, does it? The same goes for your pot filler. You need to think carefully about where you put it. First, consider the height. You want the faucet to be high enough to fill your tallest pot. Measure your pots to find the right height. Next, think about the reach. Can the faucet reach all the burners on your stove? You don’t want to have to move your pots around. Also, consider the look. Do you want the faucet to be centered over the stove? Or do you want it off to one side? Think about how it will look with your other kitchen fixtures. Finally, make sure the wall is strong enough to support the faucet. Pot fillers can be heavy. You might need to add extra support behind the wall.
Preparing the Wall for Pot Filler Installation
Okay, so you’ve got your plan, you’ve got your tools, and you’ve got your faucet. Now it’s time to get the wall ready. This is like prepping a canvas before you paint. You need a clean, smooth surface to work with. First, find the stud behind the wall where you want to install the faucet. A stud is a vertical piece of wood that helps support the wall. You’ll need to attach the faucet to the stud to make it strong and stable. Use a stud finder to locate the stud. Mark the location with a pencil. Next, cut a hole in the wall for the water pipe. Use a drywall saw or a utility knife. Be careful not to cut any wires or pipes. If you’re not sure, call an electrician or a plumber. Now, install a mounting bracket. This will hold the faucet in place. Make sure it’s securely attached to the stud. Finally, run the water pipe to the mounting bracket. Use the right fittings for your type of pipe. Make sure everything is tight and secure.
- Locate and mark the wall stud.
- Cut an access hole for the water pipe.
- Install a sturdy mounting bracket.
- Run the water pipe to the bracket location.
- Ensure the pipe is properly supported.
Imagine trying to build a house on a shaky foundation. It wouldn’t last very long, would it? Preparing the wall {how to install a pot filler faucet} is like building that strong foundation. It makes sure your faucet is secure and stable. Think about the weight of the faucet and the water. It can be heavy! You need to make sure the wall can handle it. If the wall isn’t strong enough, it could collapse. That would be a disaster! Also, think about the water pipe. It needs to be properly supported. You don’t want it to sag or leak. Use pipe clamps to hold it in place. A well-prepared wall is essential for a successful pot filler installation. It will give you peace of mind knowing that your faucet is safe and secure.
Fun Fact or Stat: Walls with proper stud support can hold up to 500 pounds! Make sure your wall is up to the task.
Finding the Wall Stud
Have you ever tried to hang a picture with just a nail in the drywall? It usually falls down, right? That’s because drywall isn’t strong enough to hold much weight. You need to find the stud behind the drywall. A stud is a vertical piece of wood that’s part of the wall’s frame. It’s much stronger than drywall. To find a stud, use a stud finder. This is a small tool that can detect the edges of studs. Move the stud finder slowly across the wall. When it beeps or lights up, you’ve found a stud. Mark the location with a pencil. You can also try knocking on the wall. A solid sound usually means there’s a stud behind the wall. A hollow sound means there’s just drywall. Once you’ve found the stud, you can attach the mounting bracket for the pot filler. This will make sure the faucet is securely attached to the wall.
Cutting the Access Hole
Imagine you’re a doctor performing surgery. You need to make a small, precise cut to get to the problem. Cutting the access hole for the water pipe is similar. You want to make a hole that’s just big enough to work with. First, mark the location of the hole on the wall. Use a pencil and a ruler. Make sure the hole is centered over the stud. Then, use a drywall saw or a utility knife to cut the hole. Be careful not to cut any wires or pipes. If you’re not sure what’s behind the wall, call an electrician or a plumber. Cut slowly and carefully. Make the hole a little bigger than the pipe. This will give you room to work. Once you’ve cut the hole, clean up any dust or debris. Now you’re ready to run the water pipe to the mounting bracket.
Installing a Mounting Bracket
Think of the mounting bracket as the anchor for your pot filler. It’s what holds the faucet securely in place. Choose a mounting bracket that’s strong and durable. It should be made of metal, not plastic. The bracket should also be the right size for your faucet. Measure the distance between the mounting holes on the faucet. Then, choose a bracket that matches those measurements. To install the bracket, hold it against the wall over the stud. Make sure it’s level. Then, use screws to attach the bracket to the stud. Use long screws that will go deep into the wood. This will make the bracket more secure. Once the bracket is installed, test it to make sure it’s strong. Push and pull on it gently. If it feels loose, tighten the screws or add more screws.
Connecting the Water Supply Line
Now comes the part where you actually get the water flowing. This is like connecting the fuel line to a car engine. You need to do it right, or it won’t work. First, make sure the water supply is still turned off. You don’t want any surprises! Next, attach the water supply line to the pipe in the wall. Use the right fittings for your type of pipe. If you have copper pipes, you’ll need to solder the fittings. If you have PEX pipes, you’ll need special PEX fittings. Make sure the connections are tight and secure. Use Teflon tape to seal the threads. This will prevent leaks. Once the water supply line is connected, slowly turn the water back on. Check for leaks. If you see any leaks, turn the water off and tighten the connections. Keep checking for leaks until everything is dry.
- Ensure the main water supply is turned off.
- Attach the water supply line using appropriate fittings.
- Use Teflon tape to seal pipe threads.
- Slowly turn the water on and check for leaks.
- Tighten connections if leaks are present.
Imagine trying to drink from a straw with a hole in it. You wouldn’t get much water, would you? Connecting the water supply line {how to install a pot filler faucet} is like making sure that straw is sealed tight. It prevents leaks and ensures a steady flow of water. Think about the pressure of the water. It can be very strong! You need to make sure the connections can handle that pressure. Use high-quality fittings and tighten them securely. Also, think about the type of pipe you have. Copper pipes need to be soldered. PEX pipes need special fittings. Using the wrong fittings can cause leaks or even damage to the pipes. A properly connected water supply line is essential for a functional pot filler. It will give you a reliable source of water for all your cooking needs.
Fun Fact or Stat: A single leaky faucet can waste up to 3,000 gallons of water per year! Prevent leaks with proper installation.
Using the Correct Fittings
Have you ever tried to put the wrong puzzle pieces together? They just don’t fit, do they? Using the correct fittings for your water pipes is just as important. Copper pipes and PEX pipes require different types of fittings. Copper pipes use soldered fittings. These fittings are heated with a torch and then joined to the pipe with solder. PEX pipes use compression fittings or expansion fittings. These fittings are crimped or expanded onto the pipe using special tools. Make sure you know what type of pipe you have before you buy fittings. Using the wrong fittings can cause leaks or even damage to the pipes. If you’re not sure which fittings to use, ask a plumber for help. They can guide you to the right choices for your specific situation.
Applying Teflon Tape
Think of Teflon tape as the superhero of plumbing. It helps prevent leaks by sealing the threads on pipe fittings. To apply Teflon tape, start by cleaning the threads on the fitting. Make sure they’re dry and free of dirt. Then, wrap the Teflon tape around the threads in a clockwise direction. Overlap the tape slightly as you wrap it. Use about three or four layers of tape. Make sure the tape is tight and smooth. Once you’ve applied the tape, you can screw the fitting onto the pipe. The Teflon tape will fill in any small gaps between the threads and create a watertight seal. If you still have leaks after tightening the fitting, try adding more Teflon tape. It’s a simple and effective way to prevent leaks in your plumbing system.
Checking for Leaks
Imagine you’re inflating a balloon. You want to make sure there are no holes in it, right? Otherwise, it will just deflate. Checking for leaks after connecting the water supply line is just as important. Slowly turn the water back on and watch the connections carefully. Look for any signs of water dripping or seeping. If you see any leaks, turn the water off immediately. Tighten the connections or add more Teflon tape. Then, turn the water back on and check again. Keep checking until there are no leaks. You can also use a dry cloth to wipe around the connections. This will help you spot any small leaks that you might otherwise miss. A leak-free connection is essential for a functional and reliable pot filler.
Attaching the Pot Filler Faucet to the Wall
Alright, you’ve got the water connected. Now it’s time for the grand finale: attaching the faucet to the wall! This is like putting the finishing touches on a masterpiece. First, make sure the mounting bracket is securely attached to the wall. You don’t want the faucet to wobble or fall off. Next, carefully slide the faucet onto the mounting bracket. Most pot fillers have a threaded connection that screws onto the bracket. Tighten the connection with a wrench. Be careful not to overtighten it, or you could damage the faucet. Once the faucet is attached, test it to make sure it works properly. Turn the water on and off. Swivel the faucet arm to make sure it moves smoothly. Check for any leaks. If everything looks good, you’re done! You’ve successfully installed your pot filler faucet.
- Ensure the mounting bracket is securely attached.
- Slide the faucet onto the mounting bracket carefully.
- Tighten the connection with a wrench, but don’t overtighten.
- Test the faucet by turning the water on and off.
- Check for leaks around the faucet connections.
Imagine hanging a beautiful chandelier in your dining room. You wouldn’t just leave it dangling from a wire, would you? You’d make sure it’s securely attached to the ceiling. Attaching the pot filler faucet {how to install a pot filler faucet} is like that. It ensures that your faucet is stable and safe to use. Think about the weight of the faucet and the water. It can be heavy! You need to make sure the mounting bracket can support that weight. Also, think about the movement of the faucet. You’ll be swiveling it and moving it around. You need to make sure the connection is tight enough to withstand that movement. A properly attached faucet is essential for safe and convenient cooking. It will give you years of reliable service.
Fun Fact or Stat: A securely mounted pot filler can withstand up to 100 pounds of pressure! That’s a lot of water.
Aligning the Faucet Properly
Have you ever seen a picture hanging crooked on the wall? It just doesn’t look right, does it? The same goes for your pot filler. You want to make sure it’s aligned properly. Use a level to check that the faucet is straight. If it’s not, loosen the connection and adjust it until it’s level. You also want to make sure the faucet is centered over your stove. Measure the distance from the faucet to the edges of the stove. Adjust the faucet until it’s centered. A properly aligned faucet will not only look better, but it will also function more efficiently. It will make it easier to fill pots and pans without spilling water.
Tightening the Connections
Think of tightening the connections as sealing the deal. It’s the final step in making sure your pot filler is leak-free and secure. Use a wrench to tighten the connections between the faucet and the mounting bracket. Be careful not to overtighten them, or you could damage the faucet. Tighten them just enough so that they’re snug and secure. After you’ve tightened the connections, turn the water on and check for leaks. If you see any leaks, tighten the connections a little more. Keep checking until there are no leaks. A properly tightened connection will give you peace of mind knowing that your pot filler is safe and reliable.
Testing the Faucet’s Functionality
Imagine you’re a pilot testing a new airplane. You wouldn’t just take off without checking all the controls, would you? Testing the faucet’s functionality is just as important. Turn the water on and off several times. Make sure the water flows smoothly and consistently. Swivel the faucet arm to make sure it moves easily. Check for any leaks around the connections. If you notice any problems, address them immediately. A properly functioning faucet will make your cooking experience much more enjoyable. It will save you time and effort by allowing you to fill pots directly at the stove.
Checking for Leaks After Installation
You’ve installed your pot filler. Great job! But don’t celebrate just yet. The final step is crucial: checking for leaks. This is like making sure all the doors and windows are closed before a storm. You want to prevent any water damage. Turn the water on and carefully inspect all the connections. Look for any signs of dripping or moisture. Pay close attention to the joints where the faucet connects to the water supply line and the mounting bracket. If you see any leaks, tighten the connections with a wrench. If the leaks persist, turn off the water and reapply Teflon tape to the threads. Then, tighten the connections again. Keep checking until there are no leaks. It’s also a good idea to check for leaks again a few hours later, and then again the next day. This will ensure that everything is completely sealed.
- Turn the water on and inspect all connections.
- Look for any signs of dripping or moisture.
- Tighten connections if leaks are found.
- Reapply Teflon tape if necessary.
- Check for leaks again after a few hours and the next day.
Imagine you’ve just finished washing your car. You wouldn’t want to see water spots all over it, would you? Checking for leaks {how to install a pot filler faucet} is like making sure your car is spotless. It prevents water damage and ensures a long-lasting installation. Think about the potential damage that a small leak can cause. It can ruin your drywall, damage your flooring, and even lead to mold growth. A little bit of prevention can save you a lot of money and hassle in the long run. Also, think about the peace of mind that comes with knowing that your pot filler is leak-free. You can relax and enjoy cooking without worrying about water damage. A thorough leak check is essential for a successful and worry-free pot filler installation.
Fun Fact or Stat: Even a small drip can waste up to 20 gallons of water per day! Catch those leaks early.
Inspecting Connections Closely
Have you ever looked closely at a spiderweb? You can see all the intricate details. Inspecting the connections on your pot filler is similar. You need to look closely for any signs of leaks. Use a flashlight to get a better view. Run your fingers around the connections to feel for any moisture. Pay special attention to the joints where the faucet connects to the water supply line and the mounting bracket. These are the most common places for leaks to occur. If you see any signs of moisture, tighten the connections or reapply Teflon tape.
Using Paper Towels to Detect Moisture
Think of paper towels as your leak-detecting detectives. They can help you find even the smallest leaks. Dry the area around the connections with a paper towel. Then, wait a few minutes and check the paper towel. If it’s wet, you have a leak. The paper towel will absorb the moisture and make it easier to see. You can also use colored paper towels. This will make it even easier to spot any leaks. Place the paper towels under the connections and check them regularly. If they change color, you know you have a leak.
Monitoring for Delayed Leaks
Imagine you’re baking a cake. You wouldn’t just take it out of the oven after a few minutes, would you? You’d let it cool completely before cutting into it. Monitoring for delayed leaks is similar. You need to give the connections time to settle and reveal any hidden leaks. Check the connections again a few hours after the initial installation. Then, check them again the next day. Sometimes, leaks don’t show up immediately. They can take time to develop. By monitoring for delayed leaks, you can catch them early and prevent any water damage.
Maintaining Your Pot Filler Faucet
You’ve done it! You know {how to install a pot filler faucet}. But the job isn’t over. Like a car, your pot filler needs regular maintenance. This will keep it working well for years. Clean the faucet regularly with a soft cloth. This will remove any water spots or grime. Check the connections periodically for leaks. Tighten them if needed. If the faucet starts to drip, you might need to replace the O-rings or cartridges. These are small rubber parts that can wear out over time. You can find replacement parts at most hardware stores. Also, be careful not to put too much weight on the faucet arm. This can damage the faucet and cause it to leak. With proper care, your pot filler will be a valuable addition to your kitchen for many years to come.
| Maintenance Task | Frequency | Benefits |
|---|---|---|
| Clean with soft cloth | Weekly | Removes spots, prevents grime buildup |
| Check for leaks | Monthly | Prevents water damage, saves water |
| Tighten connections | As needed | Maintains stability, prevents leaks |
| Replace O-rings/cartridges | As needed | Stops drips, restores functionality |
- Clean the faucet regularly with a soft cloth.
- Check connections periodically for leaks.
- Tighten connections as needed.
- Replace O-rings or cartridges if the faucet drips.
- Avoid putting too much weight on the faucet arm.
Imagine having a beautiful garden. You wouldn’t just plant the flowers and then forget about them, would you? You’d need to water them, weed them, and prune them to keep them healthy and beautiful. Maintaining your pot filler faucet is like that. It ensures that it stays in good condition and functions properly for years to come. Think about the cost of replacing a pot filler. It can be expensive! Regular maintenance can help you avoid those costs by preventing problems before they start. Also, think about the convenience of having a pot filler that always works perfectly. You can rely on it to fill your pots quickly and easily, without any leaks or drips. Proper maintenance is essential for a long-lasting and reliable pot filler.
Fun Fact or Stat: Regular maintenance can extend the life of your pot filler by up to 5 years! That’s a lot of pots filled.
Cleaning the Faucet Regularly
Have you ever seen a dirty, grimy faucet? It’s not very appealing, is it? Cleaning your pot filler regularly will keep it looking its best. Use a soft cloth and a mild soap to clean the faucet. Avoid using abrasive cleaners, as they can scratch the finish. Pay special attention to the spout and the handles. These are the areas that get the most use. Rinse the faucet with clean water and dry it with a soft cloth. Regular cleaning will not only keep your faucet looking good, but it will also prevent the buildup of mineral deposits and grime.
Replacing Worn Parts
Think of your pot filler as a machine with moving parts. Over time, those parts can wear out and need to be replaced. The most common parts that need to be replaced are the O-rings and cartridges. These are small rubber parts that seal the connections and control the flow of water. When they wear out, the faucet can start to drip. You can find replacement parts at most hardware stores. Be sure to buy the correct parts for your specific faucet model. Replacing worn parts is a simple and inexpensive way to keep your pot filler functioning properly.
Preventing Water Spots
Imagine you’ve just cleaned your windows, and then it starts to rain. The water leaves spots all over the glass. Preventing water spots on your pot filler is similar. You want to keep it looking clean and shiny. After each use, dry the faucet with a soft cloth. This will prevent water spots from forming. You can also use a water softener to reduce the mineral content of your water. This will help prevent mineral deposits from building up on the faucet. Preventing water spots will keep your pot filler looking its best for years to come.
Summary
Installing a pot filler faucet can seem like a big job. But with careful planning and the right tools, it’s something you can do yourself. The first step is to plan. Know where you want to place the faucet and make sure you have all the necessary tools. Next, prepare the wall by finding the stud and cutting an access hole for the water pipe. Then, connect the water supply line. Make sure to use the correct fittings and Teflon tape to prevent leaks. After that, attach the pot filler faucet to the wall. Make sure it’s aligned properly and the connections are tight. Finally, check for leaks after installation. A little bit of patience and attention to detail can make the whole process easier.
Remember, safety is always important. If you’re not comfortable with any of these steps, ask a professional for help. With the right knowledge and skills, you can successfully install a pot filler faucet and enjoy the convenience it brings to your kitchen. Enjoying {how to install a pot filler faucet} can add great value to your cooking experience.
Conclusion
Installing a pot filler faucet can greatly improve your cooking experience. It saves you time and effort by allowing you to fill pots directly at the stove. While the installation process may seem daunting, it’s manageable with the right preparation and tools. Planning is very important. Remember to turn off the water supply before starting any work. If you follow the steps carefully and take your time, you can successfully install a pot filler faucet yourself. This can be a rewarding project that adds both convenience and value to your kitchen. Enjoy {how to install a pot filler faucet}.
Frequently Asked Questions
Question No 1: Is it hard to install a pot filler faucet myself?
Answer: It can seem tricky, but it’s doable! If you’re good with tools and follow instructions carefully, you can install a pot filler yourself. Make sure you turn off the water first! If you’re not sure, ask an adult or a plumber for help. They can guide you through the steps. Remember to read the instructions that come with the faucet. This will help you avoid mistakes and ensure a successful installation. Knowing {how to install a pot filler faucet} can also save you money on installation costs!
Question No 2: What tools do I need to install a pot filler?
Answer: You’ll need a few key tools. A pipe wrench is a must for tightening and loosening pipes. Teflon tape will help seal the threads and prevent leaks. You might need a drill to make holes in the wall. A level will help you make sure the faucet is straight. And a measuring tape will help you measure the distance between pipes. Safety glasses and work gloves are also important for protecting your eyes and hands. Gathering all the right tools before you start will make the job much easier. Also, make sure you have the right fittings for your type of pipe.
Question No 3: Can I install a pot filler faucet on any wall?
Answer: Not just any wall! The wall needs to be strong enough to support the weight of the faucet and the water. You’ll need to find a stud behind the wall and attach the faucet to the stud. A stud is a vertical piece of wood that helps support the wall. If you can’t find a stud in the right location, you might need to add extra support behind the wall. Also, make sure there’s a water pipe nearby. Pot fillers need a cold water line. If there isn’t one, you might need to call a plumber to run a new pipe. This is important to know {how to install a pot filler faucet}.
Question No 4: How do I prevent leaks after installing a pot filler?
Answer: Preventing leaks is super important! After you’ve installed the faucet, turn the water on slowly and carefully. Check all the connections for any signs of dripping or moisture. If you see any leaks, turn the water off and tighten the connections. You can also add more Teflon tape to the threads. Wait a few hours and check again. Sometimes, leaks don’t show up right away. By checking for leaks regularly, you can prevent water damage and save water. It helps to know {how to install a pot filler faucet} the right way.
Question No 5: What if I can’t find a stud in the right place?
Answer: If you can’t find a stud in the right place, you might need to add extra support behind the wall. You can do this by installing a piece of wood between two studs. This will create a strong surface to attach the mounting bracket to. You can also use a special mounting plate that’s designed to distribute the weight of the faucet. Ask a hardware store employee for help choosing the right type of support for your wall. Make sure the support is strong enough to hold the weight of the faucet and the water. This is part of {how to install a pot filler faucet}.
Question No 6: How high should I install the pot filler above the stove?
Answer: You want the faucet to be high enough to fill your tallest pot, but not so high that it’s hard to reach. Measure the height of your tallest pot. Then, add a few inches to that measurement. This will give you the ideal height for the faucet. Most pot fillers are installed about 12 to 18 inches above the stove. But you can adjust the height to fit your specific needs. Make sure the faucet can reach all the burners on your stove. You don’t want to have to move your pots around to fill them. By considering these factors, you can choose the perfect height for your pot filler. This will make {how to install a pot filler faucet} even more rewarding.