Have you ever wondered how lights stay on the ceiling? Do you know what a junction box is? It’s a special box in your ceiling. Wires connect inside it. This box helps keep your home safe. Today, we will learn how to install bathroom light fixture junction box. It’s easier than you think!
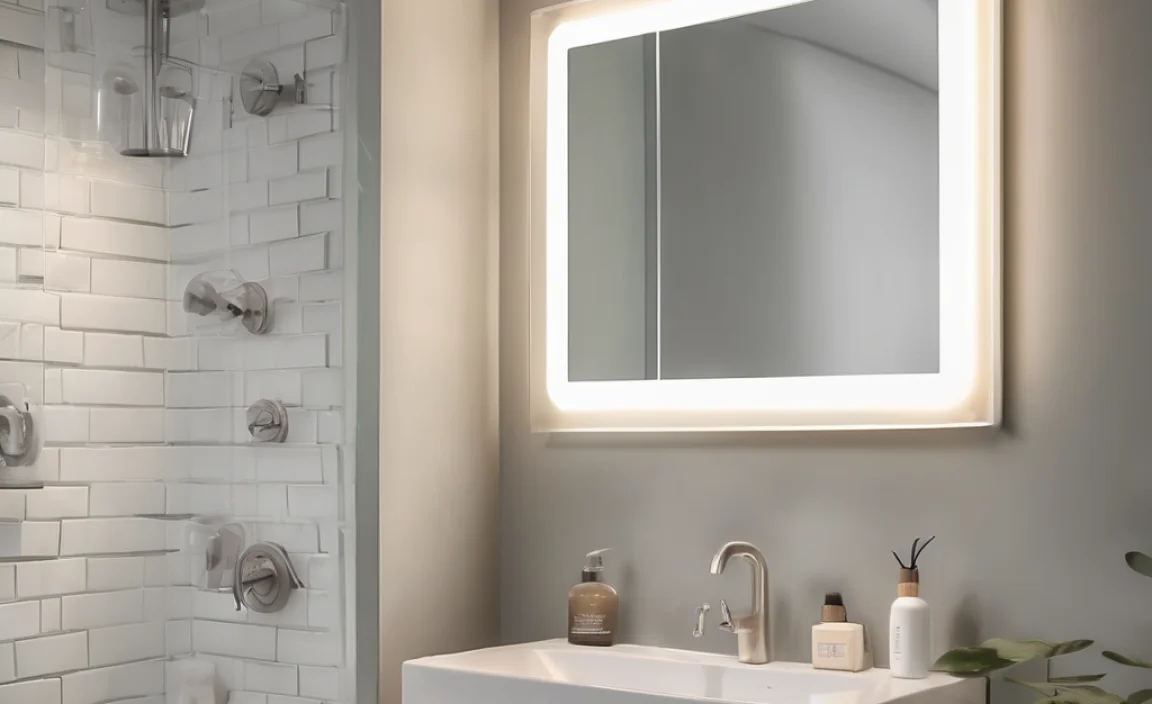
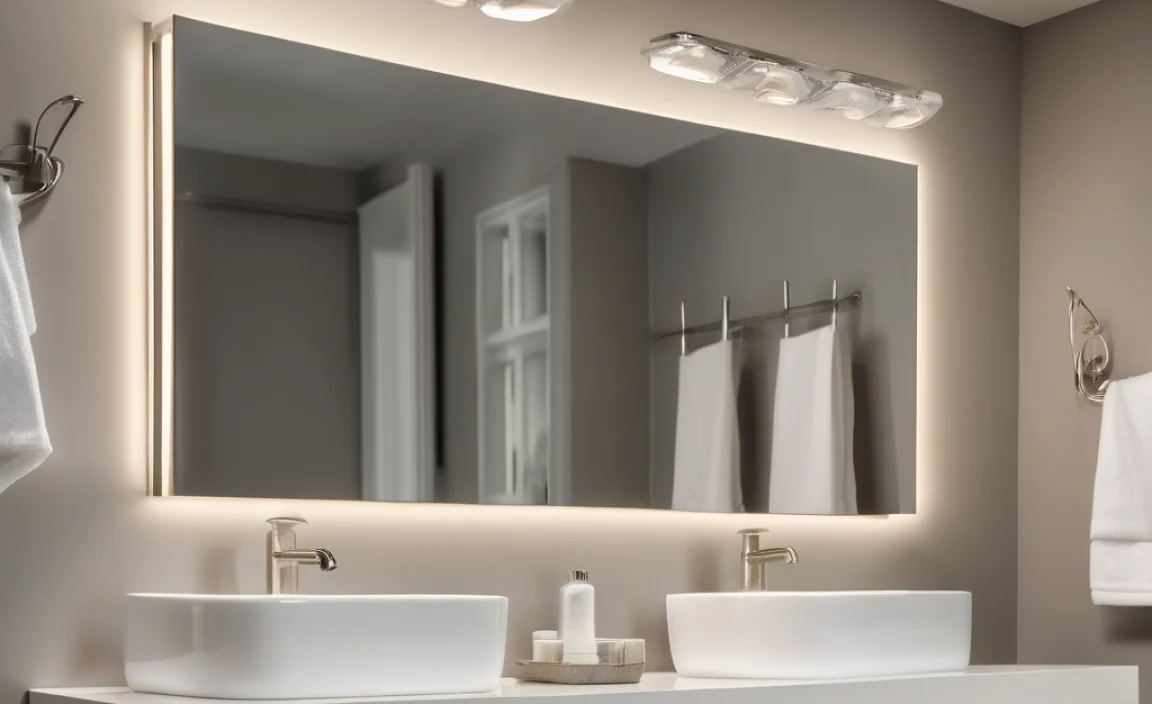
Light fixtures make bathrooms bright. They help us see when we brush our teeth. But, what happens when the light stops working? Sometimes, you need to change the whole fixture. Knowing how to install a new one is very useful. Let’s get started with our guide!
A junction box keeps electrical connections safe. Without it, wires could be dangerous. Learning about junction boxes is important for home safety. Are you ready to learn more about how to install bathroom light fixture junction box? Let’s jump right in!
Key Takeaways
- Always turn off the power before you start any electrical work.
- A junction box protects wires and makes connections safer in your bathroom.
- Knowing how to install bathroom light fixture junction box improves safety.
- Make sure the junction box is firmly attached to the ceiling or wall.
- If you are not sure, always ask a grown-up for help.
Understanding Bathroom Light Fixture Safety
Electrical safety is super important, especially in a bathroom. Bathrooms have water, and water can be dangerous with electricity. Before you even think about how to install bathroom light fixture junction box, find the breaker box. The breaker box controls the power to your house. Turn off the breaker that goes to the bathroom light. This will stop electricity from flowing to the wires you’ll be working with. Double-check that the power is off by using a non-contact voltage tester. This tool will beep or light up if there is still electricity in the wires. Never touch wires without making sure the power is off. Working with electricity can be dangerous if you don’t follow these steps. Always ask a grown-up to help you if you’re not sure what to do.
- Turn off the power at the breaker box.
- Use a voltage tester to check the wires.
- Never touch bare wires.
- Wear rubber gloves for extra safety.
- Ask a grown-up for help if needed.
- Read all instructions carefully before starting.
Now that you know about safety, let’s talk about the tools you’ll need. You’ll need a screwdriver to remove the old light fixture and install the new one. Pliers can help you bend and twist wires. Wire strippers are used to remove the plastic coating from the wires. A voltage tester is a must-have for checking if the power is off. Safety glasses protect your eyes from dust or debris. A ladder helps you reach the ceiling where the light fixture is. Make sure the ladder is stable before you climb on it. Having the right tools makes the job easier and safer. It’s like having the right ingredients to bake a cake. Without them, it’s hard to get the job done right. Now you’re one step closer to understanding how to install bathroom light fixture junction box.
Fun Fact or Stat: Did you know that electricity travels at the speed of light? That’s why it’s so important to be careful when working with it!
Why is Electrical Safety Important?
Have you ever seen a cartoon where someone gets shocked by electricity? It’s funny in cartoons, but in real life, it’s no joke. Electricity can hurt you very badly. It can cause burns or even stop your heart. That’s why safety is the number one rule when working with electricity. Always respect electricity and follow the safety steps. Turning off the power is like putting on your seatbelt in a car. It’s there to protect you. Using the right tools, like a voltage tester, is like checking the mirror before you change lanes. It helps you see if it’s safe. Learning about electrical safety is like learning the rules of a game. It helps you play safely and have fun. So, remember to always be careful and follow the rules when working with electricity to install your bathroom light fixture junction box.
What Tools Do I Need?
Imagine you’re building a Lego set without the instructions. It would be very hard, right? The same goes for working with electricity. You need the right tools to do the job safely and correctly. A screwdriver is like the key to unlock the screws holding the light fixture. Pliers are like your hands, helping you bend and twist the wires. Wire strippers are like a peeler for wires, taking off the plastic coating. A voltage tester is like a detective, checking if there’s any hidden electricity. Safety glasses are like goggles, protecting your eyes from any surprises. A ladder is like a staircase, helping you reach the ceiling. Make sure you have all these tools before you start. It’s like gathering your ingredients before you start cooking. It makes the whole process much smoother. Don’t forget to ask a grown-up to help you gather these tools if you’re not sure where to find them.
How to Use a Voltage Tester
A voltage tester is a small tool, but it’s a very important one. It’s like a superhero that can sense electricity. Before you touch any wires, you need to make sure they are not live. A live wire means there’s electricity flowing through it. That’s where the voltage tester comes in. Hold the tip of the tester near the wire. Don’t touch the wire directly. If the tester beeps or lights up, that means there’s still electricity in the wire. If it doesn’t beep or light up, that means the power is off. It’s like checking if the stove is hot before you touch it. You don’t want to get burned! Always double-check with the voltage tester, even if you turned off the breaker. Sometimes, things can go wrong. It’s better to be safe than sorry. This tool is your best friend when learning how to install bathroom light fixture junction box.
Removing the Old Light Fixture Safely
Taking down the old light is the first real step in how to install bathroom light fixture junction box. First, make sure you’ve turned off the power at the breaker. Grab your screwdriver. Look for the screws holding the old light fixture in place. They are usually on the outside of the fixture. Carefully unscrew them. You might need a grown-up to help you if the screws are stuck. Once the screws are out, gently pull the light fixture away from the ceiling. Be careful! It might be heavy. You might see wires connected to the fixture. These wires are usually held together with plastic connectors called wire nuts. Unscrew the wire nuts to disconnect the wires. Remember which wire goes where! It’s a good idea to take a picture before you disconnect them. This will help you connect the new light fixture correctly. Now, the old light fixture should be completely removed.
- Turn off the power at the breaker.
- Unscrew the screws holding the fixture.
- Gently pull the fixture away from the ceiling.
- Disconnect the wires using wire nuts.
- Take a picture of the wire connections.
- Be careful, the fixture might be heavy.
Now that the old light fixture is down, you might see the junction box. The junction box is a metal or plastic box in the ceiling. It’s where the wires connect. Make sure the junction box is in good condition. It should be firmly attached to the ceiling. If it’s loose or damaged, you might need to replace it. This is a more complicated job, so ask a grown-up for help. Check the wires coming out of the junction box. Are they in good condition? If the wires are old or frayed, you might need to replace them too. Use wire strippers to remove a little bit of the plastic coating from the ends of the wires. This will expose the bare wire. The bare wire is what you’ll connect to the new light fixture. Remember to be careful when working with wires. They can be dangerous if you don’t follow the safety rules. Now you’re ready to move on to the next step in how to install bathroom light fixture junction box.
Fun Fact or Stat: The first electric light bulb was invented by Thomas Edison in 1879. Imagine how dark it was before that!
What if the Screws Are Stuck?
Sometimes, screws can be very stubborn. They just don’t want to come out. It’s like trying to open a jar of pickles that’s been stuck for ages. Don’t worry, there are a few tricks you can try. First, make sure you’re using the right size screwdriver. If the screwdriver is too small, it might slip and damage the screw. Second, try using a little bit of oil on the screw. The oil can help loosen the screw. Let the oil sit for a few minutes before you try again. Third, ask a grown-up to help you. They might have more strength or better tools. If all else fails, you can try using a screw extractor. This is a special tool that’s designed to remove stuck screws. Just be careful not to damage the light fixture or the ceiling. Remember, patience is key. Don’t get frustrated. Take your time and eventually, the screws will come out. Learning to deal with stuck screws is a valuable part of learning how to install bathroom light fixture junction box.
How Do I Know Which Wire Goes Where?
Wires can look confusing. They’re all different colors, and it can be hard to remember which one goes where. Imagine you’re connecting the dots in a picture. If you connect them in the wrong order, the picture won’t look right. The same goes for wires. If you connect them incorrectly, the light fixture won’t work, or it could even be dangerous. That’s why it’s so important to keep track of which wire goes where. The easiest way to do this is to take a picture before you disconnect the wires. The picture will show you exactly how the wires were connected before. You can also use labels to mark the wires. Write down the color of the wire and what it was connected to. This will help you remember later. The wires are usually color-coded. Black is usually the hot wire, white is usually the neutral wire, and green or bare copper is usually the ground wire. Always double-check your work before you turn the power back on. Learning to identify wires correctly is a key part of learning how to install bathroom light fixture junction box.
What Do I Do with the Old Light Fixture?
Now that you’ve taken down the old light fixture, what do you do with it? You can’t just throw it in the trash. It might have parts that can be recycled. First, check if the light fixture is still working. If it is, you could donate it to a charity or give it to someone who needs it. If the light fixture is broken, you can take it to a recycling center. They will take it apart and recycle the metal and other materials. Some stores that sell light fixtures will also recycle old fixtures. Call your local stores to see if they offer this service. You can also check with your city or town to see if they have any special recycling programs for electronics. Recycling is important because it helps save resources and protect the environment. So, don’t just throw away your old light fixture. Find a way to recycle it. This is a responsible way to complete your how to install bathroom light fixture junction box project.
Preparing the New Light Fixture
Getting the new light ready is key before you finish learning how to install bathroom light fixture junction box. Take the new light fixture out of its box. Check all the parts. Make sure nothing is missing or broken. Read the instructions carefully. The instructions will tell you how to put the light fixture together. Some light fixtures come already assembled. Others need to be put together. You might need a screwdriver to attach the shade or the bulbs. Find the wires on the new light fixture. They will usually be black, white, and green or bare copper. These wires will connect to the wires in the junction box. Make sure the wires are long enough to reach the wires in the junction box. If they are too short, you can use wire extensions. Wire extensions are short pieces of wire that you can use to make the wires longer. Now your new light fixture is ready to be installed.
- Unpack the new light fixture.
- Check for missing or broken parts.
- Read the instructions carefully.
- Identify the wires on the new fixture.
- Make sure the wires are long enough.
- Assemble the fixture if needed.
Before you start connecting the wires, take a closer look at the junction box. Make sure it’s clean and free of dust or debris. You can use a brush or a cloth to clean it. Check the screws that hold the junction box to the ceiling. Make sure they are tight. If the junction box is loose, it could be dangerous. You might need to tighten the screws or replace the junction box. If you’re not sure how to do this, ask a grown-up for help. Make sure the wires coming out of the junction box are in good condition. If they are old or frayed, you might need to replace them. Use wire strippers to remove a little bit of the plastic coating from the ends of the wires. This will expose the bare wire. The bare wire is what you’ll connect to the new light fixture. Remember to be careful when working with wires. They can be dangerous if you don’t follow the safety rules. Now you’re all set to finish learning how to install bathroom light fixture junction box.
Fun Fact or Stat: The tallest lighthouse in the world is the Jeddah Light in Saudi Arabia. It’s 436 feet tall!
How Do I Know if a Part Is Missing?
It’s like opening a puzzle box and finding that some of the pieces are missing. You can’t complete the puzzle without all the pieces. The same goes for a light fixture. If a part is missing, you can’t install the light fixture correctly. The instructions that come with the light fixture will have a list of all the parts. Compare the list to the parts that are in the box. If something is missing, contact the store where you bought the light fixture. They will usually send you the missing part for free. Don’t try to install the light fixture without all the parts. It could be dangerous or it might not work correctly. Taking the time to check for missing parts is an important part of learning how to install bathroom light fixture junction box.
What if the Instructions Are Confusing?
Sometimes, instructions can be hard to understand. They might use words that you don’t know or have diagrams that are confusing. It’s like trying to read a map in a foreign language. Don’t worry, there are a few things you can do. First, read the instructions carefully. Try to understand what each step is asking you to do. Second, look at the diagrams. The diagrams can often help you understand the instructions. Third, ask a grown-up for help. They might be able to explain the instructions in a way that you understand. Fourth, search online for videos or tutorials. There are many helpful videos that show you how to install light fixtures. If you’re still confused, don’t give up. Keep trying and eventually, you’ll figure it out. Asking for help and using online resources are great ways to overcome confusing instructions and learn how to install bathroom light fixture junction box.
How Do Wire Extensions Work?
Imagine you’re building a bridge, but the pieces of wood are too short to reach across the river. You need to add extra pieces of wood to make the bridge longer. Wire extensions are like those extra pieces of wood. They’re used to make wires longer so they can reach the junction box. Wire extensions are short pieces of wire with plastic connectors on each end. To use a wire extension, simply connect one end to the wire on the light fixture and the other end to the wire in the junction box. Make sure the wire extension is the same gauge as the wires you’re connecting. The gauge is the thickness of the wire. Using the wrong gauge can be dangerous. Wire extensions are a simple way to solve the problem of wires that are too short. They are a useful tool when learning how to install bathroom light fixture junction box.
Connecting the Wires Correctly
Connecting the wires correctly is super important. It’s like connecting the right pieces of a puzzle. If you don’t connect them right, the puzzle won’t look right. The same goes for wires. If you don’t connect them correctly, the light won’t work. Or worse, it could be dangerous! First, find the black wire from the new light fixture. Connect it to the black wire in the junction box. Use a wire nut to connect them. Twist the wire nut tightly until the wires are securely connected. Next, find the white wire from the new light fixture. Connect it to the white wire in the junction box. Use a wire nut to connect them. Finally, find the green or bare copper wire from the new light fixture. Connect it to the green or bare copper wire in the junction box. This is the ground wire. It’s very important for safety. Use a wire nut to connect them. Double-check all the connections. Make sure the wire nuts are tight and the wires are securely connected. Now the wires are connected correctly, and you’re one step closer to finishing your how to install bathroom light fixture junction box project.
- Connect the black wire to the black wire.
- Connect the white wire to the white wire.
- Connect the green or bare wire to the green or bare wire.
- Use wire nuts to connect the wires.
- Twist the wire nuts tightly.
- Double-check all the connections.
After you connect the wires, carefully tuck them back into the junction box. Make sure they are not sticking out or getting in the way. The junction box is designed to protect the wires and keep them safe. Now, you’re ready to attach the new light fixture to the ceiling. Most light fixtures come with a mounting bracket. This bracket attaches to the junction box and provides a place to attach the light fixture. Attach the mounting bracket to the junction box using screws. Make sure the bracket is securely attached. Now, carefully lift the light fixture up to the mounting bracket. Align the holes in the light fixture with the holes in the mounting bracket. Use screws to attach the light fixture to the mounting bracket. Make sure the light fixture is securely attached. It should not be wobbly or loose. Now you’ve almost finished learning how to install bathroom light fixture junction box.
Fun Fact or Stat: The average person spends about 30 minutes in the bathroom each day. That’s a lot of time to spend under a good light!
What Is a Wire Nut?
Imagine you’re building a tower out of blocks. You need something to hold the blocks together, like glue or tape. A wire nut is like the glue or tape for wires. It’s a small plastic cap that’s used to connect wires together. To use a wire nut, you twist the ends of the wires together and then screw the wire nut onto the twisted wires. The wire nut holds the wires together and keeps them from coming apart. It also protects the wires from touching each other, which could cause a short circuit. Wire nuts come in different sizes. The size you need depends on the number and thickness of the wires you’re connecting. Using the right size wire nut is important for safety. Wire nuts are an essential part of any electrical project, including learning how to install bathroom light fixture junction box.
Why Is the Ground Wire Important?
Have you ever seen a superhero with a shield? The shield protects the superhero from danger. The ground wire is like a shield for your electrical system. It protects you from electric shock. If there’s a problem with the wiring, the ground wire provides a safe path for the electricity to flow back to the breaker box. This trips the breaker and shuts off the power, preventing you from getting shocked. The ground wire is usually green or bare copper. It’s connected to the metal parts of the light fixture and the junction box. It’s very important to connect the ground wire correctly. Without a properly connected ground wire, you could be at risk of electric shock. Understanding the importance of the ground wire is a key part of learning how to install bathroom light fixture junction box.
What if the Wires Are Different Colors?
Sometimes, the wires in your house might be different colors than the wires on the new light fixture. It’s like trying to match socks when they’re all different colors. It can be confusing! Don’t worry, there are a few things you can do. First, check the instructions that came with the light fixture. They might have a diagram that shows you how to connect the wires. Second, use a voltage tester to identify the wires. The voltage tester can tell you which wire is hot, which is neutral, and which is ground. Third, ask a grown-up for help. They might be able to help you figure out which wires to connect. If you’re not sure, it’s always better to ask for help than to guess. Connecting the wires incorrectly could be dangerous. Getting help when the wires are different colors is a smart move when learning how to install bathroom light fixture junction box.
| Wire Color | Common Use | What to Connect To |
|---|---|---|
| Black | Hot (carries electricity) | Black wire from fixture |
| White | Neutral (returns electricity) | White wire from fixture |
| Green or Bare Copper | Ground (safety) | Green or bare wire from fixture |
| Red | Sometimes Hot (switch leg) | Check instructions, or ask a grown-up |
Attaching the Light Fixture to the Ceiling
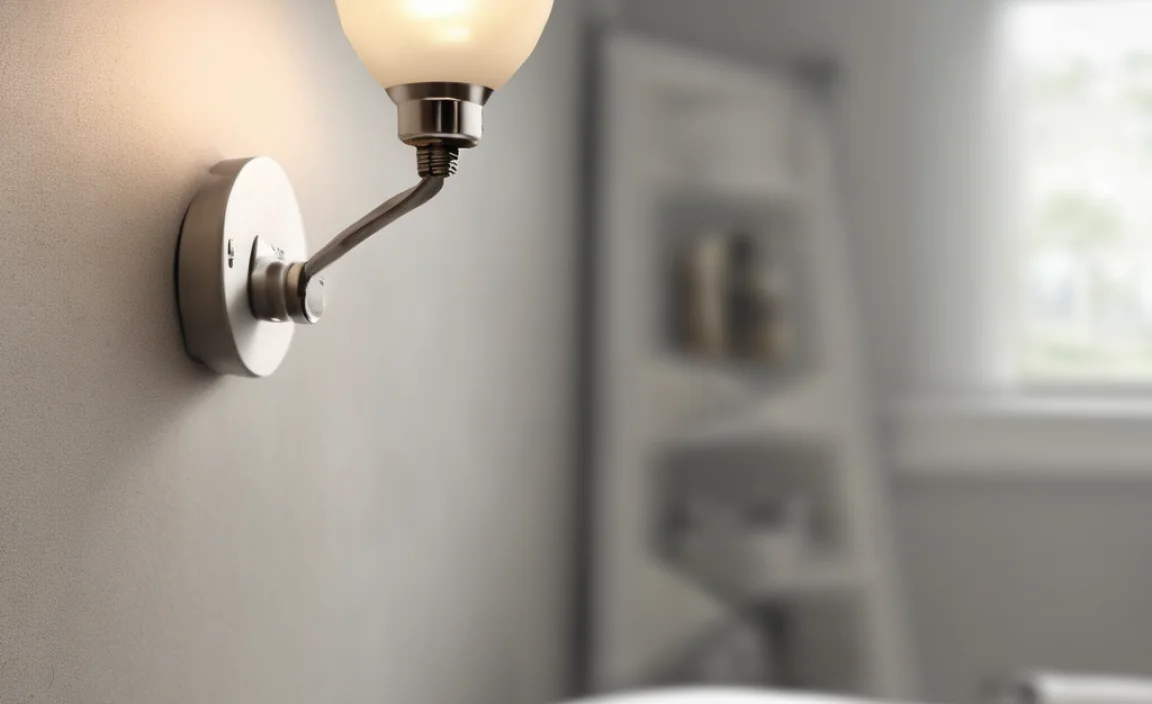
Attaching the light to the ceiling is the last big step in how to install bathroom light fixture junction box. You’ve already connected the wires and tucked them into the junction box. You’ve also attached the mounting bracket to the junction box. Now it’s time to put the light fixture in place. Carefully lift the light fixture up to the mounting bracket. Line up the holes in the light fixture with the holes in the mounting bracket. Use screws to attach the light fixture to the mounting bracket. Make sure the screws are tight. The light fixture should be securely attached to the ceiling. It shouldn’t be wobbly or loose. If the light fixture has a cover or a shade, attach it according to the instructions. Now you’re almost done. Just a few more steps to go!
- Lift the light fixture to the mounting bracket.
- Line up the holes.
- Use screws to attach the fixture.
- Tighten the screws.
- Attach the cover or shade.
- Make sure the fixture is secure.
Before you turn the power back on, take one last look at the light fixture. Make sure everything is in place and securely attached. Check the wires again. Make sure they are not sticking out or getting in the way. Make sure the wire nuts are tight. If everything looks good, you’re ready to turn the power back on. Go to the breaker box and turn the breaker back on. Now, flip the switch and see if the light works. If the light turns on, congratulations! You’ve successfully installed a new light fixture. If the light doesn’t turn on, don’t worry. Check the connections again. Make sure the wires are connected correctly. Make sure the bulb is working. If you’re still having trouble, ask a grown-up for help. Remember all the steps you’ve learned about how to install bathroom light fixture junction box.
Fun Fact or Stat: Some light bulbs can last for up to 25,000 hours. That’s almost three years!
What if the Light Fixture Is Too Heavy?
Imagine you’re trying to lift a giant teddy bear. It’s too heavy for you to lift by yourself. The same goes for a light fixture. Some light fixtures can be very heavy. If the light fixture is too heavy for you to lift safely, ask a grown-up for help. They can help you hold the light fixture in place while you attach it to the ceiling. You can also use a ladder to support the light fixture while you’re working. Just be careful not to overload the ladder. Make sure it’s stable and can support the weight of the light fixture. Working with a heavy light fixture can be challenging, but with a little help and the right tools, you can do it safely. Asking for help with heavy items is a smart part of learning how to install bathroom light fixture junction box.
How Do I Make Sure the Screws Are Tight?
Imagine you’re building a tower out of blocks. If the blocks are not stacked tightly, the tower will wobble and eventually fall down. The same goes for the screws that hold the light fixture to the ceiling. If the screws are not tight, the light fixture will wobble and could eventually fall down. To make sure the screws are tight, use a screwdriver that’s the right size for the screws. Turn the screwdriver until the screws are snug. Don’t overtighten the screws. Overtightening can damage the screws or the light fixture. Check the light fixture to make sure it’s securely attached to the ceiling. It shouldn’t be wobbly or loose. Tightening the screws correctly is important for safety and for making sure the light fixture stays in place. Making sure everything is tight is a key step as you learn how to install bathroom light fixture junction box.
What if the Light Fixture Still Wobbles?
Even after you’ve tightened the screws, the light fixture might still wobble a little bit. It’s like trying to balance a wobbly table. It can be frustrating! Don’t worry, there are a few things you can do. First, check the mounting bracket. Make sure it’s securely attached to the junction box. If the mounting bracket is loose, tighten the screws that hold it in place. Second, check the screws that hold the light fixture to the mounting bracket. Make sure they are tight. If the screws are stripped, you might need to replace them. Third, add shims between the light fixture and the ceiling. Shims are small pieces of wood or plastic that can help to stabilize the light fixture. If you’re still having trouble, ask a grown-up for help. They might have more experience and be able to help you troubleshoot the problem. Dealing with a wobbly light fixture is a common challenge when learning how to install bathroom light fixture junction box.
Testing the New Light Fixture
The moment of truth is here in your journey of how to install bathroom light fixture junction box! You’ve done all the hard work. You’ve connected the wires, attached the light fixture to the ceiling, and made sure everything is secure. Now it’s time to see if it works. Go to the breaker box and turn the breaker back on. Then, flip the switch and watch what happens. If the light turns on, hooray! You’ve successfully installed a new light fixture. Give yourself a pat on the back. If the light doesn’t turn on, don’t be discouraged. Something might have gone wrong. The most important thing is to stay safe. Turn the breaker back off before you start troubleshooting. Then, carefully check all the connections. Make sure the wires are connected correctly. Make sure the wire nuts are tight. Make sure the bulb is working. If you’re still having trouble, ask a grown-up for help. They might be able to spot the problem and help you fix it.
- Turn the breaker back on.
- Flip the light switch.
- See if the light turns on.
- If it works, celebrate!
- If not, turn the breaker off and check the connections.
- Ask for help if needed.
If the light turns on but it’s flickering or dim, there might be a problem with the wiring. Turn the breaker back off and check the connections again. Make sure the wires are securely connected and the wire nuts are tight. If the light is still flickering or dim, you might need to call an electrician. An electrician is a professional who specializes in electrical work. They can diagnose and fix any electrical problems you might have. Working with electricity can be dangerous, so it’s always best to call an electrician if you’re not sure what to do. Remember safety comes first. Now, you know how to test your work and can safely say you’ve mastered how to install bathroom light fixture junction box.
Fun Fact or Stat: The sun is the biggest light source in our solar system. It’s about 109 times wider than the Earth!
What if the Light Bulb Doesn’t Work?
Sometimes, the simplest solution is the right one. If the light doesn’t turn on, the first thing to check is the light bulb. Make sure the light bulb is screwed in tightly. If the light bulb is loose, it might not make contact with the socket. If the light bulb is still not working, try replacing it with a new light bulb. Light bulbs can burn out over time. If the new light bulb works, then the old light bulb was the problem. If the new light bulb doesn’t work, then there might be a problem with the wiring or the light fixture. In that case, you’ll need to troubleshoot the problem further. Checking the light bulb is the easiest way to start troubleshooting a light fixture that’s not working. It’s an important part of what to do after you’ve learned how to install bathroom light fixture junction box.
What if the Light Switch Doesn’t Work?
Imagine you’re trying to turn on a TV, but the remote control is not working. You might need to replace the batteries in the remote control. The same goes for a light switch. If the light switch is not working, it might be broken. Light switches can wear out over time. If the light switch is broken, you’ll need to replace it. Replacing a light switch is a relatively simple task, but it’s important to turn off the power before you start. You can also ask a grown-up for help. If you’re not comfortable replacing the light switch yourself, you can call an electrician. If the light switch is working but the light still doesn’t turn on, there might be a problem with the wiring or the light fixture. Knowing how to check and replace a light switch is a useful skill for any home owner who has just learned how to install bathroom light fixture junction box.
When Should I Call an Electrician?
Working with electricity can be dangerous. If you’re not sure what you’re doing, it’s always best to call an electrician. An electrician is a professional who specializes in electrical work. They have the training and experience to diagnose and fix any electrical problems you might have. You should call an electrician if you see any signs of electrical problems, such as flickering lights, sparking outlets, or burning smells. You should also call an electrician if you’re planning to do any major electrical work, such as wiring a new room or installing a new electrical panel. It’s always better to be safe than sorry when it comes to electricity. Calling an electrician is a smart decision if you’re not comfortable doing the work yourself. Electricians know how to install bathroom light fixture junction boxes safely.
Summary
Installing a bathroom light fixture can seem hard. But, it’s easier if you follow the right steps. First, always turn off the power. This keeps you safe from getting shocked. Next, remove the old light fixture. Be careful with the wires. Then, prepare the new light fixture. Check all the parts and read the instructions. Now, connect the wires correctly. Black to black, white to white, and green to green. Use wire nuts to keep them tight. Attach the light fixture to the ceiling. Make sure it’s secure. Finally, test the new light fixture. Turn the power back on and flip the switch. If it works, great job! If not, check the connections again. Learning how to install bathroom light fixture junction box can be a fun and useful skill. Remember to always be safe and ask for help if you need it.
Conclusion
You did it! You now know how to install bathroom light fixture junction box. Remember, safety is the most important thing. Always turn off the power first. Take your time and follow the steps carefully. If you’re not sure about something, ask a grown-up or an electrician for help. With a little practice, you’ll be able to install light fixtures like a pro. Enjoy your newly lit bathroom!
Frequently Asked Questions
Question No 1: Why is it important to turn off the power before I start?
Answer: Turning off the power is super important because electricity can be dangerous. If you touch a live wire, you could get a shock. A shock can hurt you badly. It can even stop your heart. Turning off the power is like putting on a seatbelt in a car. It protects you from getting hurt. Always double-check that the power is off by using a voltage tester. This tool will tell you if there is still electricity in the wires. Never take a chance when it comes to electricity. Safety should always be your first concern when thinking about how to install bathroom light fixture junction box.
Question No 2: What is a junction box and why do I need it?
Answer: A junction box is a special box that holds electrical connections. It’s usually made of metal or plastic. The junction box protects the wires and keeps them from getting damaged. It also helps prevent fires. Without a junction box, the wires could be exposed and dangerous. The junction box is like a helmet for the wires. It keeps them safe and sound. You need a junction box whenever you make electrical connections. It’s an important part of your home’s electrical system. Always make sure the junction box is securely attached to the wall or ceiling. This box is essential to know about when learning how to install bathroom light fixture junction box.
Question No 3: How do I know which wires to connect together?
Answer: Wires are usually