Have you ever looked at a piece of furniture and wished you could fix its little bumps and holes? It can be frustrating to see those imperfections. But what if I told you there’s a simple way to make wood filler using sawdust? This easy method might change how you view repairs.
Making wood filler with sawdust can be fun and rewarding. Imagine turning leftover materials into something useful! Not only does this help your projects look better, but it also reduces waste. Curious how it works?
Using sawdust to create your own wood filler is like crafting a secret recipe. You mix sawdust with a binder to form a paste. It’s surprisingly easy! Plus, you get to use materials you already have. This approach is perfect for DIY enthusiasts and anyone who loves keeping things tidy.
So, why buy expensive fillers when you can make your own? Let’s dive in and discover how to make wood filler with sawdust. You’ll be amazed at how simple and effective it really is!
How To Make Wood Filler With Sawdust: A Simple Guide

How to Make Wood Filler with Sawdust
Making wood filler with sawdust is easy and cost-effective. You can turn leftover sawdust into a handy solution for filling holes and cracks in wood. Start by mixing sawdust with a strong adhesive, such as glue or epoxy. This creates a paste that matches your wood’s texture. Did you know this simple trick can save money and reduce waste? It’s a great way to fix furniture and keep your home looking sharp!Understanding Wood Filler
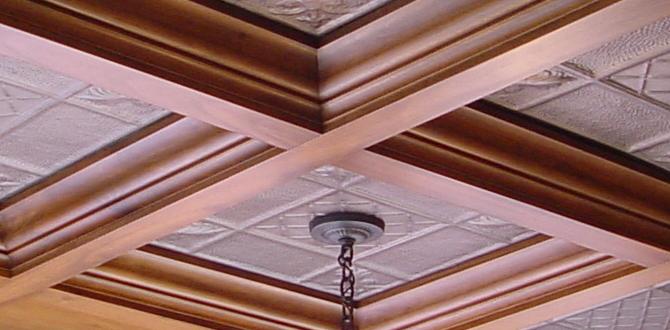
Definition and purpose of wood filler. Common uses in woodworking and repair.Wood filler is a material used to repair damage in wood. It helps fill holes, cracks, and scratches. The purpose of wood filler is to make wood surfaces smooth and flawless. You can find it in many places, especially in woodworking and restoration projects.
- Repairing furniture
- Fixing wooden floors
- Completing DIY projects
Using wood filler makes your projects look professional. It’s an easy way to fix mistakes and damage. Remember, a great finish starts with a clean surface.
What is wood filler used for?
Wood filler is used to fix holes, cracks, and dents in wood. It is commonly used in furniture repair, flooring, and various craft projects.
Why Use Sawdust for Wood Filler?
Advantages of using sawdust over commercial fillers. Environmental benefits and costeffectiveness.Using sawdust for wood filler has many great benefits. Unlike commercial fillers, sawdust is cheap and easy to find. It helps keep waste out of landfills. You can make it right at home. This saves money and protects the environment. Here are some reasons to choose sawdust:
- Cost-effective solution
- Environmentally friendly
- Easy to match wood color
- Reduces waste
What are the environment benefits of sawdust wood filler?
Using sawdust wood filler is great for the environment. It reduces waste by using scrap wood. This helps keep our planet cleaner. By recycling sawdust, we can lower pollution levels. It is a win-win for everyone!
Gathering Materials for Homemade Wood Filler
Required materials: sawdust, glue/type of adhesive. Optional additives for color matching and durability.To make homemade wood filler, first gather your materials. You will need:
- Sawdust: Collect fine sawdust. It can come from woodworking projects.
- Glue: Use a strong adhesive like wood glue or epoxy.
- Stain for color
- Paint for a finish
What are the key materials for wood filler?
The most important materials for wood filler are sawdust and glue. These help create a paste that fills gaps and cracks in wood.
Step-by-Step Instructions to Create Wood Filler
Detailed process from mixing to application. Tips for achieving the right consistency.First, gather your materials. You’ll need sawdust, a wood glue like PVA, and a mixing container. Start by mixing equal parts sawdust and glue in the container. Use a stick to blend them into a thick paste. If it’s too thick, add a little more glue. If it’s too runny, sprinkle in more sawdust. Aim for a smooth peanut butter-like consistency—delicious, right?
Once mixed, use a putty knife to fill any holes or cracks in your wood. Make sure it fits snugly! Don’t forget to let it dry completely before sanding it smooth. A tip: if it looks a bit off, don’t worry! You can always paint over it later. Happy filling!
Color Matching Your Wood Filler
Techniques for coloring the filler to match different wood types. Suggestions for staining and finishing after application.To match your wood filler with different wood types, you can use simple coloring techniques. Start by mixing the filler with stains or paint that resemble the wood’s color. Test a small amount first to see how it looks once dried. After applying the filler, finish with matching stain or varnish to enhance the look. Here are some tips:
- Use water-based stains for lighter woods.
- Oil-based stains can give a deeper color for darker woods.
- Apply a clear finish for added shine.
How can I color my wood filler effectively?
You can easily color your wood filler by mixing it with stains or paint. Always test colors on a scrap piece first.
Troubleshooting Common Issues
Problemsolving for cracking and shrinkage. Advice on adjusting application techniques.Cracking and shrinkage can ruin your wood filler results. To solve these issues, remember these tips. First, apply the filler thicker for better results. Allow time to dry fully in a cool, dry space. If you see cracks, simply add more filler. Mixing the right amount of sawdust can help, too.
- Use the right ratio of sawdust to glue.
- Apply in thin layers to prevent cracking.
- Sand lightly between layers for a smooth finish.
What is the best way to fix cracking in wood filler?
The best way to fix cracking is to fill the crack again with more wood filler and let it dry completely.
How can I prevent shrinkage in wood filler?
Prevent shrinkage by applying the filler in thinner layers and allowing it to dry slowly.
Application Techniques for Best Results
Proper methods for applying wood filler to various surfaces. Tools that enhance the application process.To get the best out of your wood filler, start with a clean surface. Remove any dirt or old finish that might be lurking. Apply the filler using a putty knife for a smooth spread. Make sure to push it into any cracks like you’re filling your friend’s voids with compliments! For extra help, use a small brush or sponge to reach tricky spots.
| Tool | Purpose |
|---|---|
| Putty Knife | Smooth and spread filler easily |
| Brush | Reach into small cracks |
| Sponge | Apply filler to uneven surfaces |
Let the filler dry completely and then sand it down. This makes it look as good as new! Remember, patience is key. If you rush it, the results might end up as bumpy as a rollercoaster ride. Keep it neat, and you’ll impress all your woodworking friends!
Maintenance of Filled Wood Surfaces
Best practices for sanding, finishing, and sealing. Longterm care tips for durability and aesthetics.To keep filled wood surfaces looking great, follow some easy steps. First, let the wood filler dry completely. Then, sanding helps smooth the area. Use fine sandpaper for best results. After sanding, apply a finish to protect the wood. This makes it shine and last longer. For long-term care:
- Wipe surfaces regularly to remove dust.
- Avoid direct sunlight which can fade colors.
- Apply a sealant every few years for extra protection.
These tips will help your wood stay beautiful and strong!
How can I repair filled wood surfaces?
To repair filled wood surfaces, sand down the area, reapply wood filler, and finish. Repeat this process to maintain a smooth appearance. Regular care improves durability.
Conclusion
In conclusion, making wood filler with sawdust is simple and effective. You mix sawdust with glue or water to create a paste. This filler can fix cracks or holes in wood smoothly. Remember to match the color to your project. Now that you know, gather your materials and try it out! For more tips, keep exploring woodwork resources.FAQs
Sure! Here Are Five Related Questions On The Topic Of Making Wood Filler With Sawdust:Sure! To make wood filler with sawdust, you mix sawdust with glue or wood glue. First, collect the sawdust from your woodworking. Then, pour a little glue in a bowl. Next, add the sawdust and stir it until it forms a thick paste. You can use this paste to fill holes or cracks in wood.
Sure! Just give me the question you’d like me to answer, and I’ll help you with it.
What Materials Do I Need To Make Wood Filler Using Sawdust?To make wood filler with sawdust, you need three things. First, collect sawdust from wood. Next, get some glue, like white glue or wood glue. Finally, you may want a small container to mix everything in. You mix sawdust and glue until it’s a paste.
How Do I Choose The Right Type Of Sawdust For Creating Effective Wood Filler?To choose the right sawdust for wood filler, you want to pick sawdust that matches your wood type. This makes the filler blend in better. Use fine sawdust, not big chunks, for a smooth mixture. You can mix it with glue to make it stick well. Remember, testing it on a small piece first can help.
What Are The Steps To Mix Sawdust With A Binder To Create A Wood Filler?To make wood filler, first collect some sawdust. You can get this from sanding wood. Next, add a binder, which is a sticky substance that helps hold everything together. Mix them well in a bowl until they blend smoothly. Finally, you can add a little water if it’s too dry. Now your wood filler is ready to use!
Can I Add Color To My Homemade Wood Filler, And If So, How?Yes, you can add color to your homemade wood filler! You can use food coloring, paint, or crayons. Just mix a little color into the filler until you get the shade you want. Make sure to mix it well so the color is even. Test it on a small piece of wood first to see how it looks!
How Do I Apply And Sand The Sawdust Wood Filler For The Best Finish?First, use a putty knife to apply the sawdust wood filler. Spread it smoothly over the holes or cracks. Let it dry completely. Then, use fine sandpaper to gently smooth the surface. Wipe off the dust, and you’ll get a nice finish!