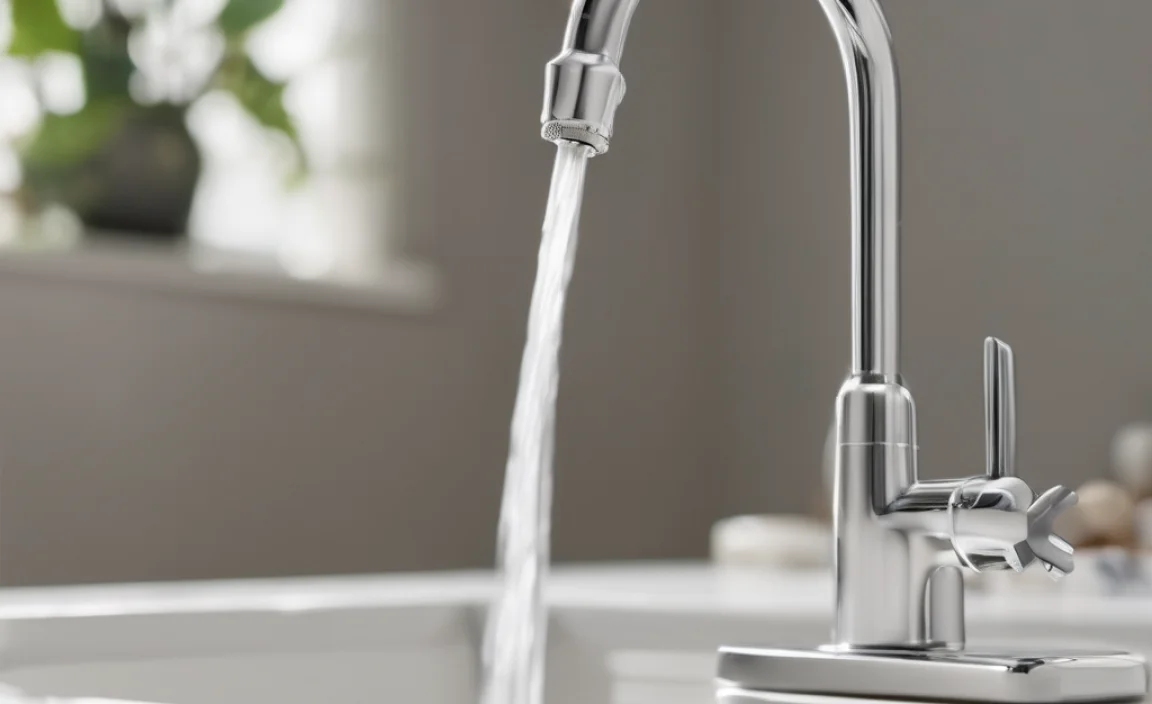
Do you know how to keep your pipes from freezing? Winter can be a tough time for your home. Cold weather can cause big problems. One common issue is frozen pipes. When water freezes, it expands. This can crack or break your pipes. Learning how to put on faucet cover can help. It’s a simple way to protect your home.
Have you ever wondered why some homes have faucet covers? These little covers can make a big difference. They help keep the cold out. This stops your outdoor faucets from freezing. Using them is easy and can save you money. Let’s learn how to put on faucet cover to prevent damage.
Imagine waking up to no water in your home. A burst pipe can cause a lot of trouble. It can also cost a lot to fix. Taking a few minutes to install faucet covers can prevent this. It is a small step that gives you peace of mind. So, let’s find out how to put on faucet cover the right way.
Key Takeaways
- Using faucet covers is a simple way to prevent frozen pipes.
- Knowing how to put on faucet cover protects your outdoor faucets.
- Faucet covers insulate faucets and stop them from freezing in winter.
- Inspect your faucets for leaks before installing any faucet covers.
- Putting on faucet covers is a cost-effective way to avoid costly repairs.
Understanding Why to Put on Faucet Cover
Protecting your outdoor faucets from freezing is super important. When water freezes, it grows bigger. This can make your pipes burst. Burst pipes can cause lots of damage and cost a lot to fix. Using a faucet cover is like giving your faucet a warm coat. It keeps the cold air away from the faucet. This helps stop the water inside from freezing. It’s a simple thing you can do to help keep your home safe and dry all winter long. Faucet covers are easy to find at most hardware stores. They come in different shapes and sizes. So, you can find one that fits your faucets. Learning how to put on faucet cover is a valuable skill for every homeowner.
- Frozen pipes can cause major water damage.
- Faucet covers provide insulation against the cold.
- Covers help to prevent pipes from bursting.
- Protecting faucets saves money on repairs.
- They are a simple, effective winter precaution.
Think of a faucet cover as a cozy blanket for your outdoor spigot. It’s designed to trap air and create a barrier between the freezing outdoor temperatures and the water inside your pipes. This insulation is what prevents the water from getting cold enough to freeze. Choosing the right type of faucet cover is also important. Some are made of foam, while others are made of insulated fabric. Make sure you pick one that fits snugly around your faucet. This will give you the best protection. Taking this simple step can save you from dealing with a big, messy, and expensive problem later on. You will be glad you learned how to put on faucet cover.
Fun Fact or Stat: A burst pipe can release hundreds of gallons of water, causing thousands of dollars in damage in just a few hours!
Why Are Outdoor Faucets at Risk?
Outdoor faucets are very prone to freezing. They are right out in the cold air. Unlike indoor pipes, they don’t have the warmth of your house to protect them. When the temperature drops below freezing, the water in these faucets can freeze quickly. This is why it’s so important to take extra care of them. Using a faucet cover is a really easy way to protect them. It acts like a shield against the cold. Regular checks can also help you catch any leaks. Even a small drip can freeze and cause big problems. So, take a few minutes to protect your outdoor faucets. It can save you a lot of trouble later. Learning how to put on faucet cover is worth the effort.
How Does Insulation Prevent Freezing?
Insulation is like a warm coat for your pipes. It keeps the cold air out and the warm air in. This helps stop the water in your pipes from freezing. Faucet covers are made of insulating materials like foam or fiberglass. These materials trap air and create a barrier. This barrier slows down the transfer of heat. So, the cold air outside can’t easily reach the water in your faucet. Good insulation is key to preventing frozen pipes. It keeps the temperature inside the pipes above freezing. This is why how to put on faucet cover correctly is so important. It ensures the best possible insulation.
What Happens When Pipes Freeze?
When water freezes, it does something amazing: it expands. This means it takes up more space. If the water inside your pipes freezes, it pushes against the sides of the pipe. Since the pipe can’t stretch, it can crack or even burst. This can cause a lot of damage to your home. Water can leak everywhere, ruining walls, floors, and furniture. Fixing a burst pipe can be very expensive. That’s why preventing pipes from freezing is so important. Taking steps like using faucet covers can save you a lot of money and trouble. Knowing how to put on faucet cover can make all the difference.
Choosing the Right Type of Faucet Cover
There are many different kinds of faucet covers you can use. Some are made of foam. Others are made of insulated fabric. The best one for you depends on where you live and how cold it gets. Foam covers are usually cheaper and easier to use. They slip right over your faucet. Fabric covers often have straps or Velcro to hold them in place. These can provide better insulation in very cold areas. Look for covers that fit snugly around your faucet. A tight fit helps keep the cold air out. No matter which type you choose, using a faucet cover is a smart way to protect your pipes. Think about the weather in your area when you choose. Learning how to put on faucet cover also means picking the right cover.
- Foam covers are affordable and simple to install.
- Fabric covers offer extra insulation for colder climates.
- Choose a cover that fits your faucet snugly.
- Check the cover’s insulation rating for effectiveness.
- Consider the typical winter temperatures in your area.
Before you buy a faucet cover, take a look at your outdoor faucets. Are they a standard size? Or are they larger or have a unique shape? Knowing this will help you choose the right cover. Some covers are designed for specific types of faucets, like those with vacuum breakers. A vacuum breaker stops water from flowing backward into your pipes. If your faucet has one, make sure the cover you choose will fit over it. Also, think about how easy the cover is to install and remove. You’ll want something that you can put on and take off quickly. This makes it easier to check your faucets for leaks or problems. Make sure you understand how to put on faucet cover for the one you chose.
Fun Fact or Stat: Some faucet covers are even heated to provide extra protection in extremely cold temperatures!
Foam Faucet Covers
Foam faucet covers are a popular choice. They are light and easy to use. You can find them at most hardware stores. They usually cost less than other types of covers. Foam covers slip right over your faucet. They provide a basic level of insulation. This can be enough to protect your pipes in areas with mild winters. However, foam covers may not be the best choice if you live in a very cold place. They may not provide enough insulation to prevent freezing. Make sure the foam cover fits snugly. A loose fit will let cold air in. Despite their simplicity, foam covers are an effective way to start protecting your faucets. You will learn how to put on faucet cover with foam easily.
Insulated Fabric Faucet Covers
Insulated fabric faucet covers offer more protection. They are made with thicker materials. These materials trap more air and provide better insulation. Fabric covers often have straps or Velcro. This helps you secure them tightly to the faucet. This snug fit keeps cold air out. Fabric covers are a good choice if you live in an area with very cold winters. They can withstand lower temperatures. They are often a bit more expensive than foam covers. But the extra protection is worth it if you want to avoid frozen pipes. It’s important to choose a fabric cover that is waterproof. This will keep moisture from seeping in and freezing. Learning how to put on faucet cover with fabric is a good investment.
Faucet Cover Materials Comparison
When choosing a faucet cover, consider the materials. Foam is lightweight and inexpensive. It offers basic insulation. Insulated fabric is more durable and provides better protection. It’s important to know what your options are. Think about the weather in your area. This will help you decide which material is best for you. Some covers also have reflective surfaces. These can help to reflect sunlight and keep the faucet warmer. Consider all the features when you make your choice. You want to ensure your faucets are well-protected all winter long. Knowing how to put on faucet cover starts with picking the right material.
Step-by-Step Guide: How to Put on Faucet Cover
Putting on a faucet cover is easy. First, gather your supplies. You’ll need the faucet cover and maybe some tape. Make sure the faucet is turned off. Check for any leaks. If you see a leak, fix it before you put on the cover. Now, simply slip the cover over the faucet. If it’s a foam cover, it should fit snugly. If it’s a fabric cover, use the straps or Velcro to secure it. Make sure the cover is tight against the wall. This helps keep cold air out. That’s it! You’ve just protected your faucet from freezing. Remember to check the cover regularly. Make sure it’s still in place and in good condition. Learning how to put on faucet cover is easy with these steps.
- Gather your faucet cover and any needed tape.
- Turn off the faucet and check for leaks.
- Slip the cover over the faucet.
- Secure the cover using straps or Velcro.
- Ensure a tight fit against the wall.
- Check the cover regularly for damage.
Before winter arrives, take a few minutes to inspect your outdoor faucets. Look for any cracks or damage. Replace any worn-out parts. This will help ensure your faucets are in good working order. Once you’ve checked the faucets, clean them off. Remove any dirt or debris. This will help the faucet cover fit better. When you put on the cover, make sure it covers the entire faucet. Pay special attention to the base of the faucet where it connects to the wall. This is a common spot for cold air to get in. By taking these extra steps, you can be sure your faucets are well-protected all winter long. Follow these steps to learn how to put on faucet cover properly.
Fun Fact or Stat: Properly installed faucet covers can raise the temperature inside the faucet by several degrees, preventing freezing!
Preparing the Faucet for Cover Installation
Before you put on the faucet cover, you need to get the faucet ready. First, turn off the water to the outdoor faucet. This will stop any leaks while you work. Next, check the faucet for any problems. Look for cracks, leaks, or broken parts. If you find anything, fix it before you put on the cover. Clean the faucet with a cloth. Remove any dirt or debris. This will help the cover fit better. Make sure the faucet is dry before you put on the cover. Water can freeze inside the cover. Taking these steps will help ensure your faucet is well-protected. It will also make the cover work better. This is a key part of how to put on faucet cover.
Attaching the Faucet Cover Securely
Once the faucet is ready, it’s time to put on the cover. Start by slipping the cover over the faucet. Make sure it covers the entire faucet. Pay close attention to the base of the faucet. This is where it connects to the wall. If the cover has straps or Velcro, use them to secure it. Tighten the straps so the cover fits snugly. A tight fit will keep cold air out. If the cover doesn’t have straps, you can use tape. Wrap the tape around the cover to hold it in place. Make sure the tape is waterproof. This will keep it from coming loose in the rain or snow. Securing the cover tightly is important. It will keep your faucet safe from freezing. This is an important step in how to put on faucet cover.
Ensuring a Snug Fit for Maximum Protection
The key to a good faucet cover is a snug fit. A loose cover will let cold air in. This can still cause your faucet to freeze. Make sure the cover fits tightly against the wall. There should be no gaps or openings. If you see any gaps, fill them with tape or extra insulation. You can use foam or fabric scraps. The goal is to create a barrier against the cold. Check the cover regularly throughout the winter. Make sure it’s still in place and in good condition. If you notice any damage, replace the cover right away. A little bit of effort can make a big difference. It can help protect your faucets from freezing all winter long. You will be glad you learned how to put on faucet cover properly.
Maintaining Your Faucet Covers
Your faucet covers need some care too. Check them regularly for damage. Look for tears, cracks, or holes. If you find any, replace the cover. A damaged cover won’t protect your faucet. Make sure the cover is clean. Dirt and debris can reduce its effectiveness. Wipe it down with a damp cloth. If the cover gets wet, let it dry completely. Moisture can freeze inside the cover. This can make the problem worse. Store your faucet covers in a dry place during the summer. This will help them last longer. Taking care of your faucet covers is easy. It will help them protect your faucets for many winters. Maintenance is key to how to put on faucet cover and keep it working.
- Inspect covers regularly for tears or damage.
- Clean covers to remove dirt and debris.
- Dry covers thoroughly if they get wet.
- Store covers in a dry place during summer.
- Replace covers when they show wear and tear.
One of the best ways to keep your faucet covers in good shape is to handle them carefully. When you put them on or take them off, avoid pulling or stretching them too much. This can cause them to tear or lose their shape. Also, be careful not to snag them on sharp objects. This can puncture the material and reduce its insulating ability. If you have fabric covers, consider washing them gently by hand. Use a mild soap and let them air dry. This will help remove any dirt or mildew that may have accumulated. By taking these simple precautions, you can extend the life of your faucet covers. You will also ensure they continue to protect your faucets effectively. Follow these tips for how to put on faucet cover and care for it.
Fun Fact or Stat: Some faucet covers are designed to last for 5–10 years with proper care and maintenance!
Checking for Wear and Tear
It’s important to check your faucet covers regularly. Look for any signs of wear and tear. This includes tears, cracks, and holes. Even small damage can reduce the cover’s effectiveness. Pay close attention to the seams and edges. These are common areas for damage to occur. If you find any problems, replace the cover right away. Don’t wait until it’s too late. A damaged cover won’t protect your faucet from freezing. Regular checks will help you keep your faucets safe. It will also save you money on repairs. Taking this step is a key part of how to put on faucet cover and maintain it.
Cleaning Your Faucet Covers
Keeping your faucet covers clean is important. Dirt and debris can build up over time. This can reduce the cover’s ability to insulate. Clean the covers with a damp cloth. Use mild soap if needed. Avoid using harsh chemicals. They can damage the material. Rinse the covers thoroughly with water. Make sure all the soap is gone. Let the covers air dry completely. Don’t put them away wet. Moisture can cause mold and mildew. Clean covers will work better. They will also last longer. Regular cleaning is a simple way to care for your faucet covers. You will learn how to put on faucet cover includes cleaning.
Proper Storage During Off-Season
When the weather warms up, it’s time to remove your faucet covers. But don’t just throw them in a pile. Store them properly to protect them. Clean the covers before you store them. This will remove any dirt or debris. Make sure the covers are completely dry. Store them in a dry place. Avoid storing them in direct sunlight. Sunlight can damage the material. A plastic bin or bag is a good choice. Label the bin so you know what’s inside. Proper storage will help your faucet covers last longer. You will be ready to use them again next winter. This is the final step in how to put on faucet cover and care for it.
Alternative Methods for Faucet Protection
Faucet covers are great. But there are other ways to protect your faucets too. One option is to wrap your faucets with insulation. You can use pipe insulation or even old towels. Just make sure the insulation is secure. Another method is to let your faucets drip slightly. A slow drip can keep the water moving. This prevents it from freezing. However, this can waste water. So, use it only when necessary. You can also install a frost-free faucet. These faucets are designed to prevent freezing. They have a valve inside the house. This keeps the water away from the cold. These are alternatives to how to put on faucet cover.
| Method | Pros | Cons |
|---|---|---|
| Faucet Covers | Easy to install, affordable | May not be enough in extreme cold |
| Insulation Wrap | Good insulation, uses available materials | Can be messy, needs secure attachment |
| Dripping Faucet | Keeps water moving, prevents freezing | Wastes water, may not work in very cold weather |
| Frost-Free Faucet | Best protection, long-lasting | More expensive to install |
If you’re going away for the winter, take extra precautions. Turn off the water to your outdoor faucets completely. Then, open the faucets to drain any remaining water. This will prevent the pipes from freezing and bursting. You can also hire a plumber to winterize your plumbing system. They can add extra insulation and take other steps to protect your pipes. Taking these extra steps can give you peace of mind. You’ll know your home is safe from frozen pipes. These are important considerations beyond just learning how to put on faucet cover.
Fun Fact or Stat: Frost-free faucets can prevent freezing even in temperatures as low as -30°F!
Wrapping Faucets with Insulation
Wrapping your faucets with insulation is another great way to protect them. You can use pipe insulation, foam, or even old blankets. The key is to cover the entire faucet. Make sure the insulation is secure. You can use tape or string to hold it in place. This method works well in combination with faucet covers. It provides an extra layer of protection. It’s also a good option if you don’t have faucet covers. Just make sure the insulation is waterproof. This will prevent it from getting wet and freezing. Learning how to put on faucet cover alternatives can be helpful.
Allowing Faucets to Drip Slowly
Letting your faucets drip slowly can also prevent freezing. Moving water is less likely to freeze. A slow drip can keep the water flowing. This prevents ice from forming. However, this method can waste water. So, use it only when necessary. It’s best to use this method when temperatures are just below freezing. A small drip is all you need. Don’t let the water run too fast. This will waste a lot of water. Check the faucet regularly to make sure it’s still dripping. This method is simple. But it’s not always the most effective. It’s best used in combination with other methods. It is an alternative to how to put on faucet cover.
Installing Frost-Free Faucets
Frost-free faucets are a long-term solution. They are designed to prevent freezing. These faucets have a valve inside your house. This keeps the water away from the cold. When you turn off the faucet, the water drains out. This prevents it from freezing in the pipe. Frost-free faucets are more expensive. But they provide the best protection. They are a good investment if you live in a very cold area. Have a plumber install them for you. This will ensure they are installed correctly. Frost-free faucets can give you peace of mind. You’ll know your faucets are protected all winter long. This is another choice if you can’t figure out how to put on faucet cover.
Summary
Protecting your outdoor faucets from freezing is very important in winter. Frozen pipes can burst and cause expensive damage. Using faucet covers is a simple and effective way to prevent this. There are different types of covers, like foam and insulated fabric. Choose the right one for your climate. Learning how to put on faucet cover involves preparing the faucet, securing the cover tightly, and maintaining it well. Regular checks, cleaning, and proper storage will help your covers last longer. There are also other ways to protect your faucets, like wrapping them with insulation or letting them drip.
For long-term protection, consider installing frost-free faucets. These faucets are designed to prevent freezing. Taking these steps can save you money and trouble. Protect your home from the cold. It is important to learn how to put on faucet cover and other methods. By taking the time to protect your faucets, you can avoid costly repairs. You can also enjoy peace of mind. You will know your home is safe from frozen pipes. Winterizing your faucets is a smart investment.
Conclusion
Protecting your outdoor faucets from freezing is a smart move. It helps prevent costly damage to your home. Faucet covers are an easy and effective solution. Choose the right type of cover for your climate. Install it correctly and maintain it well. You can also use other methods like insulation or frost-free faucets. Knowing how to put on faucet cover is a valuable skill. It can save you money and give you peace of mind. Take the time to winterize your faucets. You will be glad you did when the cold weather arrives.
Frequently Asked Questions
Question No 1: Why is it important to use faucet covers in the winter?
Answer: It’s important to use faucet covers in the winter because they protect your outdoor faucets from freezing. When water freezes, it expands, and this can cause your pipes to burst. Burst pipes can lead to serious water damage in your home, which can be very expensive to repair. Faucet covers act as a barrier, keeping the cold air away from your faucets and preventing the water inside from freezing. Learning how to put on faucet cover is a small step that prevents big problems. They are a simple way to ensure your home stays safe and dry during the cold winter months.
Question No 2: How do I choose the right size faucet cover for my outdoor faucets?
Answer: To choose the right size faucet cover, start by measuring your outdoor faucets. Measure the length and width of the faucet, including any handles or attachments. Then, look for a faucet cover that is slightly larger than your measurements. You want the cover to fit snugly over the faucet without being too tight. A tight fit can make it difficult to install and remove the cover. Check the product description or packaging for size information. Some covers are designed for specific types of faucets. Make sure you select one that is compatible with your faucets. When you know how to put on faucet cover properly, you’ll choose the right size to help!
Question No 3: Can I use a plastic bag instead of a faucet cover?
Answer: While a plastic bag might seem like a quick and easy solution, it’s not a good substitute for a faucet cover. Plastic bags don’t provide enough insulation to protect your faucets from freezing. They can also trap moisture, which can actually make the problem worse. Faucet covers are made from insulating materials like foam or fabric. These materials are designed to keep the cold air out and the warm air in. A plastic bag simply doesn’t offer the same level of protection. So, it’s best to invest in a proper faucet cover for reliable protection. Taking time to learn how to put on faucet cover is the best solution.
Question No 4: How often should I check my faucet covers during the winter?
Answer: It’s a good idea to check your faucet covers regularly during the winter. Aim to check them at least once a month, or more often if you experience extreme cold weather. When you check the covers, look for any signs of damage, such as tears, cracks, or holes. Make sure the covers are still securely attached to the faucets. If you notice any problems, replace the cover right away. Regular checks will help you ensure your faucets are well-protected throughout the winter. Knowing how to put on faucet cover also means knowing how to maintain them.
Question No 5: What other steps can I take to protect my pipes from freezing?
Answer: Besides using faucet covers, there are several other steps you can take to protect your pipes from freezing. One option is to wrap your pipes with insulation. You can use pipe insulation sleeves or heat tape. Another method is to let your faucets drip slightly during very cold weather. This keeps the water moving and prevents it from freezing. You can also seal any cracks or openings in your home’s foundation. This will help keep cold air out. If you’re going away for the winter, turn off the water supply and drain your pipes. These are ways to protect your pipes that complement how to put on faucet cover.
Question No 6: Are there any special faucet covers for specific types of faucets?
Answer: Yes, there are special faucet covers designed for specific types of faucets. For example, some faucets have vacuum breakers, which prevent water from flowing backward into your pipes. You’ll need a faucet cover that is designed to fit over these types of faucets. Also, some faucets are larger or have unique shapes. Look for covers that are specifically designed for these faucets. Check the product description or packaging for information on compatibility. Using the correct cover for your type of faucet is very important. You can learn how to put on faucet cover by reading product descriptions.