Have you ever made a mistake while building something? Maybe you used too much wood filler. Wood filler helps fix holes and cracks in wood. But, what happens if you need to remove wood filler? It can seem tricky, but it’s not impossible. Let’s learn how to remove wood filler and fix our projects!
Key Takeaways
- Knowing how to remove wood filler helps fix mistakes and improve projects.
- Use hand tools like chisels and sandpaper for controlled removal.
- Chemical solvents soften the filler, making removal easier.
- Always wear safety glasses and gloves to protect yourself.
- Take your time to avoid damaging the surrounding wood.
How to Remove Dried Wood Filler
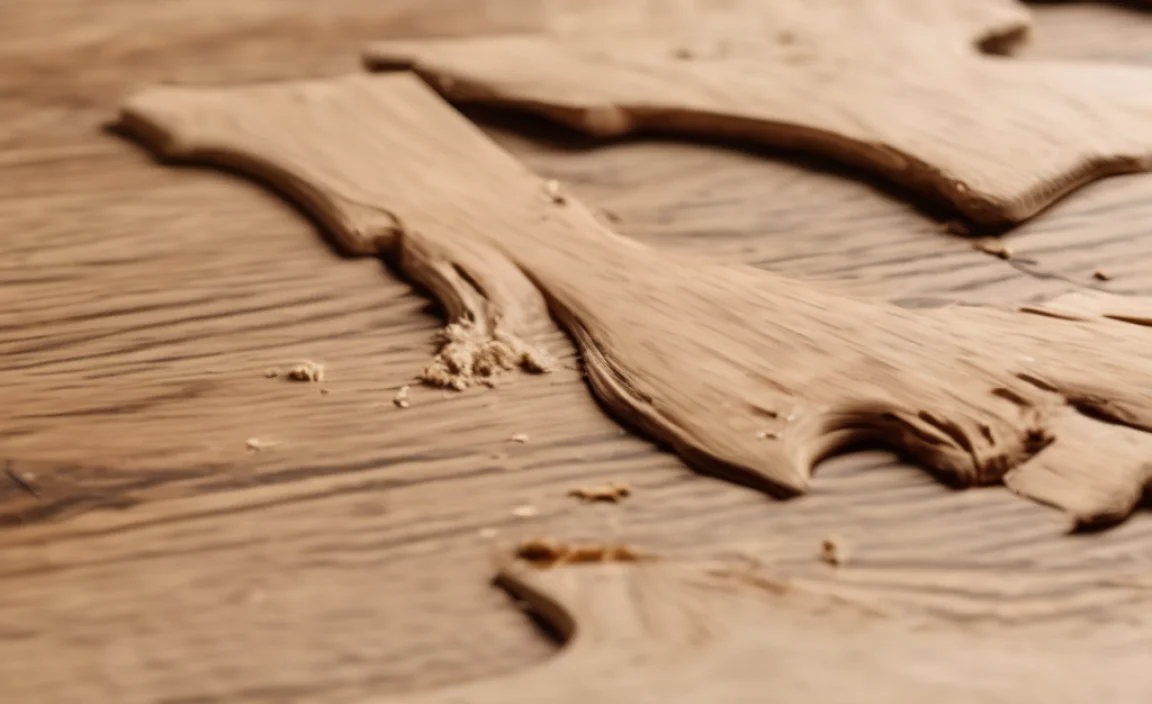
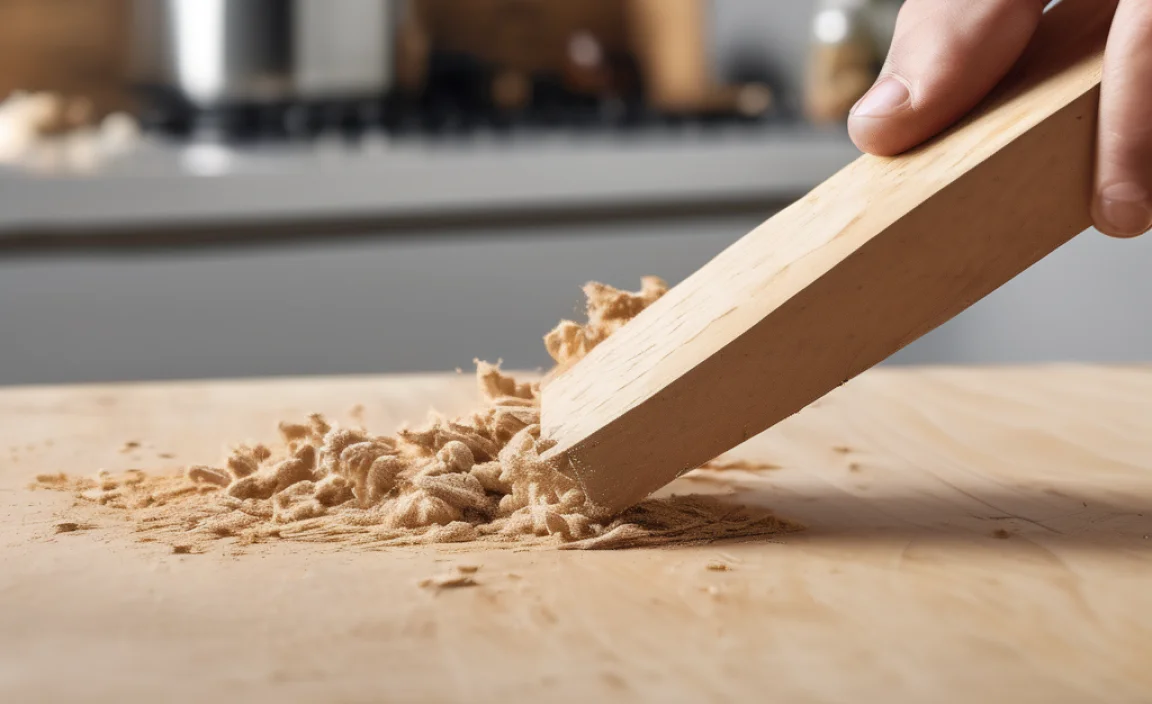
Dried wood filler can be tough to remove. It becomes hard and sticks firmly to the wood. But don’t worry! There are ways to tackle this. You can use tools and a bit of patience. Knowing how to remove wood filler that’s dried will save your projects. It might seem like a big problem now. Imagine you’re building a birdhouse and put too much filler. What do you do? You learn the right steps to fix it. Keep reading to find out the best methods. You will soon be a pro at fixing your woodworking projects!
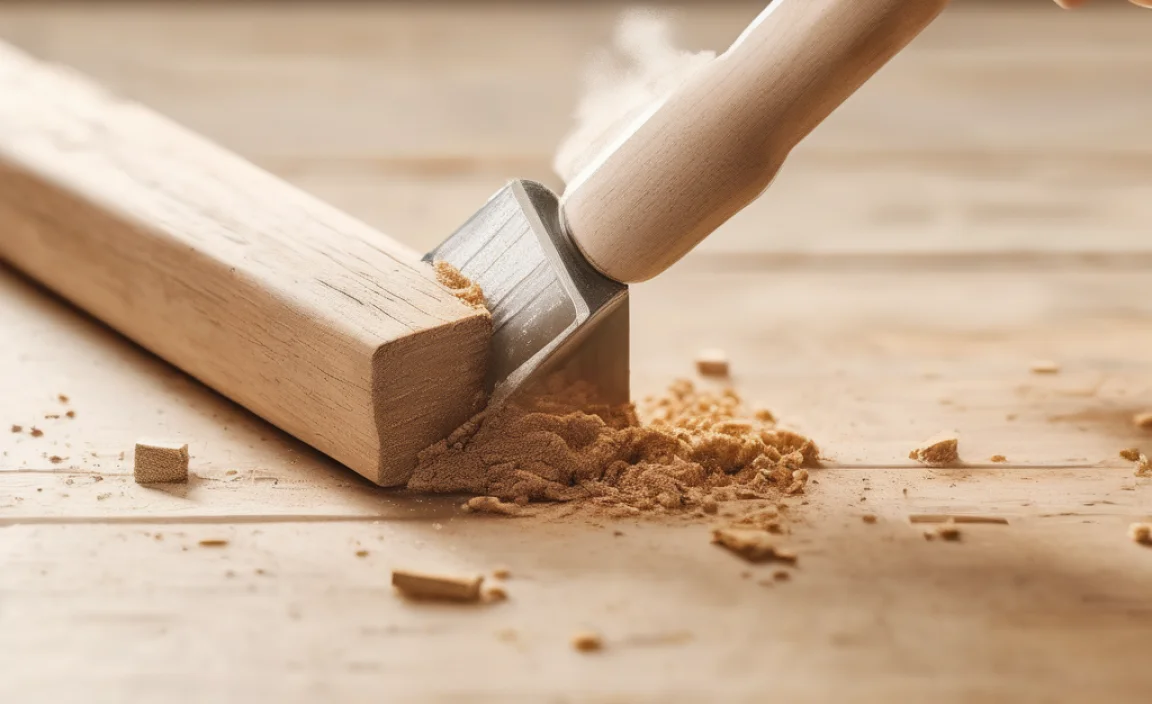
- Use a sharp chisel to carefully chip away the filler.
- Sandpaper helps smooth the area after removing the bulk of the filler.
- A utility knife can score the edges to prevent splintering.
- Heat from a heat gun softens the filler for easier removal.
- Always work slowly and carefully to protect the wood.
Using the right tools makes a big difference. A sharp chisel lets you remove small pieces. Sandpaper helps to smooth the surface. A utility knife can score the edges. This stops the wood from splintering. Applying heat can soften the filler. Remember to go slow! It is important to avoid damaging the wood. Imagine you are carving a statue. You would not rush! You take your time to get it just right. Removing wood filler is the same. Be patient, and you will get great results. Knowing how to remove wood filler is a great skill!
Fun Fact or Stat: Did you know that the type of wood filler you use can affect how hard it is to remove? Some fillers are designed to be very durable, making them more difficult to work with later.
What Tools Do I Need?
Having the right tools is super important. Using the wrong tools can make the job harder. It might even damage the wood. So, what tools should you have? You’ll need a chisel, sandpaper, and a utility knife. A heat gun can also be helpful. Each tool has its own job. The chisel helps to chip away the filler. Sandpaper smoothes the surface. The utility knife scores the edges. The heat gun softens the filler. Make sure your tools are sharp and clean. This will make the work easier and safer. Think of it like cooking. You need the right pots and pans to make a great meal!
Is It Possible to Damage the Wood?
Yes, it is possible to damage the wood. This can happen if you are not careful. Using too much force can cause splinters. Using the wrong tools can also cause damage. That’s why it’s important to take your time. Always work slowly and carefully. Score the edges of the filler first. This will help prevent splintering. Use the right amount of heat. Too much heat can burn the wood. Be patient and check your work often. Imagine you are painting a picture. You would not rush and make mistakes. You would take your time and do it right. Removing wood filler is the same!
How Can I Make the Process Easier?
There are a few ways to make the process easier. First, soften the filler with heat. A heat gun works well for this. Be careful not to burn the wood. Second, use a sharp chisel. A dull chisel will make the job harder. Third, score the edges of the filler. This will prevent splintering. Fourth, work in small sections. This gives you more control. Fifth, use sandpaper to smooth the surface. This will remove any leftover filler. Finally, be patient. Don’t rush. Take your time to do it right. Learning how to remove wood filler is a skill. Like any skill, it takes practice to master.
Fun Fact or Stat: Some professional woodworkers use special solvents to dissolve wood filler. These solvents can make the removal process much faster, but they should be used with caution and proper ventilation.
Using Solvents to Remove Wood Filler
Sometimes, removing wood filler can be tricky. The filler might be too hard or too stuck. That’s when solvents come in handy. Solvents are special liquids that can soften or dissolve the filler. This makes it easier to scrape or wipe away. When you are thinking about how to remove wood filler, consider using the right solvent. It can make the job much simpler. Imagine you have a sticky label on a jar. It’s hard to peel off, right? But if you use a little oil, it comes right off! Solvents work the same way for wood filler. They loosen the filler so you can remove it easily.
- Mineral spirits can soften many types of wood filler.
- Acetone is effective for dissolving certain fillers.
- Always test the solvent in a small, hidden area first.
- Wear gloves and eye protection when using solvents.
- Work in a well-ventilated area to avoid fumes.
- Dispose of used solvents properly according to local rules.
When using solvents, safety is important. Always wear gloves and eye protection. Work in a place with fresh air. This will protect you from the fumes. Test the solvent on a small part of the wood first. This will make sure it doesn’t damage the finish. After applying the solvent, let it sit for a few minutes. This gives it time to soften the filler. Then, use a scraper or cloth to remove the filler. Remember to clean the area well after removing the filler. This will get rid of any solvent left behind. Knowing how to remove wood filler with solvents can be a big help!
Fun Fact or Stat: Different solvents work best on different types of wood filler. Some fillers are water-based, while others are epoxy-based. Always check the filler’s label to choose the right solvent.
What Types of Solvents Can I Use?
Many types of solvents can help remove wood filler. Mineral spirits are a common choice. They work well on many fillers. Acetone is another option. It’s stronger and can dissolve some fillers that mineral spirits can’t. Lacquer thinner can also work. But it’s very strong and should be used with care. Always read the label on the filler. This will tell you which solvents are best. Remember to test the solvent in a small area first. This will make sure it doesn’t damage the wood. Think of it like trying a new food. You take a small bite first to make sure you like it!
How Long Should I Let the Solvent Sit?
The amount of time you let the solvent sit is important. If you don’t let it sit long enough, it won’t soften the filler. If you let it sit too long, it could damage the wood. A good rule is to let it sit for 5-10 minutes. Check the filler to see if it has softened. You should be able to scrape it away easily. If it’s still hard, let the solvent sit a little longer. Keep checking it every few minutes. Remember to work in a well-ventilated area. This will help you avoid breathing in the fumes. Learning how to remove wood filler takes patience.
How Do I Clean Up After Using Solvents?
Cleaning up after using solvents is important. First, remove any leftover solvent. Use a clean cloth to wipe the area. Make sure all the solvent is gone. Next, let the area dry completely. This can take a few hours. Once the area is dry, you can sand it smooth. This will prepare it for refinishing. Dispose of the used solvent properly. Check your local rules for how to do this. Never pour solvents down the drain. This can pollute the water. Think of it like cleaning up after a party. You want to leave everything nice and tidy!
Fun Fact or Stat: Some solvents are made from natural ingredients, like citrus fruits. These solvents are often safer and have a pleasant smell.
Sanding as Part of Wood Filler Removal
Sanding is a key step in how to remove wood filler. It helps smooth the surface after you’ve removed most of the filler. Sanding also helps blend the repaired area with the rest of the wood. Have you ever seen a bumpy road? Sanding is like paving that road. It makes everything smooth and even. When you are thinking about how to remove wood filler, don’t forget the importance of sanding. It’s the finishing touch that makes your project look great. It can turn a messy repair into a professional-looking fix.
- Use different grits of sandpaper for best results.
- Start with a coarse grit to remove the bulk of the filler.
- Switch to a finer grit to smooth the surface.
- Sand in the direction of the wood grain.
- Use a sanding block for even pressure.
- Vacuum up the sanding dust regularly.
Choosing the right sandpaper is important. Use a coarse grit to remove the bulk of the filler. Then, switch to a finer grit to smooth the surface. Always sand in the same direction as the wood grain. This helps avoid scratches. Use a sanding block to apply even pressure. This will help you create a smooth, flat surface. Vacuum up the sanding dust often. This will help you see your progress. It will also keep the dust from getting everywhere. Remember to wear a dust mask when sanding. This will protect your lungs. Learning how to remove wood filler with sanding is a valuable skill!
Fun Fact or Stat: The grit number on sandpaper tells you how many abrasive particles there are per square inch. A lower number means a coarser grit.
What Grit Sandpaper Should I Use?
Choosing the right grit sandpaper is very important. For removing most of the wood filler, start with a coarser grit. Something around 80-grit or 100-grit works well. This will help you quickly remove the bulk of the filler. Once you have removed most of it, switch to a finer grit. Use 120-grit or 150-grit to smooth the surface. For the final smoothing, use an even finer grit. Try 220-grit or 320-grit. This will give you a very smooth finish. Think of it like climbing stairs. You start with big steps and end with small ones.
How Do I Sand Without Damaging the Wood?
Sanding without damaging the wood takes practice. Always sand in the direction of the wood grain. This will help avoid scratches. Use a sanding block to apply even pressure. This will prevent you from sanding too much in one area. Don’t press too hard. Let the sandpaper do the work. Check your work often. This will help you see if you are sanding evenly. If you see scratches, switch to a finer grit sandpaper. Be patient and take your time. Learning how to remove wood filler without damage is key. It will help you achieve a professional finish.
How Do I Clean Up the Sanding Dust?
Cleaning up sanding dust is important for your health. It also helps you see your work better. The best way to clean up sanding dust is with a vacuum cleaner. Use a vacuum with a brush attachment. This will help you get into corners and crevices. You can also use a tack cloth. This is a sticky cloth that picks up dust. Wipe down all the surfaces with the tack cloth. Wear a dust mask while cleaning. This will protect your lungs. Dispose of the dust properly. Don’t just sweep it onto the floor. Think of it like cleaning up after baking. You want to get rid of all the flour!
Fun Fact or Stat: Sanding dust can be flammable. Always dispose of it properly in a sealed metal container.
Using Heat Guns for Filler Removal
Heat guns are useful when you want to learn how to remove wood filler. They soften the filler, making it easier to scrape away. The heat helps break down the filler’s bond with the wood. This makes the removal process much simpler. Imagine you’re trying to spread butter that’s too cold. It’s hard, right? But if you warm it up, it spreads easily. A heat gun does the same thing for wood filler. It warms it up so you can remove it without a struggle. Knowing how to remove wood filler with a heat gun can save you time and effort.
- Use a low heat setting to avoid scorching the wood.
- Keep the heat gun moving to distribute the heat evenly.
- Scrape the softened filler away with a putty knife.
- Wear heat-resistant gloves to protect your hands.
- Work in a well-ventilated area.
- Be careful not to overheat the wood.
When using a heat gun, safety is very important. Always wear heat-resistant gloves to protect your hands. Work in a well-ventilated area to avoid breathing in fumes. Use a low heat setting to avoid scorching the wood. Keep the heat gun moving to distribute the heat evenly. Scrape the softened filler away with a putty knife. Be careful not to overheat the wood. Check the wood often to make sure it’s not getting too hot. Remember, the goal is to soften the filler, not burn the wood. Learning how to remove wood filler with a heat gun can be a great skill!
Fun Fact or Stat: Heat guns can reach temperatures of over 1000 degrees Fahrenheit. Always use caution and follow the manufacturer’s instructions.
How Hot Should the Heat Gun Be?
The temperature of the heat gun is important. You want it hot enough to soften the filler, but not so hot that it burns the wood. A low heat setting is usually best. Start with the lowest setting and increase it slowly. Keep the heat gun moving. Don’t hold it in one spot for too long. This can cause the wood to overheat. Check the filler often to see if it’s softening. If it’s not softening, increase the heat a little. But be careful not to go too high. Think of it like toasting a marshmallow. You want it golden brown, not burnt!
How Do I Protect the Wood from the Heat?
Protecting the wood from the heat is important. Keep the heat gun moving. This will distribute the heat evenly. Don’t hold it in one spot for too long. Use a low heat setting. This will reduce the risk of burning the wood. Check the wood often. If you see it starting to scorch, stop immediately. Let the wood cool down before continuing. You can also use a heat shield. This is a piece of metal that protects the wood from the heat. Be patient and take your time. Learning how to remove wood filler without damaging the wood takes practice.
What Kind of Scraper Should I Use?
The type of scraper you use matters. A putty knife is a good choice. It has a wide, flat blade. This makes it easy to scrape away the softened filler. Make sure the blade is sharp. A dull blade will make the job harder. You can also use a plastic scraper. This will help prevent scratches on the wood. Hold the scraper at an angle. This will help you get under the filler. Apply even pressure. Scrape away the filler in small sections. Be careful not to dig into the wood. Think of it like icing a cake. You want to spread the icing smoothly and evenly.
Fun Fact or Stat: Some heat guns come with different nozzles that can be used to direct the heat to a specific area.
Choosing the Right Method for Filler Removal
Choosing the right method is key when learning how to remove wood filler. Not all methods work for every situation. You need to think about the type of filler. Also, think about the type of wood. Some methods are better for certain fillers or woods. The best way to know how to remove wood filler is to understand your options. Imagine you are choosing a tool for a job. You would not use a hammer to screw in a screw! You would choose the right tool for the job. Removing wood filler is the same. Choose the right method for the best results.
| Method | Best For | Pros | Cons |
|---|---|---|---|
| Chisel and Sandpaper | Small areas, hard filler | Precise, good for detail work | Slow, can damage wood if not careful |
| Solvents | Large areas, soft filler | Quick, effective | Can be messy, requires ventilation |
| Heat Gun | Tough filler, large areas | Softens filler quickly | Can burn wood if not careful |
| Combination | Any filler, any area | Most effective | Takes more time and effort |
Think about the size of the area you need to fix. For small areas, a chisel and sandpaper might be best. For large areas, solvents or a heat gun might be better. Consider the type of filler. Some fillers are easier to remove than others. Some fillers dissolve in solvents. Others need heat to soften. Always test your method in a small, hidden area first. This will help you see if it works. It will also help you avoid damaging the wood. Remember to wear safety glasses and gloves. This will protect you from dust and chemicals. Learning how to remove wood filler safely is very important.
Fun Fact or Stat: Some wood fillers are designed to be permanent and are very difficult to remove without damaging the surrounding wood.
What Type of Wood Filler Was Used?
Knowing what type of wood filler was used is very helpful. Some fillers are water-based. These are often easier to remove. Solvents like mineral spirits can work well. Other fillers are epoxy-based. These are tougher to remove. You might need a heat gun or stronger solvents. Check the label on the filler container. It will tell you what type of filler it is. If you don’t know what type of filler was used, try a small test area. Use different methods to see what works best. Think of it like being a detective. You need to gather clues to solve the mystery!
How Big Is the Area That Needs Repair?
The size of the area matters when choosing a removal method. For small areas, a chisel and sandpaper work well. You can be precise and careful. For large areas, solvents or a heat gun might be better. These methods can remove filler quickly. But they also require more caution. You don’t want to damage the wood. If the area is very large, you might want to use a combination of methods. Start with a heat gun to soften the filler. Then, use a chisel to remove the bulk of it. Finish with sandpaper to smooth the surface. Learning how to remove wood filler efficiently saves time.
What Is the Finish on the Wood?
The finish on the wood can affect your removal method. If the wood has a delicate finish, you need to be extra careful. Solvents can damage some finishes. Test the solvent in a hidden area first. Heat can also damage some finishes. Use a low heat setting and keep the heat gun moving. If the wood has a tough finish, you have more options. You can use stronger solvents or higher heat. But still be careful not to damage the wood. Remember to refinish the wood after removing the filler. This will protect the wood and make it look beautiful. Knowing how to remove wood filler and refinish wood is a great skill!
Fun Fact or Stat: Some woodworkers prefer to use homemade wood filler made from sawdust and wood glue. This type of filler is often easier to remove than commercial fillers.
Safety Tips for Wood Filler Removal
Safety is the most important thing when you learn how to remove wood filler. Working with tools and chemicals can be dangerous. You need to protect yourself from injury. Always wear safety glasses to protect your eyes. Wear gloves to protect your hands. Work in a well-ventilated area to avoid breathing in fumes. Follow all the instructions for the tools and chemicals you use. Knowing how to remove wood filler safely is just as important as knowing how to do it correctly. Imagine you are riding a bike. You would wear a helmet to protect your head, right? Safety is just as important when working with wood filler.
- Always wear safety glasses to protect your eyes.
- Use gloves to protect your hands from chemicals and splinters.
- Work in a well-ventilated area to avoid fumes.
- Read and follow all instructions for tools and chemicals.
- Keep children and pets away from the work area.
- Dispose of waste materials properly.
When using solvents, be extra careful. Solvents can be harmful if swallowed or inhaled. Keep solvents away from heat and flames. They can be flammable. When using a heat gun, be careful not to burn yourself. The heat gun gets very hot. Wear heat-resistant gloves. Keep the heat gun moving to avoid overheating the wood. When sanding, wear a dust mask. Sanding dust can be harmful to your lungs. Clean up the dust regularly with a vacuum cleaner. Remember, safety is always first. Knowing how to remove wood filler safely will help you enjoy your projects more.
Fun Fact or Stat: According to the U.S. Consumer Product Safety Commission, eye injuries are one of the most common types of injuries associated with woodworking projects.
What Safety Gear Do I Need?
You need several pieces of safety gear. Safety glasses are a must. They protect your eyes from flying debris. Gloves protect your hands from chemicals and splinters. A dust mask protects your lungs from sanding dust. Hearing protection is also a good idea. Power tools can be very loud. Heat-resistant gloves are needed when using a heat gun. A well-ventilated area is also important. This will help you avoid breathing in fumes. Think of it like being a superhero. You need the right gear to protect yourself!
How Do I Work Safely with Solvents?
Working safely with solvents is very important. Always work in a well-ventilated area. This will help you avoid breathing in fumes. Wear gloves to protect your hands. Solvents can irritate your skin. Wear safety glasses to protect your eyes. Solvents can splash and cause serious eye damage. Read and follow all instructions on the solvent container. Keep solvents away from heat and flames. They can be flammable. Never mix different solvents together. This can create dangerous fumes. Learning how to remove wood filler with solvents requires care.
How Do I Dispose of Waste Materials Properly?
Disposing of waste materials properly is important for the environment. Check your local rules for how to dispose of solvents and other chemicals. Never pour solvents down the drain. This can pollute the water. Store used solvents in a sealed container. Take the container to a hazardous waste disposal site. Dispose of sanding dust in a sealed bag. This will prevent it from spreading. Dispose of used sandpaper and rags in a trash can. Keep your work area clean. This will help prevent accidents. Think of it like taking care of the planet. We all need to do our part!
Fun Fact or Stat: Many communities have special collection days for hazardous waste. Check with your local government for more information.
Summary
Removing wood filler can seem hard. But with the right tools and methods, it’s easy. First, decide what kind of filler you are dealing with. Then, choose the best method for removal. You can use hand tools like chisels and sandpaper. Solvents can soften the filler. Heat guns can also work. Remember to work safely. Wear safety glasses and gloves. Work in a place with fresh air. Always take your time. Don’t rush. With practice, you’ll be able to fix your woodworking projects. Soon you will be a pro at how to remove wood filler.
Conclusion
Knowing how to remove wood filler is a valuable skill. It allows you to fix mistakes and improve your projects. Remember to choose the right method for the job. Safety is important. Always wear safety glasses and gloves. Whether you use hand tools, solvents, or a heat gun, take your time. Practice makes perfect. With a little effort, you can master the art of wood filler removal. Your woodworking projects will look better than ever!
Frequently Asked Questions
Question No 1: Can I use a regular hair dryer instead of a heat gun?
Answer: No, a hair dryer is not a good substitute for a heat gun. Hair dryers don’t get hot enough to soften wood filler effectively. Heat guns are designed to produce much higher temperatures. This is needed to break down the filler’s bond with the wood. Using a hair dryer will likely be a waste of time. It might even damage the wood if you hold it in one spot for too long. Invest in a heat gun for best results. This will make the job of how to remove wood filler much easier.
Question No 2: What if I don’t know what type of wood filler was used?
Answer: If you don’t know what type of wood filler was used, start with the gentlest method. Try using mineral spirits first. Apply it to a small, hidden area. Let it sit for a few minutes. Then, try to scrape away the filler. If that doesn’t work, try a heat gun on a low setting. Be very careful not to burn the wood. If neither of those methods works, you might need to try a stronger solvent like acetone. Remember to always wear safety glasses and gloves. Knowing how to remove wood filler safely is important. Always test in a small area first!
Question No 3: How do I prevent damaging the surrounding wood?
Answer: Preventing damage to the surrounding wood takes care. Use the right tools for the job. A sharp chisel is better than a dull one. A sanding block helps to distribute pressure evenly. When using solvents, protect the surrounding wood with painter’s tape. This will prevent the solvent from damaging the finish. When using a heat gun, keep it moving. Don’t hold it in one spot for too long. Be patient and take your time. Rushing can lead to mistakes and damage. Careful work is essential for how to remove wood filler without causing harm.
Question No 4: Can I reuse the wood filler I remove?
Answer: No, you should not reuse wood filler that you remove. Once wood filler has dried and been removed, it’s no longer in its original state. It may be contaminated with dust, dirt, or other materials. It may also have lost some of its adhesive properties. Using old wood filler could result in a weaker or less durable repair. It’s always best to use fresh wood filler for the best results. This will ensure a strong and long-lasting repair. Knowing how to remove wood filler properly also means knowing when to use fresh materials.
Question No 5: What should I do if I accidentally get solvent in my eyes?
Answer: If you accidentally get solvent in your eyes, it’s important to act quickly. Flush your eyes with plenty of clean water for at least 15 minutes. Use an eyewash station if one is available. Remove contact lenses if you are wearing them. Seek medical attention immediately. Solvents can cause serious eye damage. Do not rub your eyes. This can make the damage worse. It’s always better to be safe than sorry. Always wear safety glasses when working with solvents. This is a key part of how to remove wood filler safely.
Question No 6: How long does it take to remove wood filler?
Answer: The time it takes to remove wood filler depends on several factors. The type of filler, the size of the area, and the method you use all play a role. Small areas with soft filler can be removed in minutes. Larger areas with tough filler can take much longer. Be patient and take your time. Rushing can lead to mistakes. Plan for enough time to complete the job. Remember, how to remove wood filler correctly is more important than how quickly you do it. Work carefully and you will get good results.