Replacing a Kohler toilet seat with hidden bolts can seem tricky, but it’s totally doable! You’ll need a few basic tools and about 30 minutes. First, find the hidden bolts, usually under a plastic cover. Then, loosen the bolts, remove the old seat, install the new one, and tighten everything up. Easy peasy!
Is your Kohler toilet seat wobbly, cracked, or just plain outdated? Don’t worry, you don’t need to call a plumber! Replacing a toilet seat with hidden bolts might seem a little intimidating, but it’s actually a straightforward DIY project. Many modern Kohler toilets feature a sleek, clean design where the mounting bolts are concealed for a more polished look. This can make figuring out how to remove the old seat a bit puzzling.
This guide will walk you through each step, from uncovering those hidden bolts to securely installing your new seat. We’ll cover everything you need, from the tools you’ll need to the best way to tighten those pesky bolts. Let’s get started and give your bathroom an easy upgrade!
What You’ll Need
Before you begin, gather these essential tools and materials. Having everything on hand will make the process smoother and faster.
- New Kohler Toilet Seat: Make sure it’s compatible with your toilet model.
- Screwdriver: Both a Phillips head and a flathead screwdriver might be needed.
- Adjustable Wrench or Pliers: For loosening stubborn bolts.
- Gloves: To keep your hands clean and protected.
- Old Cloth or Sponge: For cleaning the area.
- Penetrating Oil (Optional): To help loosen corroded bolts.
- Safety Glasses: To protect your eyes.
Step-by-Step Guide to Replacing Your Kohler Toilet Seat
Follow these detailed steps to safely and effectively replace your Kohler toilet seat with hidden bolts. Take your time and double-check each step to ensure a secure and clean installation.
Step 1: Prepare the Area
Before you start, it’s a good idea to prep the area around the toilet. This makes the whole process smoother and more hygienic.
- Clean the Toilet: Wipe down the toilet bowl and the area around the seat with a disinfectant cleaner.
- Protect the Floor: Place an old towel or cloth under the toilet to catch any drips or dropped tools.
- Gather Your Tools: Keep all your tools within easy reach.
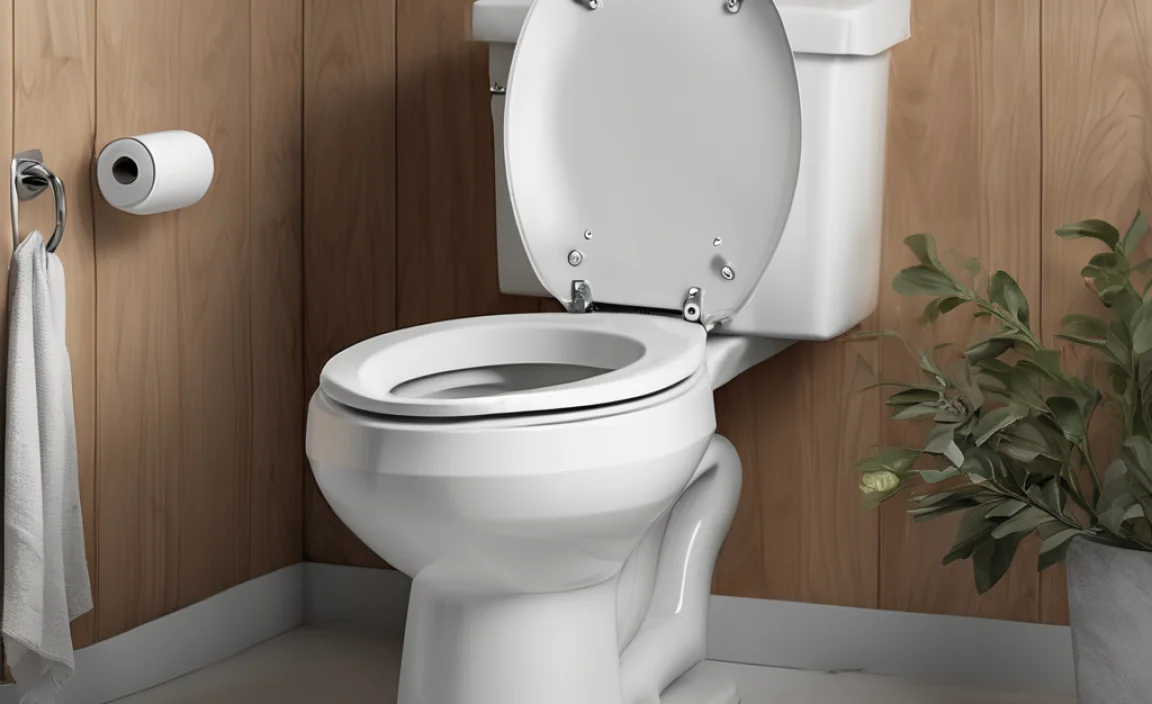
Step 2: Locate the Hidden Bolts
This is the trickiest part. Kohler toilet seats with hidden bolts usually have covers concealing the bolts. Here’s how to find them:
- Check for Hinge Covers: Look for small, rectangular or circular covers at the base of the seat where it connects to the toilet bowl.
- Flip Open the Covers: Gently lift or pry open these covers. Some may flip up, while others might slide or snap off. A small flathead screwdriver can help.
- Inspect for Bolts: Once the covers are open, you should see the bolt heads.
Step 3: Loosen the Bolts
Now that you’ve found the bolts, it’s time to loosen them. This might require a bit of patience, especially if they’re corroded.
- Use a Screwdriver: Insert the appropriate screwdriver (Phillips head or flathead) into the bolt head.
- Turn Counterclockwise: Turn the screwdriver counterclockwise to loosen the bolts. If they’re stuck, don’t force it.
- Apply Penetrating Oil (If Needed): If the bolts are difficult to turn, spray a little penetrating oil (like WD-40) onto the threads. Wait a few minutes for the oil to work, then try again.
- Use an Adjustable Wrench (If Needed): If the bolt spins but doesn’t come loose, try holding the nut underneath the toilet bowl with an adjustable wrench or pliers while you turn the screwdriver.
Step 4: Remove the Old Toilet Seat
With the bolts loosened, you can now remove the old toilet seat.
- Lift the Seat: Once the bolts are loose enough, lift the seat straight up and off the toilet bowl.
- Remove the Bolts: Completely remove the bolts, washers, and nuts from the mounting holes.
- Clean the Area: Use a cloth or sponge to thoroughly clean the area around the mounting holes. Remove any old residue, grime, or corrosion.
Step 5: Install the New Toilet Seat
Now for the satisfying part – installing your new Kohler toilet seat!
- Position the New Seat: Place the new toilet seat on the toilet bowl, aligning the mounting holes.
- Insert the New Bolts: Insert the new bolts through the mounting holes from the top. Make sure any washers are in the correct order as indicated in the new seat’s instructions.
- Secure the Bolts: Reach under the toilet bowl and attach the nuts to the bolts. Hand-tighten them to start.
Step 6: Tighten the Bolts
Properly tightening the bolts is crucial for a secure and stable toilet seat.
- Use a Screwdriver and Wrench: Use a screwdriver to hold the bolt head from the top while you tighten the nut from underneath with an adjustable wrench or pliers.
- Tighten Evenly: Tighten both bolts evenly to ensure the seat is aligned correctly. Avoid over-tightening, which could damage the toilet bowl or the seat.
- Check for Stability: Once the bolts are snug, check the seat for any wobbling. If it’s not stable, tighten the bolts a little more until it feels secure.
Step 7: Conceal the Bolts
The final step is to conceal the bolts, giving your toilet that clean, finished look.
- Close the Hinge Covers: Snap or slide the hinge covers back into place, concealing the bolts.
- Ensure They’re Secure: Make sure the covers are securely attached and flush with the seat.
Step 8: Final Check and Cleaning
Before you call it a day, give everything a final once-over.
- Test the Seat: Sit on the seat to ensure it’s stable and comfortable.
- Clean Up: Wipe down the toilet seat and the surrounding area to remove any dirt or fingerprints.
- Dispose of Old Seat: Dispose of the old toilet seat and any packaging materials properly.
Troubleshooting Common Issues
Sometimes, things don’t go exactly as planned. Here are some common issues you might encounter and how to solve them.
| Issue | Possible Solution |
|---|---|
| Bolts are stuck | Apply penetrating oil and wait. Use an adjustable wrench to hold the nut underneath while turning the bolt. |
| New seat wobbles | Tighten the bolts evenly. Make sure the washers are installed correctly. |
| Hinge covers won’t close | Ensure the bolts are not over-tightened. Check for any obstructions. |
| Incorrect seat size | Double-check the model number and compatibility with your toilet. Return for the correct size if needed. |
| Bolts keep spinning | Apply upward pressure on the bolt from underneath while tightening from the top. |
Choosing the Right Kohler Toilet Seat
Selecting the right replacement toilet seat is essential for a perfect fit and optimal comfort. Here’s what to consider:
- Toilet Model: Kohler toilet seats are often designed to fit specific models. Check your toilet’s model number (usually found inside the tank) to ensure compatibility.
- Seat Shape: Toilet seats come in two main shapes: round and elongated. Choose the shape that matches your toilet bowl.
- Material: Options include plastic, wood, and molded wood. Plastic is durable and easy to clean, while wood offers a more premium look and feel.
- Features: Consider features like soft-close hinges (which prevent slamming), quick-release mechanisms (for easy cleaning), and heated seats for added comfort.
Types of Kohler Toilet Seats
Kohler offers a variety of toilet seats to suit different needs and preferences.
- Standard Seats: Basic, durable seats that fit most standard toilets.
- Soft-Close Seats: Feature hinges that prevent the seat from slamming shut, reducing noise and wear.
- Quick-Release Seats: Designed with a quick-release mechanism that allows you to easily remove the seat for thorough cleaning.
- Heated Seats: Provide added comfort with adjustable temperature settings.
- Bidet Seats: Combine the functionality of a toilet seat and a bidet, offering enhanced hygiene and comfort.
Maintaining Your New Toilet Seat
Proper maintenance will keep your new Kohler toilet seat looking and functioning its best for years to come.
- Regular Cleaning: Clean the seat regularly with a mild soap and water solution. Avoid using harsh chemicals or abrasive cleaners, which can damage the finish.
- Gentle Wiping: Use a soft cloth or sponge to wipe the seat clean. Avoid using abrasive scrub brushes or pads.
- Avoid Over-Tightening: Check the bolts periodically to ensure they are snug but not over-tightened. Over-tightening can cause the seat to crack or warp.
- Proper Use: Avoid standing or placing excessive weight on the toilet seat, as this can damage the hinges or the seat itself.
Cost Considerations
Replacing a toilet seat is generally an affordable DIY project. Here’s a breakdown of the potential costs involved.
| Item | Estimated Cost |
|---|---|
| Kohler Toilet Seat | $20 – $150 (depending on features and material) |
| Penetrating Oil | $5 – $10 |
| Screwdriver Set | $10 – $30 (if you don’t already have one) |
| Adjustable Wrench | $15 – $30 (if you don’t already have one) |
As you can see, the main cost is the toilet seat itself. By doing the job yourself, you’ll save on professional installation fees, which can range from $50 to $150 or more.
When to Call a Professional
While replacing a Kohler toilet seat is usually a straightforward DIY project, there are certain situations where it’s best to call a professional plumber.
- Severe Corrosion: If the bolts are severely corroded and you can’t loosen them even with penetrating oil, a plumber may have specialized tools to remove them without damaging the toilet.
- Toilet Damage: If you accidentally damage the toilet bowl or tank while trying to remove the old seat, it’s best to have a professional assess the damage and make repairs.
- Plumbing Issues: If you notice any underlying plumbing issues, such as leaks or a wobbly toilet, it’s a good idea to call a plumber to address these problems before installing the new seat.
- Lack of Confidence: If you’re not comfortable working with tools or unsure about any step of the process, it’s always best to err on the side of caution and hire a professional.
Safety Tips
Your safety is paramount. Keep these tips in mind when replacing your toilet seat.
- Wear Gloves: Protect your hands from dirt, grime, and potential exposure to bacteria.
- Wear Safety Glasses: Protect your eyes from debris or splashes.
- Turn Off Water Supply (Optional): If you’re concerned about accidentally loosening a water connection, turn off the water supply to the toilet before starting.
- Be Careful with Tools: Use tools carefully to avoid injury or damage to the toilet.
- Dispose of Materials Properly: Dispose of the old toilet seat and any cleaning materials in accordance with local regulations.
Benefits of Replacing Your Toilet Seat
Replacing your toilet seat offers several benefits, both practical and aesthetic.
- Improved Comfort: A new seat can provide improved comfort, especially if your old seat was cracked or worn.
- Enhanced Hygiene: A clean, new seat is more hygienic and easier to maintain.
- Updated Look: A new toilet seat can instantly update the look of your bathroom.
- Increased Home Value: Simple upgrades like a new toilet seat can increase the overall value of your home.
- Cost Savings: Replacing a toilet seat is a relatively inexpensive DIY project that can save you money on professional plumbing fees.
FAQ: Replacing a Kohler Toilet Seat with Hidden Bolts
Q1: What are hidden bolts on a toilet seat?
Hidden bolts are a design feature where the screws that hold the toilet seat in place are covered by plastic caps or hinges. This gives the toilet a cleaner, more modern look by concealing the hardware.
Q2: Can I replace any toilet seat with a Kohler seat?
Not always. Kohler seats are often designed to fit specific Kohler toilet models. Check the compatibility before buying to ensure a proper fit.
Q3: What if the bolts are really stuck and won’t budge?
Try using a penetrating oil like WD-40. Spray it on the bolts and let it sit for about 15-20 minutes before trying again. If that doesn’t work, you might need to call a plumber.
Q4: How do I know what size toilet seat to buy?
Measure your toilet bowl. Standard toilets are either round or elongated. Buy a seat that matches the shape and size of your bowl.
Q5: Do I need special tools to replace the toilet seat?
Generally, no. You’ll usually need a screwdriver (both flathead and Phillips head) and possibly an adjustable wrench or pliers. A little penetrating oil can also be helpful.
Q6: What do I do with the old toilet seat?
Check your local regulations for disposing of bulky waste. Some areas may have specific guidelines for disposing of toilet seats.
Q7: How often should I clean my toilet seat?
Clean your toilet seat at least once a week, or more often if needed. Use a mild soap and water solution and a soft cloth.
Conclusion
Replacing a Kohler toilet seat with hidden bolts doesn’t have to be a daunting task. By following these step-by-step instructions, you can easily upgrade your bathroom and improve your home’s comfort and value. Remember to take your time, gather the right tools, and prioritize safety. With a little patience and attention to detail, you’ll have your new toilet seat installed in no time. Enjoy your updated bathroom!