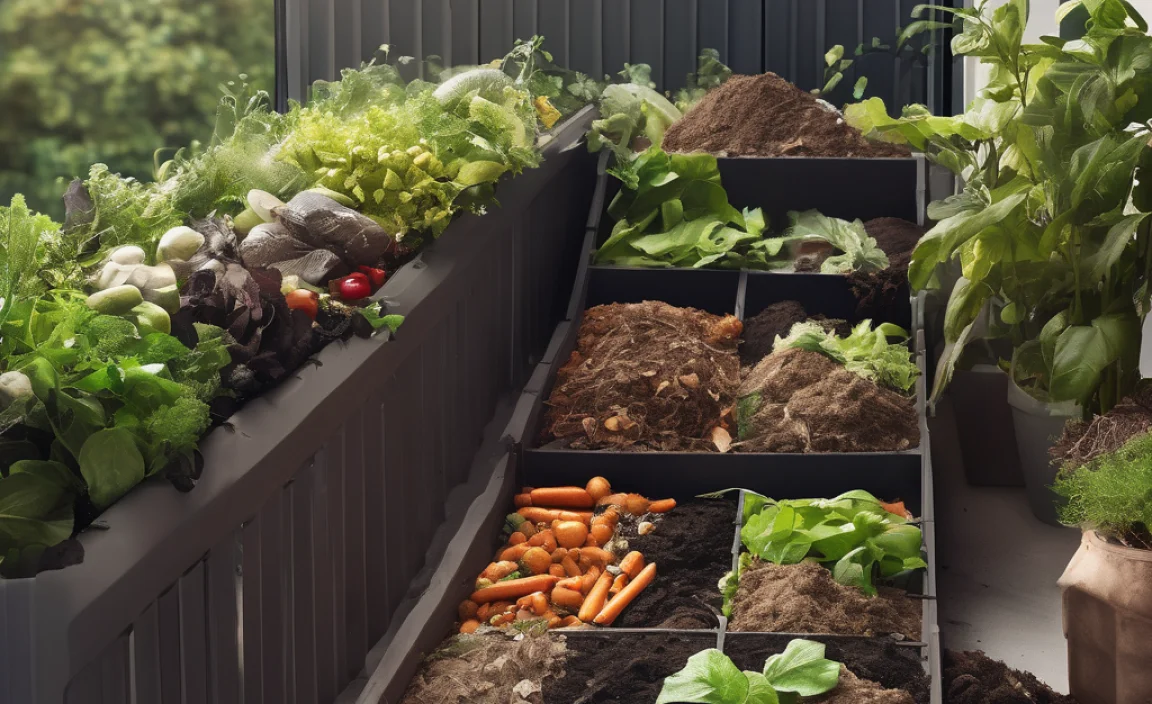
Got kitchen scraps piling up? Want to help the planet and your plants without breaking the bank? Indoor composting might sound complicated, but it’s actually a super simple way to turn that food waste into amazing fertilizer. Even if you live in a small apartment, you can do it! We’ll walk you through affordable ways to start, making it easy and fun. Get ready to transform your kitchen and garden.
Why Go Inside? The Magic of Indoor Composting on a Budget
Let’s face it, throwing away food scraps feels a bit wasteful, right? When those scraps end up in landfills, they produce methane, a greenhouse gas that’s not great for our planet. Composting at home is a fantastic way to combat this. But what if you don’t have a big backyard, or the weather’s not cooperating? That’s where indoor composting shines! It’s a practical, eco-friendly solution that works for everyone, no matter the space or season. And the best part? It doesn’t have to cost a fortune.
The Big Wins of Composting Indoors
- Reduces Waste: Divert a significant amount of food scraps from the trash.
- Creates Free Fertilizer: Make nutrient-rich compost for your houseplants, balcony garden, or even to share with friends.
- Eco-Friendly: Less waste in landfills means fewer greenhouse gases.
- Year-Round Gardening: Continue composting through the winter months.
- Odor Control: When done correctly, indoor compost bins are virtually odorless.
- Affordable Start: You can get started with simple, inexpensive materials.
Choosing Your Affordable Indoor Composting Method
There are a few main ways to compost indoors, and we’ll focus on the most budget-friendly and beginner-friendly options. These methods are designed to be compact, manageable, and odor-free when done right.
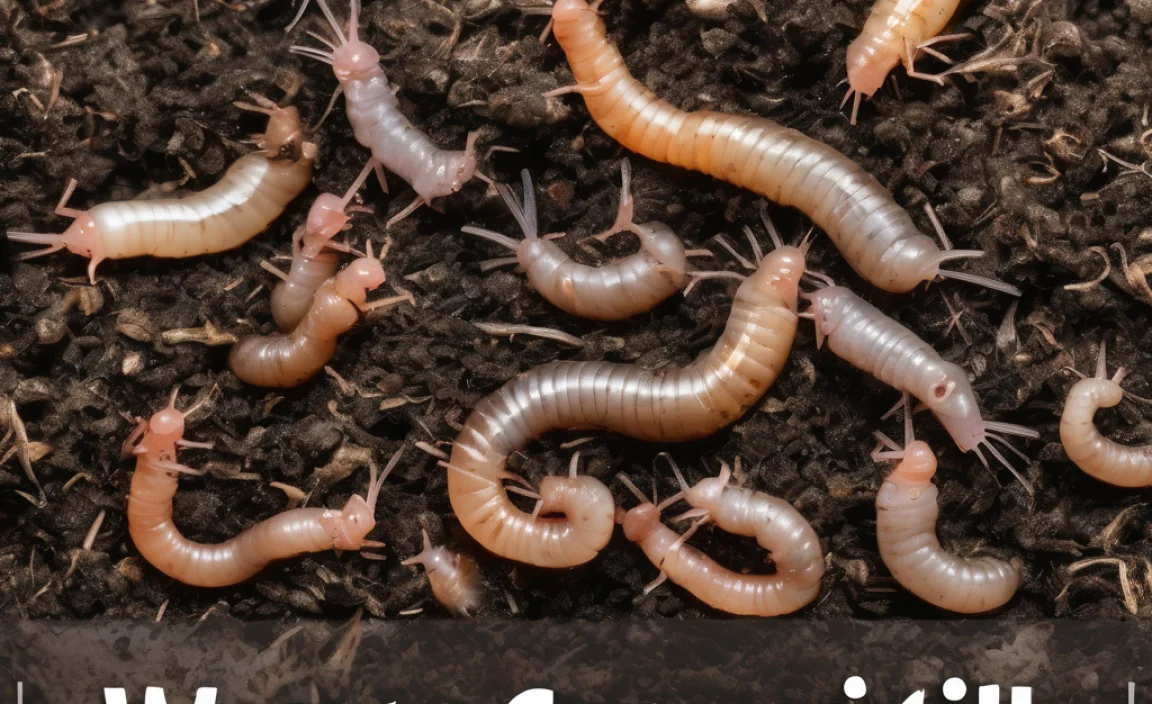
1. The Worm Bin (Vermicomposting)
This is a popular and highly effective method for indoor composting. It uses special composting worms (like Red Wigglers) to break down your food scraps. It’s quiet, efficient, and produces amazing compost called “worm castings,” which are like superfood for plants.
What You’ll Need (Budget-Friendly Edition):
- A Bin: You can buy a plastic worm bin, but a much cheaper option is a large opaque plastic storage tote (10-18 gallons works well). Look for one with a lid.
- Bedding: Shredded newspaper, cardboard, coconut coir, or dried leaves work great. Aim for carbon-rich materials.
- Composting Worms: You’ll need about 1/2 to 1 pound of Red Wigglers (Eisenia fetida) or European Nightcrawlers. Don’t use regular earthworms from your garden! You can order these online from reputable worm farms or sometimes find them at local garden centers.
- Food Scraps: Your kitchen waste (we’ll cover what to feed them later).
DIY Worm Bin Setup (Super Simple!):
- Prepare the Bin: Take your plastic tote. Drill several small holes (about 1/4 inch) on the bottom for drainage, a few on the top for airflow, and some along the upper sides. You don’t need a ton of holes; just enough for air circulation and to let excess moisture drain.
- Add Bedding: Moisten your bedding material (like shredded newspaper) until it’s damp like a wrung-out sponge. Fill the bin about 1/3 to 1/2 full with this moist bedding.
- Introduce the Worms: Gently place your composting worms on top of the bedding. Leave the lid off for about 30 minutes to an hour to let them settle in. They’ll naturally burrow down away from the light.
- Feed Them: After a day or two, you can start adding food scraps. Bury a small amount of chopped-up scraps (about 1/4 of the bin’s volume) under the bedding in one corner. This encourages them to move around and eat.
- Close It Up!: Place the lid on the bin. If you’re worried about light getting in, you can cover the bin with a dark cloth or dark garbage bag. Worms prefer darkness.
2. The Bokashi Bin (Fermentation Composting)
Bokashi is a bit different. It’s an anaerobic (oxygen-free) fermentation process that pickles your food waste using a special inoculant (often bran or sawdust) covered in beneficial microbes. It can handle almost all food scraps, including meat and dairy, which are usually a no-go for other composting methods. The end product isn’t finished compost, but it’s ready to be buried underground (in a garden bed, large planter, or even your neighbor’s compost pile if they’ll have it!) or added to a traditional compost pile.
What You’ll Need (Budget-Friendly Edition):
- Two Airtight Buckets: These are usually 5-gallon buckets with airtight lids. You can often find used food-grade buckets for cheap or free from restaurants, bakeries, or online marketplaces. Make sure they have lids that seal well.
- Bokashi Bran/Inoculant: This is the special sprinkle that activates the fermentation. You can buy it online or at some garden supply stores. A little goes a long way!
- Food Scraps: All your kitchen waste.
DIY Bokashi Bin Setup (Simple & Effective):
- Prepare the Buckets: You’ll need to create a way for any liquid (called “Bokashi tea”) to drain out. If your buckets don’t have spigots, you can drill a few small holes in the bottom of one bucket. Place this bucket inside the second bucket, which will collect the liquid.
- Start Adding Scraps: Add your food scraps to the top bucket. Chop them up into smaller pieces to speed up the fermentation.
- Sprinkle the Bran: Sprinkle a generous tablespoon or two of Bokashi bran over the food scraps. Make sure to cover all the scraps evenly.
- Compact and Seal: Press down the scraps to remove as much air as possible. Put the airtight lid on tightly. The goal is to keep oxygen out.
- Repeat: Continue adding scraps and bran daily, pressing them down each time. Once the bucket is full, seal it and let it ferment for at least two weeks. Then, start filling your second bucket while the first one ferments.
- Drain the Tea: Periodically drain the liquid that collects in the bottom bucket. This is potent “Bokashi tea” that can be diluted and used as a liquid fertilizer for plants (dilution ratio of 1:100 is a good starting point) or poured down drains to help clean them.
3. DIY Countertop Compost Scraper (Not True Composting, but Waste Reduction!)
This isn’t technically composting, but it’s a super affordable way to collect food scraps for later use. It’s essentially a designated container for your kitchen waste that you can then take to a larger compost facility, bin, or even your neighbor’s outdoor pile. Think of it as a stylish holding station.
What You’ll Need (Super Simple!):
- A Contained Vessel: An old coffee can, a small reusable ice cream tub, a decorative ceramic crock with a lid (often sold as “countertop compost keepers”), or even a repurposed plastic container.
- A Lid (Optional, but Recommended): A lid helps keep odors down and pests out. Even a piece of foil or plastic wrap secured with a rubber band works.
How to Use:
Simply collect your food scraps in the container throughout the day. When it’s full, or a few times a week, empty it into your main compost bin, a municipal composting service, or even a friend’s garden compost pile. This method is best if you don’t have space or the time for a full indoor system but still want to divert waste from the landfill.
What to Compost (and What to Avoid!)
Knowing what goes into your compost bin is key to success and avoiding any unpleasant smells or issues. The general rule for most composting methods is to aim for a balance of “greens” (nitrogen-rich) and “browns” (carbon-rich).
Best for Worm Bins (Vermicomposting):
Worms are picky eaters! Stick to these primarily:
Greens (Nitrogen-rich):
- Fruit and vegetable scraps (peels, cores, leaves)
- Coffee grounds and tea bags (paper ones are fine)
- Crushed eggshells (great for grit)
- Grass clippings (in moderation)
Browns (Carbon-rich):
- Shredded newspaper and junk mail (non-glossy)
- Shredded cardboard (remove tape and labels)
- Dry leaves
- Sawdust (from untreated wood)
What to Avoid in Worm Bins:
- Meat, fish, and bones
- Dairy products (cheese, milk, yogurt)
- Oily or greasy foods
- Citrus peels (in large quantities; can be acidic)
- Onions and garlic (can be too potent)
- Diseased plant matter
- Pet waste (from cats or dogs)
Best for Bokashi Bins:
Bokashi is much more forgiving and can handle almost everything, making it super convenient. You can add:
- All fruit and vegetable scraps
- Meat, fish, and bones
- Dairy products
- Cooked foods
- Coffee grounds, tea bags, filters
- Eggshells
- Small amounts of soiled paper products (like paper towels)
What to Avoid in Bokashi Bins:
While Bokashi is tolerant, very large bones or items that won’t break down easily (like plastic or large woody stems) should be avoided or cut into tiny pieces. The main thing is that the bin should be able to seal tightly to create that anaerobic environment.
For Countertop Collection Bins:
For a simple collection bin that you’ll empty elsewhere, you can generally put anything that you would put in your main compost system or that the recipient compost facility/person accepts. Always check with them first!
Maintaining Your Affordable Indoor Compost System
Keeping your indoor compost happy and productive is straightforward. It’s all about balance and a little bit of observation.
Worm Bin Care:
- Moisture Levels: The bedding should always feel like a wrung-out sponge. If it’s too dry, the worms can’t survive. Add a little water. If it’s too wet, add more dry bedding (browns) to help absorb excess moisture, and ensure drainage holes are clear.
- Feeding Schedule: Start by feeding them sparsely. As the worm population grows, you can increase the amount of food. Don’t overfeed, or the food will rot and smell. A good rule of thumb is to feed them what they can eat in a few days. You’ll know they’re happy if they’re eating the scraps quickly.

I am passionate about home engineering. I specialize in designing, installing, and maintaining heating, ventilation, and air conditioning systems. My goal is to help people stay comfortable in their homes all year long.