A shower faucet is essential in any bathroom, as it controls water flow and temperature. Over time, shower faucets can become worn or outdated, making it necessary to replace them.
While hiring a professional plumber is always an option, replacing a shower faucet is an easy DIY job that can save you money and give you a sense of accomplishment. We will guide you step by step through how to replace a shower faucet.
We’ll cover everything from removing an old faucet to installing a new one and give tips on avoiding common mistakes. Whether you’re a seasoned DIY enthusiast or a first-timer, this guide will give you the knowledge and confidence to tackle this project. With the right tools and patience, you can replace your shower faucet and enjoy a refreshed and updated bathroom in no time.
What Is A Shower Faucet?
A shower faucet is the part of your shower that controls the flow and temperature of the water. It usually consists of a handle or knob that you turn to adjust the water pressure and temperature and a spout or nozzle that the water comes out of.
Over time, shower faucets can become worn or damaged, leading to leaks or other issues. If you’re experiencing problems with your shower faucet, it may be time to replace it. Replacing a shower faucet with a few basic tools and some DIY know-how can be a relatively simple project that can help improve your shower experience.
Identifying Shower Faucet Problems
Identifying shower faucet problems can be a frustrating experience for homeowners. Some common issues include leaks, low water pressure, and difficulty adjusting the temperature.
If you notice any of these problems with your shower faucet, addressing them immediately is essential to prevent further damage or more expensive repairs. One of the first steps in identifying shower faucet problems is to check for leaks around the faucet and handle.
If there is water pooling or dripping, this may indicate a loose or damaged component that needs to be replaced. Another potential issue could be with the cartridge or valve that controls the flow and temperature of the water.
If you are experiencing low water pressure or difficulty adjusting the temperature, this could be a sign that these components need to be cleaned or replaced. Consulting with a professional plumber can help you identify and resolve any shower faucet problems efficiently and effectively.
How To Replace A Shower Faucet :The Top Tools And Tips
Replacing a shower faucet can seem daunting, but it can be a manageable DIY project with the right tools and tips. Here are some of the top tools you will need to know how to replace a shower faucet. Replacing your shower faucet can be daunting if you’re unfamiliar with plumbing. However, with the right tools and knowledge, it’s a project that most people can tackle on their own.
- Adjustable wrench
- Pliers
- Screwdriver
- Pipe cutter or hacksaw
Here are some tips to help you replace your shower faucet. By following these simple tips, you can confidently replace your shower faucet and enjoy a refreshing new look in your bathroom.
- Turn off the water supply: Before starting any work on your shower faucet, make sure to turn off the water supply to avoid any accidents.
- Remove the old faucet: Use a wrench or pliers to loosen and remove the old faucet. Keep track of any screws or other small parts that may fall out during removal.
- Clean the area: Once the old faucet is removed, clean the area around the opening to remove any debris or buildup.
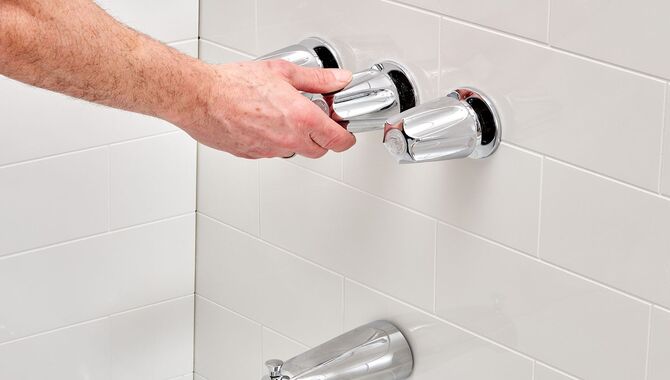
- Install the new faucet: Follow the manufacturer’s instructions for installing the new faucet, making sure to tighten all screws securely.
- Test for leaks: After installing the new faucet, turn on the water supply and test for any leaks.
How To Remove A Shower Faucet
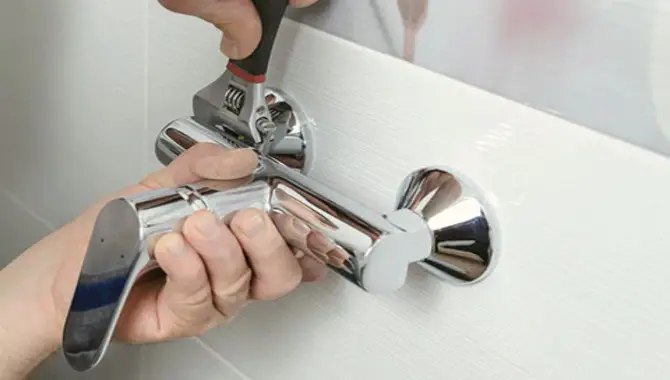
Removing a shower faucet may seem daunting, but it can be done quickly with the right tools and knowledge. The first step is to turn off the water supply to the shower. This can typically be done by turning off the valve near the shower or shutting off the main water supply to the house.
Next, remove any decorative covers or handles covering the faucet. This can often be done by using a screwdriver or Allen wrench.
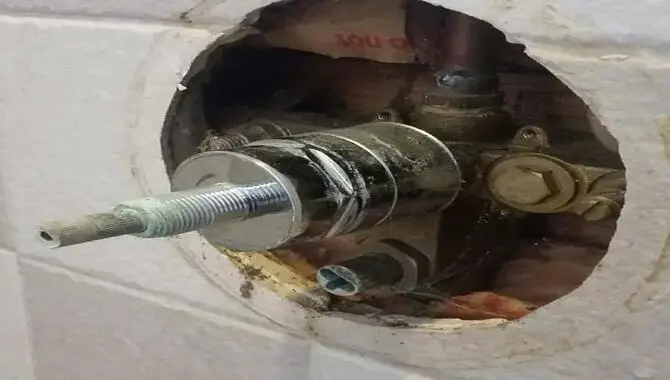
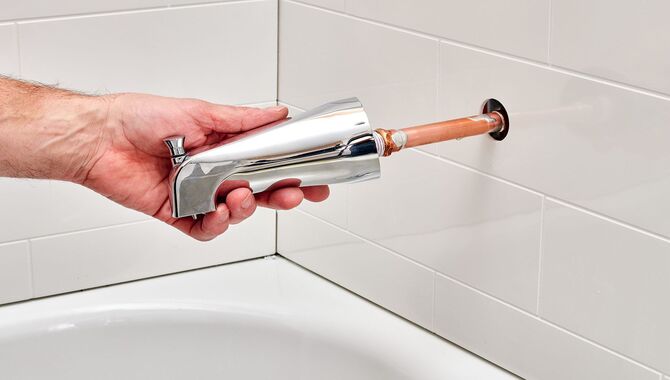
Once the handles have been removed, you should see a retaining nut holding the faucet. Use an adjustable wrench to loosen and remove this nut, being careful not to damage any surrounding tiles or walls. Once the nut has been removed, you should be able to pull the faucet out of its housing.
If you encounter difficulties during this process or are unsure about what you are doing, it may be best to seek professional plumbing help. But with a little patience and some essential tools, removing a shower faucet can be a relatively easy DIY project for any homeowner.
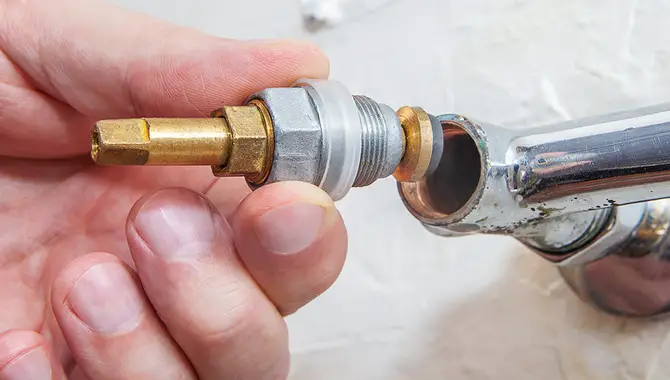
Remove The Old Cartridge
To remove an old cartridge from your shower faucet’s valve housing, turn off the water supply and remove decorative caps or screws. Gently pull out the old cartridge and use pliers if necessary. Check for damage before installing a new one for improved water flow. Inspect all parts of your shower faucet for leaks and wear regularly.
Disconnect The Water Supply Lines
First, disconnect the water supply lines for a shower faucet replacement, and turn off the main water valve. Use pliers or a wrench to loosen the nuts connecting the supply lines to the valve stem. Have a bucket or towel handy to catch any remaining water in the copper pipes. Before disconnecting them, please take a picture of their connections for easy reinstallation.
How To Prep For A Shower Faucet Replacement
To prepare for replacing a shower faucet, turn off the water supply and drain any remaining water from the pipes. Next, remove the old fixture while carefully not damaging the shower valve or plumbing.
Clean the area where you removed the old one and buy a new institution matching your bathroom décor. Before installing the new device, inspect it for any small parts or adapters that may be needed. Follow manufacturer instructions carefully to ensure proper new fixture installation without leaks or damage.
Turn Off The Water Supply
Before replacing a shower faucet, cutting off the water supply is crucial. Find and turn off the shut-off valve for your home’s water supply or specifically for your shower if available. Relieve pressure in pipes by opening another tap or showerhead. Afterwards, drain any remaining water from the pipes before undoing the old faucet.
Remove The Old Escutcheon Plate
When replacing a shower faucet, one of the first steps is to remove the old escutcheon plate. This plate covers the hole in the wall where the faucet is mounted and can be removed with a screwdriver or hex key, depending on the type of screws used.
Before removing the plate, turning off the water supply is essential to prevent leaks or water damage. Once the screws have been removed, gently pull the plate away from the wall and set it aside.
If there is any caulking or adhesive around the edges of the plate, use a putty knife to loosen it carefully before removing it. With the old escutcheon plate removed, you can now move on to installing your new shower faucet.
Troubleshooting Your Shower Faucet Replacement
If you’ve recently replaced your shower faucet and are experiencing issues, don’t panic. Several common problems can arise with shower faucet replacements, and most of them can be easily fixed. Here are some troubleshooting tips:
– Leaks: If you notice water leaking from the faucet or showerhead after installation, it could be due to loose connections or improper sealing. Check all connections and make sure they are tight. You may also need to apply a plumber’s tape or a sealant to prevent leaks.
– Low water pressure: If the water pressure is lower than usual after installation, it could be due to a clogged aerator or valve. Clean the aerator or valve to remove any debris or buildup causing the issue.
– Temperature issues: If the water temperature is not consistent or is too hot or cold, it could be due to a problem with the valve or cartridge. Check for any damage or misalignment and replace as needed.
Following these troubleshooting tips, you can quickly get your shower faucet replacement working properly.
How To Fix A Leaking Shower Faucet
If you have a leaking shower faucet, it can be frustrating and wasteful. Luckily, fixing a leaking shower faucet is a relatively easy DIY project that can save you money on your water bill. Here’s how to fix a leaking shower faucet:
- Turn off the water supply to the shower.
- Remove the faucet’s handle by locating and removing the screw or cap on top of the handle.
- Use pliers to remove the retaining clip or nut holding the cartridge.
- Pull out the cartridge and inspect it for damage or wear.
- Replace any damaged parts and reassemble the faucet.
- Turn on the water supply and test your repairs.
If these steps do not fix your leaking shower faucet, it may be time to call a professional plumber.
Applying Silicone Caulk To The Shower Faucet
When applying silicone caulk to the shower faucet, follow a few critical steps for the best results. First, ensure the area is clean and dry before you begin. Any dirt or moisture can interfere with the adhesion of the caulk, so it’s essential to take the time to prep the area properly.
Next, apply a thin, even layer of silicone caulk around the base of the shower faucet. Use a caulking gun for precision and control, and smooth out any bumps or air pockets with your finger or a caulk smoothing tool.
Finally, allow the caulk to dry completely before using the shower again. This usually takes about 24 hours, but check your product’s label for recommended drying times. With these simple steps, you can ensure a clean and professional-looking finish for your shower faucet caulking project.
Conclusion
Replacing a shower faucet can seem daunting, but it can be done efficiently with the right tools and tips. Before you start the replacement process, properly identify the problem with your current faucet. Once you have that figured out, preparing for the replacement process is essential by turning off the water supply and removing the old escutcheon plate.
After replacing the shower faucet, it’s important to troubleshoot any issues and apply silicone caulk to prevent any leaks. If you’re not confident in your DIY skills on how to replace a shower faucet, don’t hesitate to call a professional plumber. Follow these steps for a successful replacement and enjoy your newly functioning shower.
Frequently Asked Questions
Is Replacing A Shower Faucet Hard?
The difficulty level in replacing a shower faucet varies depending on your DIY skills and experience with plumbing. If you’re confident, it can be an easy task. However, if you lack experience or feel unsure, hiring a professional may be the best option. Prior research and gathering of necessary tools are essential for a smooth replacement.
Can You Replace Just The Shower Faucet?
It is possible to replace just the shower faucet without replacing the entire unit. However, ensure you turn off the water supply and choose a compatible faucet that meets your aesthetic preferences. Follow installation instructions or hire a professional plumber for assistance to avoid any damage.
How Do You Remove An Old Shower Faucet?
To remove an old shower faucet, first turn off the water supply. Then, use a screwdriver or wrench to remove any screws or nuts holding it in place. If stuck, apply penetrating oil and wait before trying again. Finally, gently pull the faucet away from the wall to detach it.
Can You Change A Shower Faucet Without Turning Off The Water?
Changing a shower faucet without shutting off the water supply is not advisable. This prevents any mishaps or leaks during the replacement process. Before starting, locate and turn off the main water valve. It’s better to seek guidance from a professional if you lack experience in replacing faucets.
Are There Any Safety Precautions I Should Take Before Replacing My Shower Faucet?
Turn off the water supply before replacing your shower faucet, and exercise caution while handling parts. If you’re uncertain about the process, hiring a professional plumber is best to avoid causing any harm or damaging your plumbing system. Also, follow the manufacturer’s instructions and safety protocols when working with plumbing tools.

I am passionate about home engineering. I specialize in designing, installing, and maintaining heating, ventilation, and air conditioning systems. My goal is to help people stay comfortable in their homes all year long.