Installing durable hardwood flooring can be a great home improvement project. Properly measuring the square footage and choosing from different boxes of grooved edge planks is essential.
Are you looking to give your home a fresh, new look with hardwood flooring? Installing hardwood flooring can be daunting, especially if you have never done it before. But don’t worry; we are here to help. Here we will provide you with a step-by-step guide on how to install hardwood flooring.
We will cover everything from gathering the necessary tools and materials to cleaning and maintenance tips. We will also highlight some common mistakes to avoid when installing hardwood flooring, such as gaps and buckling in your hardwood flooring. So let’s transform your home with beautiful, new hardwood flooring.
How To Install Hardwood Flooring With Some Process
Preparing your subfloor is critical when installing beautiful hardwood floors in your home. Make sure you clean and level it before beginning. Before you nail down planks with your pneumatic nailer or stapler, acclimate your hardwood floor boards to your room’s humidity and temperature for a few days before installation.
Remember to measure and mark out the layout of your new floorboards while accounting for obstacles like doorways. Cut carefully around those obstructions with a saw or jigsaw as needed. Here is the process on how to install hardwood flooring.
Gather The Necessary Tools And Materials
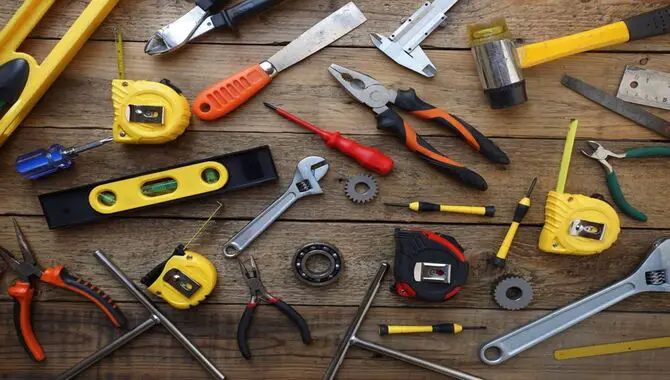
Gathering all the necessary tools and materials before beginning your new hardwood floor installation process is crucial. Ensure you have everything required to avoid unnecessary trips to the hardware store mid-installation.
Essential tools such as a saw, hammer, pry bar, and a level will be needed in addition to hardwood planks, underlayment sheets, adhesive or nails, and finishing materials such as trim pieces and stains. Proper preparation can save time and prevent mistakes during the flooring installation process.
Acclimate The Hardwood Flooring
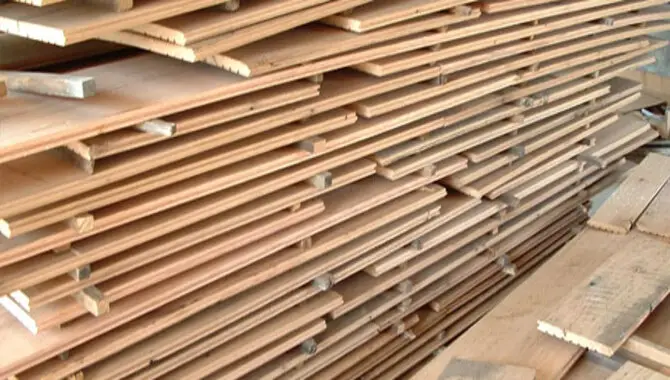
Properly acclimating hardwood flooring is essential for its successful installation. To prevent any warping or buckling later on, it’s crucial to let the planks adjust to the specific temperature and humidity of the room.
You can store the planks in their packaging, opened, flat, and stacked together for several days before installing. It’s always better not to rush through this process; proper preparation leads to efficient work and a beautiful final product.
Prepare The Subfloor

Before installing hardwood flooring, it is important to prepare the subfloor properly. Ensure that the subfloor is clean, level, and free of debris. To avoid unevenness, use a moisture meter to check its humidity levels before installing an underlayment or self-leveling compound.
This will help reduce noise and provide insulation while acting as a barrier against moisture. To ensure durability in your home improvement project, use pilot holes, spacers, and staple or nail-down methods when affixing your hardwood floorboards.
Install The Floor Boards
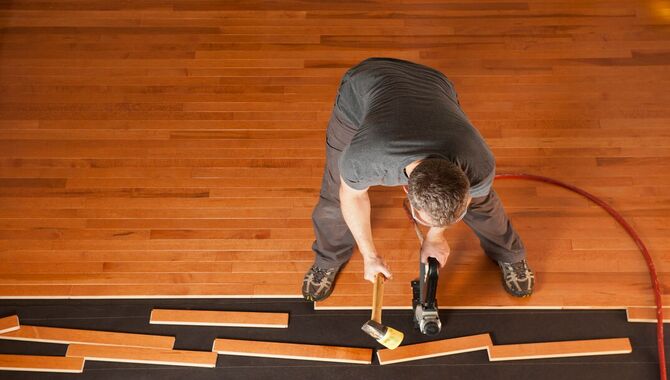
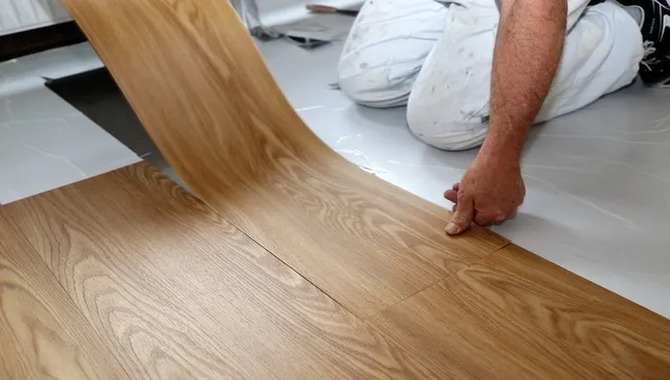
To start installing hardwood flooring in your home improvement project, prepare your subfloor by checking for moisture content using a moisture meter, cleaning it thoroughly, and ensuring it is leveled properly. Installing an underlayment can help increase insulation while reducing noise levels.
Once you have prepared your subfloor for installation, begin installing your hardwood flooring by laying out your first row of boards along the longest wall in the room with inch spacers between each board to allow for expansion gaps. Secure each board by nailing or stapling them down at an angle using pilot holes on their groove side with a hammer or nailer for a durable finish.
Replace Baseboards
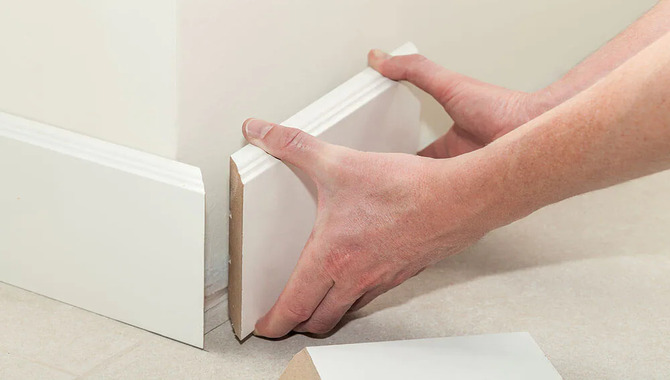
Replacing the baseboards when installing hardwood flooring is essential to achieve a polished final result. To do so without damaging them or the walls, carefully remove them and clean or replace them with matching ones.
It will help safeguard the edges of your beautiful hardwood floor from any potential harm while providing a seamless look. Installing new baseboards should be done only after completing the flooring installation process.
Install Threshold Or Transition Strips
To install threshold or transition strips, ensure a clean and level subfloor. Cut the strip to fit the doorway or transitional area with a small gap for expansion. Depending on your flooring type and subfloor condition, you can secure it using adhesive or nails.
Threshold strips cover expansion gaps between hardwood planks and walls/structures while joining different types of flooring/areas in a room. It’s crucial to use spacers for consistency throughout installation.
Cleaning & Maintenance Tips
Proper cleaning and maintenance are crucial to maintaining the longevity of your hardwood floor. To keep scratches and dust at bay, sweep or vacuum regularly using a cleaner designed for hardwood flooring. Avoid excessive water usage while cleaning to prevent warping or damage to the floorboards.
After installing hardwood flooring, it is important to properly clean and maintain it to ensure its longevity and beauty. Here are some cleaning and maintenance tips for your hardwood floors:
- Sweep or vacuum regularly to remove dirt and debris that can scratch the surface.
- Use a damp mop with a mild cleaner specifically designed for hardwood floors. Avoid using excessive water, as this can damage the wood.
- Wipe up spills immediately to prevent staining or warping of the wood.
- Place protective pads on furniture legs to prevent scratches and dents.
- Avoid wearing high heels or shoes with spikes on hardwood floors, as these can cause damage.
Following these tips, you can keep your hardwood floors looking their best for years.
Common Mistakes To Avoid When Installing Hardwood Flooring
To ensure a durable hardwood floor installation, homeowners should avoid common mistakes such as failing to acclimate the wood before installation, skipping the moisture barrier, incorrect spacing between planks, not allowing enough time for adhesive or sealant to dry, and installing transitions and molding incorrectly.
Home improvement enthusiasts should also use spacers between boards when cutting them with a saw or jigsaw to leave room for expansion gaps. Additionally, using a vapor barrier on top of the subflooring will help protect against moisture damage.
Avoiding Gaps And Buckling In Your Hardwood Flooring
Proper hardwood flooring acclimation to a room’s temperature and humidity levels is crucial for avoiding gaps and buckling. Creating an expansion gap around the room’s perimeter and using proper fastening techniques are also essential for preventing buckling.
Regular maintenance, like monitoring humidity levels, will help maintain durable floors. Homeowners should also use spacers during installation for uniform spacing between planks. Always check moisture content before laying your new floor to avoid squeaks or gaps.
Conclusion
Installing hardwood flooring can be an exciting and challenging task. Following the correct steps can have a beautiful floor that lasts for years. Gather all necessary tools and materials beforehand, acclimate your flooring, prepare your subfloor, install your floorboards, and replace baseboards.
Finish off with installing threshold or transition strips. Once installed, maintain and clean it properly to retain its natural sheen. Avoid common mistakes like ignoring gaps and buckling in your hardwood flooring. You can enjoy a smooth and perfect finish for many years by avoiding these common mistakes. Remember to take your time, measure carefully, and stay patient.
Whether you are a DIY enthusiast or a professional contractor, installing hardwood flooring is a rewarding project that can add beauty and value to any home. With this guide on how to install hardwood flooring, you have the knowledge you need to start your installation project today.
Frequently Asked Questions
Can I Install Hardwood Floors Myself?
Installing hardwood floors yourself is possible if you have the tools and skills. Ensure proper subfloor preparation and follow manufacturer instructions for acclimation and installation. Watching tutorial videos or seeking professional advice can also be helpful.
What Do You Put Down Before Hardwood Flooring?
Prior to hardwood flooring installation, a subfloor must be laid down to provide a sturdy and even base. Popular subflooring options are plywood or OSB. A moisture barrier, like felt paper, is also advised to prevent moisture buildup damage.
Do You Need Underlayment For Hardwood Flooring?
While hardwood flooring can be installed without underlayment, it may provide additional benefits such as stability, soundproofing, and moisture protection depending on the subfloor and flooring type. Consult a flooring professional to determine whether underlayment is necessary for your installation.
Do You Glue Or Nail Down Hardwood Flooring?
When installing hardwood flooring, you can nail it down or glue it. Nailing involves securing planks to the subfloor with nails or staples while gluing attaches them directly to the subfloor with adhesive. The choice depends on floor type, budget, and personal preference.
What Is Engineered Hardwood Flooring?
Engineered hardwood flooring consists of layers of wood, with a top layer of hardwood and a bottom layer of plywood or high-density fiberboard. It is more stable than solid hardwood and can handle higher moisture levels. While it can be sanded and refinished, it has fewer refinishing options than solid hardwood. It comes in many styles, finishes, and colors to fit any design style.

I am passionate about home engineering. I specialize in designing, installing, and maintaining heating, ventilation, and air conditioning systems. My goal is to help people stay comfortable in their homes all year long.