Ever glance at your kitchen scraps – banana peels, coffee grounds, eggshells – and wonder if there’s a better way than just tossing them in the trash? You’re not alone! It can feel like a waste, and sometimes, a smelly one. But what if I told you those scraps could become garden gold? This guide is here to break down everything you need to know about kitchen composting, making it super simple. We’ll go from understanding what it is, to picking the right setup, and getting it done. Let’s turn that waste into wonderful compost for your plants!
This article is your go-to resource for all things kitchen composting. We’ll cover:
- What exactly kitchen composting is and why it’s awesome.
- The different types of kitchen compost keepers you can get.
- How to set one up and what to toss in (and what to avoid!).
- Troubleshooting common issues.
- And a handy FAQ to clear up any last-minute questions.
Why Kitchen Composting is a Game-Changer
Think of kitchen composting as giving your food waste a second life. Instead of letting it pile up in a landfill, where it can produce harmful methane gas, you’re turning it into a nutrient-rich soil amendment for your garden, houseplants, or even just to donate to a local community garden. It’s a win-win for your wallet and the planet!
Benefits of Composting Your Kitchen Scraps
- Reduces Landfill Waste: A significant chunk of household trash is food scraps. Composting diverts this from landfills, easing their burden.
- Creates Nutrient-Rich Soil: Compost is like superfood for your plants! It improves soil structure, helps retain moisture, and provides essential nutrients, leading to healthier, happier plants.
- Saves Money: You’ll buy less fertilizer and soil enhancers for your garden. Plus, some municipalities offer incentives or discounted compost bins.
- Environmentally Friendly: It significantly cuts down on methane emissions from landfills, a potent greenhouse gas. It also reduces the need for chemical fertilizers, which can pollute waterways.
- Educational & Rewarding: It’s a fantastic way to teach kids (and adults!) about the natural cycle of decomposition and the importance of sustainability. Watching your scraps transform is incredibly satisfying.
Choosing Your Kitchen Compost Keeper: A Quick Review
When it comes to collecting kitchen scraps, you’ve got a few neat options. The best one for you depends on how much space you have, how much food waste you generate, and if you’re composting indoors or outdoors. Here’s a look at the most popular choices:
1. Countertop Compost Bins
These are the little guys you see sitting right on your kitchen counter, usually holding a few liters. They’re perfect for quickly collecting peels, cores, and other small bits throughout the day. Most have lids that help control odors. Some even have built-in filters for extra smell-fighting power.
Pros:
- Convenient for daily scrap collection.
- Compact and stylish, fitting on most countertops.
- Easy to empty into a larger compost system.
Cons:
- Small capacity, might need frequent emptying for larger households.
- Can still develop odors if not emptied regularly or if certain items are added.
2. Under-Sink Compost Bins
Similar to countertop bins but designed to tuck away neatly under your sink. They are usually a bit larger and can be mounted or simply placed on the cabinet floor. This is a great option if you prefer to keep your countertops clear.
Pros:
- Keeps clutter off the counter.
- Can be larger than countertop bins, requiring less frequent emptying.
- Out of sight, out of mind for those who are sensitive to the idea of a scrap bin.
Cons:
- May require a bit of installation or adjustment under the sink.
- Access can be slightly less convenient than a countertop bin.
3. Electric Kitchen Composters (Food Cyclers)
These are countertop appliances that use heat and aeration to break down food scraps much faster, often within hours. They significantly reduce the volume and often create a dry, odorless material that can be added to soil. They don’t technically “compost” in the traditional sense but offer a rapid decomposition process.
Pros:
- Very fast processing time.
- Dramatically reduces food waste volume.
- Odorless operation.
- Can handle a wider range of food types, including meat and dairy (check manufacturer’s specs).
Cons:
- Higher upfront cost.
- Requires electricity to operate.
- The end product is more of a dried, processed material than traditional compost; it still needs to break down further in soil.
4. Bokashi Bins
This is an indoor, anaerobic (without oxygen) fermentation system. You layer food scraps with a special Bokashi bran (containing beneficial microbes). It’s great for pickling your food waste and can handle meat, dairy, and oils. The fermented material then needs to be buried in soil or added to a traditional compost bin to finish decomposing.
Pros:
- Can handle almost all food scraps, including meat and dairy.
- Completely sealed system, minimizing odors.
- Produces a nutrient-rich “tea” that can be diluted and used as liquid fertilizer.
Cons:
- Requires purchasing the special Bokashi bran.
- The fermented product needs to be further composted or buried.
- The fermentation process can sometimes produce a strong, pickly smell (though not typically unpleasant).
Getting Started with Your Kitchen Compost System
Ready to dive in? Setting up your kitchen compost system is easier than you think. It’s all about choosing the right bin and knowing what to put in it.
Step-by-Step: Setting Up Your Countertop or Under-Sink Bin
These bins are your direct link to the composting process in your kitchen. They’re meant for collecting scraps before you take them to your main compost pile or bin.
- Choose Your Bin: Select a bin that fits your space and needs (countertop, under-sink). Look for one with a tight-fitting lid and consider features like a charcoal filter for odor control.
- Placement: Find a convenient spot in your kitchen. A countertop bin should be close to where you prepare food. An under-sink bin needs enough clearance.
- Line (Optional but Recommended): Many people like to line these bins with compostable bags or even just plain newspaper. This makes cleanup a breeze. Be sure to use bags certified compostable for home or industrial composting, depending on your setup. Check out resources from the U.S. Environmental Protection Agency (EPA) for more on composting and compostable materials.
- Start Collecting: Begin tossing in your acceptable kitchen scraps as you generate them. Don’t overfill it – you’ll want to be able to close the lid easily.
- Empty Regularly: The key to avoiding odors and pests is to empty your kitchen bin into your main compost system (outdoor bin, worm bin, Bokashi bin, or municipal collection) every few days, or whenever it gets full.
- Clean Your Bin: Give it a quick rinse or wash with soap and water periodically, especially if any food particles start to stick.
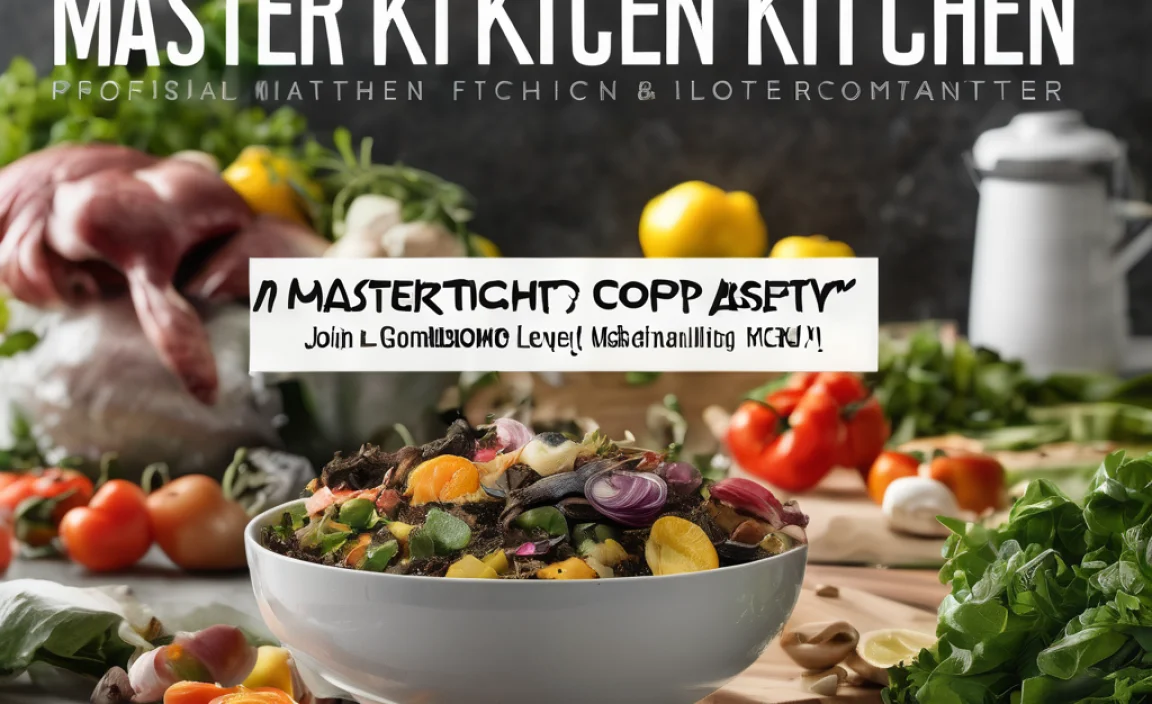
What Can You Compost? (The “Greens” and “Browns”)
Composting, whether in a large bin or using specific indoor methods, relies on a balance of “greens” and “browns.” Your kitchen scraps will primarily be “greens.” Browns are usually carbon-rich materials. To understand this fully, think about what fuels the decomposition process:
Kitchen “Greens” (Nitrogen-Rich):
- Fruit peels and scraps
- Vegetable scraps and peels
- Coffee grounds and filters
- Tea bags (remove any plastic staples or tags)
- Eggshells (crushed)
- Stale bread and grains
- Plate scrapings (from vegetarian/vegan meals, mostly)
“Browns” (Carbon-Rich – for your main compost, not usually collected in kitchen bins):
While not typically collected in your kitchen compost keeper, these are crucial for your larger compost pile. They balance out the “greens.”
- Dry leaves
- Shredded newspaper or cardboard (non-glossy)
- Sawdust (from untreated wood)
- Straw or hay
- Twigs and small branches
What to Avoid in Your Kitchen Compost Bin (and larger compost pile)
Some items can cause problems, attract pests, or simply won’t break down well in most home composting systems. For your kitchen bin, it’s best to be conservative. For a larger, more robust compost pile, some exceptions might apply, but always check your specific system’s guidelines.
- Meat, fish, and bones: These can attract pests and create strong odors. (Note: Some advanced systems like Bokashi or electric composters can handle these, but traditional bins generally can’t.)
- Dairy products: Similar to meat, these can be smelly and attract pests.
- Oily or greasy foods: These can slow down decomposition and create an unpleasant environment.
- Diseased plants: This can spread diseases to your garden.
- Weeds that have gone to seed: You don’t want to spread more weeds.
- Pet waste (dog, cat): Can contain harmful pathogens.
- Chemically treated yard waste: Pesticides or herbicides can harm your compost and plants.
- Glossy or coated paper/cardboard: These often contain plastics or chemicals that don’t break down.
- Synthetic materials: Plastics, metals, glass, etc., will not decompose.
Reviewing Popular Kitchen Composting Systems
Let’s take a closer look at how some of these systems actually work in practice and their pros and cons. This will help you make an informed decision.
Table 1: Comparison of Kitchen Composting Systems
| System Type | Best For | Ease of Use | Odor Control | Capacity | Composting Speed | Cost (Approx.) | Pros | Cons |
|---|---|---|---|---|---|---|---|---|
| Countertop Bin | Collecting daily scraps quickly | Very High | Good (with filter) | Low | N/A (collection only) | $20 – $60 | Convenient, accessible, simple | Needs frequent emptying, small volume |
| Under-Sink Bin | Concealed collection | High | Good | Medium | N/A (collection only) | $25 – $70 | Out of sight, still accessible | Less convenient than countertop, may need space |
| Electric Food Cycler | Rapid breakdown, odor-free | Very High | Excellent | Medium | Hours | $200 – $500+ | Fast, reduces volume, odorless, handles most scraps | High initial cost, uses electricity, processed material still needs to decompose |
| Bokashi Bin | Fermenting all food types indoors | Medium | Excellent (sealed) | Medium | Weeks (ferment), then months (in soil) | $50 – $100 (per system) + ongoing bran cost | Handles all scraps, nutrient tea, no smell during fermentation | Requires specific bran, fermented product needs further processing |
Outdoor Compost Bins and Tumblers
For many homeowners, the ultimate goal is to have an outdoor compost bin or tumbler. Your kitchen compost keeper simply acts as a temporary holding station for scraps before they are transferred to this larger system. Outdoor bins come in various forms: stationary bins (often made of plastic or wood pallets) or rotating tumblers.
Stationary Bins
These are typically large bins where you layer your kitchen scraps (“greens”) with yard waste (“browns”). They require turning with a pitchfork or compost aerator every so often to introduce oxygen and speed up decomposition. For more on proper layering and turning, the Old Farmer’s Almanac has some great, practical advice.
Compost Tumblers
These are barrel-like containers that you can rotate or tumble. Tumblers make turning much easier and can speed up the composting process significantly because they heat up faster and are kept contained. They also deter pests more effectively.
Materials for Outdoor Bins
- Plastic Bins: Durable, easy to find, often with built-in aeration holes.
- Wooden Bins: Can be built from scratch (e.g., using pallets) for a DIY approach, or purchased. They offer good insulation.
- Wire Mesh Bins: Simple to construct, good aeration, but can dry out quickly.
- Tumblers: Usually made of durable plastic or metal, designed for easy turning.
Troubleshooting Common Kitchen Composting Issues
Even with the best intentions, you might run into a hiccup or two. Don’t worry, most issues are easily fixed. The key is to observe what’s happening and make adjustments.
Issue 1: Bad Odors
Why it happens: Usually too many “greens” (nitrogen-rich scraps) and not enough “browns” (carbon-rich materials), or lack of oxygen. This leads to anaerobic decomposition, which stinks. It can also happen if you’re composting meat or dairy.
The Fix:
- Add Browns: Mix in more shredded paper, dry leaves, or sawdust into your main compost pile.
- Aerate: Turn your compost pile more frequently to introduce oxygen.
- Empty Kitchen Bin: Make sure you’re emptying your kitchen compost keeper promptly.
- Avoid Problematic Items: Stick to the “what to avoid” list for your kitchen bin and main compost pile.
- For Indoor Bins: Ensure the lid is sealed properly and consider using charcoal filters if your bin has them.
Issue 2: Pests (Flies, Fruit Flies, Rodents)
Why it happens: Exposed food scraps, especially those containing meat, dairy, or oils, are a beacon for pests.
The Fix:
- Bury Scraps: Always bury fresh kitchen scraps deep within your main compost pile or under a layer of brown materials.
- Secure Lids: Ensure all compost bins have tight-fitting lids. For outdoor bins, consider rodent-proof designs or wire mesh at the base.
- Avoid Problem Foods: Strictly avoid meat, dairy, and greasy foods in standard compost systems.
- Faster Composting: A well-managed, “hot” compost pile (that reaches high temperatures) will kill off many potential pests and their eggs.
- Fruit Fly Traps: For countertop bins, a simple trap made of vinegar and dish soap in a small dish can help manage persistent fruit flies.
Issue 3: The Compost is Too Wet
Why it happens: Too many wet kitchen scraps (like melon rinds or leafy greens) and not enough dry “browns.” It can also happen from too much rain if you have an outdoor uncovered bin.
The Fix:
- Add Browns: Mix in plenty of shredded newspaper, cardboard, dry leaves, or sawdust.
- Improve Drainage: Ensure your outdoor bin has good drainage at the bottom. For tumblers, check if drain holes are clear.
- Cover Bin: If your outdoor bin is exposed to heavy rain, consider placing a tarp or lid over it (but ensure some airflow).
- Drain Excess Liquid: If you see standing water, try to carefully drain it off or use a garden fork to aerate and mix in dry materials.
Issue 4: The Compost is Too Dry
Why it happens: Not enough moisture, or too many dry “browns” and not enough “greens.” This happens especially in hot, dry weather.
The Fix:
- Add Water: Sprinkle with

I am passionate about home engineering. I specialize in designing, installing, and maintaining heating, ventilation, and air conditioning systems. My goal is to help people stay comfortable in their homes all year long.