Feeling a bit overwhelmed by food scraps piling up in your kitchen bin? You’re not alone! For many of us in South Africa, figuring out what to do with leftover fruit peels, veggie bits, and coffee grounds can be a sticky situation. But what if I told you there’s a simple, eco-friendly way to turn that “waste” into something valuable for your garden? Get ready, because we’re about to explore how easy kitchen composting can be, right here in South Africa. We’ll walk through everything you need to know, step-by-step, so you can start transforming your kitchen waste into nutrient-rich compost.
Kitchen Compost in South Africa: Your Essential Beginner’s Guide
Hey there! Troy D Harn here, your friendly guide to making home life a little bit easier and a lot more sustainable. Today, we’re diving into kitchen composting, specifically for us here in South Africa. You know, those banana peels, eggshells, and coffee grounds that usually end up in the bin? We’re going to learn how to turn them into garden gold!
Composting isn’t just about reducing landfill waste, although that’s a big win. It’s also about creating fantastic, natural fertiliser for your plants, whether you have a sprawling garden or just a few pots on your balcony. And the best part? It’s totally doable, even if you’re a complete beginner.
We’ll break down exactly what you need, how to do it, and what to avoid, all in plain English. Ready to get your hands a little dirty (in the best way possible)? Let’s get composting!
Why Start Kitchen Composting in South Africa?
You might be wondering, “Why bother with kitchen composting?” Well, there are some fantastic reasons, especially for us living in South Africa.
- Reduce Landfill Waste: Food scraps make up a significant portion of what ends up in our landfills. Composting diverts this valuable organic material, helping to lessen the burden on our environment. Did you know that organic waste in landfills can release methane, a potent greenhouse gas? Composting avoids this.
- Create Amazing Garden Food: Compost is often called “black gold” by gardeners, and for good reason! It’s packed with nutrients that your plants will absolutely love. It improves soil structure, helps retain moisture, and can even suppress some plant diseases. Your veggies will thank you!
- Save Money: Instead of buying expensive fertilisers and soil conditioners, you can make your own for free using your kitchen scraps. This is great for the budget and your peace of mind.
- Connect with Nature: There’s something incredibly rewarding about taking something that would have been thrown away and transforming it into something beneficial for the earth. It’s a small but powerful way to be more in tune with natural cycles.
- It’s Easier Than You Think: Many people imagine composting as a complicated or smelly process. In reality, with a few simple steps and the right approach, kitchen composting can be clean, easy, and very effective.
What You Need to Start Your Kitchen Compost Journey
Don’t let fancy equipment scare you off! You can start composting with minimal gear. Here’s a simple breakdown of what’s helpful:
1. A Kitchen Compost Caddy (or a Simple Container)
This is where you’ll collect your kitchen scraps before taking them to your main compost pile or bin. Look for one with a lid to keep things tidy and prevent smells from escaping. Many are designed to have charcoal filters to help with odour. If you don’t have a dedicated caddy, a sturdy plastic container with a lid will work perfectly. Just make sure it’s easy to clean!
| Compost Caddy Option | Pros | Cons | Good For |
|---|---|---|---|
| Dedicated Kitchen Compost Bin (with lid/filter) | Odor control, stylish designs, easy to use | Can be an extra purchase | Beginners, those concerned about smells |
| Repurposed Container (e.g., old ice cream tub) | Free, readily available | May not have odor control, might not be as durable | Budget-conscious, quick start |
| Paper Bags or Newspaper Lined Container | Absorbs moisture and odors | Needs frequent replacement, can get messy | Temporary storage, very small kitchens |
2. A Main Composting System
This is where the magic of decomposition happens. You have a few options depending on your space and how much waste you produce:
- Worm Farm (Vermicomposting): Ideal for smaller spaces, apartments, or if you don’t have much garden space. Special composting worms (like red wigglers) eat your food scraps and produce nutrient-rich worm castings. This is a popular choice in South Africa, and you can even buy kits!
- Tumbler Composter: These are enclosed drums that you can rotate. Tumbler composting is often faster and keeps pests out. They can be a bit more of an investment but are very efficient.
- Open Compost Bin: The classic backyard compost heap. This can be a simple pile or a constructed bin made from wood, wire mesh, or plastic. It’s great for larger volumes of waste and is a straightforward method.
- Bokashi: This is a unique, anaerobic (without oxygen) fermentation method that uses inoculated bran to pickle your food waste. You can compost almost anything with Bokashi, including meat and dairy. The fermented material then needs to be buried in soil or added to a traditional compost pile to finish breaking down.
For beginners in South Africa, a worm farm or a simple enclosed bin is often the most manageable and effective way to start.
3. Kitchen Scraps (Your “Greens”)
These are the nitrogen-rich materials that break down quickly. Think of them as the “fuel” for your compost.
4. “Browns” (Carbon-Rich Materials)
These are your paper and dry plant matter. They provide the carbon that balances out the nitrogen and adds bulk, creating air pockets. This is crucial for a healthy compost pile that doesn’t smell.
5. Water
Your compost needs to be about as damp as a wrung-out sponge. Too dry and it won’t break down; too wet and it can become a stinky mess.
And that’s it! You don’t need anything too fancy.
What Kitchen Scraps Can You Compost? (The “Greens”)
This is the fun part! Most of your everyday food waste can be composted. Aim for a good mix:
- Fruit scraps (peels, cores, rinds)
- Vegetable scraps (peels, stalks, wilted leaves)
- Coffee grounds and paper filters
- Tea bags (remove any staples)
- Eggshells (crush them for faster breakdown)
- Stale bread, crackers, and pasta (in moderation)
- Cooked rice and grains (in moderation)
Pro-Tip: Chop larger items into smaller pieces. This speeds up the decomposition process significantly.
What Kitchen Scraps Should You AVOID Composting?
While composting is versatile, some things are best left out of your main compost bin, especially if you’re a beginner:
- Meat, fish, and bones: These can attract pests and create foul odors. (Note: Bokashi can handle these, but not a standard compost pile).
- Dairy products (milk, cheese, yogurt): Similar to meat, these can smell and attract unwanted visitors.
- Oily or greasy foods: These can slow down decomposition and create unpleasant smells.
- Diseased plant matter: You don’t want to spread plant diseases to your healthy garden.
- Weeds that have gone to seed: Unless your compost gets very hot, you risk spreading weed seeds.
- Pet waste (dog and cat feces): These can contain pathogens harmful to humans.
- Chemically treated materials: Avoid anything that might have been sprayed with pesticides or herbicides.
- Glossy or coated paper/cardboard: These often contain plastics or other non-biodegradable materials.
If you’re using a worm farm, it’s generally best to avoid citrus peels, onions, and garlic in large quantities, as worms can be sensitive to them. Small amounts are usually fine.
What “Browns” Do You Need?
These are the dry, carbon-rich materials that are essential for balancing your compost. They add air and prevent your “greens” from becoming a slimy, stinky mess. Think of them as the “fluff” or “structure” for your compost.
- Dried leaves
- Shredded newspaper (avoid glossy inserts)
- Shredded cardboard (non-coated is best)
- Straw or hay
- Wood chips or sawdust (in moderation, ensure they’re untreated)
- Egg cartons (torn up)
- Paper towels and napkins (if not too greasy or soiled with chemicals)
Balancing your greens and browns is key! A good rule of thumb is to aim for roughly two to three parts browns for every one part greens.
Step-by-Step: How to Start Kitchen Composting
Let’s get practical! Here’s how to set up and maintain your kitchen compost system.
Step 1: Set Up Your Kitchen Caddy
Place your chosen kitchen compost caddy on your countertop or under your sink. It’s your collection point for daily food scraps.
Step 2: Choose and Set Up Your Main Composting System
Decide where your main compost bin, worm farm, or Bokashi setup will go. A shaded spot is usually best, especially in hot South African weather, to prevent it from drying out too quickly.
- For a Worm Farm: Follow the instructions provided with your kit. Usually, this involves adding bedding (like shredded newspaper or coir), moistening it, and then adding your composting worms. Allow them a few days to get settled before adding food scraps.
- For a Compost Bin/Tumbler: Choose a level spot. If it’s a tumbler, assemble it. If it’s an open bin, you might want to start with a layer of “browns” at the bottom for drainage and aeration.
- For Bokashi: You’ll need a Bokashi bin (usually comes with a spigot for draining liquid) and the Bokashi bran. Start by adding your food scraps, then sprinkle a layer of bran over the top. Keep the lid sealed tightly.
Step 3: Collect Your Kitchen Scraps
As you cook or prepare food, toss your compostable scraps (your “greens”) into your kitchen caddy. Remember what to include and what to avoid!
Step 4: Add Scraps to Your Main System
When your kitchen caddy is full (or at least once a day), take it to your main composting setup.
- Worm Farm: Bury the food scraps under the bedding. This helps prevent fruit flies and odors.
- Compost Bin/Tumbler: Add your greens. Then, cover them with a layer of “browns.” This is crucial for odour control and to keep the moisture balanced. Aim for that 2:1 or 3:1 brown-to-green ratio.
- Bokashi: Add your food scraps to the Bokashi bin, cover with the inoculated bran, and press down to remove air. Seal the lid tightly.
A common beginner mistake is adding too many “greens” without enough “browns.” This is a recipe for a smelly pile! Always think about adding a layer of dry leaves or shredded newspaper after you add your kitchen scraps to the bin.
Step 5: Maintain Moisture Levels
Your compost should feel like a damp sponge. If it’s too dry, add a bit of water. If it’s too wet, add more “browns.”
- Worm Farms: The bedding should be moist, not soggy. Worm castings should look dark and crumbly.
- Compost Bins/Tumblers: Check moisture by grabbing a handful. If a few drops of water come out, it’s likely just right.
- Bokashi: The material will be pickled, not damp in the composting sense. Drain the liquid (Bokashi tea) regularly – this is a nutrient-rich liquid fertiliser!
Step 6: Provide Airflow
Composting is an aerobic process, meaning it needs oxygen. Regularly turn your compost pile or tumble your compost bin. This mixes everything, speeds up decomposition, and prevents foul-smells.
- Worm Farms: Worms generally do a good job of aerating the material themselves.
- Compost Bins/Tumblers: Use a pitchfork or compost aerator tool to turn the pile weekly or bi-weekly.
- Bokashi: Air is not needed as it’s anaerobic.
Step 7: Harvest Your Compost!
How long does it take? This varies depending on your method, the materials you use, and the conditions.
- Worm Farms: Usually ready to harvest castings in 2-4 months.
- Compost Bins/Tumblers: Finished compost can be ready in 2-6 months. It will look dark, crumbly, and smell earthy, like a forest floor.
- Bokashi: The fermentation process takes about 2 weeks. After that, you’ll need to bury the fermented material in a compost pile, garden bed, or large pot for another 2-4 weeks to fully break down.
Once ready, you can use your compost in your garden beds, around trees and shrubs, or add it to potting mixes for your containers. You can sift it if you want a finer texture.
Common Kitchen Composting Problems & Solutions
Even with the best intentions, you might run into a few hiccups. Here’s how to troubleshoot:
Problem 1: It Smells Bad!
- Cause: Too many “greens,” not enough “browns,” or the pile is too wet and compacted. This means it’s gone anaerobic (lacking oxygen).
- Solution: Add a generous amount of “browns” (shredded newspaper, dry leaves, cardboard). Poke holes in the pile or turn it more frequently to introduce air. If it’s very wet, add more browns and turn it.
Problem 2: Fruit Flies
- Cause: Exposed food scraps.
- Solution: Always cover your kitchen scraps with a layer of “browns” when adding them to your main bin. If it’s a worm farm, bury the scraps just beneath the surface. You can also try a simple fruit fly trap made from a jar of apple cider vinegar with a drop of dish soap.
Problem 3: It’s Not Breaking Down
- Cause: Pile is too dry, too cold, or lacks nitrogen (“greens”).
- Solution: Check moisture – it should be damp. Add more “greens” if you suspect a lack of nitrogen. If it’s cold weather, decomposition will slow down, but it will still happen. Turning the pile can help generate heat.
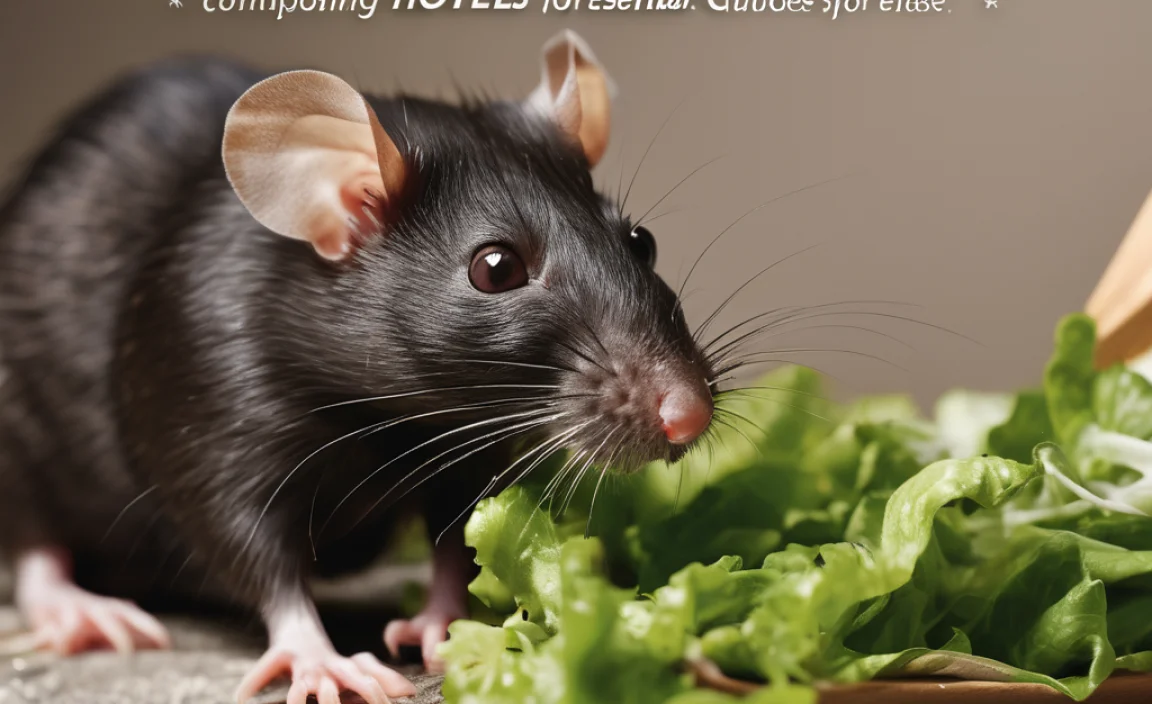
Problem 4: Pests (Rodents, etc.)
- Cause: Exposure of meat, dairy, or oily foods; an unsecured bin.
- Solution: Ensure you are not adding prohibited items like meat, dairy, or oils. Use a secure, enclosed compost bin (like a tumbler or a rodent-proof bin). You can also bury food scraps deep within the pile and cover them well with browns.
For more detailed advice on composting in South Africa, the City of Cape Town offers some great local resources.
The Benefits and Challenges of Composting in Different South African Climates
South Africa boasts diverse climates, and this can affect your composting efforts.
| Climate Type | Potential Benefits | Potential Challenges | Tips for Success |
|---|---|---|---|
| Hot & Dry (e.g., Karoo, Northern Cape) | Faster decomposition in warmer months. Heat can kill weed seeds and pathogens. | Dries out very quickly. May require more frequent watering. | Site in partial shade. Add more ‘greens’ or water more frequently. Cover with compost blanket or mulch. |
| Temperate & Humid (e.g., Coastal, Garden Route) | Ideal moisture and temperature levels can lead to steady decomposition. | Can become too wet if rainfall is excessive, leading to anaerobic conditions. | Ensure good drainage. Add extra ‘browns’ during wet periods. Turn regularly. |
| Subtropical (e.g., KZN) | Warm temperatures encourage fast decomposition year-round. | High humidity and heat can sometimes lead to odors if not managed with sufficient ‘browns’ and aeration. Pests might be more active. | Focus on balancing ‘greens’ and ‘browns’. Ensure good airflow. Use enclosed bins if pests are a major concern. |
| Mediterranean (e.g., Western Cape) | Mild winters and warm summers support good composting activity. | Dry summers can be a challenge, requiring consistent watering. | Water regularly during dry spells. Site in a location that receives morning sun but afternoon shade. |
Understanding your local conditions will help you fine-tune your composting technique. For instance, if you’re in a very hot, dry area, you’ll need to be extra vigilant about moisture. If you’re in a humid area, focus on aeration and adding enough browns.
Composting for Apartments and Small Spaces
Don’t have a big garden? No problem! Kitchen composting is still very achievable.
- Worm Farms: These are perfect for balconies, under a sink, or even in a small kitchen. They are contained, efficient, and produce fantastic worm castings.
- Bokashi: This system is entirely contained and can be done indoors. The fermented waste then needs to be added to soil elsewhere (a friend’s garden, a community garden, or a larger pot).
- Countertop Composter (Electric/Dehydrator): These aren’t strictly composting but rather dehydrate and reduce food waste significantly, turning it into a dry, ground-up material that can be added to soil or compost bins. While they use electricity, they are super fast and odourless.
- Community Gardens/Composting Services: If space is extremely limited and even a worm farm isn’t an option, look for local community gardens or municipal initiatives that might offer composting collection services.
Even a small amount of kitchen composting makes a difference. Start small, and you’ll see how easy it can become.
Conclusion
There you have it – your essential guide to kitchen composting right here in South Africa! We’ve shown you that turning your food scraps into valuable garden food is not only possible but also incredibly rewarding and easier than you might think. From choosing the right setup for your space to understanding what to compost and what to avoid, you’re now equipped to start this simple yet powerful sustainable practice.
Remember, composting is a journey. Don’t be discouraged if your first few attempts aren’t perfect. A little practice, observation, and a good balance of green and brown materials will have you creating ‘black gold’ in no time. You’ll be reducing landfill waste, enriching your soil, and making a positive impact on your environment, one banana peel at a time. So, grab a caddy, set up a bin, and start composting!
FAQs About Kitchen Composting in South Africa
What is the best type of compost bin for a beginner in South Africa?
For most beginners in South Africa, a worm farm or a well-ventilated, enclosed compost bin is a great starting point. Worm farms are compact and efficient for smaller spaces, while enclosed bins help manage moisture and deter pests effectively.
How often should I add kitchen scraps to my compost bin?
You can add scraps as you accumulate them in your kitchen caddy. If you have a standard compost bin, it’s best to add them a few times a week, always burying them under a layer of ‘browns’ (like dry leaves or shredded newspaper) to control odour and pests.
Is it normal for my compost pile to get hot?
Yes! A healthy, active compost pile will generate heat as microorganisms break down the organic material. This heat is good as it kills pathogens and weed seeds. If it’s not heating up, it might be too dry, lack nitrogen (greens), or needs turning.
Can I compost citrus peels and eggshells?
Yes, you can compost citrus peels and eggshells. Eggshells should be crushed to help them break down faster. While worms can be sensitive to large amounts of citrus, small quantities are usually fine in a worm farm. In a traditional compost bin, they break down well.
How do I know when my compost is ready to use?
Finished compost will be dark brown or black, crumbly, and will smell pleasant and earthy, like a forest floor. You shouldn’t be able to recognise the original food scraps.
Will composting attract rats or other pests to my home?
If done correctly, composting with kitchen scraps should not attract pests. The key is to avoid adding prohibited items like meat and dairy, to always cover fresh kitchen scraps with ‘brown’ material, and to use a well-maintained, secure compost bin or system. A hot compost pile also deters pests.
Where can I find composting worms in South Africa?
Composting worms, such as red wigglers (Eisenia fetida), can often be purchased from specialist worm farm suppliers online, at some garden centres, or from people who already have established worm farms. Searching online for “composting worms South Africa” or “worm farm suppliers South Africa” will usually lead you to local options.

I am passionate about home engineering. I specialize in designing, installing, and maintaining heating, ventilation, and air conditioning systems. My goal is to help people stay comfortable in their homes all year long.