Ever find yourself staring at apple cores, coffee grounds, and veggie peels, wondering where they should go besides the trash can? It’s a common kitchen puzzle! Many of us want to do our bit for the planet by composting, but figuring out how to store food scraps right in our kitchen can feel a bit tricky. Don’t worry, it’s simpler than you think! We’ll walk through easy, practical ways to keep your kitchen clean and your compost journey smooth from the start. Get ready to turn those scraps into garden gold!
Kitchen Compost Stores: Essential Solutions for a Greener Kitchen
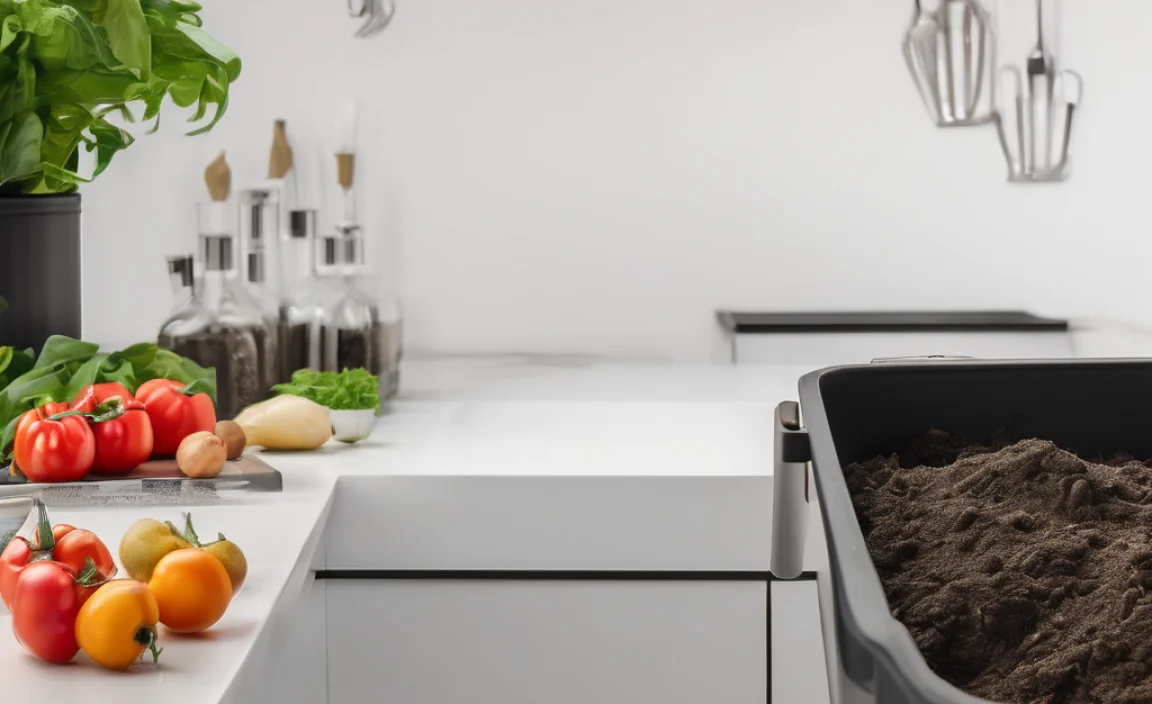
Hey neighbors! Troy D Harn here from TopChooser. You know, I’ve always believed that making our homes better shouldn’t be complicated. And that includes making eco-friendly choices like composting. One of the first hurdles people hit? Figuring out where to put those food scraps before they go out to the main compost bin or pile. That’s where a good kitchen compost store, or a compost caddy as some folks call it, comes in. It’s your little helper, keeping things tidy and odor-free right on your countertop or under your sink. Let’s dive into the best ways to handle kitchen compost holding.
Why You Need a Kitchen Compost Store
Think about it. Every day, you’re tossing things into your regular trash that could be composted. Things like:
- Vegetable and fruit scraps (peels, cores, ends)
- Coffee grounds and tea bags
- Eggshells
- Stale bread and grains
- Plate scrapings (if you’re not using plates with lots of grease or meat)
Without a dedicated spot for these, they pile up in your bin, can get messy, and might even start to smell. A kitchen compost store solves this by giving you a convenient bin to collect these items right where you prepare your food. It makes the whole process so much easier and cleaner.
The Benefits at a Glance:
- Reduces Odors: Most kitchen composters are designed to contain smells.
- Keeps it Tidy: No more messy piles or drippy bags.
- Convenience: Easy to access while cooking.
- Encourages Composting: Makes the habit easier to start and maintain.
- Less Waste: Diverts food scraps from landfills, helping the environment.
Types of Kitchen Compost Stores
When we talk about kitchen compost stores, there are a few main types. Each has its own charm and works best for different folks. The goal is simple: hold those scraps conveniently and cleanly.
1. Countertop Compost Bins (Compost Caddies)
These are the most common and probably what you picture. They’re small bins designed to live on your kitchen counter, hang on a cabinet door, or sit under the sink. You fill these up throughout the day with your food scraps. When it’s full, you take the whole bin or the liner bag out to your main compost bin outside.
Features to Look For:
- Size: Usually between 1-3 gallons. Pick one that fits your household’s scrap volume and how often you empty it.
- Lid: A tight-fitting lid is key for keeping smells in and pests out. Some have charcoal filters to help with odors.
- Material: Often made of plastic, stainless steel, or sometimes ceramic. Plastic is common, easy to clean, and affordable. Stainless steel looks sleek and is durable.
- Handle: A sturdy handle makes carrying it to your outdoor compost easy.
- Ventilation: Some have small vents, especially if you’re using compostable bags, to allow a bit of air circulation.
Pros: Super convenient, readily available, good odor control with filters.
Cons: Need regular emptying, can be small for large households.
2. Under-Sink Compost Collectors
If you prefer to keep your countertops clear, an under-sink collector is a great option. These are often just a bit larger than a typical countertop bin and are designed to slide out or fit snugly within your cabinet. You usually still need a smaller collection bin to gather scraps at your prep area and then transfer them to the under-sink collector.
Considerations:
- Space: Measure your under-sink cabinet to ensure a good fit.
- Height and Depth: Make sure it won’t interfere with pipes or cleaning supplies.
- Ease of Access: A pull-out drawer or removable lid makes it user-friendly.
Pros: Keeps countertops clutter-free, larger capacity might be possible.
Cons: Requires bending down, might be less convenient for frequent scrap collection.
3. Compostable Bags
While not a ‘store’ in itself, compostable bags are a crucial partner for many kitchen compost solutions. These bags are designed to break down along with your food scraps in a compost environment (either your home bin or an industrial facility). They make emptying your kitchen caddy much cleaner as they contain any moisture.
What to Know:
- Certification: Look for bags certified by organizations like the Biodegradable Products Institute (BPI) in North America or Home Compostable certified (like TUV Austria OK compost HOME). This ensures they will break down properly.
- Durability: Some can be a bit flimsy when wet, so handle with care.
- Cost: They are more expensive than traditional plastic bags.
Pros: Keeps caddies clean, easy to transport scraps.
Cons: Additional cost, must be composted properly to realize benefits.
4. DIY Solutions
Don’t underestimate your own creativity! Many people use repurposed containers as their kitchen compost store. An old ice cream tub, a large yogurt container, or even a dedicated metal pail can work. The key is to ensure it has a lid you can secure and that it’s easy to clean. You might need to poke a few small holes for ventilation if you’re not using a compostable liner, but be careful not to make them too big, or pests could get in.
Pros: Very affordable, reduces waste by reusing containers.
Cons: May not have the best odor control or sealing capabilities of a purpose-built product.
Choosing the Right Kitchen Compost Store for You
So, how do you pick the perfect one? It boils down to your kitchen, your habits, and your preferences. Let’s break it down.
Consider Your Household Size and Habits
Small household/infrequent cooking: A smaller countertop caddy (1-1.5 gallons) with a good lid and maybe a charcoal filter should be plenty. You’ll likely empty it every 2-3 days.
Larger household/lots of cooking: You might need a larger caddy (2+ gallons) or consider an under-sink solution where you can store more scraps before taking them out. You’ll probably find yourself emptying it daily.
Are you sensitive to smells? Look for caddies with actively filtering lids (charcoal filters) or those designed for an airtight seal. Proper emptying is also crucial, regardless of the type of store you choose.
Countertop vs. Under-Sink
Countertop: Best for those who want quick, easy access. It’s right there when you’re chopping veggies or rinsing plates. It does take up a bit of counter space, but many are designed to be attractive.
Under-Sink: Great if you value clear countertops and have the space. It’s hidden away, but you’ll need to be disciplined about bringing scraps to it or having a smaller scoop bin for constant use.
Budget
You can find basic plastic countertop bins for as little as $10-$20. Stainless steel ones can range from $25-$50 or more. Compostable bags add an ongoing cost, but they do make the process cleaner. DIY options are, of course, the most budget-friendly.
Ease of Cleaning
No matter what you choose, it needs to be easy to wash! Most plastic and stainless steel bins can be washed with soap and water. Some are even dishwasher safe (check the manufacturer’s instructions). Regular cleaning prevents build-up and odors.
Top Features to Seek in a Kitchen Compost Store
Let’s get down to the nitty-gritty of what makes a kitchen compost store truly effective. It’s not just about holding scraps; it’s about doing it well and conveniently.
Odor Control is King!
This is often the biggest concern for people. Here’s how good kitchen compost stores tackle it:
- Airtight Lids: A simple, snug-fitting lid prevents air circulation, which reduces the development of odor-causing bacteria and smells.
- Charcoal Filters: Many popular models come with a small compartment on the lid that holds a replaceable activated charcoal filter. These filters trap odors before they escape. They’re usually effective for a few months before needing replacement. Check out resources on how activated charcoal works, like those found on EPA.gov for general waste reduction tips that apply here.
- Ventilation (for specific uses): If you’re using certified compostable bags and plan to empty the bin very frequently (daily), some bins might have small vents. The idea is that quick emptying means less time for odors to build up. However, for most people, a sealed system is better for odor control.
Material Matters
- Plastic: Lightweight, affordable, easy to clean, and available in many colors and styles. Look for BPA-free plastics if that’s a concern.
- Stainless Steel: Durable, aesthetically pleasing, and doesn’t absorb odors or stains. They can be more expensive and might show fingerprints.
- Ceramic: Often found in decorative styles. They can be heavy and breakable, but they offer good odor containment and look nice on a counter.
Size and Capacity
This is where your personal habits come into play. A 1-gallon bin might be fine for a single person who cooks minimally, but a family of four will likely fill a 2-gallon or even a 3-gallon bin quickly. The goal is to find a size that you’re happy to empty every 1-3 days. If you find yourself emptying it every few hours, it might be too small. If you’re going a week without filling it, it might be taking up too much space.
Ease of Use and Ergonomics
- Handle: A comfortable, sturdy handle is essential for carrying the bin to your outdoor compost or curbside bin.
- Lid Mechanism: Some lids flip open, some lift off, and some have a clasp. Think about what’s easiest for you to operate with one hand while holding scraps.
- Opening Size: A wide opening makes it easy to sweep scraps in without missing and making a mess.
Cleaning and Maintenance
This is HUGE. A compost bin that’s hard to clean is one that likely won’t get used properly.
- Dishwasher Safe: If this is an option, it’s a major convenience. Even if not, a smooth interior with no nooks and crannies is ideal for easy wiping.
- Removable Parts: Some bins have removable inner buckets, which can make emptying and cleaning simpler.
- Material Don’t Absorb Odors: Non-porous materials like plastic and stainless steel are best for preventing lingering smells.
For more on maintaining compostable materials and what happens to them, you can look at resources from university extension offices, which often have excellent, science-based gardening and composting advice. For example, Michigan State University Extension offers great insights into compostable materials.
Using Your Kitchen Compost Store Effectively
Having the right store is only half the battle! How you use it makes all the difference in keeping things smelling fresh and working well.
Step-by-Step Best Practices
- Collect Scraps: Keep your chosen kitchen compost store accessible. As you cook or eat, scrape all appropriate food scraps directly into the bin.
- Know What to Compost: Stick to fruit and vegetable scraps, coffee grounds, tea bags (paper ones), eggshells, and small amounts of plain bread or grains. Avoid meat, dairy, oily foods, and diseased plants, as these can cause odor issues or attract pests in your main compost system.
- Empty Regularly: This is the golden rule! Don’t let scraps sit in your kitchen caddy for more than a day or two, especially in warm weather. The fuller it gets, the more likely odors are to escape.
- Rinse After Emptying: After you empty the caddy, give it a quick rinse with water. If anything feels a bit sticky or smells, use a bit of mild dish soap.
- Use Compostable Bags (Optional but Recommended): If you use compostable bags, place one in your caddy before you start collecting scraps. This makes emptying and cleaning much faster. Ensure the bags are certified compostable and disposed of correctly.
- Maintain Filters: If your caddy has a charcoal filter, remember to replace it according to the manufacturer’s instructions (usually every 2-3 months) to keep odor control working effectively.
What to Avoid:
- Overfilling: This is a recipe for spills and smells.
- Composting Prohibited Items: Meat, dairy, fats, oils, and diseased plants should generally not go into a typical kitchen compost caddy or a home compost bin without advanced knowledge.
- Leaving it Too Long: The longer scraps sit, the more opportunities for smells and potential issues.
- Not Cleaning: Build-up can harbor bacteria and odors.
Popular Kitchen Compost Store Models at a Glance
While specific models can change, here’s a look at some common types you’ll find, highlighting what people like about them. This isn’t an endorsement of any single brand, just a guide to what features are popular.
| Feature | Typical Example 1 (Plastic Caddy with Filter) | Typical Example 2 (Stainless Steel, Sleek Design) | Typical Example 3 (Hanging Door Mount) |
|---|---|---|---|
| Material | BPA-free Plastic | Brushed Stainless Steel | Plastic or Metal |
| Capacity | 1-2 Gallons | 1-3 Gallons | 0.75-1.5 Gallons |
| Lid Type | Flip-top with charcoal filter compartment | Clasp-lid or Lift-off | Hinged or Lift-off |
| Mounting Option | Countertop or under-sink | Countertop or under-sink | Hangs on cabinet door or drawer front |
| Key Advantage | Affordable, good odor control with filter | Durable, aesthetic, no absorbed odors | Space-saving, convenient access for scrap disposal |
| Potential Drawback | Can scratch/stain over time, filter replacement cost | Higher upfront cost, can show fingerprints | Smaller capacity, door might swing awkwardly |
When you’re shopping, look for reviews that talk about ease of cleaning, how well the lid seals, and how effective the odor control is over time. These details matter in the long run.
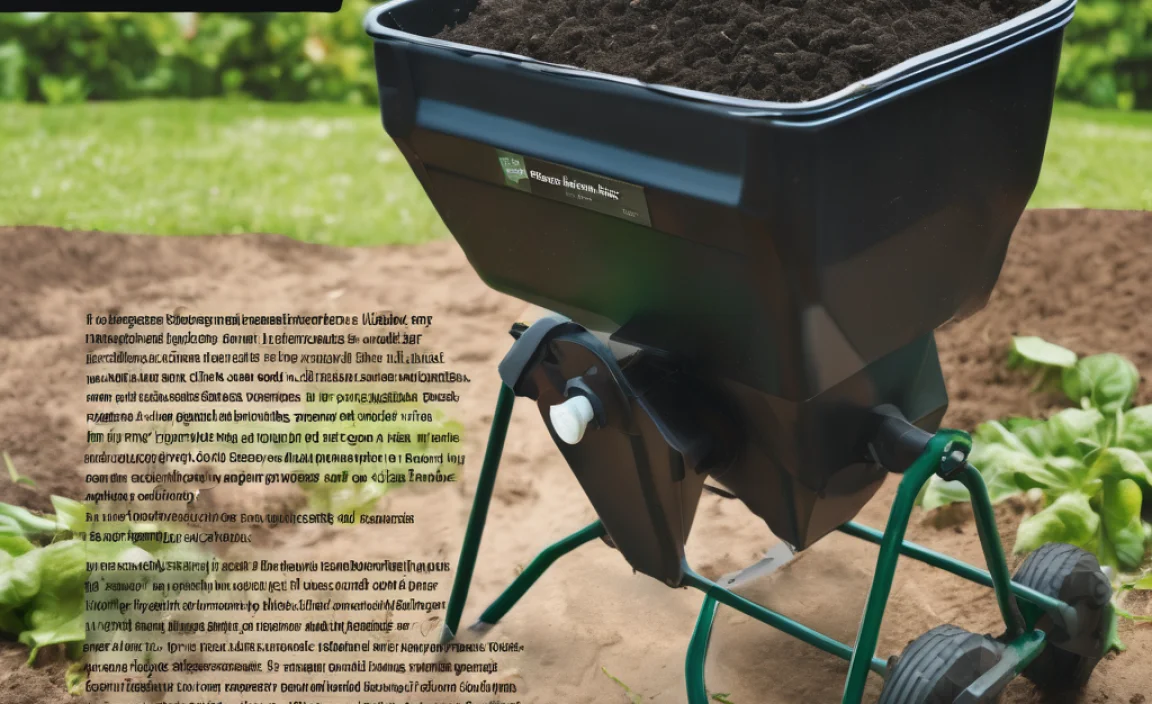
Composting Beyond the Kitchen: What Happens Next?
Once your kitchen compost store is full, it’s time to take it to its next destination. This is where the magic of composting really happens!
Your Outdoor Compost Bin or Pile
This is the most common place. You’ll empty your kitchen caddy directly into your:
- Compost Bin: These can be store-bought tumblers, stationary bins, or DIY structures made from wood or wire mesh.
- Compost Pile: A simple heap in a corner of your yard.
In your outdoor compost system, the food scraps join other “greens” (like grass clippings) and “browns” (like dry leaves, shredded cardboard) to break down into nutrient-rich compost for your garden. For best practices in backyard composting, the
.lwrp.link-whisper-related-posts{
margin-top: 40px;
margin-bottom: 30px;
}
.lwrp .lwrp-title{
}.lwrp .lwrp-description{
}
.lwrp .lwrp-list-container{
}
.lwrp .lwrp-list-multi-container{
display: flex;
}
.lwrp .lwrp-list-double{
width: 48%;
}
.lwrp .lwrp-list-triple{
width: 32%;
}
.lwrp .lwrp-list-row-container{
display: flex;
justify-content: space-between;
}
.lwrp .lwrp-list-row-container .lwrp-list-item{
width: calc(25% – 20px);
}
.lwrp .lwrp-list-item:not(.lwrp-no-posts-message-item){
max-width: 150px;
}
.lwrp .lwrp-list-item img{
max-width: 100%;
height: auto;
object-fit: cover;
aspect-ratio: 1 / 1;
}
.lwrp .lwrp-list-item.lwrp-empty-list-item{
background: initial !important;
}
.lwrp .lwrp-list-item .lwrp-list-link .lwrp-list-link-title-text,
.lwrp .lwrp-list-item .lwrp-list-no-posts-message{
}@media screen and (max-width: 480px) {
.lwrp.link-whisper-related-posts{
}
.lwrp .lwrp-title{
}.lwrp .lwrp-description{
}
.lwrp .lwrp-list-multi-container{
flex-direction: column;
}
.lwrp .lwrp-list-multi-container ul.lwrp-list{
margin-top: 0px;
margin-bottom: 0px;
padding-top: 0px;
padding-bottom: 0px;
}
.lwrp .lwrp-list-double,
.lwrp .lwrp-list-triple{
width: 100%;
}
.lwrp .lwrp-list-row-container{
justify-content: initial;
flex-direction: column;
}
.lwrp .lwrp-list-row-container .lwrp-list-item{
width: 100%;
}
.lwrp .lwrp-list-item:not(.lwrp-no-posts-message-item){
max-width: initial;
}
.lwrp .lwrp-list-item .lwrp-list-link .lwrp-list-link-title-text,
.lwrp .lwrp-list-item .lwrp-list-no-posts-message{
};
}
Related Posts

I am passionate about home engineering. I specialize in designing, installing, and maintaining heating, ventilation, and air conditioning systems. My goal is to help people stay comfortable in their homes all year long.