Want to turn your kitchen scraps and yard waste into garden gold without a lot of fuss? Lasagna composting, also known as no-turn composting, might be your new best friend. It sounds fancy, but it’s actually a super simple way to get nutrient-rich compost for your plants. Let’s dive into how this method works and why it’s so great for beginners.
Lasagna Composting Benefits: Your Essential Guide to Effortless Garden Gold
Hey everyone, Troy D Harn here from TopChooser! If you’re anything like me, you love a healthy garden but don’t have tons of time for complicated chores. We’ve all seen those piles of compost, and sometimes it looks like a lot of work with all the turning and waiting. But what if I told you there’s a way to create fantastic compost that’s literally as easy as layering a lasagna? That’s right, we’re talking about lasagna composting!
This method is fantastic because it’s lazy-friendly, requires minimal effort, and produces amazing results for your soil. It’s perfect for anyone who feels a bit intimidated by traditional composting or just wants a simpler, more effective way to recycle organic waste. We’ll walk through exactly how to set it up and all the awesome benefits you’ll get from this layering technique.
What Exactly is Lasagna Composting?
Think of it like building a delicious lasagna, but instead of pasta, sauce, and cheese, you’re layering “greens” and “browns.” This method is a type of cold composting, meaning you don’t need to actively manage the temperature or turn it often. You simply build the pile in alternating layers, and nature does most of the work for you. It’s a gentle decomposition process that breaks down your materials efficiently over time.
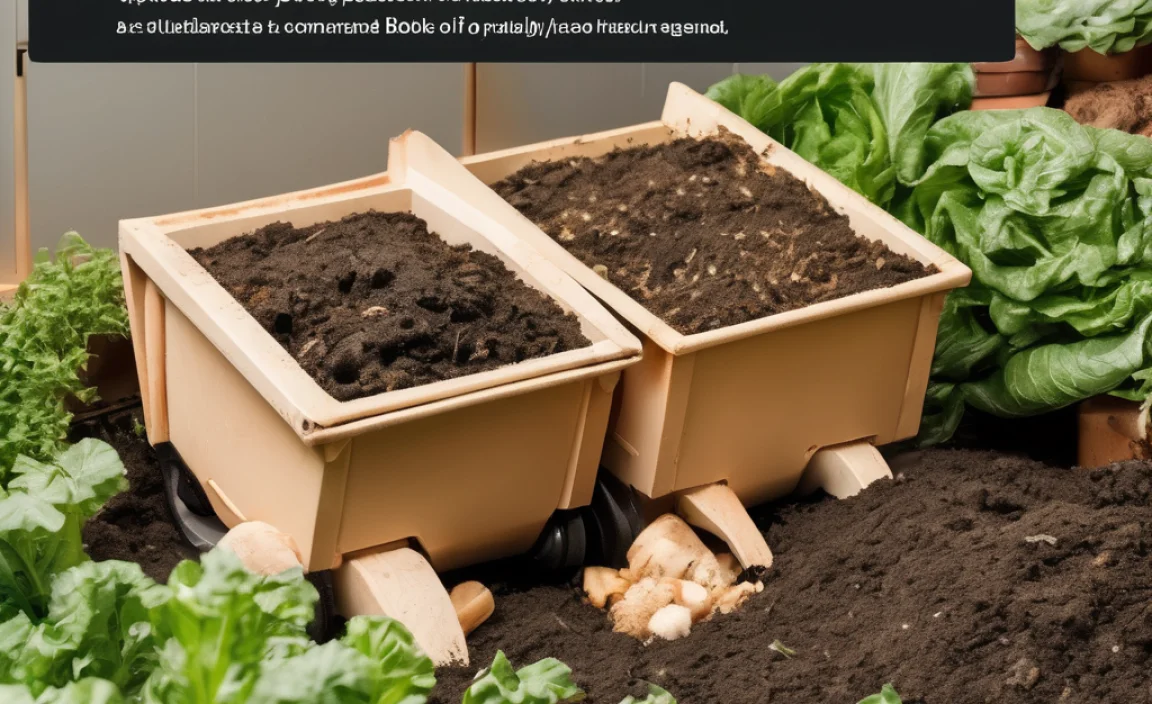
The “greens” are nitrogen-rich materials, like kitchen scraps and grass clippings. The “browns” are carbon-rich materials, such as dried leaves, shredded cardboard, and straw. By layering them correctly, you create the perfect environment for microorganisms to break everything down into rich, crumbly compost.
8 Amazing Lasagna Composting Benefits You Can’t Ignore
Why choose lasagna composting over other methods? Well, the benefits are pretty compelling, especially for busy homeowners and beginner gardeners:
- Effortless and Low Maintenance: This is the biggest win! No constant turning or fussing required. Just layer and let it be.
- Produces Rich, Nutrient-Dense Compost: The slow decomposition process creates compost that is packed with beneficial microbes and nutrients, perfect for feeding your plants.
- Ideal for Beginners: The simple layering technique takes the guesswork out of composting. If you can layer ingredients, you can do lasagna composting!
- Reduces Waste Significantly: Diverts a huge amount of organic material from landfills, helping the environment.
- Improves Soil Structure: Adding compost to your garden breaks up heavy clay soils and helps sandy soils retain moisture.
- Cost-Effective: You’re essentially recycling your own waste for free fertilizer. No need to buy expensive soil amendments.
- Can Be Done in a Small Space: While larger piles are great, you can also set up a smaller lasagna compost bin or a contained area.
- Attracts Beneficial Organisms: A healthy compost pile becomes a home for earthworms and other helpful critters that further break down materials.
The Science (Simplified!) Behind the Layers
At its heart, composting is all about providing the right conditions for decomposers – bacteria, fungi, earthworms, and other tiny organisms – to do their job. Lasagna composting works by creating an accessible environment for these workers. Here’s a quick rundown:
- Greens (Nitrogen): These materials provide the “food” for the decomposers. Think of them as the protein of the compost meal. Examples include fruit and vegetable scraps, coffee grounds, tea bags, and fresh grass clippings.
- Browns (Carbon): These materials provide the “energy” source and structure for the pile. They help aerate the compost and prevent it from becoming a slimy, stinky mess. Examples include dry leaves, straw, shredded newspaper, cardboard, and wood chips.
- Moisture: Like any living organism, decomposers need water. The pile should be damp, like a wrung-out sponge.
- Air: While it’s a “no-turn” method, the carbon-rich brown layers help create air pockets, allowing the aerobic (oxygen-loving) microbes to thrive.
When you layer greens and browns, you create mini-ecosystems within the pile. As the materials slowly break down, they generate heat (even in cold composting, though less intensely than hot composting), further speeding up the process. The layers also help prevent the materials from getting too compacted, which is crucial for airflow.
Gathering Your Lasagna Compost Ingredients: Greens and Browns
The key to successful lasagna composting is knowing what to use for your layers. Aim for a good balance, generally more browns than greens by volume, to ensure good airflow and prevent odors. A good rule of thumb is roughly 2-3 parts browns to 1 part greens.
Browns (Carbon-Rich Materials):
- Dried leaves (your most valuable compost material!)
- Shredded newspaper (avoid glossy inserts)
- Shredded cardboard (tape and labels removed)
- Straw and hay
- Sawdust or wood shavings (from untreated wood)
- Pine needles
- Egg cartons (shredded)
- Toilet paper/paper towel tubes (shredded)
Greens (Nitrogen-Rich Materials):
- Fruit and vegetable scraps
- Coffee grounds and filters
- Tea bags
- Grass clippings (use in thin layers to avoid matting)
- Plant trimmings (non-diseased)
- Manure from herbivores (cow, horse, rabbit, chicken – well-rotted is best)
- Seaweed
What NOT to Compost:
It’s just as important to know what to leave out:
- Meat, fish, bones, and dairy products (attract pests and can smell)
- Oily or greasy foods
- Diseased plants
- Weeds that have gone to seed (they might sprout in your garden)
- Pet waste (dog or cat feces – can contain pathogens)
- Chemically treated wood or yard waste
- Coal ash or charcoal briquettes
Setting Up Your Lasagna Compost Pile: A Simple Step-by-Step Guide
Ready to build your compost lasagna? It’s easier than you think! You can build this directly on the ground or in a bin. Building directly on the soil allows beneficial worms and microbes to move in from the ground.
Step 1: Choose Your Location
Find a spot that is:
- Accessible for adding materials and eventually harvesting compost.
- Well-drained to prevent sogginess.
- Partially shaded is ideal; full sun can dry it out too quickly, and full shade might keep it too wet.
- Consider where you’ll use the finished compost.
Step 2: Prepare the Base
If building directly on the ground, you can skip this step or lay down a layer of coarse brown material like twigs or straw to improve initial airflow.
Step 3: Start Layering – The First Brown Layer
Begin with a thick layer (about 4-6 inches) of carbon-rich brown materials. This could be dried leaves, shredded cardboard, or straw. This layer acts as the foundation and helps with drainage.
Step 4: Add Your First Green Layer
Top the brown layer with a thinner layer (about 2-4 inches) of nitrogen-rich green materials. This is where your kitchen scraps, grass clippings, or coffee grounds go. Try to distribute them evenly.
Step 5: Add Moisture (If Needed)
If your brown materials are very dry, lightly water the brown layer before adding the green layer. The goal is for the entire pile to be consistently damp, like a wrung-out sponge, not soggy.
Step 6: Continue Layering
Keep alternating layers of browns and greens. Aim for the 2-3 parts browns to 1 part greens ratio. Tuck the greens within the browns to avoid attracting pests and minimize odors. For example:
- Thick layer of browns (leaves, cardboard)
- Thin layer of greens (kitchen scraps, grass clippings)
- Lightly moisten if dry
- Another thick layer of browns
- Another thin layer of greens
- Continue until your pile reaches about 3-4 feet in height, or until you run out of materials.
Step 7: The Finishing Touches
For your final layer, always top the pile with a thick layer of brown material (like dry leaves or straw). This helps to insulate the pile, retain moisture, deter pests, and looks neater.
Step 8: Patience is a Virtue (and Compost!)
Now comes the easiest part: waiting! Lasagna composting is a slow-and-steady process. Depending on the materials used, the season, and your climate, it can take anywhere from 6 months to 2 years for the compost to be fully decomposed and ready to use. You don’t need to turn it. You can add more materials to the top, continuing the layering process as you generate more scraps and yard waste.
To encourage decomposition and ensure the layers meld, you can occasionally poke holes into the pile with a stick or garden fork. This helps with air circulation deeper within the pile. You can learn more about composting basics and best practices from the Environmental Protection Agency (EPA).
What You Can Expect: The Lasagna Composting Process Over Time
Don’t expect a steaming, bubbling pile like you might see in hot composting. Lasagna composting is more subtle. Here’s what typically happens:
- Initial Weeks: The pile might settle slightly as moisture distributes and microorganisms begin their work. You might notice some condensation on the inside of a bin if you’ve used one.
- Months in: The materials will start to shrink and break down. You’ll see less distinct layers as decomposition progresses from the bottom up. Earthworms and other beneficial insects will likely move in.
- Ready Compost: The finished compost will be dark, crumbly, and smell earthy. You shouldn’t be able to recognize the original materials. It will be free of weed seeds and pathogens.
You can harvest compost from the bottom of the pile while continuing to add new layers on top. This is often the most efficient way if your pile is large enough and has a front opening.
Lasagna Deconstructed: Pros and Cons at a Glance
Like anything, this method has its upsides and a few things to be aware of.
| Pros (The Good Stuff!) | Cons (Things to Keep in Mind) |
|---|---|
| Effortless: No turning needed, minimal intervention. | Slow Process: Can take 6 months to 2 years to be fully ready. |
| Rich Compost: Nutrient-dense, great for soil. | Space Requirement: Needs some physical space for the pile. |
| Beginner Friendly: Simple layering technique. | Potential for Odor: If the green-to-brown ratio is off, or if it gets too wet. |
| Waste Reduction: Diverts lots of household/yard waste. | Pest Attraction: If meat, dairy, or oily foods are added, or if not properly covered with browns. |
| Soil Improvement: Greatly enhances soil structure and fertility. | Aesthetics: Can look a bit messy if not contained in a bin. |
| Cost-Effective: Free fertilizer! | Requires Patience: You can’t rush nature’s process. |
Lasagna Composting Bins vs. Open Piles
You have choices when it comes to containing your lasagna compost:
Open Piles
- Pros: Easiest to set up, no cost for materials, allows easy access for worms from the soil. You can build it as large as you like.
- Cons: Can look messy, materials can spread out, may dry out or get too wet more easily.
Compost Bins
These can be made from pallets, wire mesh, or purchased bins. A bin helps contain the materials, looks tidier, and can help retain heat and moisture better.
- Pros: Neat appearance, better containment, retains moisture and heat more effectively, can be easier to manage in smaller yards. Many designs are available, such as tumblers or stationary bins. For great DIY bin ideas, check out resources for building compost bins from sites like Oregon State University Extension.
- Cons: Cost can be a factor if purchasing a bin, may limit the size of your pile unless you have multiple bins, can sometimes restrict airflow if not designed well.
For lasagna composting, a wooden bin made from pallets is a fantastic, budget-friendly option. You can arrange them in a U-shape or a three-sided box to create a contained area for your layers. Wire mesh bins are also excellent for allowing good airflow.
Troubleshooting Common Lasagna Composting Issues
Even with an easy method, sometimes issues pop up. Here are a few common ones:
My compost is smelly!
- Cause: Too many “greens” or the pile is too wet, leading to anaerobic conditions (lack of oxygen).
- Solution: Add more “browns” (dry leaves, shredded cardboard) to absorb moisture and improve airflow. Ensure you have good air pockets. If it’s very wet, gently fork in some dry browns.
My compost isn’t breaking down and is too dry.
- Cause: Not enough “greens” or moisture. Often happens in dry climates or during hot summers.
- Solution: Add more nitrogen-rich green materials. Water the pile thoroughly, ensuring it’s damp like a wrung-out sponge. You might need to go deeper into the pile with water if the center is dry.
I see pests (rodents, flies).
This is usually due to adding the wrong materials or not covering them properly.
- Cause: Exposed kitchen scraps, or addition of meat, dairy, or greasy foods.
- Solution: Stop adding these prohibited items immediately. Ensure all food scraps are buried well within the brown layers. Always finish with a substantial top layer of browns. Consider adding a layer of wire mesh at the bottom if pests are a persistent problem, especially in an open bin.
The pile is too compacted/slimy.
- Cause: Too many fine green materials like grass clippings packed too tightly, or not enough bulky brown materials to create air pockets.
- Solution: Gently fork or poke holes into the pile to allow air to circulate. Add more coarse brown materials to bulk it up.
Remember, a healthy compost pile is teeming with life! A few earthworms or a bit of mold are good signs, not problems.
When is My Lasagna Compost Ready?
Patience is key, but the finished product is worth the wait! Your compost is ready when it:
- Is dark brown and crumbly.
- Smells earthy and pleasant, not sour or like rotting food.
- You can no longer recognize the original materials (no identifiable leaves, scraps, etc.).
- The temperature has cooled down to ambient air temperature.
Once ready, you can screen it through a large sieve if you want a finer texture, although this isn’t necessary for most garden uses.
How to Use Your Homemade Compost
Finished compost is like black gold for your garden!
- Soil Amendment: Mix 1-3 inches of compost into garden beds before planting. It improves drainage in clay soil and water retention in sandy soil.
- Mulch: Spread a layer of compost around plants to suppress weeds, retain moisture, and slowly feed the plants.
- Potting Mix: Mix compost with other ingredients like perlite or coco coir to create a nutrient-rich potting mix for containers.
- Top Dressing: Sprinkle compost on lawns to improve soil health and grass vitality.
Conclusion: Effortless Gardening with Lasagna Compost
So there you have it – lasagna composting is a wonderfully simple and effective way to create nutrient-rich compost for your garden. By following the basic principles of layering greens and browns, you can transform your kitchen scraps and yard waste into a valuable resource that nourishes your soil and your plants. It’s a low-effort, high-reward gardening practice that’s perfect for busy people, beginners, or anyone looking for a more sustainable way to manage waste.
Don’t let the idea of composting intimidate you. This method proves that you don’t need fancy equipment or constant attention to get amazing results. Start layering, be patient, and soon you’ll be reaping the benefits of your own homemade garden gold. Happy composting!
Frequently Asked Questions About Lasagna Composting
Q1: How tall should my lasagna compost pile be?
For best results and to generate a bit of heat even in cold composting, aim for a pile that is at least 3 feet tall and ideally 3-4 feet wide and deep. This size helps it retain moisture and heat better, while also allowing for good aeration. Smaller piles will still compost, just more slowly.
Q2: Can I add diseased plants to my lasagna compost pile?
It’s best to avoid adding diseased plants, especially if you’re not actively managing your compost for high temperatures. Pathogens may not be killed off in a slow-composting pile and could spread to your garden. Stick to healthy plant trimmings.
Q3: How do I know if I have the right balance of greens and browns?
The best indicator is how the pile behaves. If it smells foul or looks slimy, you likely have too many greens or it’s too wet. If it’s bone dry and nothing seems to be happening, you might need more greens or moisture. Visually, strive for layers of browns that are roughly 2-3 times the thickness of your green layers.
Q4: Can I compost in winter using the lasagna method?
Yes, you can! While decomposition will slow down significantly in freezing temperatures, the pile will still break down over time. You can continue to add materials. Once warm weather returns, decomposition will pick up speed again. It will likely take longer around if making compost especially in colder climates.
Q5: How long does it take for lasagna compost to be ready?
This is the biggest variable. It can range from 6 months to 2 years. Factors include the size of your pile, the ratio of greens to browns, moisture levels, climate, and the types of materials used. The key is patience – it’s a ‘set it and forget it’ approach.
Q6: Do I need to add a compost starter or worms?
You don’t strictly need to add a starter. The microorganisms are naturally present in the soil and on the organic materials. If you build your pile directly on the ground, worms will find their way in. Adding a shovel-full of finished compost can introduce beneficial microbes and worms, which can speed things up slightly, but it’s not essential.
Q7: What’s the difference between lasagna composting and hot composting?
Hot composting involves managing a pile to reach high temperatures (131-160°F or 55-71°C) through regular turning and a precise balance of greens and browns. This process is much faster, often yielding compost in 1-3 months. Lasagna composting is a “cold” composting method that requires no turning and relies on slower decomposition over a longer period (6 months to 2 years), making it much less labor-intensive.

I am passionate about home engineering. I specialize in designing, installing, and maintaining heating, ventilation, and air conditioning systems. My goal is to help people stay comfortable in their homes all year long.