Thinking about composting your pet’s waste? It sounds a bit unusual, maybe even a little messy, right? Many pet owners wonder if there’s a sustainable way to handle pet waste without just bagging it all up for the landfill. Well, you’re in the right place! We’re going to break down how you can use a special composting method, called lasagna composting, specifically for pet waste.
It might feel like a big task, but with a few simple steps, you’ll be turning pet waste into garden gold. We’ll cover everything you need to know to get started safely and effectively. Let’s dive in and make your composting journey a success!
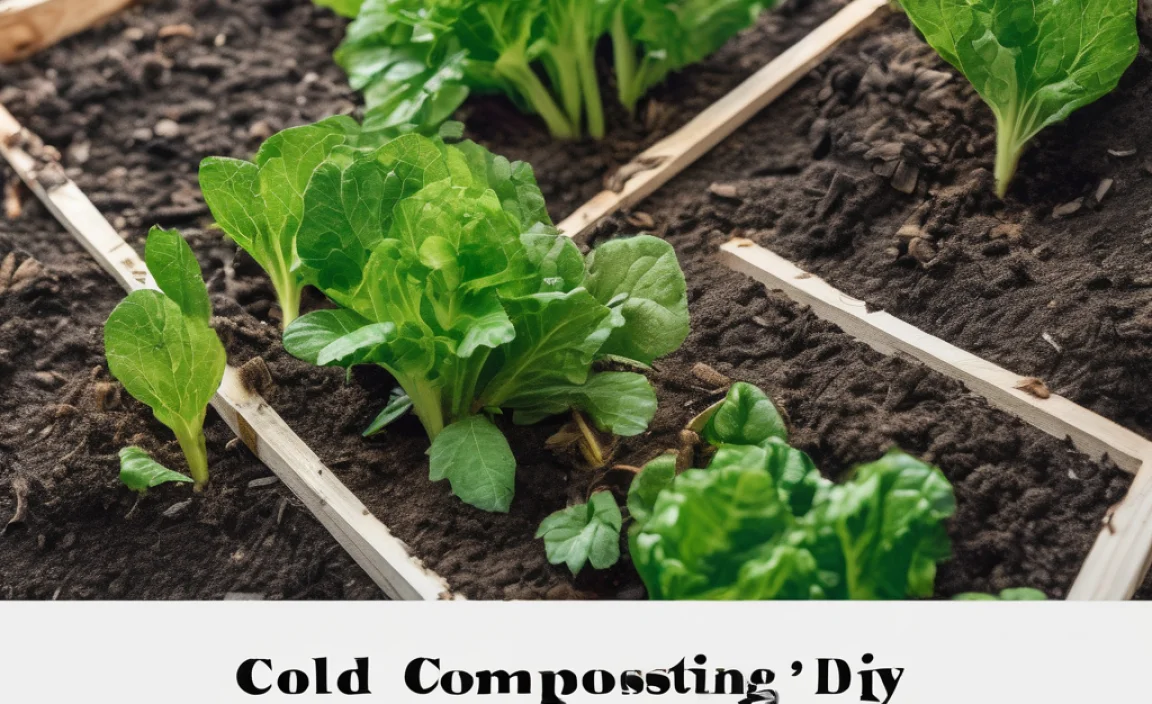
Lasagna Composting Pets: The Beginner’s Blueprint
Hey there, fellow home improvers and garden enthusiasts! Troy D Harn here from TopChooser. So, you love your furry friends, but you’re starting to think about that ever-growing pile of pet waste. Bagging it up and sending it to the landfill feels… well, not ideal. And let’s be honest, it’s a lot of waste! What if I told you there’s a way to transform that “problem” into a valuable resource for your garden?
We’re talking about lasagna composting for pets. Now, the name might sound fancy, but the idea is super simple. It’s all about layering different organic materials, much like making a delicious lasagna. The real magic? It’s a safe and effective way to compost certain types of pet waste, turning it into nutrient-rich soil amendments instead of just waste.
This guide is designed for you, the beginner. We’ll skip the complicated jargon and give you the practical, step-by-step instructions you need. By the end, you’ll feel confident about starting your own pet waste composting system. Ready to turn your pet’s business into garden success? Let’s get started!
Why Compost Pet Waste? The Big Picture
Before we get our hands dirty with the “how-to,” let’s quickly touch on the “why.” Composting pet waste offers some pretty neat benefits:
- Reduces Landfill Waste: Pet waste, especially from dogs, is a significant contributor to landfill. Composting diverts this from ending up there.
- Creates Nutrient-Rich Compost: Properly composted pet waste can be a fantastic soil enricher for non-edible plants, like flowers and shrubs.
- Environmentally Friendly: It’s a more sustainable way to manage waste, reducing the environmental impact associated with traditional disposal methods.
- Saves Money: Over time, you’ll need fewer soil amendments from the store.
What Kind of Pet Waste Can You Compost?
This is super important and where many people get a bit nervous. Not all pet waste is created equal when it comes to composting, especially for beginners. For lasagna composting, we’re primarily talking about:
- Dog Waste: This is the most common type people compost. However, it’s crucial to know that dog waste can contain pathogens, so it needs to be composted at high temperatures to be safe.
- Cat Litter: Yes, you can compost cat litter, but with specific caveats. You must use biodegradable cat litter (like those made from paper, wood, corn, or wheat). Never compost plastic-based litter as it won’t break down.
What to AVOID composting with your lasagna method:
- Waste from herbivorous pets like rabbits, guinea pigs, hamsters, and horses. While their waste is generally safer and can be composted easily, it requires a different approach than the hot composting needed for dog waste. For simplicity and safety for beginners, we’ll focus on dog waste and cat litter here.
- Diseased animal waste. If your pet is sick, avoid adding their waste to the compost.
- Meat or dairy from your pet’s diet.
Understanding Lasagna Composting for Pets
Think of lasagna composting like building a layered cake. You’re alternating “green” materials (rich in nitrogen) with “brown” materials (rich in carbon). This mixture, along with moisture and air, creates the perfect environment for microorganisms to break down the waste.
The key to safely composting pet waste, especially dog waste, is achieving high temperatures. This “hot composting” method is essential for killing off harmful pathogens. The lasagna method, when done correctly, can help achieve these temperatures.
Essential Tools and Materials
Don’t worry, you don’t need a fancy setup! Here’s what you’ll want to gather:
The Compost Bin: Your Lasagna Layering Base
You need a container that can hold the layers and allow for some airflow. Here are a few beginner-friendly options:
- DIY Wooden Bin: Simple to build with pallets or scrap lumber. Ensure gaps for airflow.
- Plastic Compost Tumbler: Great for easy turning, but make sure it’s large enough and compatible with pet waste decomposition principles.
- Wire Mesh Bin: Easy to assemble and provides excellent airflow.
- Commercial Three-Bin System: If you’re serious about composting and want to manage different stages, this is a great long-term investment, though perhaps overkill for just pet waste initially.
Crucial Note: For pet waste, especially dog poop, it’s often recommended to have a separate composting system dedicated only to pet waste. This is to prevent any potential pathogen contamination of compost that might be used on edible gardens. It’s also a good idea to use a bin that doesn’t have a removable bottom or one that’s well-sealed at the bottom, to prevent leachate (liquid runoff) from contaminating groundwater.
Your Layering Ingredients (The “Sauce” and “Pasta”)
This is where the “lasagna” comes in. You need balanced “greens” and “browns.” Remember our focus is on dog waste and biodegradable cat litter.
“Greens” (Nitrogen-Rich):
- Pet Waste: Fresh dog feces and soiled biodegradable cat litter. This is your primary “green” source.
- Grass clippings (use sparingly and ensure they haven’t been treated with herbicides)
- Vegetable scraps (no meat or dairy)
- Coffee grounds
- Tea bags
“Browns” (Carbon-Rich):
- Shredded Cardboard: Plain, un-inked cardboard is excellent.
- Shredded Newspaper: Black and white print only.
- Dried Leaves: A fantastic, free resource!
- Straw or Hay: Ensure it’s pesticide-free.
- Wood Chips or Sawdust: Use in moderation, especially if from treated wood.
- Paper Towels and Toilet Paper Rolls: Plain ones are fine.
Other Essentials:
- Water Source: A hose or watering can.
- Turning Tool: A pitchfork, compost aerator, or strong shovel.
- Gloves: Always wear sturdy garden gloves!
- Sieve/Sifter: For the finished compost (optional but helpful).
Step-by-Step: Building Your Pet Waste Lasagna Compost
Let’s get this compost party started! Remember, patience and balance are key.
Step 1: Choose Your Location Wisely
Find a good spot for your compost bin. It should be:
- Accessible for easy additions and turning.
- Well-drained to prevent waterlogging.
- Ideally, partially shaded to prevent drying out too quickly, but some sun can help heat it up.
- Away from water sources like wells or streams.
- Consider local regulations regarding composting pet waste. Some municipalities have specific rules. The U.S. Environmental Protection Agency (EPA) offers resources on composting and reducing waste, which you can explore for general guidance: EPA Composting Resources.
Step 2: Prepare Your Bin
Set up your chosen bin. If it’s a DIY bin, ensure it’s sturdy and has adequate ventilation. If it’s a tumbler, make sure it’s properly assembled.
Step 3: Start with a Base Layer
Begin with a thick layer (4-6 inches) of “brown” material at the bottom. This could be wood chips, straw, or shredded cardboard. This layer helps with drainage and airflow from the start.
Step 4: Add Your First “Pet Waste” Layer
This is the exciting part! Add a moderate layer (2-3 inches) of fresh dog waste or soiled biodegradable cat litter directly on top of the brown base. Spread it out evenly.
Step 5: Cover with a “Brown” Layer
Immediately cover the pet waste layer with another substantial layer (4-6 inches) of “brown” material. This is crucial for several reasons:
- Odor Control: The browns act as a blanket, trapping smells.
- Pest Deterrent: It makes it harder for pests to access the waste.
- Insulation: It helps maintain internal temperatures.
- Carbon Balance: It balances the nitrogen-rich pet waste.
Step 6: Add a “Green” Layer (Optional but Recommended)
On top of the brown layer, you can add a thin layer (1-2 inches) of other “green” materials like grass clippings or vegetable scraps. This adds diversity to your compost microbes.
Step 7: Moisten the Layers
Lightly water each layer as you add it. The compost should be moist, like a wrung-out sponge, but not soggy. Too much water can lead to anaerobic conditions (lack of air) and poor composting, plus smells.
Step 8: Continue Layering!
Keep repeating the cycle: pet waste layer, followed by a thick brown layer, and maybe a thin green layer. Aim for a ratio of roughly 2-3 parts browns to 1 part greens (by volume).
A helpful way to visualize it:
| Layer Number | Material Type | Approximate Thickness | Purpose |
|---|---|---|---|
| 1 (Base) | Browns (e.g., wood chips, straw) | 4-6 inches | Drainage, Airflow |
| 2 | Pet Waste (Dog feces / soiled biodegradable litter) | 2-3 inches | Nitrogen Source |
| 3 | Browns (e.g., shredded cardboard, leaves) | 4-6 inches | Odor control, Pest deterrent, Insulation, Carbon balance |
| 4 (Optional) | Greens (e.g., grass clippings, veggie scraps) | 1-2 inches | Microbial diversity |
| 5 | Moisten | Lightly damp | Activates microbes |
Repeat layers 2-5 until your bin is full or you’ve reached a good height (at least 3 feet is ideal for hot composting!). Always finish with a thick layer of browns on top to keep odors down and pests away.
Step 9: Monitor and Maintain Moisture
Check the moisture level regularly. If it feels dry, add some water. If it’s too wet, add more brown materials.
Step 10: Aerate (Turn) Your Compost
This is crucial for hot composting and killing pathogens. Aim to turn your compost pile vigorously every 1-2 weeks. Use your pitchfork or aerator to mix the outer layers into the center. This introduces oxygen, which the microbes need, and helps distribute moisture and heat evenly. If using a tumbler, simply rotate it regularly!
Signs of a Healthy Compost Pile:
- Temperature: A properly functioning hot compost pile will get quite hot in the center, often between 130°F and 160°F (54°C to 71°C). Using a compost thermometer is a great way to monitor this. Gardening Know How on Compost Thermometers can give you more insight into their use.
- Smell: It should smell earthy, like a forest floor. A strong ammonia or rotten egg smell indicates a problem (usually too wet, not enough air, or unbalanced materials).
- Appearance: Materials will start to break down, and the layers will become less distinct over time.
Step 11: How to Know When It’s Ready
This is the most important part for safety. Properly hot composted pet waste can take anywhere from 6 months to over a year to fully mature. You’ll know it’s ready when:
- The original materials are no longer recognizable.
- The compost is dark brown and crumbly.
- It has a pleasant, earthy aroma.
- The temperature has cooled down to ambient levels.
Safety First: For pet waste compost, especially dog waste, it’s generally advised to use it only on non-edible plants like ornamental flowers, shrubs, or lawns where people won’t be directly consuming anything grown in it. This is a precaution against any persistent pathogens that might not have been killed, even with hot composting. If you’re unsure or want to be extra cautious, consider treating the finished compost further or using less processed compost from a reliable source for edibles.
Troubleshooting Common Composting Problems
Even with the best intentions, you might run into a few snags. Here’s how to fix them:
Problem: It Smells Bad (Ammonia or Rotten Eggs)
Why it happens: Too much nitrogen (“greens”) or not enough air circulation (anaerobic conditions).
Solution:
- Add more “brown” materials (shredded cardboard, leaves) to absorb excess moisture and nitrogen.
- Turn the pile thoroughly to introduce air.
- Ensure the compost isn’t waterlogged. If it is, add more browns and turn.
Problem: The Pile Isn’t Heating Up
Why it happens: Not enough nitrogen (“greens”), the pile is too dry, or it’s too small to build heat.
Solution:
- Add more “green” materials (pet waste, grass clippings, coffee grounds).
- Moisten the pile if it’s dry.
- Ensure the pile is at least 3x3x3 feet. If it’s too small, you might need to add more material or combine it with other compostable waste.
- Turn the pile to mix materials and aerate.
Problem: Pests are Attracted to the Pile
Why it happens: Exposed food scraps or pet waste, or the pile isn’t hot enough.
Solution:
- Always bury pet waste and food scraps deep within the pile and cover them with a thick layer of brown material.
- Make sure the outer layer is always browns.
- If the pile isn’t reaching high temperatures, focus on turning and adding sufficient greens and browns to encourage heating.
- Consider a fully enclosed compost bin or tumbler.
Problem: The Compost is Too Wet and Slimy
Why it happens: Too much moisture, not enough airflow, or too many “green” materials.
Solution:
- Add dry “brown” carbon materials like shredded cardboard, dried leaves, or straw.
- Turn the pile to aerate and help it dry out.
- If the bin is sitting in standing water, move it to a better-drained spot or improve drainage with more coarse browns at the base.
Using Your Finished Pet Waste Compost
Once your compost is ready, you’ll have a beautiful, dark, crumbly material that smells like fresh earth. Remember our safety advice:
- For Non-Edible Plants: This is the safest bet. Mix it lightly into the soil around your flowers, shrubs, trees, and lawn. It will improve soil structure, aeration, and water retention.
- For Edible Plants (With Extreme Caution): If you are 10

I am passionate about home engineering. I specialize in designing, installing, and maintaining heating, ventilation, and air conditioning systems. My goal is to help people stay comfortable in their homes all year long.