Organic Compost Pets: Your Genius Guide
Ever tossed kitchen scraps into the trash and felt a pang of guilt? You’re not alone! A lot of us want to do our bit for the planet, but composting can sound complicated. What if I told you there’s a way to turn that waste into garden gold, and it’s easier than you think? We’re talking about “organic compost pets” – a fun and simple way to get started. Think of them as your busy little helpers. Stick around, and I’ll show you just how easy it is to get your own composting crew up and running, turning your kitchen waste into nutrient-rich food for your garden. It’s a genius way to reduce waste and boost your garden’s health, all without breaking a sweat.
What Exactly Are “Organic Compost Pets”?
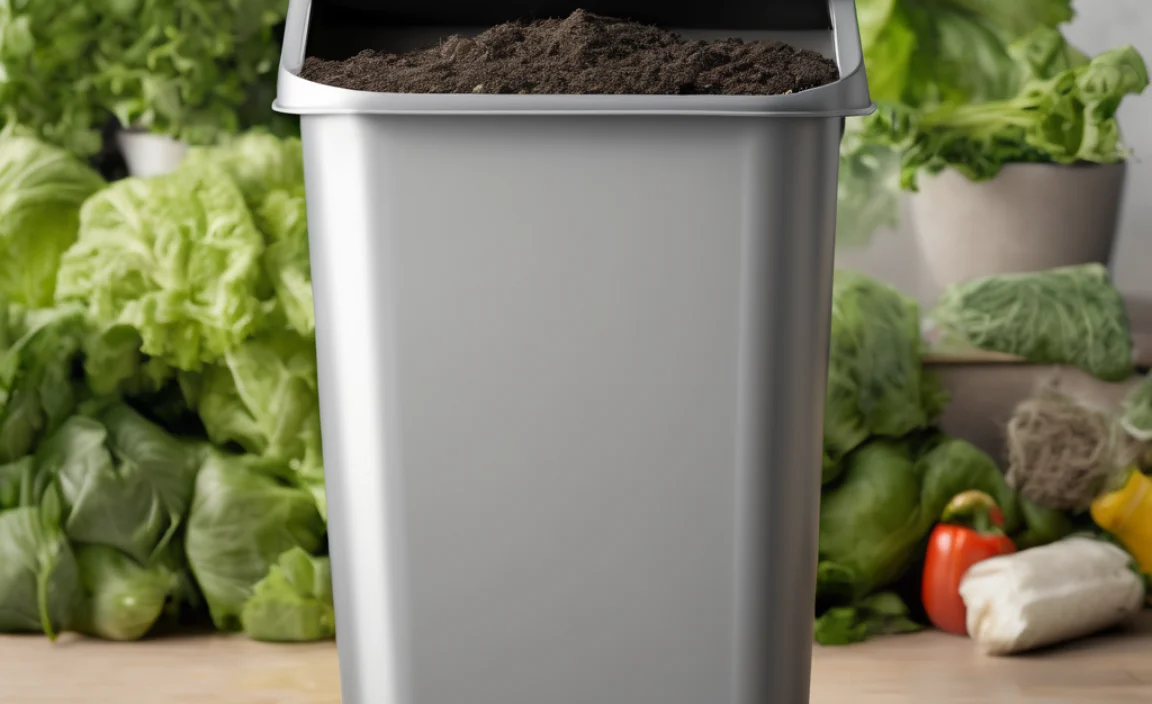
So, what are these “organic compost pets” I keep talking about? Put simply, they’re the tiny, hardworking organisms that break down your organic waste in a compost bin. The most common and popular members of this crew are red wiggler worms (Eisenia fetida). You might also have tiny beneficial bacteria, fungi, and even some mites joining the party. These little critters are the superstars of decomposition. They munch on your fruit peels, veggie scraps, and paper, turning them into a rich, dark substance called humus – basically, superfood for your plants! It’s like having a miniature recycling plant going 24/7, right in your backyard or even inside your home. No complicated machinery needed, just a simple setup and these amazing natural decomposers.
Why You Should Consider Worm Composting
Composting with worms, also known as vermicomposting, offers a bunch of fantastic perks, especially for beginners. It’s super efficient, relatively fast, and produces an incredibly nutrient-dense fertilizer (worm castings!).
- Reduces Waste: You’ll dramatically cut down on what you send to the landfill. Imagine all those food scraps getting a second life instead of going to waste.
- Creates Amazing Fertilizer: Worm castings are like a potent, slow-release fertilizer. They improve soil structure, water retention, and nutrient availability for your plants.
- It’s Faster Than Traditional Composting: Worms are industrious! They can process food scraps much quicker than a big compost pile, often making usable compost in a few months.
- Can Be Done Indoors or Outdoors: Don’t have a yard? No problem! Worm bins can live happily on a balcony, in a garage, or even under your kitchen sink.
- Educational and Fun: It’s a great way to learn about the natural world and a fun project for the whole family. Kids often love watching the worms do their work!
- Odor-Free (When Done Right): A well-managed worm bin shouldn’t smell bad. Any off-putting odors usually mean something needs adjusting.
Getting Started with Your Compost Pets: A Step-by-Step Guide
Ready to invite these little helpers to your home? It’s much simpler than you might think. We’ll walk through setting up a basic worm bin. You don’t need fancy equipment; a simple DIY bin or a pre-made one will do the trick.
Step 1: Choose Your Bin
You have a few options here, and the best choice depends on your space, budget, and how much time you want to invest in building.
Option A: The DIY Plastic Tub Bin
This is the most budget-friendly and straightforward option. You can grab a sturdy plastic storage tub from almost any home goods store.
Materials:
- One opaque plastic storage tub with a lid (10-20 gallons is a good size to start). Opaque is important; worms prefer darkness.
- A drill with a 1/8-inch or 3/16-inch drill bit and a larger bit (around 1/2 inch).
- Bricks or blocks to elevate the bin (optional, but good for drainage).
What to do:
- Drill Drainage Holes: Drill about 8-10 small (1/8 or 3/16 inch) holes in the bottom of the tub for drainage. This is super important to prevent your bin from becoming waterlogged.
- Drill Aeration Holes: Drill about 20-30 of these small holes across the lid and the sides of the tub. This allows air to circulate, which your worms need to breathe.
- Drill Larger Drainage/Harvesting Holes (Optional for advanced users): Some people drill a few larger (1/4 to 1/2 inch) holes in one corner of the bottom and place a mesh screen over them to allow liquid to drain into a tray below, which can be helpful for harvesting compost tea. For beginners, stick to the small holes.
- Set Up Drainage: If you have a tray or a way to collect liquid, great. Otherwise, placing the bin on bricks or blocks will allow air to circulate underneath and any excess moisture to evaporate.
Option B: The Pre-Made Worm Bin
If DIY isn’t your thing, there are many excellent pre-made worm composting bins available online. They often are designed with good airflow and drainage built-in. This is a pricier option but saves you time and effort.
Step 2: Prepare the Bedding
Your worms need a cozy and moist place to live. Think of this as their home’s mattress. Bedding provides habitat, absorbs moisture, and offers initial food.
Good Bedding Materials:
- Shredded newspaper (black and white print only, avoid glossy paper)
- Shredded cardboard
- Coconut coir (often sold as “worm bedding”)
- Peat moss (use sparingly, as it can be acidic)
- Dried leaves
How to Prepare:
- Shred Your Materials: Tear or shred your chosen materials into thin strips. The finer, the better for the worms to easily burrow and digest.
- Moisten the Bedding: This is key! Grab a handful of your shredded bedding and squeeze it. You want it to feel like a wrung-out sponge – damp, but not dripping. If it’s too dry, add a little water. If it’s too wet, add more dry bedding.
- Fluff and Place in Bin: Fluff up the moistened bedding and fill your bin about half to two-thirds full. Create a loose, airy environment for your worms.
Step 3: Get Your Worms
The stars of the show! You’ll want to get red wigglers (Eisenia fetida). Don’t use regular earthworms from your garden; they prefer to live in the ground and won’t thrive in a bin. You can buy red wigglers online from reputable worm farms or sometimes from local garden supply stores.
How Many Worms?
A good starting point is 1 pound of composting worms for a 10-20 gallon bin. This allows them to get established and start processing food quickly. More worms mean faster composting, but start with what you can manage.
Introducing Your Worms:
- Gently place the worms on top of the bedding.
- Leave the lid off for the first hour or so (if indoors) or in dim light. This allows them to acclimate and burrow down into the bedding, away from light.
- Once they’ve burrowed, you can put the lid on.
Step 4: Feeding Your Worms
This is where the magic happens! Worms are hungry creatures, but they have specific dietary needs. Start slowly with feeding to avoid overwhelming them.
What Worms Love to Eat (The “Greens” and “Browns”):
- Fruits: Apple cores, banana peels, citrus rinds (in moderation, as they can be acidic), berries.
- Vegetables: Lettuce, spinach, carrots, broccoli stems, potato peels, coffee grounds and filters.
- Grains: Cooked pasta or rice (small amounts), bread (small amounts).
- Other: Eggshells (crushed, they help with grit), tea bags (remove staples).
What to AVOID Feeding Your Worms:
- Meat and Dairy: These attract pests and can create foul odors.
- Oily or Greasy Foods: They can harm the worms and make the bin unhealthy.
- Spicy Foods: Worms don’t like hot peppers!
- Citrus in Large Quantities: While they can eat it, too much can make the bin acidic.
- Diseased Plants: You don’t want to perpetuate problems.
- Pet Waste: Dog or cat feces can contain pathogens.
- Glossy or Heavily Printed Paper: The inks can be toxic.
How to Feed:
- Start Small: For your first feeding, bury a small handful of scraps under the bedding in one corner of the bin.
- Bury the Scraps: Always bury food scraps under the bedding. This keeps pests away and prevents odors.
- Rotate Feeding Spots: As you continue to feed, move to a different area of the bin each time. This way, the worms follow the food and spread out.
- Chop or Blend (Optional but Recommended): Smaller pieces break down faster. You can chop up larger items, or even blend them into a smoothie with some water for super-fast decomposition.
- Don’t Overfeed: A good rule of thumb is that worms can eat about half their weight in food per day. But start with less! If you notice uneaten food after a week, you’re feeding too much. The bin should smell earthy, not like rotting food.
Step 5: Managing Moisture and Temperature
Your worms are sensitive creatures, and keeping their environment just right is crucial for their survival and productivity.
Moisture Levels:
- As mentioned, bedding should be like a wrung-out sponge.
- If the bin looks too dry, sprinkle in some water or add moist food scraps.
- If it’s too wet, add more dry bedding (shredded newspaper or cardboard) and ensure there’s good airflow.
- A well-functioning bin should produce a little bit of liquid (called “worm tea” or leachate) at the bottom. This is a nutrient-rich liquid that can be diluted and used on plants, but if you have a lot, it means your bin is too wet.
Temperature:
- Red wigglers prefer temperatures between 55°F and 77°F (13°C – 25°C).
- Too Hot: If it gets too warm (over 85°F/30°C), worms can die. Move the bin to a cooler spot, add frozen water bottles, or add more dry bedding to help insulate.
- Too Cold: If it gets too cold (below 40°F/4°C), worms can hibernate or die. Bring the bin indoors, insulate it with blankets, or place it in a slightly warmer location.
Step 6: Harvesting Your Compost
After a few months of dedicated worm-labor, you’ll be ready to reap the rewards! Harvesting can seem a bit daunting, but it’s manageable.
The Goal: Separate the finished compost (worm castings) from any uncomposted material and the worms themselves. The worms will move away from light and strong smells.
Harvesting Methods:
- The “Migration” Method:
- Stop feeding one side of the bin for a week or two.
- Add fresh bedding and food scraps only to the other side.
- The worms will naturally migrate to the fresh food and bedding.
- Once most worms have moved over, you can scoop out the finished compost from the “old” side. Repeat as needed.
- Dump the contents of your bin onto a plastic sheet or tarp under bright light (sunlight is great).
- The worms will burrow down to escape the light and heat.
- Scrape off the top layer of compost, then wait a few minutes for the worms to burrow again. Repeat this process, scraping layers until you are left with mostly worms and a small amount of compost.
- Gather the worms and return them to the bin with fresh bedding.
- Use a sieve or screen (about 1/4-inch mesh) to sift the compost. Worms and larger uncomposted bits will stay on the screen, while the fine castings fall through.
What to do with the Castings:
Your finished worm castings are pure gold! You can:
- Mix them into potting soil for houseplants.
- Top-dress your garden beds.
- Add them to your seedling starting mix.
- Use them when transplanting shrubs or flowers.
What to Expect from Your Organic Compost Pets
Starting with worms can bring a learning curve, but don’t get discouraged! Here’s what you can generally expect:
- The First Few Weeks: The worms will be getting used to their new home and diet. You might not see a huge reduction in scraps right away, and that’s perfectly normal.
- Maturity: After a month or two, your worm population should be well-established and actively processing food scraps. You might start seeing baby worms (called “cocoons” before they hatch) if conditions are good.
- Odor: A healthy worm bin smells earthy, like a forest floor after rain. If it smells sour, like ammonia, or like rotting garbage, you likely have an issue with overfeeding, too much moisture, or pH imbalance.
- Pests: Fruit flies can sometimes be an issue. The best way to combat them is to always bury food scraps completely under the bedding and avoid overfeeding. You can also try a simple trap made with apple cider vinegar in a small cup left on top of the bin.
Troubleshooting Common Worm Bin Issues
Even with the best intentions, you might run into a hiccup or two. Here are some common problems and how to fix them:
| Problem | Possible Cause | Solution |
|---|---|---|
| Foul Odor (Rotting Garbage Smell) | Overfeeding, too much moisture, or adding forbidden foods (meat, dairy). | Stop feeding for a week. Add dry bedding. Ensure good airflow. Gently bury all food scraps. Check the bin’s moisture level and adjust. |
| Excessive Moisture (Bin is Soggy) | Too much water added, food scraps are too wet, poor drainage. | Add more dry shredded newspaper or cardboard bedding. Ensure drainage holes are clear. Gently aerate the bedding with a small tool. |
| Worms Trying to Escape | Conditions are unfavorable: too wet, too dry, too acidic, too alkaline, wrong temperature, or new to the bin. | Check moisture and temperature. Ensure you’re only feeding them appropriate foods. Bury scraps well. They might be trying to find a better spot. |
| Fruit Flies or Gnats | Food scraps are exposed on the surface; overfeeding leading to waste. |

I am passionate about home engineering. I specialize in designing, installing, and maintaining heating, ventilation, and air conditioning systems. My goal is to help people stay comfortable in their homes all year long.