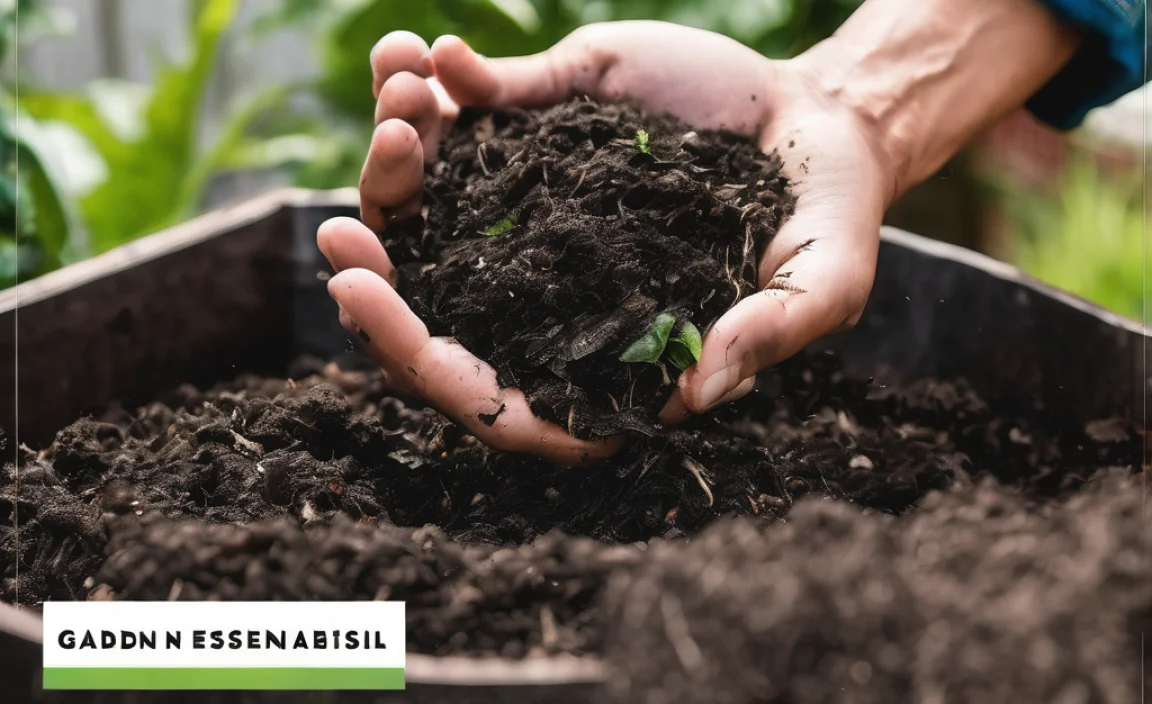
Got kitchen scraps and yard waste piling up? Don’t want a big, bulky bin? Let’s talk pit composting! It’s a super simple way to turn your “trash” into “treasure” for your garden. You can create fantastic, nutrient-rich compost right in your yard without needing fancy equipment. We’ll walk through it step-by-step, so you can start making the best soil your plants have ever seen. Ready to dig in?
What is Pit Composting, Anyway?
Pit composting, sometimes called trench composting or pile composting where the pile is directly on the ground, is one of the oldest and easiest ways to make compost. Instead of building a contained bin, you simply dig a hole or create a pile directly on the soil in your yard. Nature does most of the work, with the help of beneficial microbes, insects, and worms breaking down your organic materials. It’s a fantastic option if you have a bit of space and want a low-effort, low-cost composting solution.
Why Choose Pit Composting? The Awesome Benefits!
Pit composting isn’t just easy; it’s downright smart! It’s perfect for beginners because it’s so forgiving.
- Super Simple: No need to buy or build expensive bins. Just dig a hole or start a pile!
- Low Cost: You likely have most of what you need already – a shovel and some organic stuff.
- Great for Soil: The compost you create enriches your soil, improving its structure, water retention, and nutrient content. Your plants will thank you!
- Reduces Waste: Diverts food scraps and yard trimmings from landfills, which is good for the planet.
- Hidden Gem: If you don’t like the look of a compost bin, a pit or pile can be discreetly located.
- Attracts Earthworms: Earthworms are garden superheroes! Pit composting naturally draws them in, further speeding up the decomposition process and aerating your soil.
Pit Composting vs. Other Methods: A Quick Look
You might have heard of other composting methods like worm bins (vermicomposting) or tumbler bins. Here’s a quick rundown:
| Composting Method | Pros | Cons | Best For |
|---|---|---|---|
| Pit Composting | Easiest, cheapest, requires minimal effort, good for larger volumes of yard waste. | Slower decomposition, can attract pests if not managed well, requires direct garden access. | Beginners, those with ample yard space, large amounts of yard waste. |
| Bin Composting (Stationary) | Neater appearance, good for moderate volumes, easier to turn. | Requires purchasing or building a bin, can be a bit more work to manage. | Homeowners wanting contained compost, moderate yard size. |
| Tumbler Composting | Fastest decomposition, neat, pest-proof, easy to turn. | Most expensive, smaller batch sizes, can be heavy when full. | Those wanting compost quickly, limited space, willing to invest. |
| Vermicomposting (Worm Bin) | Excellent for kitchen scraps, produces high-quality compost (worm castings), good for small spaces. | Requires specific care for worms, can’t handle large volumes, needs controlled temperature. | Apartment dwellers, avid veggie gardeners with lots of kitchen scraps. |
As you can see, pit composting really shines when it comes to simplicity and cost. It’s a fantastic starting point!
What You’ll Need: Keep It Simple!
The beauty of pit composting is its simplicity. You don’t need much:
- A Shovel: For digging your initial pit.
- A Pitchfork or Garden Fork: Handy for turning and aerating your compost pile later on.
- Your Organic Materials: This is the “food” for your compost.
- Water: To keep your compost moist.
- Optional: A Garden Hose/Watering Can: To easily add water.
That’s it! Seriously. No fancy gadgets required.
Choosing the Right Spot: Location, Location, Location!
Picking the perfect spot for your pit compost is key to its success and to making your life easier. Here’s what to look for:
- Access to Soil: The most important part! You need to be able to dig directly into the ground. This allows beneficial microbes and worms from the soil to get into your compost.
- Drainage: Choose a spot that doesn’t get waterlogged. If water pools there after rain, so will your compost pile, and that’s bad news for decomposition.
- Partial Shade: A little bit of sun is good for warmth, but direct, all-day sun can dry out your compost pile too quickly. Partial shade, like under a tree or on the north side of a building, is ideal.
- Convenience: Pick a spot that’s easy for you to get to from your kitchen (for food scraps) and your garden (for yard waste and to use the finished compost).
- Out of Sight (If You Prefer): While not strictly necessary for function, you might want to place it where it’s not the first thing you see when you look at your yard.
- Away from Structures: Avoid placing it right next to your house or wooden fences, as constantly damp compost can potentially cause damage over time.
Pit Composting How To: The Step-by-Step Process
Ready to get your hands dirty? It’s easier than you think!
Step 1: Dig Your Pit or Prepare Your Pile Area
You have two main options here:
Option A: The Pit Method (Digging a Hole)
- Size: Aim for a pit that’s about 2-3 feet wide and 2-3 feet deep. How long and wide depends on how much material you plan to compost. A good starting point is about 3 feet wide by 3 feet long by 2 feet deep.
- Digging: Use your shovel to excavate the soil. You can simply remove the soil and set it aside to use later for covering your compost layers.
- Where to Dig: You can dig your pit directly in a garden bed you plan to enrich later, or in a designated composting area in your yard. If digging in a garden bed, just layer your compostable materials directly into the hole you’ve dug.
Option B: The Direct Pile Method (No Digging Required Initially)
- Location: Choose your well-drained, convenient spot as described above.
- Clear the Area: Remove any grass or weeds from a patch of ground about 3×3 feet.
- Start Building: You’ll simply start piling your materials directly onto this cleared spot.
Pro Tip: If you choose the pit method, breaking up the soil at the very bottom of the pit with your shovel or fork will help with drainage and give earthworms an easier entrada.
Step 2: Layering is Caring (For Your Compost!)
This is where the magic happens. Compost is all about a good mix of “greens” and “browns.”
- Greens (Nitrogen-Rich): These are typically wet materials that provide nitrogen. Think of them as the “fuel” for the microbes.
- Fruit and vegetable scraps
- Coffee grounds and tea bags
- Grass clippings (in thin layers to avoid matting)
- Plant trimmings (non-diseased)
- Manure (from herbivores like cows, horses, rabbits – avoid dog or cat waste)
- Browns (Carbon-Rich): These are usually dry materials that provide carbon and add airy structure. Think of them as the “insulation.”
- Dry leaves
- Shredded newspaper or cardboard (avoid glossy paper)
- Straw or hay
- Wood chips or sawdust (in moderation)
- Twigs and small branches
How to Layer:
- Start with Browns: Lay down a base layer of about 4-6 inches of brown materials. This helps with drainage and airflow.
- Add Greens: Add a layer of green materials on top.
- Cover and Continue: After adding your greens, cover them with another layer of browns. This is crucial! It helps prevent odors and keeps pests away. Aim for a ratio of roughly 2 parts browns to 1 part greens. You don’t need to be too precise, just aim for a good mix.
- Add Soil (Optional but Recommended): After a few layers, you can add a thin layer of garden soil. This introduces beneficial microbes to kick-start decomposition.
Gardening Know-How Notes: For a thriving compost ecosystem, aim for a balance. Too much green can lead to a slimy, smelly mess. Too much brown can slow down decomposition. The key is variety and adequate covering! GardeningKnowHow.com has a great resource on composting ingredients if you want to dive deeper.
Step 3: Burying the “Bad” Stuff (Food Scraps)
If you’re using the pit method where you’re not immediately filling the whole pit, you can add food scraps and bury them. Every time you have kitchen scraps (like fruit peels, veggie trimmings, coffee grounds), dig a little hole in your existing compost materials and bury them. Then, cover them with at least 4-6 inches of brown material (leaves, shredded paper). This is a great way to keep the pile neat and discourage scavenging critters.
Step 4: Moisture Check – Goldilocks Zone!
Your compost needs to be moist, but not soggy. Think of a wrung-out sponge.
- Too Dry: Decomposition will slow down or stop.
- Too Wet: It can become anaerobic (lacking oxygen), leading to foul smells and slimy conditions.
Check the moisture regularly, especially during dry or hot weather. If it feels dry, sprinkle it with water. If it seems too wet, add more brown materials and try to turn it to help it dry out.
Step 5: Aeration is Key – Give it Some Air!
Compost needs oxygen to work efficiently. Microbes are aerobic, meaning they need air to live and do their job.
- Turning: Periodically, especially if you notice it getting compacted or you suspect it’s too wet, use your garden fork to gently turn and aerate the pile. Aim to mix the outer layers into the center and vice versa.
- Frequency: For faster compost, turn it every couple of weeks. For a more hands-off approach, turning once a month or even less is fine, but decomposition will take longer.
Step 6: What NOT to Compost
Some things are best kept out of your compost pile to avoid problems.
- Meat, Fish, and Dairy: These can attract pests and create strong odors.
- Oily Foods: Similar to meat and dairy, these can attract pests and slow decomposition.
- Diseased Plants: You don’t want to spread plant diseases to your garden.
- Weeds with Seeds: Unless you’re confident your pile gets extremely hot, these seeds might survive and sprout in your garden.
- Pet Waste (Dogs and Cats): Can contain harmful pathogens.
- Chemically Treated Wood: Avoid anything treated with preservatives or paint, as these chemicals can leach into your compost.
- Glossy or Coated Paper: The coatings don’t break down well and can contain plastics.
Step 7: Patience! The Waiting Game
Composting is a natural process, and it takes time. Depending on the materials you use, how often you turn it, and your climate, compost can be ready anywhere from 2 months to a year.
How to Tell When It’s Ready:
- It will look dark, crumbly, and rich, like good soil.
- It will smell earthy and pleasant, not sour or rotten.
- You shouldn’t be able to recognize the original materials (like eggshells or banana peels).
Step 8: Using Your Compost
Once it’s ready, you’ve struck gold! You can use finished compost in many ways:
- Top Dressing: Spread a layer around existing plants, shrubs, and trees.
- Mixing into Soil: Dig it into garden beds before planting to give your soil a nutrient boost.
- Potting Mix: Mix it with other ingredients like perlite or coconut coir for a great homemade potting mix.
- Lawn Care: Rake a thin layer over your lawn in the spring or fall to improve soil health.
Troubleshooting Common Pit Composting Issues
Even with simple methods, you might run into a snag. Here are some common issues and how to fix them:
Problem: My compost smells bad (like rotten eggs or ammonia).
- Cause: Too much green material, too wet, or not enough air.
- Solution: Add more brown materials (leaves, shredded paper, cardboard). Turn the pile thoroughly to aerate it. If it’s too wet, add even more browns and turn it well.
Problem: My compost isn’t breaking down.
- Cause: Too dry, not enough green material, or not enough air.
- Solution: Check moisture levels and water if dry. Add more green materials (food scraps, grass clippings). Turn the pile to introduce air.
Problem: I see pests (flies, rodents, etc.).
- Cause: Often due to improper materials being added (meat, dairy, oily foods) or food scraps not being buried deep enough.
- Solution: Ensure you’re not adding forbidden items. Always bury food scraps deep within the pile and cover them thoroughly with brown materials. A layer of soil on top can also help deter pests.
Problem: My compost is just a soggy mess.
- Cause: Too wet, not enough browns, and poor drainage.
- Solution: Add a generous amount of brown materials. Turn the pile to incorporate them and introduce air. If the spot is prone to waterlogging, consider digging it deeper or improving drainage around it.
Tips for Faster Composting
Want to speed things up a bit? Try these tricks:
- Chop it Up: Smaller pieces break down much faster. Chop up large kitchen scraps and yard waste before adding them.
- Balance Greens and Browns: Aim for that approximate 2:1 brown-to-green ratio.
- Turn Regularly: Frequent turning (every 1-2 weeks) introduces oxygen, which speeds up microbial activity.
- Keep it Moist: Proper moisture levels are crucial for the microbes to thrive.
- Good Location: A spot that gets some warmth but not excessive drying is ideal.
- Use a Thermometer: For rapid composting, aim for pile temperatures between 130-160°F (54-71°C) for a few days, which kills weed seeds and pathogens. This requires more active management and turning.
Environmental Benefits You’re Creating
By simply engaging in pit composting, you’re doing more than just making garden soil. You’re actively contributing to a healthier planet!
- Reduced Landfill Waste: Organic materials make up a significant portion of landfill waste. Diverting them means less methane gas (a potent greenhouse gas) is produced in anaerobic landfill conditions.
- Healthier Gardens & Ecosystems: Compost improves soil structure, reducing the need for synthetic fertilizers and pesticides, which can pollute waterways. Healthy soil supports a richer biodiversity of beneficial insects and microorganisms.
- Water Conservation: Compost-rich soil holds moisture better, reducing the need for frequent watering.
- Closed-Loop System: You’re essentially recycling nutrients from your own yard and kitchen back into the environment, creating a sustainable, closed-loop system.
For more on how composting benefits the environment, check out resources from the U.S. Environmental Protection Agency (EPA).
Ready to Start Composting? You’ve Got This!
There you have it! Pit composting is an incredibly accessible and effective way to transform your kitchen scraps and yard waste into a valuable resource for your garden. You don’t need fancy equipment or a degree in soil science. Just a shovel, some organic materials, a bit of patience, and the willingness to give it a try. By following these simple steps, you’ll be well on your way to creating nutrient-rich compost that will make your plants flourish, all while doing a good deed for the planet.
So, grab that shovel, find a quiet corner of your yard, and start digging! Your garden will be so much happier, and you’ll feel great knowing you’re turning waste into wonderful garden gold. Happy composting!
Frequently Asked Questions About Pit Composting
Here are some common questions beginners have:
Q1: How deep should my pit compost be?
A1: A depth of about 2 to 3 feet is generally good. This helps with insulation, retaining moisture, and discouraging surface pests. The width and length can vary based on the amount of material you have, but starting around 3×3 feet is a good size.
Q2: Can I compost everything from my kitchen?
A2: Almost! You can compost fruit and vegetable scraps, coffee grounds, tea bags, and eggshells. However, it’s best to avoid meat, fish, dairy products, and oily foods, as they can attract pests and create unpleasant odors.
Q3: My compost smells terrible. What did I do wrong?
A3: A strong, unpleasant smell usually means your compost is too wet and lacks air (anaerobic). Try adding more “brown” materials like dry leaves or shredded cardboard, and turn the pile to mix everything and introduce oxygen.
Q4: How long does it take for pit compost to be ready?
A4: It varies! With regular turning and a good balance of materials, you might have usable compost in 2-4 months. If you’re doing a more “set it and forget it” approach, it could take 6-12 months or even longer.
Q5: Do I need to cover my pit compost pile?
A5: While not strictly required, covering your pile with a layer of brown materials (like leaves or straw) after adding food scraps helps deter pests and control moisture and odors. A tarp can also be used, but ensure it allows for airflow.
Q6: Can I compost diseased plants?
A6: It’s best to avoid composting diseased or pest-infested plants. While hot composting can kill pathogens, less active pit composting might not reach high enough temperatures, potentially spreading the disease back into your garden.

I am passionate about home engineering. I specialize in designing, installing, and maintaining heating, ventilation, and air conditioning systems. My goal is to help people stay comfortable in their homes all year long.