Hey there! If you’ve got kitchen scraps and yard waste piling up, you’re probably wondering how to turn that “problem” into something amazing for your garden. Composting sounds great, but sometimes it feels a bit… complicated, right? Well, guess what? It doesn’t have to be! Pit composting is one of the simplest ways to get started. We’ll walk through everything you need to know, step-by-step, so you can start making that black gold for your plants. You’ve got this!
Pit Composting Guide: Your Easy Start to Garden Gold
So, you’re looking to reduce waste and boost your garden’s health without a fuss? Pit composting is a fantastic, low-tech method that’s perfect for beginners. Think of it as nature’s recycling program, and you’re just providing the ingredients and a handy spot. This method is straightforward, requires minimal equipment, and is incredibly effective. Let’s dive in and get your compost pile started!
What Exactly is Pit Composting?
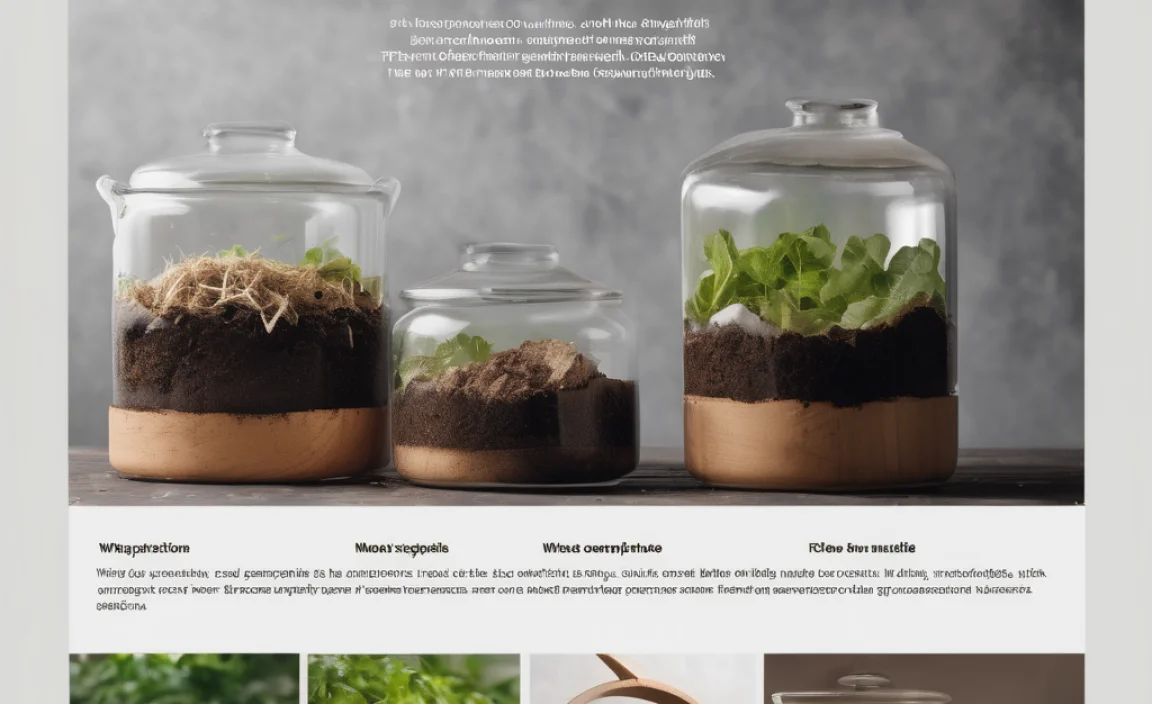
Pit composting, also known as in-ground composting or trench composting, is a method where you bury your organic materials directly into the soil. Instead of building a pile above ground, you dig a hole or trench and incorporate your compostable items right into the earth. The soil acts as the container, and the microorganisms already present in the ground get to work breaking everything down. It’s a natural process that’s been happening for ages, and by doing it intentionally, you’re speeding up the creation of nutrient-rich soil amendment for your garden.
This method has a few key advantages:
- Simplicity: No need for fancy bins or turning machines.
- Aesthetics: It’s out of sight, out of mind. Your yard stays tidy.
- Moisture Control: The surrounding soil helps maintain consistent moisture, which is crucial for decomposition.
- Pest Deterrent: Burying materials makes them less accessible to common pests.
- Direct Soil Improvement: As it breaks down, it enriches the soil where it’s buried.
Is Pit Composting Right for You?

This method shines in certain situations. If you have a larger yard where digging a pit won’t be an issue, it’s a great option. It’s also ideal if you’re not keen on the look of a traditional compost bin or if you want a pest-resistant solution. Renters might find this less suitable unless they have permission to dig, but homeowners looking for simplicity will love it. If you have a lot of kitchen scraps and yard waste and want an easy way to manage them while enriching your soil, pit composting is a winner.
Getting Started: What You’ll Need

The beauty of pit composting is its minimal requirement for tools. You likely already have most of what you need!
- Shovel or Spade: To dig the pit. A sturdy garden spade is perfect.
- Fork or Garden Hoe: For breaking up any larger clumps and mixing materials.
- Your Organic Waste: The “greens” and “browns” (we’ll cover this more soon!).
- Water: To keep things moist.
That’s pretty much it! No need for complex setups or expensive purchases. You can find good quality shovels at most hardware stores or garden centers. For instance, brands like Fiskars often offer durable and ergonomic shovels that make digging easier. You can check out resources like SOG-Tools’ spade selection if you’re looking for something robust for years of use.
Choosing Your Pit Location
Location is key for successful pit composting. You want a spot that will help the decomposition process along:
- Partial Shade: Avoid full sun, which can dry out your compost too quickly. A spot that gets morning sun and afternoon shade is ideal.
- Good Drainage: Don’t choose a spot that’s always waterlogged.
- Easy Access: Pick a place that’s convenient to get to with your organic scraps from the kitchen and garden.
- Away from Structures: Keep it a reasonable distance from your house, sheds, or wooden fences to prevent any potential moisture issues or pest attraction to these areas over time.
- Consider Future Planting: If you plan to plant in this area later, keep in mind that decomposition takes time.
Digging Your Compost Pit: Step-by-Step
This is where the action happens! It’s simple, honest work that feels good and serves a great purpose.
Step 1: Dig the Hole
Using your shovel, dig a hole in your chosen spot. Aim for a size that’s manageable for you. A pit that’s about 2-3 feet deep and 2-3 feet wide is usually a good starting point. You can make it longer if you have more space and lots of material. The depth is important as it helps insulate the contents and deter animals.
Step 2: Start Layering Your Materials
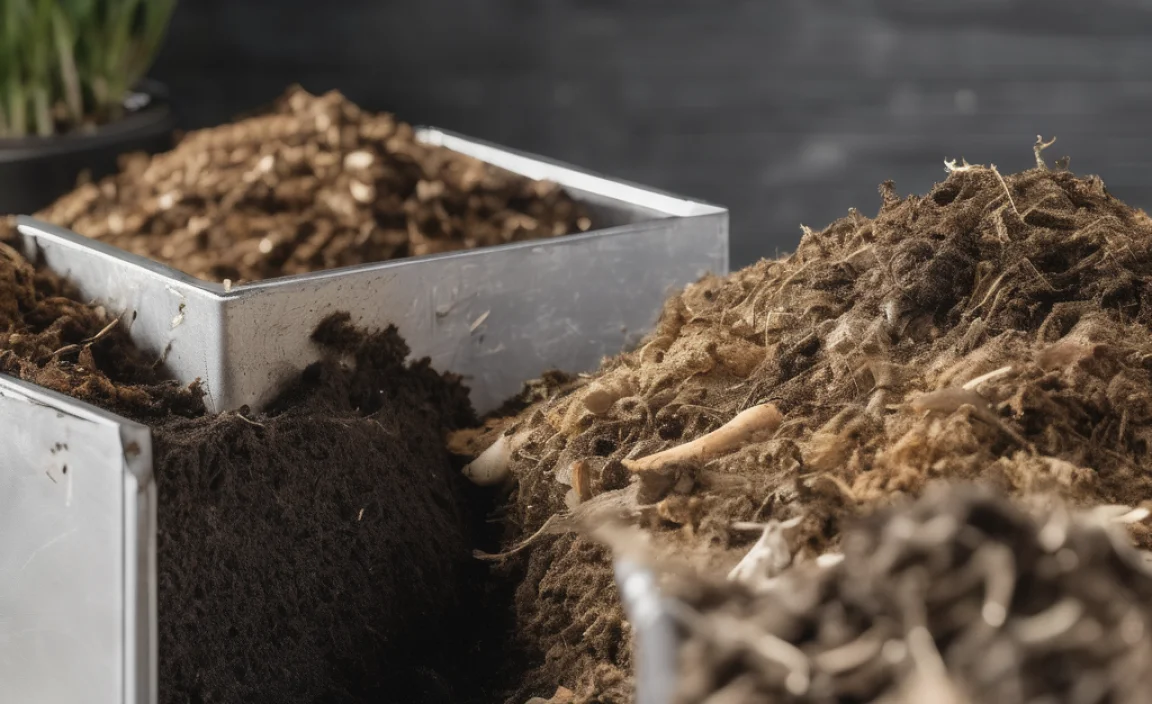
Now, begin adding your compostable materials. The key to successful composting, pit or otherwise, is balancing “greens” and “browns.”
Greens (Nitrogen-Rich): These are usually moist and provide nitrogen, which is food for the microorganisms. Think of them as the activators.
- Fruit and vegetable scraps
- Coffee grounds and tea bags
- Grass clippings (in thin layers to avoid matting)
- Plant trimmings (non-woody)
- Manure from herbivores (chicken, rabbit, cow, horse – ensure it’s well-aged if concerned about pathogens)
Browns (Carbon-Rich): These are typically dry and provide carbon, which is the energy source for the microorganisms and adds bulk. They prevent the heap from getting too wet and smelly.
- Dry leaves
- Shredded newspaper or cardboard (avoid glossy or colored ink)
- Straw or hay
- Twigs and small branches (chopped up)
- Wood chips or sawdust (use sparingly as they break down slowly)
- Paper towel rolls and egg cartons
As you add materials, try to layer them. A good ratio is roughly 2 parts browns to 1 part greens. This isn’t an exact science, but it helps create the right environment for decomposition.
Step 3: Bury Your Scraps
Once you’ve added a layer of greens and browns, cover them with about 4-6 inches of soil. This is the “pit” part. This soil layer is crucial for several reasons:
- It helps retain moisture.
- It insulates the decomposing material.
- It deters pests like rodents and flies.
- It introduces beneficial microorganisms from the soil into your compost.
If you’re adding kitchen scraps, a good tip is to dig a small pocket in the existing compost layer or soil, add your scraps, and then cover them thoroughly with soil or the existing compost. This ensures they are well-buried.
Step 4: Keep it Moist
Your compost needs to be about as damp as a wrung-out sponge. If it gets too dry, decomposition will slow down significantly. If it gets too wet, it can become anaerobic (lacking oxygen) and start to smell. If the pit seems dry, give it a good watering. If you’ve added a lot of wet “greens,” you might need to add more “browns” and ensure good soil cover.
Step 5: Continue Adding and Burying
As you accumulate more kitchen scraps and yard waste, simply repeat the layering process: add your greens and browns, mix them a bit if you like, and cover with soil. Continue this as your pit fills up or as materials become available.
Step 6: Let it Decompose
Once you’ve filled your pit or can no longer easily add materials, it’s time to let nature do its work. Depending on the materials used, the temperature, and the moisture levels, decomposition can take anywhere from a few months to a year or more. You might notice the pit settling as the material breaks down. You can dig a new pit nearby or refill the old one once it’s mostly decomposed.
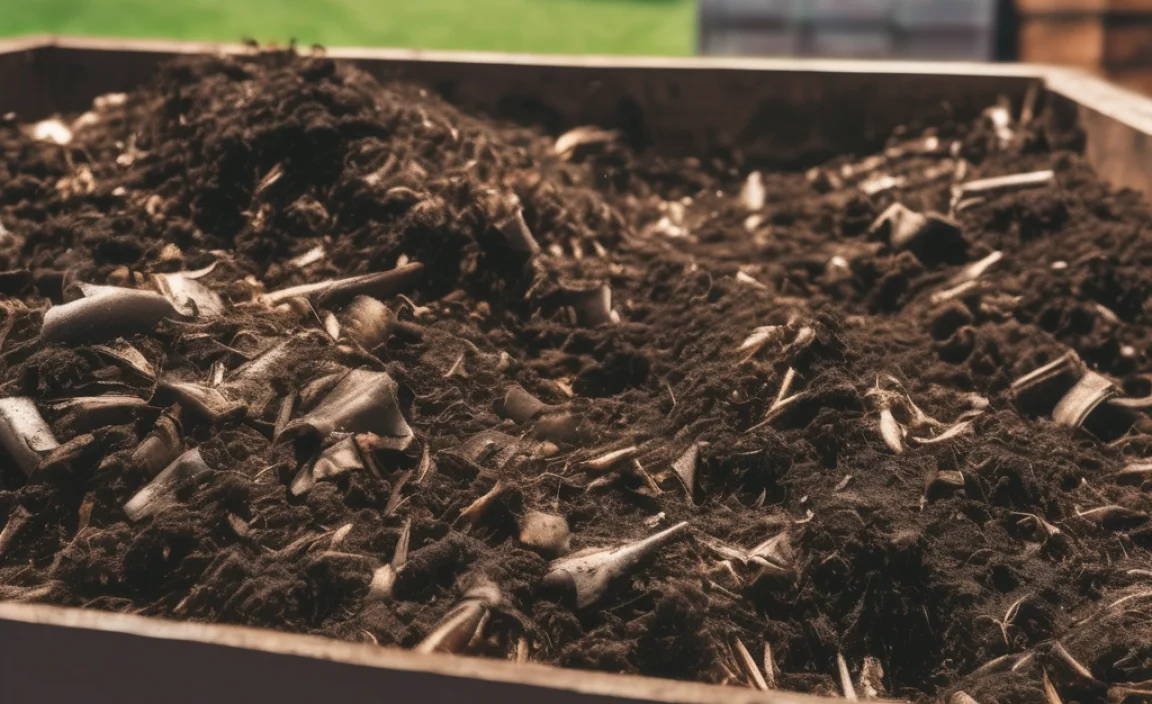
What to Compost and What to Avoid
This is super important for healthy, effective composting. Here’s a quick rundown:
Compostable: The “Go” List
- All fruit and vegetable scraps
- Eggshells (crushed)
- Coffee grounds and filters
- Tea bags
- Grass clippings (in thin layers)
- Yard trimmings (leaves, small twigs, spent flowers)
- Shredded newspaper, cardboard, and junk mail (uncoated)
- Hair and fur (human and pet)
- Sawdust and wood chips (from untreated wood, use sparingly as they decompose slowly)
- Paper towels and napkins (unsoiled)
- Houseplant trimmings
Do Not Compost: The “No-Go” List
These items can cause problems, attract pests, or won’t break down properly.
- Meat, fish, and bones: Attract pests and can cause odors.
- Dairy products: Attract pests and can cause odors.
- Oily or greasy foods: Slow down decomposition and can cause odors.
- Diseased plants: May spread disease to your garden.
- Weeds that have gone to seed: You might end up with weeds growing in your garden beds.
- Pet waste (dog and cat): Can contain pathogens harmful to humans.
- Chemically treated wood or yard waste: Chemicals can contaminate your compost.
- Coal or charcoal ash: Can contain harmful compounds and raise soil pH too high.
- Glossy or coated paper/cardboard: Inks and coatings may not be good for the soil.
Understanding these lists is fundamental to good composting. For more detailed information on composting best practices, including what’s safe for finished compost, the Environmental Protection Agency (EPA) offers excellent guidelines.
Troubleshooting Common Pit Composting Issues
Even with the simplest methods, questions pop up. Here’s how to handle a few common concerns:
Issue: My compost smells bad.
Possible Cause: Too much “green” material, or it’s too wet and not getting enough air (anaerobic). It might also be that you’re not burying your kitchen scraps deep enough, attracting flies that cause odor.
Solution: Add more “browns” (like dry leaves or shredded cardboard) to absorb excess moisture and balance the carbon-to-nitrogen ratio. Ensure you’re covering all food scraps thoroughly with at least 4-6 inches of soil. If the smell persists, try to gently aerate the top few inches with a fork.
Issue: Nothing seems to be happening; it’s not breaking down.
Possible Cause: Likely too dry, or not enough “green” (nitrogen) material to feed the microbes.
Solution: Add water to the pit until it’s consistently moist like a wrung-out sponge. Introduce more “green” materials, like fresh grass clippings or fruit scraps. Patience is also key – decomposition takes time!
Issue: I’m seeing pests (like rodents) near my pit.
Possible Cause: Food scraps are too accessible, or something in the “do not compost” list was added.
Solution: The best defense is a good offense! Ensure all food scraps are buried at least 6 inches deep and always covered with soil. Avoid adding meat, dairy, and oily foods, as these are major attractants. If pests are persistent, you might need to temporarily stop adding to that pit and start a new one, ensuring strict adherence to the rules.
Issue: The pit is full of water after rain.
Possible Cause: Poor drainage in the chosen location.
Solution: For future pits, choose a location with better drainage. For the current pit, try to dig a small drainage channel nearby or carefully fork the top layer to help water escape. You can also add more “brown” materials, which can help absorb excess moisture.
When is Pit Compost Ready?
Pit compost is ready when the original materials are no longer identifiable. It will look and smell like rich, dark soil. You might find small twigs or other woody bits that take longer to break down, but the bulk of it should be homogenous and earthy.
The time it takes varies greatly. A well-managed pit with a good mix of materials, adequate moisture, and the right temperature can be ready in 4-6 months. However, pit composting often relies on slower, passive decomposition, so it can also take up to a year or even longer, especially if materials were not finely chopped or if conditions weren’t optimal.
You can test the readiness by digging into the middle of the pit. If it’s still slimy, smelly, or you can clearly see food scraps, it needs more time. If it’s crumbly, dark, and smells like fresh earth, it’s likely ready to use.
How to Use Your Finished Pit Compost
Once your pit compost is ready, you have several options:
- Direct Spreading: You can carefully dig out the finished compost from the pit and spread it directly over your garden beds or around trees and shrubs. It’s a fantastic way to add nutrients and improve soil structure.
- Incorporating into Soil: Gently fork or till the compost into the top few inches of your soil before planting. This is especially beneficial for vegetable gardens.
- Potting Mix: You can sieve the compost to remove larger pieces and use it as a component in your own homemade potting mix for containers and raised beds.
- Top Dressing: Apply a layer around existing plants to provide a slow release of nutrients and help retain soil moisture.
Remember, finished compost is a powerful soil enhancer. Using it generously will pay dividends in healthier, more vibrant plants.
The Benefits of Pit Composting for Your Garden and Beyond
Making compost isn’t just about getting rid of waste; it’s about enriching your environment. Here are some of the big wins:
- Healthier Soil: Compost improves soil structure, aeration, and water retention. It introduces beneficial microorganisms that help plants absorb nutrients. Your soil will be more alive and fertile.
- Reduced Waste: Diverting organic waste from landfills significantly reduces methane emissions, a potent greenhouse gas. You’re doing your part for the planet!
- Less Need for Chemical Fertilizers: Compost provides a natural source of nutrients, reducing or eliminating the need for synthetic fertilizers, which can be costly and harmful to the environment.
- Improved Plant Growth: Plants fed with compost are often stronger, more disease-resistant, and produce better yields.
- Water Conservation: Compost acts like a sponge in the soil, holding moisture and reducing the need for frequent watering.
- Cost Savings: You save money on fertilizers, soil amendments, and potentially on waste disposal fees.
The process of turning waste into a valuable resource is incredibly rewarding. Pit composting makes this accessible to anyone with a bit of yard space.
A Quick Summary Table: Pit Composting Basics
Here’s a handy table to keep the essentials in view:
| Aspect | Details |
|---|---|
| Method | Burying organic materials directly into the soil. |
| Pros | Simple, aesthetic, good moisture control, pest resistant, improves soil directly. |
| Cons | Requires digging, takes longer than some other methods, less controllable than above-ground bins. |
| Key Ingredients | Balanced “Greens” (nitrogen-rich: food scraps, grass) and “Browns” (carbon-rich: leaves, paper). |
| Essential Tool | Shovel. |
| Maintenance | Bury materials, keep moist, add more as needed. |
Frequently Asked Questions about Pit Composting
Q1: How deep should my pit be?
A: Aim for a depth of about 2 to 3 feet. This depth helps insulate the compost, retain moisture, and deter animals from digging it up.
Q2: Can I compost just kitchen scraps in a pit?
A: You can, but it’s best to mix them with “brown
.lwrp.link-whisper-related-posts{
margin-top: 40px;
margin-bottom: 30px;
}
.lwrp .lwrp-title{
}.lwrp .lwrp-description{
}
.lwrp .lwrp-list-container{
}
.lwrp .lwrp-list-multi-container{
display: flex;
}
.lwrp .lwrp-list-double{
width: 48%;
}
.lwrp .lwrp-list-triple{
width: 32%;
}
.lwrp .lwrp-list-row-container{
display: flex;
justify-content: space-between;
}
.lwrp .lwrp-list-row-container .lwrp-list-item{
width: calc(25% – 20px);
}
.lwrp .lwrp-list-item:not(.lwrp-no-posts-message-item){
max-width: 150px;
}
.lwrp .lwrp-list-item img{
max-width: 100%;
height: auto;
object-fit: cover;
aspect-ratio: 1 / 1;
}
.lwrp .lwrp-list-item.lwrp-empty-list-item{
background: initial !important;
}
.lwrp .lwrp-list-item .lwrp-list-link .lwrp-list-link-title-text,
.lwrp .lwrp-list-item .lwrp-list-no-posts-message{
}@media screen and (max-width: 480px) {
.lwrp.link-whisper-related-posts{
}
.lwrp .lwrp-title{
}.lwrp .lwrp-description{
}
.lwrp .lwrp-list-multi-container{
flex-direction: column;
}
.lwrp .lwrp-list-multi-container ul.lwrp-list{
margin-top: 0px;
margin-bottom: 0px;
padding-top: 0px;
padding-bottom: 0px;
}
.lwrp .lwrp-list-double,
.lwrp .lwrp-list-triple{
width: 100%;
}
.lwrp .lwrp-list-row-container{
justify-content: initial;
flex-direction: column;
}
.lwrp .lwrp-list-row-container .lwrp-list-item{
width: 100%;
}
.lwrp .lwrp-list-item:not(.lwrp-no-posts-message-item){
max-width: initial;
}
.lwrp .lwrp-list-item .lwrp-list-link .lwrp-list-link-title-text,
.lwrp .lwrp-list-item .lwrp-list-no-posts-message{
};
}
Related Posts
- Are Diphtheroids Normal in Urine? Powerful Facts!
- Bokashi Composting Stores: Essential Guide

A Little Blood in Urine After Bladder Surgery Male: Secret?- Garden Compost: Keep Rats Away with These Tips!

I am passionate about home engineering. I specialize in designing, installing, and maintaining heating, ventilation, and air conditioning systems. My goal is to help people stay comfortable in their homes all year long.