So, you want to compost but think it’s a lot of work? Maybe you’ve seen those big piles and felt a bit overwhelmed. Well, I’ve got a secret weapon for you: rotating bin composting! It’s way easier than you think, and it turns your kitchen scraps and yard waste into garden gold with surprisingly little fuss. Let’s dive in and make composting a breeze!
Rotating Bin Composting: Your Genius, Effortless Guide
Hey there, fellow home improvers and garden enthusiasts! Troy D Harn here from TopChooser, ready to tackle another project that makes life a little bit better and a lot more sustainable. Today, we’re unlocking the magic of rotating bin composting. If you’ve ever thought composting was too messy, too smelly, or just too much effort, stick around. I’m going to show you how a rotating compost bin can be your secret weapon for creating fantastic fertilizer with minimal sweat.
Many folks shy away from composting because they imagine turning a giant, hot pile with a pitchfork. While that’s a valid method, it’s not the only way, and it’s certainly not the easiest for beginners. Rotating composters are designed to simplify the process, speed it up, and keep things neat and tidy. Think of it as a composting shortcut that works smarter, not harder. We’ll break down everything you need to know, from choosing the right bin to feeding it just the right goodies. Ready to turn trash into treasure?
Why Rotating Bin Composting is a Game-Changer
Let’s be honest, we’re all looking for ways to make our lives easier. Rotating compost bins are designed with exactly that in mind. They take the “chore” out of composting and replace it with a simple, effective system. Here’s why so many people are switching to this method:
- Speed: The tumbling action introduces oxygen, which is crucial for the microbes that break down organic matter. More oxygen means faster decomposition.
- Convenience: Instead of manually turning a compost pile, you simply give the bin a spin every few days. It’s like a mini-workout with a big payoff!
- Neatness: These bins are typically enclosed, which helps contain odors and keeps pests away. No more unsightly, sprawling compost piles in the corner of your yard.
- Less Work: The mechanical action of turning does the heavy lifting for you, making it ideal for people with limited mobility or just those who prefer less physical exertion.
- Better Results: The consistent aeration and mixing lead to a more uniform compost, free from the anaerobic pockets that can cause unpleasant smells.
Choosing Your Rotating Composter: What to Look For
Not all rotating composters are created equal. When you’re shopping, keep these factors in mind to find one that fits your needs and budget:
Types of Rotating Bins
There are two main styles of rotating composters:
- Stationary Bins with a Tumbler: These are usually a drum or barrel mounted on an axis. You fill one side, let it compost, and then empty it while starting a new batch in the other side, or you add to it as you go.
- Two-Chamber Systems: Some bins have two compartments. You fill one side, and once it’s ready or you want to start a new batch, compost from the first chamber can be moved to mature while you fill the second chamber with fresh scraps. This offers a continuous composting cycle.
Key Features to Consider
- Capacity: How much organic material do you generate? A typical household might do well with a 30-50 gallon (110-190 liter) bin. If you have a large yard and kitchen, consider a larger one.
- Material: Most bins are made of durable, UV-resistant plastic. Look for sturdy construction that can withstand weather.
- Ease of Turning: Does the crank or handle feel comfortable to operate? Can you turn it easily when it’s full? Some models have gear mechanisms that make turning easier.
- Aeration: Good compost bins have ventilation holes. Check how well-designed these are to allow airflow without letting too much moisture escape.
- Durability: Will it stand up to the elements and repeated use? Read reviews to see how well they hold up over time.
- Assembly: How easy is it to put together? Most are designed for DIY assembly, but some are simpler than others.
A popular and reliable option often recommended for its durability and ease of use is the Gardner Oscillating Compost Tumbler. Many users praise its effectiveness in breaking down materials quickly and its robust build.
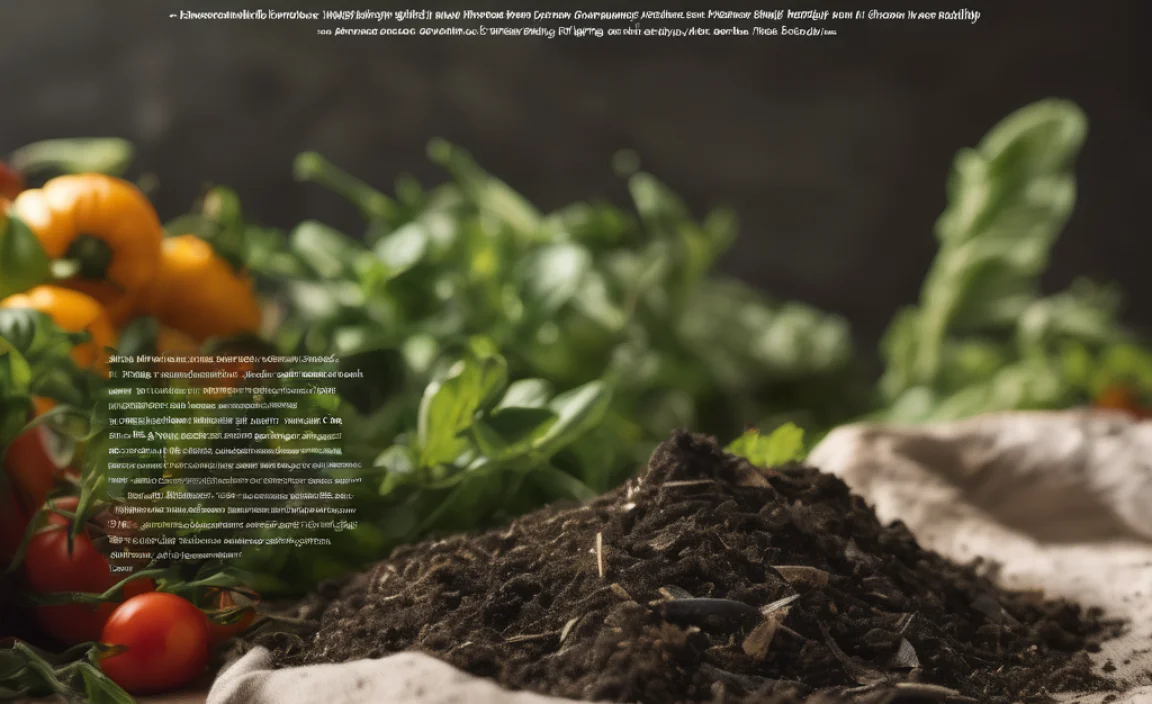
What Goes Into Your Rotating Compost Bin? The “Greens” and “Browns”
Composting is all about balance. You need a mix of “green” (nitrogen-rich) and “brown” (carbon-rich) materials to create the perfect environment for decomposition. Think of it like a balanced diet for your compost microbes!
Greens (Nitrogen-Rich)
These are typically moist materials that provide nitrogen, which helps the microbes multiply and heat up the compost pile. Too many greens can make your compost a bit smelly and slimy.
- Fruit and vegetable scraps (peels, cores, rinds)
- Coffee grounds and tea bags
- Grass clippings (use in moderation to avoid matting)
- Plant trimmings (non-woody, healthy plants)
- Eggshells (crushed)
- Manure from herbivorous animals (chicken, rabbit, cow, horse – avoid pet waste!)
Browns (Carbon-Rich)
These are dry materials high in carbon. They provide energy for the microbes and add bulk, helping to keep the compost airy and preventing it from getting too soggy. Too many browns will slow down decomposition.
- Dried leaves
- Shredded newspaper and plain cardboard (avoid glossy or colored inks)
- Twigs and small branches (chopped or shredded)
- Straw or hay
- Sawdust or wood chips (use sparingly, as they break down slowly)
- Paper towels and napkins (unsoiled with chemicals or grease)
What NOT to Compost
To keep your compost healthy and safe, avoid adding these:
- Meat, fish, and dairy products (attract pests and can smell bad)
- Oily foods or grease
- Diseased plants or weeds that have gone to seed (they might survive the composting process and spread)
- Pet waste (from dogs or cats – can contain harmful pathogens)
- Treated wood or sawdust from treated wood
- Coal or charcoal ash
- Glossy paper or heavily inked paper
The Ideal Ratio: Getting the Balance Right
The magic ratio for successful composting is about 2 parts Browns to 1 part Greens by volume. Don’t stress too much about being exact; it’s more about getting a good mix. If your compost seems too wet and smells bad, add more browns. If it’s not breaking down and seems dry, add more greens and a little water.
Here’s a simple table to help visualize:
| Greens (Nitrogen) | Browns (Carbon) | Purpose in Compost |
|---|---|---|
| Fruit & Veggie Scraps | Dried Leaves | Provide nitrogen for microbes, create heat |
| Coffee Grounds | Shredded Newspaper | Add moisture and “food” for the decomposers |
| Grass Clippings | Cardboard (uncoated) | Provide carbon for energy, add bulk and air pockets |
| Eggshells | Twigs/Wood Chips | Help balance moisture, improve structure |
| Certain Manures | Straw/Hay | Aid in decomposition, prevent compaction |
Step-by-Step: How to Use Your Rotating Composter
Now for the fun part! Using your rotating composter is surprisingly straightforward. Follow these steps, and you’ll be a composting pro in no time.
Step 1: Set Up Your Bin
Most rotating composters require some assembly. Follow the manufacturer’s instructions carefully. Place your bin on a level, well-drained spot, ideally in a location that gets some sun (to help with heat) but not so much that it dries out too quickly. Under a tree or on the edge of your garden are good spots. Ensure there’s enough space around it for you to comfortably turn the bin.
Step 2: Start Adding Materials
Begin by adding a layer of “brown” materials, like dry leaves or shredded cardboard, to the bottom. This helps with aeration and drainage from the start. Then, start adding your kitchen scraps (“greens”) and more browns. Aim for that 2:1 brown-to-green ratio as you fill it. Chop or shred larger items to help them break down faster.
Pro Tip: Keep a small compost caddy in your kitchen for scraps and a bag of leaves or shredded paper nearby. When you add kitchen scraps, immediately cover them with a layer of browns. This helps reduce odors and prevents flies.
Step 3: The Turning Routine
This is where the “rotating” part comes in! Every 2-3 days, give your composter a good spin.
- How to Turn: If your bin has a crank, turn it steadily for 10-20 rotations. If it’s a barrel you can tilt or push, give it a good, vigorous roll.
- Purpose of Turning: This action mixes the materials, introduces oxygen (essential for aerobic decomposition), and helps to evenly distribute moisture.
- Frequency: Aim for every 2-3 days. More frequent turning speeds up the process, but even once a week will yield results.
Step 4: Monitor Moisture Levels
Your compost should feel like a damp, wrung-out sponge. Not dripping wet, and not bone dry.
- Too Dry? If it feels dry, add a little water. You can do this by adding moist “green” materials or by sprinkling some water in while you turn the bin.
- Too Wet? If it’s soggy and smells sour, add more dry “brown” materials (like shredded paper or dry leaves) and ensure good aeration by turning it more frequently.
Step 5: Patience and Observation
Composting isn’t instantaneous. Depending on the materials, temperature, and how often you turn it, it can take anywhere from 4 weeks to a few months to get finished compost.
- What to Look For: Finished compost will be dark, crumbly, and smell earthy. You shouldn’t be able to recognize the original materials you put in.
- Harvesting: Once a batch is ready, either empty the entire bin and start fresh, or if your bin allows, push the finished compost to one side to mature while you fill the other. Many bins have a door or opening to easily access the finished product.
Troubleshooting Common Composting Issues
Even with the best intentions, you might run into a few snags. Here’s how to fix them:
-
Smells Bad (Like Ammonia or Rotten Eggs):
- Cause: Too many “greens” or not enough air.
- Fix: Add more “browns” (like dry leaves, shredded paper, or sawdust) and turn the bin more frequently to aerate it.
-
Not Breaking Down (Too Slow):
- Cause: Too many “browns,” not enough moisture, or too cold.
- Fix: Add more “greens” (like kitchen scraps), ensure adequate moisture (damp, not wet), and turn more often. If it’s persistently cold, you might need a warmer location or a larger batch to generate internal heat.
-
Attracting Pests (Flies, Rodents):
- Cause: Exposed food scraps, or adding prohibited items like meat/dairy.
- Fix: Ensure your bin is securely closed. Always bury kitchen scraps under a layer of brown material when adding them. Never add meat, dairy, or oily foods. A well-maintained, enclosed rotating bin generally deters pests effectively.
-
Too Wet/Slimy:
- Cause: Too many “greens,” not enough “browns,” or poor drainage.
- Fix: Add plenty of dry “browns” and turn frequently to improve airflow. Ensure the bin isn’t sitting in standing water.
When Is Compost Ready?
Knowing when your compost is ready is key. You’re looking for a few tell-tale signs:
- Appearance: It should be dark brown or black, resembling rich soil.
- Texture: It will be crumbly and uniform. You shouldn’t be able to identify the original food scraps or yard waste.
- Smell: It should have a pleasant, earthy aroma – like a forest floor after rain. If it smells sour or like ammonia, it’s not quite ready, or something is out of balance.
- Temperature: Once mature, the compost pile will have cooled down to ambient temperature.
This nutrient-rich material is often called “black gold” by gardeners for a good reason! It’s packed with beneficial microbes, nutrients, and organic matter that will enrich your soil, improve drainage, and help your plants thrive.
How to Use Your Finished Compost
Congratulations, you’ve made compost! Now, how do you use this amazing garden amendment?
- Soil Amendment: Mix compost into your garden beds before planting. It improves soil structure, aeration, and water retention. A layer of 1-3 inches is usually sufficient.
- Top Dressing: Spread a thin layer of compost around existing plants, shrubs, and trees. This feeds the plants and nourishes the soil life over time.
- Potting Mix: Combine compost with other ingredients like perlite or vermiculite to create a rich, DIY potting mix for containers and houseplants. A common mix is 1/3 compost, 1/3 peat moss or coco coir, and 1/3 perlite. Check out resources on RHS potting media for more ideas.
- Lawn Dressing: Rake a thin layer of compost over your lawn in the spring or fall to improve soil health and grass vigor.
Frequently Asked Questions About Rotating Bin Composting
What’s the biggest advantage of a rotating compost bin over a traditional pile?
Rotating bins drastically reduce the effort required to aerate the compost. Instead of manual turning with a fork, you simply spin the bin, making the process far more convenient and faster.
How often should I turn my rotating compost bin?
For the fastest results, aim to turn your bin every 2-3 days. However, turning it 1-2 times a week will still produce good compost.
My bin smells bad. What did I do wrong?
A bad smell (like ammonia or rotten eggs) usually means you have too many “greens” (nitrogen-rich materials) or not enough air circulation. Add more “browns” (carbon-rich materials like dry leaves or shredded paper) and turn the bin more frequently.
Can I compost in a rotating bin during winter?
Yes, but decomposition will slow down significantly in cold weather. You can continue adding materials, but expect a much longer breakdown time. Some people move their bins to a more protected location or insulate them.
How long does it take to get finished compost in a rotating bin?
It varies greatly depending on the materials, temperature, moisture, and turning frequency. Typically, you can expect finished compost in 4 weeks to 3 months.
Can I put all my kitchen scraps in a rotating bin?
You can compost most fruit and vegetable scraps, coffee grounds, and tea bags. However, avoid meat, dairy, oily foods, and pet waste, as these can attract pests and create odors, even in an enclosed bin.
Do I need to add water to my rotating compost bin?
Yes, you need to maintain moisture. The compost should feel like a damp, wrung-out sponge. If it’s too dry, add water. If it’s too wet

I am passionate about home engineering. I specialize in designing, installing, and maintaining heating, ventilation, and air conditioning systems. My goal is to help people stay comfortable in their homes all year long.