Tired of that smelly compost pile in the corner of your yard? Wish there was an easier, cleaner way to turn kitchen scraps and yard waste into garden gold? You’re not alone! Many of us dream of making rich compost but get put off by the mess, the smell, or the sheer effort involved. But what if I told you there’s a composting method that’s super simple, relatively clean, and incredibly effective? Get ready, because we’re about to dive into the awesome world of rotating bin composting – it truly is a genius solution for busy gardeners and eco-conscious homeowners!
Rotating Bin Composting Best: A Genius Solution for Easy, Smelly-Free Compost
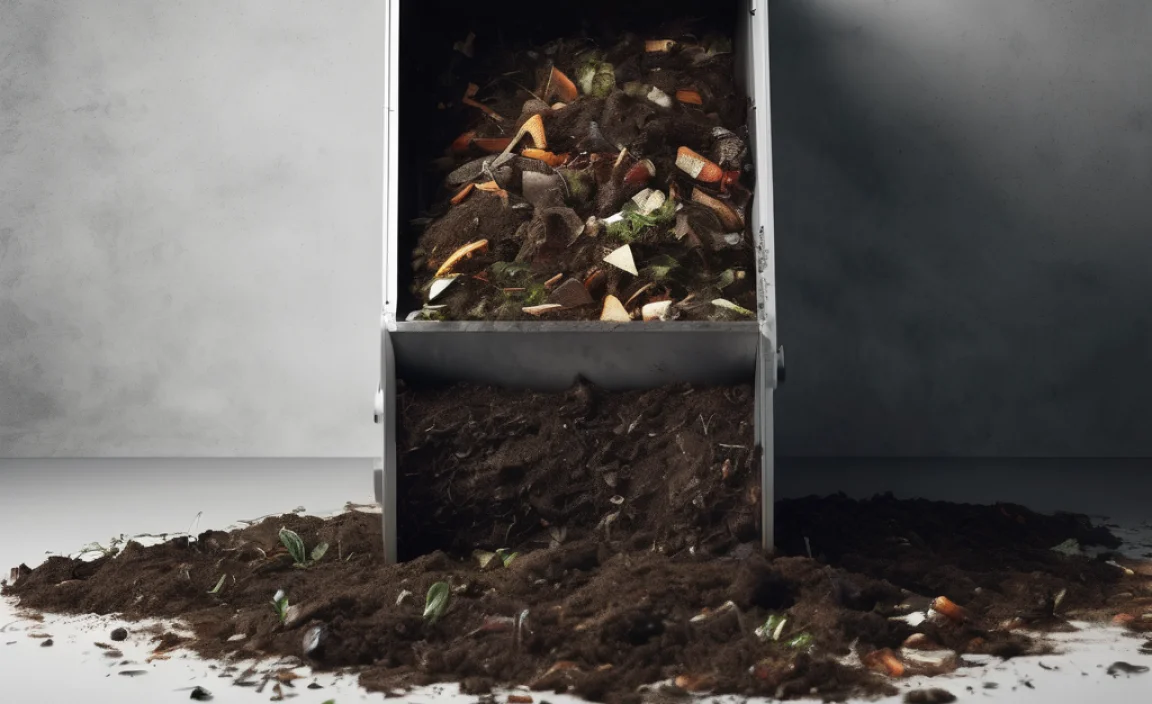
Hey everyone, Troy D Harn here from TopChooser! If you’ve ever thought about composting but felt overwhelmed, you’re in the right place. Composting is one of the best things you can do for your garden and the planet, turning your waste into nutrient-rich food for your plants. But let’s be honest, traditional compost piles can sometimes be a bit… involved. They can smell, attract pests, and take a long time to break down. That’s where the rotating bin composter, also known as a tumbling composter, swoops in like a superhero!
These clever contraptions are designed to make composting faster, easier, and way less messy. Instead of turning a big pile with a fork, you just give the bin a good roll or spin. It’s like a workout for your compostables! We’ll explore why they are so fantastic, who they’re best for, and how to use them to create beautiful compost for your garden. Ready to ditch the compost guilt and get composting like a pro? Let’s get started!
Why Rotating Bin Composting is a Game-Changer
So, what makes a rotating bin composter the “best” for so many people? It boils down to a few key advantages that tackle the common composting headaches head-on. It’s a fantastic way to get into composting without the usual hurdles.
- Speed: Tumbling composters usually speed up the composting process significantly because they allow for better aeration. Regular turning is key to compost breakdown, and tumbling does this automatically.
- Aeration Made Easy: Oxygen is super important for the microbes that break down your waste. Rotating the bin constantly mixes air into the compost, helping it decompose faster and smell better.
- Less Mess, Less Smell: Because the compost is contained within a sealed bin, it’s much tidier. The good microbes thrive with the oxygen, and unpleasant anaerobic (oxygen-poor) bacteria that cause stinky smells are kept at bay.
- Pest Deterrent: The enclosed design makes it harder for unwanted critters like rodents or flies to get into your compost. Most designs have secure lids, adding an extra layer of protection.
- Simplicity: Seriously, this is the easiest part. Instead of wrestling with a compost fork, you just give the bin a few turns a few times a week. It’s an achievable task for almost anyone.
- Space-Saving: Many rotating composters are designed to be relatively compact, making them a great option for smaller yards or even patios.
Who is Rotating Bin Composting Perfect For?
This method isn’t just for hard-core gardeners or eco-warriors. Rotating bin composting is ideal for a wide range of people:
- Beginners: If you’re new to composting, this is probably the most straightforward way to start. The instructions are simple, and the results are quick, which is super encouraging.
- Busy People: Don’t have a lot of time to dedicate to a large compost pile? Tumble composting requires minimal effort – just a quick turn here and there.
- Apartment/Small Yard Dwellers: Space constraints are no match for a compact rotating composter. Many models can fit neatly on a balcony or a small patio.
- Those Who Hate Mess and Smell: If the thought of a messy, potentially stinky traditional pile puts you off, a sealed tumbling composter is your best bet.
- People Who Want Faster Compost: Want to feed your garden sooner? The accelerated breakdown in a tumbler means you can often get usable compost in a matter of weeks or a couple of months, not many months.
Understanding the “Greens” and “Browns”
Before we get into the “how-to,” it’s essential to understand the building blocks of good compost: “greens” and “browns.” Getting this balance right is crucial for any composting method, including rotating bins. Think of it like baking – you need the right ingredients in the right amounts. The ideal ratio is roughly 2 parts Browns to 1 part Greens by volume.
What are “Greens”?
Greens are nitrogen-rich materials. They tend to be moist and break down quickly, providing the energy for the composting microbes. Adding too many greens can lead to a slimy, smelly compost.
- Fruit and vegetable scraps
- Coffee grounds and tea bags
- Grass clippings (in moderation)
- Plant trimmings (soft ones)
- Eggshells
- Manure from herbivores (like rabbits or chickens, but avoid dog/cat waste)
What are “Browns”?
Browns are carbon-rich materials. They are usually dry and provide the structure and energy source for the microbes. Browns help balance the moisture and prevent the compost from becoming too dense and smelly.
- Dry leaves
- Straw or hay
- Shredded newspaper or cardboard (avoid glossy or colored inks)
- Twigs and small branches (chopped up)
- Sawdust (from untreated wood)
- Paper towels and napkins
Tip: Chop larger items into smaller pieces to help them break down faster. Even with a tumbler, smaller pieces mean quicker compost!
Choosing the Right Rotating Bin Composter
The market has a variety of rotating composters. They generally fall into a few categories, but the core function is the same: a rotating drum to mix and aerate. When picking one, consider size, ease of use, and durability.
Types of Rotating Composters:
- Single Chamber Tumblers: These are the most common. You fill one side, let it compost, and then move it aside to start a new batch. You’ll continuously have compost on one side and actively composting material on the other.
- Dual Chamber Tumblers: These have two separate sections. While one side is actively composting, you can start filling the other side. This provides a continuous flow of compost. Many find this a more efficient setup.
- Batch Tumblers: These are designed to be filled completely at once, then tumbled until the compost is ready. Once emptied, you start a new batch from scratch.
What to Look For:
- Capacity: How much compost do you need? Consider your kitchen waste and yard debris output. Most home composters range from 10 to 50 gallons.
- Durability: Look for sturdy, UV-resistant plastic or metal construction that can withstand outdoor elements. Reviews can be helpful here.
- Ease of Rotation: Some tumblers are easier to spin than others. Consider the ergonomics, especially if you have limited strength. Most should spin with moderate effort.
- Ease of Loading and Unloading: Does it have a wide opening? Is the compost easy to access when it’s done?
- Ventilation Holes: Proper airflow is key. Ensure the design has adequate vents.
- Price: Rotating composters can range from $50 to over $200. Set a budget and find one that fits your needs and your wallet.
A good starting point for understanding composting science and best practices is the EPA’s guide to home composting. While it covers all methods, the fundamental principles of balancing greens and browns, and providing air and moisture, apply directly to your rotating bin.
Step-by-Step Guide: How to Use Your Rotating Bin Composter
Using a rotating bin composter is wonderfully simple. Follow these steps, and you’ll be well on your way to creating fantastic compost.
Step 1: Assemble Your Composter
Most rotating composters come flat-packed. Follow the manufacturer’s instructions carefully. Typically, this involves attaching the drum to a stand and securing any lids or ports. Ensure all parts are firmly in place for safe operation.
Step 2: Choose a Location
Select a level spot in your yard that gets a good amount of sun, but not scorching afternoon sun all day. This helps the compost heat up. Ensure there’s enough space around it to easily turn or rotate the bin and to access it for adding materials and harvesting compost.
Step 3: Start Adding Materials (The Mix!)
Begin by adding a layer of “browns” to the bottom. This can be chopped-up cardboard, dry leaves, or straw. This layer helps with drainage and aeration right from the start. Then, start alternating layers of “greens” and “browns,” aiming for that 2:1 (Browns:Greens) ratio by volume. Don’t overstuff it; leave some room for tumbling.
Example First Fill:
- A few handfuls of dry leaves (Browns)
- A layer of kitchen scraps (Greens)
- Some shredded newspaper (Browns)
- More kitchen scraps (Greens)
- A layer of twiggy yard waste (Browns)
It’s a good idea to mix things up as you add them. Some people like to put a shovel full of finished compost or garden soil in to introduce beneficial microbes.
Step 4: Start Tumbling!
Once you’ve added your initial batch of materials, close the lid securely. Now, it’s time to turn it! Depending on your composter model, you’ll either push it to roll or crank a handle. Give it about 10-20 turns. Do this 2-3 times during the first week. You’ll notice the material starts to mix and break down.
Step 5: Continue Adding Materials
Keep adding your kitchen scraps and yard waste. Remember the 2:1 Browns to Greens ratio. When adding new “greens,” try to bury them slightly within the existing material or cover them with some “browns” to prevent odors and fruit flies.
Tip: If you have a dual-chamber bin, fill one side until it’s about two-thirds full, then let it start its composting process while you begin filling the second chamber. This ensures continuous compost production.
For more on composting science, including the role of temperature, the North Carolina State University Extension offers excellent resources.
Step 6: Monitor Moisture Levels
Your compost should be moist, but not soaking wet. It should feel like a wrung-out sponge. If it’s too dry, add a little water and tumble. If it’s too wet, add more dry “browns” (like shredded cardboard or dry leaves) and tumble to mix. Too much moisture can lead to smelly, anaerobic conditions.
Step 7: Keep Tumbling Regularly
Continue to tumble your composter every few days (2-4 times a week) as you add new materials. This regular aeration is the key to fast, efficient composting. The more you tumble, the faster it breaks down.
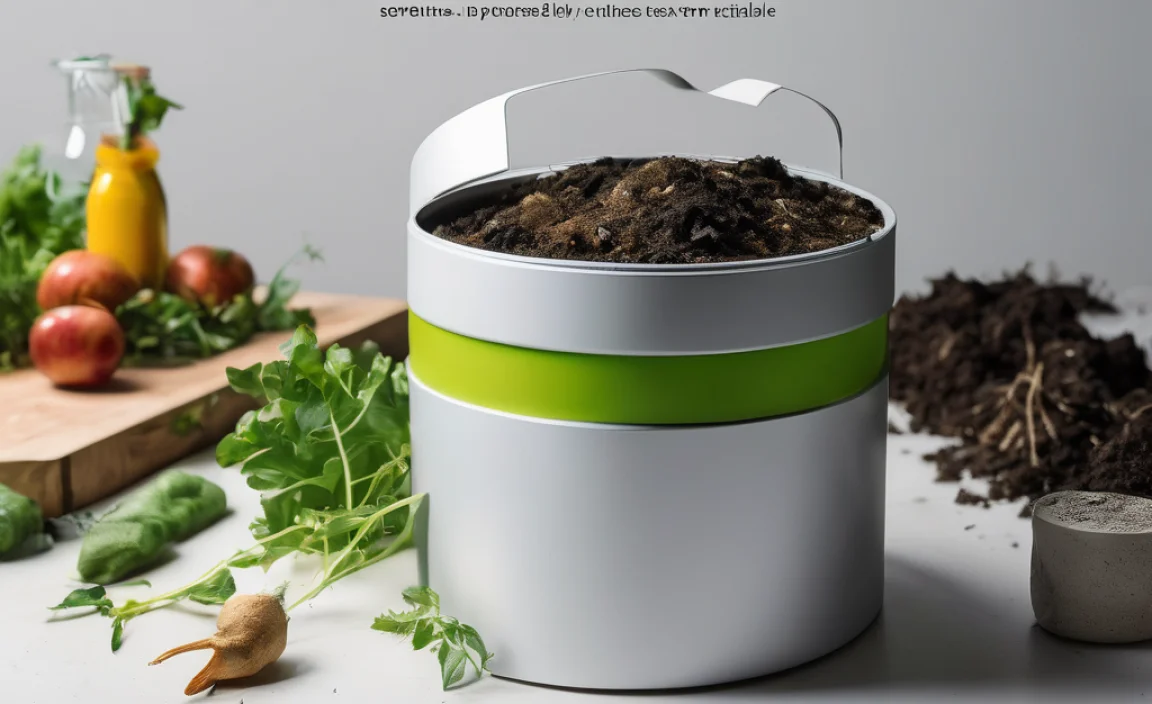
Step 8: Harvesting Your Compost
How do you know when it’s ready? Finished compost will look dark, crumbly, and earthy. It should smell pleasant, like soil, not sour or rotten. You won’t be able to recognize the original materials you put in. This can take anywhere from 4 weeks to 3 months, depending on your materials, how often you tumble, and the weather.
To harvest, simply open the door or lid and empty the contents of the bin onto a tarp or into a wheelbarrow. You might want to sift it through a screen (a simple hardware cloth on a frame works well) to remove any larger, unfinished pieces. These unfinished bits can go back into the composter to break down further.
Important Note on What NOT to Compost:
Some things should be avoided in your compost bin to prevent pests, diseases, and foul odors:
- Meat, fish, or bones
- Dairy products (cheese, milk, yogurt)
- Oily or greasy foods
- Diseased plants
- Weeds that have gone to seed (unless your compost gets very hot)
- Pet waste (dog or cat feces)
- Chemically treated wood or sawdust
- Coal or charcoal ash
Troubleshooting Common Rotating Composter Issues
Even with a genius solution like a rotating bin, you might run into a few hiccups. Here’s how to fix them:
Problem: My compost smells bad (like rotten eggs or ammonia).
Cause: Too much “green” material, not enough aeration, or too much moisture.
Solution: Add more “browns” (like shredded cardboard, dry leaves, or sawdust) to absorb moisture and balance the carbon-to-nitrogen ratio. Tumbling more frequently will also help introduce air. If it’s very wet, add plenty of browns and tumble till drier.
Problem: My compost isn’t breaking down or is too dry.
Cause: Not enough moisture, not enough “greens,” or not tumbling enough.
Solution: Add water to the compost until it feels like a wrung-out sponge. Add more “greens” to provide nitrogen for the microbes. Make sure you are tumbling regularly (every few days).
Problem: I see fruit flies or other small insects.
Cause: Exposed food scraps (greens) on the surface.
Solution: Bury fresh kitchen scraps deeper into the compost material and cover them with a layer of “browns.” Ensure the lid is Tightly closed. Regular tumbling also helps disrupt insect populations.
Problem: The composter is difficult to turn.
Cause: It might be overfilled, too heavy, or the mechanism needs lubrication.
Solution: If it’s overfilled, remove some material. If it’s just heavy, break up the compost inside to redistribute it. Check the spinning mechanism for any obstructions or apply a food-grade lubricant if recommended by the manufacturer.
Problem: My compost is not getting hot.
Cause: Poor aeration, incorrect moisture, or an imbalanced C:N ratio (too many browns, not enough greens).
Solution: Ensure you are tumbling regularly. Check moisture levels. Add a good dose of “greens” to fuel the microbial activity. In cooler weather, a sunny spot helps.
Pros and Cons of Rotating Bin Composting
No composting method is perfect, but for many, the pros of rotating bin composting far outweigh the cons. Let’s break it down:
| Pros | Cons |
|---|---|
| Speed: Faster decomposition than static piles. | Capacity Limits: Can be limiting for very large households or those with extensive yard waste. |
| Ease of Use: Simple to turn, no heavy lifting with tools. | Initial Cost: Can be more expensive upfront than building a simple bin. |
| Less Smell: Enclosed design helps control odors. | Batch Composting: Some models require waiting for a full batch to finish before starting a new one, though dual chambers mitigate this. |
| Pest Resistant: Fully enclosed bins deter rodents and other pests. | Requires Turning: While easy, it still requires regular effort to turn. |
| Tidiness: Contained compost keeps the yard neater. | Temperature Peaks: May not reach the very high temperatures of large, well-managed hot compost piles, which can kill weed seeds and pathogens more effectively. |
| Good Aeration: Easy to introduce oxygen for healthy microbial activity. | Can Get Heavy: As materials break down and become denser, especially with added moisture, larger bins can become heavy to turn. |
Composting Materials: A Quick Reference Table
Here’s a handy table to quickly reference what’s good for your rotating composter and what to avoid.
| Add to Your Compost Bin (Greens & Browns) | Avoid in Your Compost Bin |
|---|---|
| Fruit scraps | Meat, poultry, fish scraps |

I am passionate about home engineering. I specialize in designing, installing, and maintaining heating, ventilation, and air conditioning systems. My goal is to help people stay comfortable in their homes all year long.