Hey there! Ever look at your kitchen scraps and yard waste, thinking there has to be a better way than just tossing them in the trash? You’re not alone! Many folks find composting a bit daunting, picturing complicated setups or smelly piles. But what if I told you it could be super simple and easy on your wallet? We’re diving into the world of rotating bin composting, showing you how to make amazing compost without breaking the bank or breaking a sweat. Get ready for effortless success!
Rotating Bin Composting on a Budget: Your Easy Guide to “Green Gold”
Hello, I’m Troy D Harn from TopChooser, your go-to for making home projects and gardening simple. Today, we’re tackling something truly rewarding: composting! Specifically, we’re focusing on rotating bin composting, often called tumbler composting. It’s a fantastic way to turn your food scraps and yard trimmings into nutrient-rich soil food, also known as “black gold.” The best part? You can do it affordably. Forget those expensive, fancy tumblers. We’ll show you how to set one up and use it effectively without spending much, making your garden happier and your trash bin lighter.
Why Choose Rotating Bin Composting? The Speedy, Simple Way to Compost
Composting might sound like a lot of work, but rotating bin composting is designed for ease and speed. Unlike traditional pile composting, a rotating bin encloses your materials, keeping things tidy and helping them break down faster. The action of turning the bin aerates the compost, speeds up decomposition, and prevents those less-than-pleasant odors.
Here’s a quick look at why it’s a great choice, especially for beginners:
- Faster Results: The tumbling action mixes air and moisture, significantly speeding up the composting process. You can often have finished compost in just a few weeks or months, not many months or even a year.
- Neater & Cleaner: Everything is contained within the bin. No messy piles or worrying about pests getting into your compost.
- Less Turning, More Doing: While you still need to turn it, rotating is often easier than forking a large compost pile.
- Improved Aeration: Turning introduces oxygen, which is crucial for the microbes that break down organic matter. This also helps prevent smelly anaerobic conditions.
- Moisture Control: It’s easier to manage the moisture levels inside a closed bin.
“Cheap” Doesn’t Mean “Chintzy”: Making Your Own Rotating Composter
The biggest hurdle for many when it comes to rotating bin composting is the perceived cost of buying a commercial tumbler. They can range from $100 to over $400! But you absolutely don’t need to spend that much. We can build a highly effective DIY version for a fraction of the price, often using materials you might already have or can find very affordably.
The core idea is a container that can hold your compostables, be sealed to retain heat and moisture, and be easily rotated or tumbled. Here are a few budget-friendly approaches:
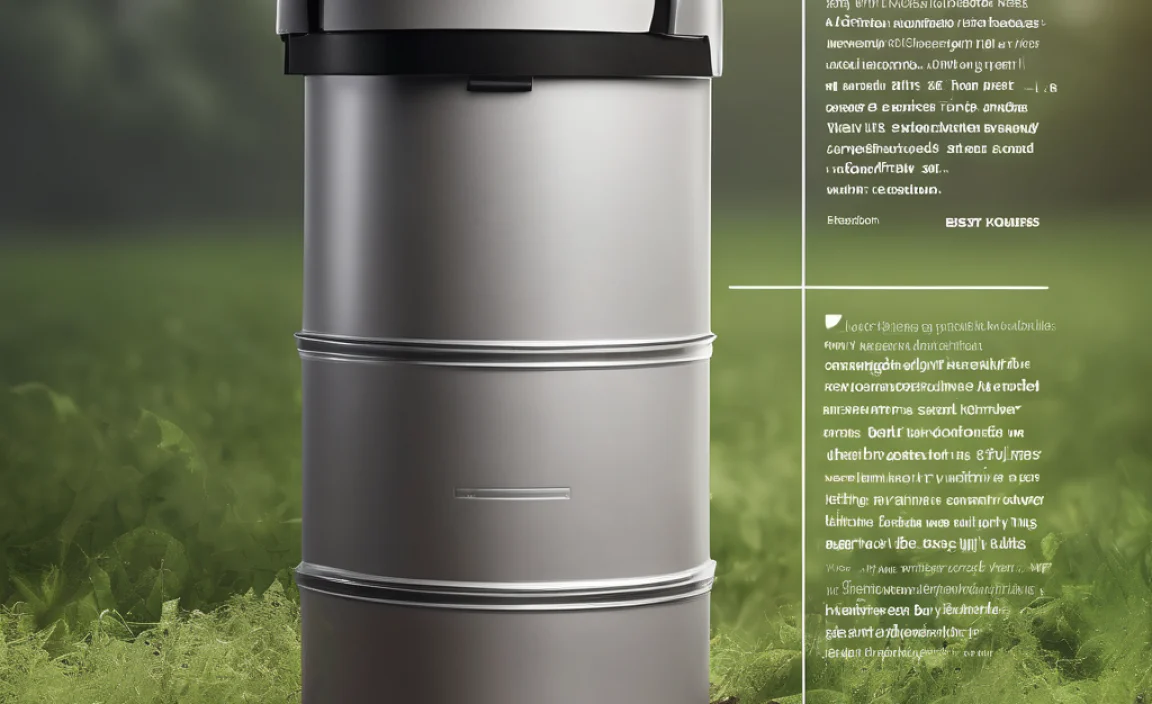
Option 1: The Repurposed Plastic Bin Tumbler (Super Cheap & Easy!)
This is my favorite for its sheer simplicity and minimal cost. You can often find large, sturdy plastic trash cans or storage totes at thrift stores, garage sales, or even for free on local online marketplaces. Look for one with a tight-fitting lid.
Materials You’ll Need:
- A large, sturdy plastic garbage can with a secure lid (30-50 gallon size is ideal).
- A drill with a large bit (around 1/2 inch to 1 inch) and a smaller bit (around 1/4 inch).
- (Optional) Two shorter lengths of sturdy wood or PVC pipe to act as handles or a turning mechanism, if needed.
- (Optional) Two small hinges and a latch if you want a more secure opening.
Step-by-Step: Build Your Plastic Bin Tumbler
- Clean It Up: Thoroughly wash out the garbage can and lid. You don’t want any lingering cleaning chemicals or old residue impacting your compost.
- Drill for Air and Water: This is crucial! Use your larger drill bit to drill plenty of holes all over the sides and bottom of the bin. These holes allow air to enter (essential for aerobic composting) and excess water to drain out. Aim for holes every 4-6 inches. Don’t forget the lid!
- Add Small Drainage Holes: Use the smaller drill bit to add a few more holes, especially on the very bottom, to ensure good drainage.
- Secure the Lid: Make sure the lid fits snugly. If it’s a bit loose, you might consider drilling small pilot holes and adding screws to keep it in place, or using bungee cords. For a more advanced build, you could attach hinges and a latch for easier access and a better seal.
- (Optional) Add Turning Handles: If the bin is heavy or you want an easier way to grip and turn it, you can attach short lengths of wood or PVC pipe vertically to the outside of the can, secured with bolts or strong adhesive.
- Get Composting! Once built, you’re ready to fill it.
This method is fantastic because it’s incredibly inexpensive and quick to assemble. The plastic is durable, and the holes provide necessary aeration. Heavy-duty storage totes with secure lids work just as well, sometimes even better due to their often more robust construction.
Option 2: The Barrel Tumbler (Slightly More Involved, Very Durable)
This involves using a food-grade plastic barrel, which you can often find used from places that sell bulk food ingredients (e.g., pickle barrels, olive barrels). These are sturdy and designed to hold food products, so they’re clean and durable.
Materials You’ll Need:
- A used, food-grade plastic barrel with a removable lid and locking ring, or a barrel with two screw-on watertight caps. (Check local food processing plants, large restaurants, or online marketplaces.)
- A drill with various bits (similar to Option 1).
- (Optional) A small amount of lumber or PVC pipes and fittings to build a simple stand or frame for the barrel to rest on, allowing it to spin easily.
- (Optional) A sturdy PVC pipe long enough to go through the center of the barrel to act as an axle.
- Bolts, nuts, and washers for securing the axle (if using).
Step-by-Step: Build Your Barrel Tumbler
- Clean the Barrel: Thoroughly wash the barrel and its lid(s) or caps. Ensure no residue remains.
- Drill for Aeration and Drainage: Just like the trash bin, drill numerous holes (1/2 inch to 1 inch) all around the barrel’s circumference and on the ends. Spacing them every 4-6 inches is good.
- (Optional) Install Axle: If you’re using a central axle, you’ll need to drill holes through the exact center of each end of the barrel. These holes should be just large enough for your PVC pipe or metal rod to pass through snugly. Secure the axle to the barrel with bolts, nuts, and washers, ensuring it’s centered and stable. This makes turning much easier.
- Create a Turning Stand (Optional but Recommended): A simple A-frame or a U-shaped stand made from scrap lumber or PVC pipes can support the barrel and allow it to easily rotate on its axle. This elevates the barrel, making it easier to turn and to empty compost into a wheelbarrow.
- Seal it Tight: Ensure the lid or caps are securely fastened to keep moisture in and pests out.
The barrel method is a step up in durability and capacity. While it might require a bit more effort and potentially some simple lumber work for a stand, it creates a robust and long-lasting composter. Food-grade barrels ensure safety for your compost and garden.
The “Goldilocks” Ratio: What to Compost (Greens vs. Browns)
Getting your compost to break down efficiently is all about balancing two types of materials: “Greens” and “Browns.” Think of it like a recipe; getting the ratio right is key for success. The goal is to have roughly a 2:1 or 3:1 ratio of Browns to Greens by volume. This sounds technical, but it’s easy once you understand it!
What are Greens? (Nitrogen-Rich Materials)
Greens are typically moist, nitrogen-rich materials that provide the energy for the microbes doing the decomposing. They often come from the kitchen or fresh yard waste.
- Fruit and vegetable scraps
- Coffee grounds and tea bags
- Grass clippings (in moderation – layer them to avoid matting)
- Plant trimmings (non-diseased)
- Manure from herbivores (cow, horse, rabbit – avoid dog or cat waste)
What are Browns? (Carbon-Rich Materials)
Browns are drier, carbon-rich materials that provide bulk, allow airflow, and help balance the moisture. They often come from dried leaves, twigs, or paper products.
- Dry leaves
- Shredded newspaper or cardboard (avoid glossy paper and colored inks if possible)
- Straw or hay
- Small twigs and wood chips
- Paper towel rolls and egg cartons (shredded)
- Sawdust (from untreated wood)
The Magic Ratio: Why It Matters
Too many Greens can make your compost pile wet, dense, and smelly (like rotten eggs). Too many Browns can make it dry and slow to decompose.
A good starting point is to aim for your bin to be about 1/3 to 1/2 Greens, and the rest Browns. Don’t stress about perfect measurements; it’s more of an art than an exact science. If it starts smelling bad, add more Browns. If it’s not breaking down, add more Greens and ensure it’s moist enough.
What NOT to Compost
There are a few things that can cause problems, attract pests, or spread disease. It’s best to keep these out of your compost bin:
- Meat, fish, and dairy products (attract pests, cause odors)
- Oily or greasy foods
- Diseased plants or weeds that have gone to seed
- Pet waste (dog or cat feces – can contain pathogens)
- Treated wood or sawdust from treated wood
- Coal ash or charcoal briquettes
- Synthetic materials (plastics, styrofoam)
Step-by-Step: Filling and Using Your Rotating Bin Composter
Now, let’s get your compost cooking!
Step 1: Start with a Brown Base
When you first start filling your bin, lay down a layer of Browns (like dried leaves or shredded cardboard) at the bottom. This helps with drainage and initial aeration.
Step 2: Add Your Materials in Layers
Begin adding your Greens (kitchen scraps, grass clippings) and Browns. Try to alternate layers, or mix them as you add them. For example, after adding some fruit peels (Green), toss in some shredded newspaper or dry leaves (Brown).
Pro Tip: Chop or shred larger items. Smaller pieces break down much faster! Kitchen scraps should be added within the bin and then covered with a layer of Browns to prevent odors and pests.
Step 3: Get the Moisture Right
Your compost pile should feel like a wrung-out sponge – moist, but not dripping wet. If it’s too dry, add a little water. If it’s too wet, add more Browns. This is where the tight-fitting lid helps keep moisture levels stable.
Step 4: Turn It Regularly!
This is the “rotating” part! For a DIY bin, you’ll manually turn it. If you have an axle, this is easy. If not, you might have to carefully roll the bin on its side or lift and shake it. Aim to turn your compost at least once every few days, and up to once a day if you want the fastest results.
What to look for when turning:
- Temperature: A healthy compost pile heats up as the microbes work. It should feel warm to the touch, especially in the center.
- Smell: It should smell earthy, not foul. A bad smell means it needs more air (turn it more!) or more Browns.
- Moisture: Check if it’s still moist.
Step 5: Know When It’s Ready
Finished compost is dark, crumbly, and smells earthy. It will no longer resemble the original materials. Depending on your turning frequency, the types of materials, and temperature, this can take anywhere from 4 weeks to 3 months.
Step 6: Harvest Your “Black Gold”
Once ready, empty your bin onto a tarp or into a wheelbarrow. Sift out any larger, unfinished pieces and return them to the bin for the next batch. Use your finished compost in your garden beds, as a top dressing for lawns, or mix it into potting soil for container plants.
Troubleshooting Common Composting Issues
Even with the best intentions, compost can sometimes be a bit finicky. Here are some common problems and how to fix them:
| Problem | Cause | Solution |
|---|---|---|
| Smelly Compost (Rotten Egg Smell) | Too much Green material, too wet, not enough air. | Add plenty of Brown material (shredded paper, dry leaves). Turn the bin more frequently. Ensure good drainage. |
| Compost is Not Heating Up / Decomposing Slowly | Too dry, not enough Green material, not enough air. | Add water until it’s like a wrung-out sponge. Add more Green material (kitchen scraps, grass clippings). Turn the bin to add air. |
| Attracting Pests (Flies, Rodents) | Exposed food scraps, improper materials. | Always bury kitchen scraps in the center of the pile and cover with Browns. Do not add meat, dairy, or oily foods. Ensure the lid is secure. |
| Compost is Too Wet and Soggy | Too much Green material, rain getting in, poor drainage. | Add lots of Brown material. Turn frequently. Ensure your bin has adequate drainage holes. If using a bin with a removable lid, make sure it’s sealed well but not airtight if you have drainage issues. |
| Compost is Too Dry and Dusty | Not enough moisture, too many Browns, too much airflow. | Add water, a little at a time, while turning. Add more Green material. Ensure the lid is kept securely on to retain moisture. |
Remember, composting is a natural process. Observe your compost, and it will tell you what it needs.
The Benefits of a Cheap Rotating Composter
Beyond the obvious savings, a DIY rotating composter offers some fantastic advantages:
- Significant Cost Savings: You can get a functional composter for next to nothing, especially if you use recycled materials.
- Reduced Waste: Diverts a substantial amount of organic waste from landfills, reducing methane gas production. According to the U.S. Environmental Protection Agency (EPA), food scraps and yard waste together constitute more than 30 percent of what we throw away.
- Soil Enrichment: Creates nutrient-dense compost that improves soil structure, water retention, and fertility, meaning healthier plants and vegetables.
- Environmental Impact: Reduces the need for synthetic fertilizers and pesticides, contributing to a healthier ecosystem.
- Educational Opportunity: It’s a great way to teach kids (and adults!) about natural cycles and sustainability.
Key Takeaways for Effortless Composting Success
To wrap things up, here are the most important points to remember for your budget-friendly rotating bin composting adventure:
- DIY is King: Don’t shy away from building your own tumbler. A sturdy plastic bin or barrel is all you need.
- Balance is Key: Aim for a good mix of Greens (nitrogen) and Browns (carbon) – roughly 1 part Green to 2-3 parts Brown by volume.
- Aeration & Moisture: Drill plenty of holes for air and drainage. Keep it moist like a wrung-out sponge.
- Turn It Often: Regular turning speeds up decomposition and prevents smells.
- Avoid the “Don’ts”: Keep meat, dairy, and diseased plants out.
By following these simple steps, you’re well on your way to creating fantastic compost from everyday waste, saving money, and giving your garden a serious boost. It truly is effortless success when you get the hang of it!
Conclusion: Your Garden’s New Best Friend
So there you have it! You’ve seen how simple and budget-friendly rotating bin composting can be. By repurposing everyday items and following a few basic principles of balancing your inputs, you can transform your kitchen scraps and yard waste into potent, garden-loving compost. No need for fancy gadgets or a hefty price tag. This method is all about working smarter, not harder, and getting fantastic results for your garden and your wallet.
Embrace this process, experiment a little with your Green and Brown ratios, and enjoy the satisfaction of creating your own “black gold.” Your plants will thank you, and you’ll be making a positive impact on the environment, one kitchen scrap at a time. Happy composting!
Frequently Asked Questions About Budget Rotating Bin Composting
Q1: How often do I really need to turn my DIY rotating composter?
A1: For the fastest results, turning it daily or every other day is ideal. However, if you’re busy, turning it 2-3 times a week will still yield good compost, just perhaps a bit slower. Even turning it once a week is better than not at all!
Q2: My compost bin smells. What should I do?
A2: A bad smell usually means it’s too wet or there’s too much nitrogen (Greens). Add more carbon-rich “Browns” like shredded newspaper, dry leaves, or sawdust. Make sure there are plenty of air holes and turn it frequently to aerate it. This helps the beneficial aerobic bacteria do their job.
Q3: Can I put citrus peels and onion scraps in my composter?
A3: Yes, you can! While large amounts of citrus can sometimes slow decomposition due to their acidity and essential oils, and onions are a bit slower to break down, they are generally safe in moderation. Just make sure to balance them with enough Browns and chop them up.
Q4: How do I know if my compost is “finished” and ready to use?
A4: Finished compost will be dark brown or black, crumbly, and smell pleasant and earthy, like a forest floor. You shouldn’t be able to recognize the original materials you put in. It should also be cool or slightly warm, not hot.
Q5: My bin isn’t turning easily. What’s wrong?
A5: If you built a barrel tumbler, check if the axle is centered and secure. If it’s a simple bin without an axle, it might be too heavy. Try to empty some material before turning, or ensure it’s rolling on a relatively smooth surface.
Q6: How long does it take to make compost with a rotating bin?
A6: With regular turning and a good balance of materials, you can sometimes get finished compost in as little as 4-8 weeks. However, a more typical timeframe for a less actively managed bin might be 2-4 months. Factors like outside temperature also play a role.
Q7: Can I compost coffee grounds?
A7: Absolutely! Coffee grounds are considered a “Green” material and are excellent for composting. They add nitrogen and help with the decomposition process. You can add both the grounds and the paper filters. Tea bags are also usually compostable (check if the staple is metal and remove it if so).

I am passionate about home engineering. I specialize in designing, installing, and maintaining heating, ventilation, and air conditioning systems. My goal is to help people stay comfortable in their homes all year long.