Welcome to my little corner of the internet, where we make home improvement and gardening less of a headache! I’m Troy D Harn, and I’m here to break down those DIY projects and garden tasks that might seem a bit much at first glance. Think of me as your friendly neighbor who’s already tried it, learned a few things, and is happy to share. We’ll tackle composting today, specifically a method that’s a game-changer for your garden: sheet composting.
Feeling overwhelmed by kitchen scraps and yard waste? Wish your garden soil was richer and healthier without a lot of fuss? You’re in the right spot. Sheet composting, also known as lasagna gardening, is a fantastic way to build amazing soil right where you need it. It’s like a magic trick for your garden beds that’s surprisingly simple. Ready to turn trash into garden treasure? Let’s get started!
What is Sheet Composting? Your Garden’s New Best Friend
So, what exactly is this “sheet composting” we’re talking about? Imagine building a layered cake, but for your garden. Instead of flour and sugar, we’re using organic materials—think leaves, grass clippings, and kitchen scraps. We layer these materials directly onto the ground where you want to grow your plants, and nature does the rest. It’s a no-turn method, meaning you don’t have to do any of that hard work of constantly flipping compost piles.
This method is genius for a few reasons. First, it creates incredibly fertile soil over time, right in your garden bed. Second, it suppresses weeds naturally. And third, it’s super forgiving, even if you’re new to gardening or composting. It’s one of the easiest ways to boost your garden’s health, and it’s incredibly satisfying to watch your efforts transform into nutrient-rich earth.
We’re essentially mimicking the way nature builds soil on a forest floor. Layers of organic matter fall, decompose, and create rich humus. Sheet composting just speeds up that process in a controlled way. It’s a slow, steady transformation that results in happier, healthier plants and much less work for you in the long run.
Why Choose Sheet Composting? The Big Benefits
Before we dive into the ‘how,’ let’s chat about ‘why.’ Why should you consider sheet composting for your garden? The advantages are pretty compelling, especially for us home gardeners who want great results without a ton of effort or expense.
- Builds Super Soil: This is the headline benefit. Over time, the layers break down into a dark, crumbly, nutrient-dense soil that plants absolutely love. It improves drainage, aeration, and water retention.
- Weed Suppression: By layering materials directly onto the ground (especially over weeds or grass), you smother existing weeds and prevent new ones from taking root. It’s like giving your garden a natural mulch blanket.
- No Turning Required: This is a huge win! Traditional composting often means regularly turning heavy piles. Sheet composting is a “no-turn” method, saving you significant time and physical effort.
- Reduces Waste: It’s a fantastic way to divert kitchen scraps and yard waste from landfills. You’re giving these materials a new, valuable life in your garden.
- Cost-Effective: You’re using materials you likely already have or can get for free (like leaves from your yard or coffee grounds from a local cafe). It’s a budget-friendly way to enrich your soil.
- Moisture Retention: The finished compost acts like a sponge, helping your soil hold onto precious moisture, which means less watering for you during dry spells.
- Improves Soil Structure: Over time, it breaks up heavy clay soils and adds structure to sandy soils, making it ideal for almost any garden type.
Think of it as creating a healthy ecosystem right in your garden beds. The beneficial microbes and earthworms are invited to the party, and they do the heavy lifting of decomposition for you.
Understanding the “Greens” and “Browns”
The secret to successful sheet composting, just like any composting, lies in balancing materials. We need two main types: “greens” and “browns.” This isn’t about the color of the material, but its nitrogen (greens) or carbon (browns) content. Getting this balance right is key to efficient decomposition.
“Greens” (Nitrogen-Rich Materials)
These are typically moist, nitrogen-rich materials that provide the “fuel” for decomposition. They tend to break down quickly.
- Fruit and vegetable scraps
- Coffee grounds and tea bags
- Grass clippings (in moderation, can get slimy if too much)
- Plant trimmings (non-diseased)
- Manure (from herbivores like chickens, cows, horses – avoid pet waste)
- Algae or seaweed
“Browns” (Carbon-Rich Materials)
These are typically dry, carbon-rich materials that provide bulk and structure, allowing air to circulate. They break down more slowly.
- Dry leaves
- Shredded newspaper or cardboard (avoid glossy paper)
- Straw or hay
- Wood chips or sawdust (in moderation)
- Pine needles (use sparingly as they can be acidic)
- Eggshells (though technically they add calcium, they act more like browns due to their structure)
The Ideal Ratio: While strict adherence isn’t always necessary for sheet composting, a general rule of thumb is to aim for roughly two to three parts “browns” to one part “greens” by volume. This carbon-to-nitrogen ratio (C:N) provides the best conditions for microbes to break everything down efficiently without getting smelly or waterlogged.
Don’t get too hung up on exact measurements. If it looks like you have way more brown material, add a bit more green. If it seems a bit soggy and mostly green, pile on some more brown materials. Nature is pretty good at finding a balance when given the ingredients.
Essential Tools for Sheet Composting (You Might Already Have Them!)
The beauty of sheet composting is that it requires very few specialized tools. You can often get by with things you already have around the house or garage. Minimal investment means maximum reward!
- Shovel or Garden Fork: For moving larger materials like leaves or composted soil. A spading fork is excellent for gently aerating or turning.
- Wheelbarrow or Garden Cart: Incredibly useful for transporting your “greens” and “browns” to your desired bed location. Trust me, this will save your back!
- Pruning Shears or String Trimmer (Optional): To break down larger materials like tough stems or thick cardboard into smaller, faster-decomposing pieces. Shredding leaves is also highly recommended.
- Water Source (Hose or Watering Can): You’ll need to moisten the layers as you build them.
- Cardboard or Newspaper: A layer of plain cardboard or newspaper is often used as the base layer to smother grass and weeds.
- Your Chosen Organic Materials: This is the fun part – gathering your greens and browns!
That’s pretty much it! You don’t need fancy bins or special equipment. The garden bed itself is your “bin.” Keep it simple, and you’ll be amazed at how much you can accomplish.
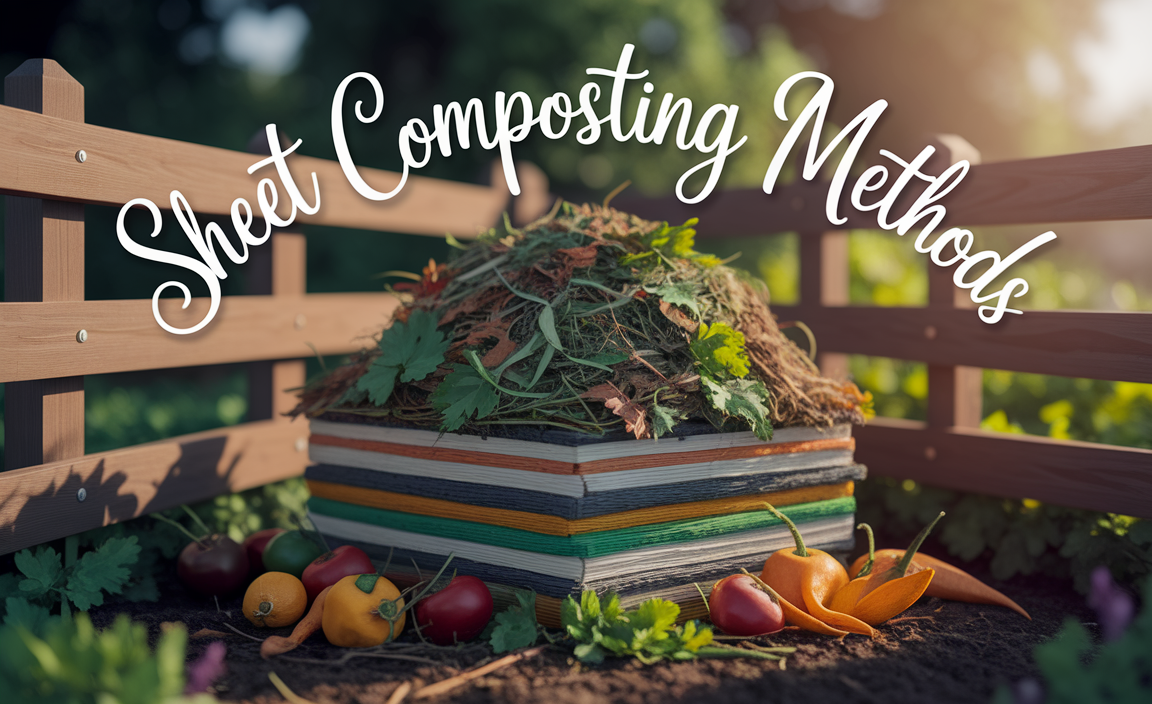
Sheet Composting Methods: Step-by-Step Guides
Now for the exciting part! Let’s get building. There are a couple of main ways to do sheet composting, depending on your needs and how quickly you want to plant. We’ll cover the most popular and effective methods.
Method 1: The Direct-to-Garden Bed (No-Dig, Over Time Method)
This is the most hands-off and arguably the easiest method. You build directly on an existing garden bed or lawn where you want to grow later. It takes longer for the materials to break down, so you’re typically building this in the fall for spring planting, or in late spring for a fall garden.
- Prepare the Site: If you’re building on a lawn or an area with weeds, start by mowing the grass or weeds very short. Then, lay down a layer of plain cardboard (remove all tape and labels) or several layers of newspaper directly on the ground. Overlap the edges well so no light gets through. This is your weed barrier. Lightly wet this layer.
- Start Layering: Begin building your lasagna layers. Alternate between “greens” and “browns.”
- First Layer: A thick layer of “greens” – grass clippings, kitchen scraps, etc. (about 4-6 inches).
- Second Layer: A thick layer of “browns” – dry leaves, shredded newspaper, straw (about 4-6 inches).
- Third Layer: Another layer of “greens.”
- Fourth Layer: Another layer of “browns.”
Continue alternating, trying to maintain that 2-3 parts brown to 1 part green ratio. Don’t worry if your layers aren’t perfectly even.
- Moisten as You Go: Each time you add a layer (or every few layers), lightly water it. The goal is for the whole pile to be as moist as a wrung-out sponge. Not dripping wet, but not dry either.
- Top It Off: Finish with a layer of “browns” like straw or shredded leaves. This helps to keep moisture in and prevents the top layer from getting too messy or attracting pests.
- Wait Patiently: This is the hardest part! Let nature do its work. Over several months, the layers will decompose. You can cover the pile with a tarp if you wish, but it’s not strictly necessary. Earthworms and microbes will be busy turning your materials into rich compost.
- Planting Time: When you’re ready to plant (typically 4-6 months later, or even up to a year for best results), you can plant directly into this new, enriched soil. The cardboard base will have decomposed, and the soil will be ready. You might notice some undigested material, which is perfectly fine.
Method 2: The “Lasagna Garden” Bed (Raised Bed Creation)
This method is similar but often involves creating a defined raised bed structure first. It’s great if you want to build a new garden bed in a specific spot and have immediate access to planting materials.
- Create Your Bed Frame (Optional): You can simply lay out the shape of your bed directly on the ground, or you can build a simple frame using wood, bricks, or stones. This helps contain the layers and gives it a more finished look.
- Lay the Foundation: Just like Method 1, start with a layer of cardboard or newspaper on the ground within your bed frame (or marked area) to smother existing grass and weeds. Wet it down.
- Build Your “Lasagna” Layers:
- Start adding your “greens” and “browns” in alternating layers. Here, you have more control over the depth and composition as you build.
- Aim for layers about 3-6 inches thick each.
- A good order might look like: Cardboard -> Compost/Manure (thin layer if you have it) -> Greens -> Browns -> Greens -> Browns…
- Add Compost Activator (Optional): If you have a bag of finished compost, a shovelful of garden soil, or a bit of aged manure, adding a thin layer between your green and brown layers can help kick-start the decomposition process.
- Moisten Thoroughly: Ensure each layer, or every few layers, is adequately moistened. The goal is consistently damp, not soggy.
- Top Layer is Key: For immediate planting, you’ll want to top your lasagna layers with about 4-6 inches of good quality topsoil or finished compost. This gives your plants something to root into right away.
- Plant & Maintain: You can plant into this top layer of soil immediately. The layers below will continue to decompose, feeding your plants from below and enriching the soil over time. The top layer of soil will settle as the lower layers break down, so you might need to add more soil in subsequent seasons.
Method 3: Sheet Composting in Containers
Think you can’t sheet compost if you don’t have a yard? Think again! You can adapt this method for large pots or containers.
- Choose a Large Container: You’ll need a container that’s at least 12-18 inches deep. A large fabric grow bag, a wooden planter box, or a repurposed sturdy bin with drainage holes works well.
- Start with a Base: Place a layer of small twigs or straw at the bottom for drainage and aeration. Then add your cardboard/newspaper weed barrier if placing on a surface with potential weeds, or just start layering if the container is elevated or on pavement.
- Layer Like a Lasagna: Add alternating layers of greens and browns. Since you have less volume, you’ll need to pack them in a bit more. Chop materials into smaller pieces for faster breakdown.
- Water Wisely: Keep the layers consistently moist. Containers can dry out faster, so check frequently.
- Top with Soil: For planting, top your lasagna layers with a good few inches of potting mix or finished compost.
- Planting: You can plant herbs, small vegetables, or flowers in your container. The composting process will happen within the pot, enriching the soil as it goes.
For a comprehensive guide on composting, the EPA (Environmental Protection Agency) offers excellent resources on the science and benefits of composting.
What NOT to Compost in Sheet Piles
While sheet composting is forgiving, there are certain items that are best avoided. These can cause odors, attract pests, or introduce diseases to your garden.
- Meat, bones, dairy products, and greasy/oily foods: These attract pests and can create foul odors as they decompose.
- Diseased plant material: If you have plants that were sick, they might harbor pathogens that can survive the decomposition process and infect your healthy plants later.
- Weeds that have gone to seed or invasive weeds: The heat generated in a sheet compost pile might not be enough to kill all weed seeds or invasive roots, and you could end up spreading them.
- Pet waste (dog and cat feces): These can contain harmful pathogens that are not reliably killed by home composting methods.
- Treated wood or coal/charcoal ash: These can contain harmful chemicals or heavy metals.
- Glossy or coated paper/cardboard: The inks and coatings may not be good for your soil.
When in doubt, it’s usually better to leave it out. Focus on simple, safe ingredients like leaves, grass, kitchen scraps, and garden waste.
Tips and Tricks for Sheet Composting Success
Ready to make your sheet composting even better? Here are some tried-and-true tips that Troy (that’s me!) has picked up along the way:
- Chop It Up: The smaller the pieces of your “greens” and “browns,” the faster they will break down. Take a few minutes to chop up tough stems, shred cardboard, or chop larger food scraps.
- Moisture is Key: I can’t stress this enough – keep it like a wrung-out sponge! Too dry, and decomposition slows to a crawl. Too wet, and it can get anaerobic (stinky) and slimy.
- Location, Location, Location: If you’re building an open pile (Method 1), choose a spot that gets some sun (to help with heat) but also potentially some shade (to retain moisture better). For planting beds, choose a spot that suits the plants you intend to grow.
- Sheet Compost in Layers, Not Piles: Remember, the “sheet” in sheet composting refers to the layers. Unlike a compost bin where you might add things to the top, sheet composting is about building a series of distinct layers.
- Be Patient: Nature takes time. Don’t get discouraged if it doesn’t break down overnight. The layers will transform into amazing soil eventually.
- Add an “Activator”: If you’re eager to speed things up, adding a bit of finished compost, worm castings, or manure between layers can introduce beneficial microbes and bacteria that get the decomposition party started faster.
- For Immediate Planting: If you want to plant soon, always top your lasagna bed with a good layer of purchased compost or good quality topsoil. The materials below will still decompose and enrich the soil from underneath.
- Cover it Up (Optional): While not essential, covering your sheet compost layers with a tarp, straw, or mulch can help maintain consistent moisture levels and temperatures, especially in very hot or dry climates.
Think of your sheet compost bed as a living, breathing entity. It needs air, moisture, and the right balance of food (greens and browns) to thrive. Your efforts will be rewarded with incredibly healthy

I am passionate about home engineering. I specialize in designing, installing, and maintaining heating, ventilation, and air conditioning systems. My goal is to help people stay comfortable in their homes all year long.