Feeling a bit stumped by sheet composting temperatures? You’re not alone! Getting the heat just right can feel tricky, but it’s actually a super important part of making amazing compost fast. Don’t worry, though! We’re going to break it all down in simple steps. I’ll show you exactly what to aim for, and why it matters, so you can turn kitchen scraps and yard waste into black gold for your garden without the guesswork. Let’s get started!
Sheet Composting Temperature: Your Guide to the “Proven Best” Heat
Hey there, fellow gardeners and DIY enthusiasts! Troy D Harn here, from TopChooser, and I’m excited to dive into a topic that’s often a bit mysterious but oh-so-crucial for successful sheet composting: temperature. If you’ve ever wondered what’s happening inside your compost pile and if it’s getting hot enough to work its magic, you’ve come to the right place. We’ll explore the ideal temperatures for sheet composting, why they matter, and how you can easily manage them to create rich, nutrient-filled compost for your plants.
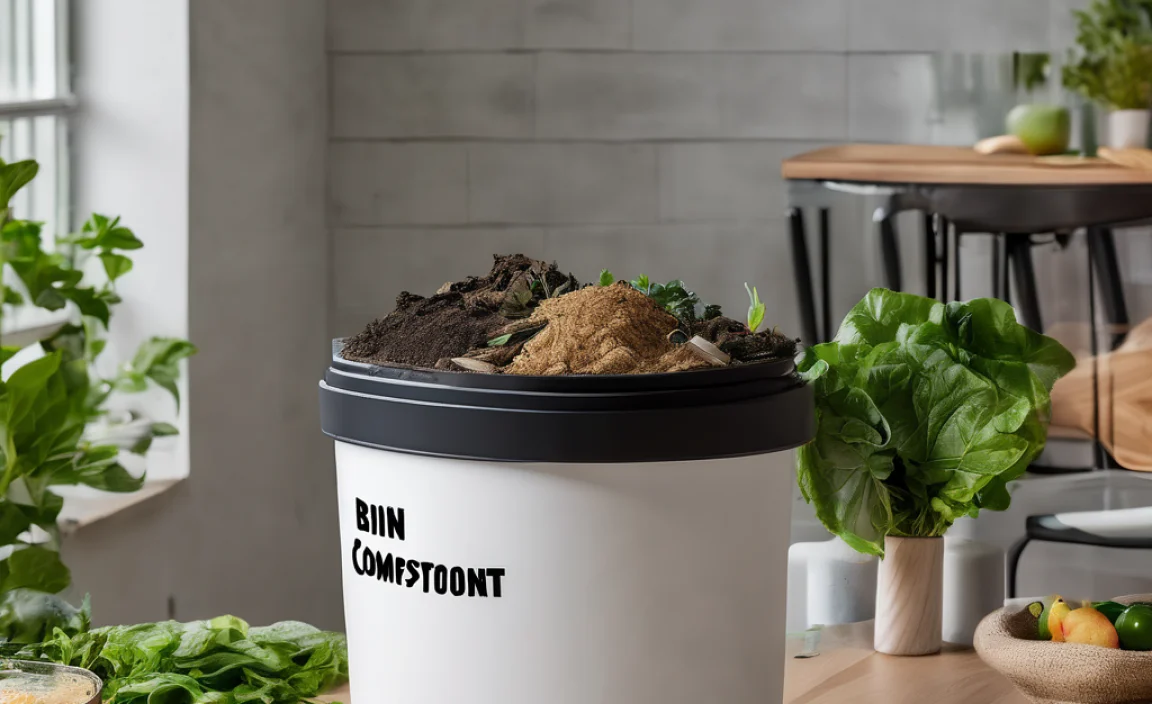
Sheet composting, also known as lasagna gardening or layer composting, is a fantastic way to build soil health right in your garden beds. It’s all about layering organic materials like a delicious lasagna, letting nature do most of the work. But just like a good lasagna needs the right oven temperature to cook perfectly, your compost pile needs the right internal temperature to break down efficiently. Let’s figure out what that “sweet spot” is!
Why Does Sheet Composting Temperature Matter So Much?
Think of your compost pile as a bustling city of microbes – bacteria, fungi, and other tiny organisms. These little workers are the real heroes of composting, breaking down all those leaves, kitchen scraps, and grass clippings into that wonderful, earthy compost we love.
Temperature plays a huge role in what kind of microbial life thrives in your pile:
- The “Hot” Zone: Mesophilic Microbes: These are the workhorses that start the decomposition process at moderate temperatures.
- The “Even Hotter” Zone: Thermophilic Microbes: When your pile heats up, these special bacteria take over. They are incredibly efficient at breaking down materials quickly and, as a bonus, can help kill off weed seeds and pathogens.
- Too Cold? If your pile stays too cool, decomposition slows way down. It might eventually compost, but it will take a lot longer, and you won’t get the same level of weed seed and pathogen destruction.
- Too Hot? (Extremely Rare in Sheet Composting): While it’s very hard to overheat a typical sheet compost pile outdoors due to its size and insulation, if it were to get excessively hot (like in an industrial composter), it could kill off beneficial microbes.
The “proven best” temperature range for rapid, effective sheet composting centers around the thermophilic stage. This is where the magic really happens, turning your waste into valuable garden soil additive at a good pace.
The “Proven Best” Temperature Range for Sheet Composting
So, what’s the magic number? For the most efficient and fastest breakdown in sheet composting, you want to aim for a temperature range that encourages those thermophilic bacteria. This is often referred to as the “hot composting” zone.
The National Gardening Association and various university extension offices often cite the following as ideal:
- Ideal Hot Composting Range: 131°F to 160°F (55°C to 71°C)
Why this range? At these temperatures:
- Rapid Decomposition: Microbes work at lightning speed.
- Pathogen Destruction: Many harmful bacteria and pathogens are killed.
- Weed Seed Sterilization: The heat can significantly reduce or eliminate the viability of weed seeds, meaning fewer weeds in your garden from your compost.
It’s important to note that achieving and consistently maintaining these high temperatures in a typical backyard sheet compost pile is more of an art than an exact science. Unlike a dedicated compost bin with active turning, sheet composting relies on passive decomposition within the soil layers.
However, the goal is to create conditions that allow for this heating to happen, even if it’s not as uniform or sustained as in a well-managed hot compost pile. The “proven best” temperature is what your pile can and should reach at its core when the carbon-to-nitrogen ratio and moisture are just right.
What About Cooler Temperatures?
Don’t despair if your sheet compost pile isn’t hitting 150°F! Sheet composting can still be incredibly effective at cooler ambient temperatures, it just takes longer.
Here’s a breakdown of different temperature zones:
| Temperature Range | Classification | Microbial Activity & Effects | Speed of Decomposition |
|---|---|---|---|
| Below 50°F (10°C) | Cold Composting | Very slow microbial activity. Primarily fungi and actinomycetes. | Very Slow (months to years) |
| 50°F – 104°F (10°C – 40°C) | Mesophilic Stage | Active mesophilic bacteria and fungi. Breaks down sugars and starches. Pile begins to heat up. | Moderate |
| 104°F – 160°F (40°C – 71°C) | Thermophilic Stage (The “Hot” Zone) | High activity of thermophilic bacteria. Breaks down fats, proteins, and complex organic matter. Kills most weed seeds and pathogens. | Fast (weeks to a few months) |
| Above 160°F (71°C) | Too Hot (Rare in Sheet Composting) | May kill beneficial thermophilic microbes. Pile can dry out. | Slows down due to lack of active microbes or drying. |
For sheet composting, which is often done directly in place, you’ll likely experience a mix of these. The initial decomposition will be mesophilic (around or above ambient temperature), and if you’ve layered correctly, you might see a temporary rise into the lower thermophilic range in the core of the pile. Even if it never gets “hot” by industrial composting standards, continuous layering and time will result in nutrient-rich soil.
Achieving the Ideal Sheet Composting Temperature: The Key Factors
So, how do we encourage that heat, or at least the best possible decomposition, in our sheet compost layers? It boils down to a few key ingredients and conditions:
1. The Carbon-to-Nitrogen (C:N) Ratio
This is the secret sauce. You need a good balance of “browns” (carbon-rich materials) and “greens” (nitrogen-rich materials). Think of it as the fuel and the spark plug for your compost pile’s engine.
- Browns (Carbon): Dried leaves, straw, shredded cardboard, newspaper, wood chips, sawdust. These provide energy for the microbes.
- Greens (Nitrogen): Grass clippings, fruit and vegetable scraps, coffee grounds, tea bags, manure (from herbivores like cows, horses, chickens). These provide the protein and building blocks for microbes.
A good starting point is a C:N ratio of around 25:1 to 30:1 by weight. In practical terms for sheet composting, this often means layering roughly 2-3 times as much “brown” material as “green” material. For example, a layer of dried leaves followed by a layer of kitchen scraps, then more leaves.
Tip: If your pile isn’t heating up, it might be too heavy on the browns (too much carbon). Add more green materials. If it’s slimy and smelly, it might be too heavy on the greens (too much nitrogen); add more browns.
2. Moisture Content
Microbes need water to live and work. Your compost pile should be as moist as a wrung-out sponge.
- Too Dry: Decomposition grinds to a halt.
- Too Wet: The pile can become waterlogged, leading to anaerobic conditions (lack of oxygen), which smells bad and slows decomposition.
How to Check: Grab a handful of compost. If a few drops of water come out when you squeeze it, it’s just right. If water streams out, it’s too wet. If it crumbles apart easily and feels dry, it’s too dry.
Adjustment Tips:
- Too Dry: Sprinkle with water. If you’re adding dry materials like straw or cardboard, moisten them as you layer them.
- Too Wet: Add more dry brown materials like shredded newspaper or leaves to absorb excess moisture. Ensure good drainage by not compacting layers too much.
3. Aeration (Oxygen)
Those beneficial microbes need to breathe! Without enough oxygen, anaerobic bacteria take over, leading to slow decomposition and unpleasant odors. Sheet composting, being in place and not typically turned, relies on the structure of the materials themselves to allow air flow.
- Layering is Key: Avoid compacting the layers too much. Loosely layering materials like straw, shredded cardboard, and larger twigs helps create air pockets.
- Avoid Overly Fine Materials: Too much finely ground material without structure can lead to compaction and restrict airflow.
- Consider “No-Dig” Gardening Principles: Sheet composting is inherently a no-dig method. While you don’t turn it, you want the layers to create a porous structure.
4. Pile Size (Less Critical for Sheet Composting in Place)
For traditional hot composting piles, a minimum size of about 3 feet x 3 feet x 3 feet (1 cubic yard or meter) is often recommended. This size helps the pile insulate itself and retain heat. In sheet composting, you’re often working with beds rather than a distinct pile. While you won’t get the same intense self-insulation, the principle of having enough material to initiate decomposition still applies.
When creating a new bed for sheet composting, aim for a depth of at least 6-12 inches of layered material. This gives enough mass for the decomposition process to begin and for some microbial activity to occur.
How to Measure Sheet Composting Temperature (and When to Worry About It)
For the dedicated compost enthusiast, a compost thermometer is a fantastic tool. These are long probes you can stick into the center of your pile. For sheet composting done directly in garden beds, measuring the core temperature can be a bit less practical as it’s spread out.
Using a Compost Thermometer:
- Insert: Carefully insert the thermometer so the probe is in the thickest or most central part of your composted material.
- Wait: Leave it for a few minutes according to the manufacturer’s instructions.
- Read: Note the temperature.
- Check Regularly: If you’re aiming for hot composting, check daily or every few days as the temperature fluctuates, especially after adding new layers or if you’re actively managing a pile.
For Sheet Composting in Beds:
Honestly, for most home gardeners using the sheet composting (lasagna gardening) method directly in their beds, actively measuring the core temperature isn’t a strict necessity. The goal is decomposition over time, and the method itself encourages a healthy breakdown.
When you might consider checking temperature (or at least observing signs):
- If you’re building a very large, deep sheet compost pile (e.g., for a new garden bed that will sit for several months before planting) and want to ensure good breakdown.
- If you’re not seeing signs of decomposition after several weeks.
Signs your compost is working (regardless of exact temperature):
- Volume Reduction: The layers will settle and shrink significantly over time.
- Earthy Smell: It should smell like pleasant, damp earth, not rotten eggs or ammonia.
- Visual Clues: Layers will start to become indistinct, and materials will break down into finer textures. You might see mushrooms or fungal hyphae, which are good signs of decomposition.
DIY Sheet Composting Temperature Monitoring (The “Feel” Method)
If you don’t have a thermometer, you can use your senses and a bit of intuition:
- Feel for Warmth: Carefully put on a glove and reach into the deepest part of your layered material. Can you feel a noticeable warmth, especially compared to the ambient air? If so, your microbes are working hard!
- Observe the Sides: If your sheet compost is in a contained area (like built-up beds), sometimes the outer edges might feel warmer to the touch if the inner core is generating heat.
While not as precise as a thermometer, feeling for warmth is a good, practical indicator that your composting process is active. If it feels cool to lukewarm, it’s likely in the mesophilic stage, which is perfectly fine for sheet composting, just slower than the thermophilic stage.
Troubleshooting Common Sheet Composting Temperature Issues
Even with the best intentions, sometimes things don’t go as planned. Here’s how to address common issues related to temperature and decomposition:
Issue: Pile Isn’t Heating Up (or Showing Signs of Activity)
Causes:
- Too Dry: Microbes are dormant.
- Too Many “Browns” (Carbon): Not enough nitrogen “fuel.”
- Not Enough Material: Pile is too small to retain any heat generated.
- Poor Aeration (Less likely to prevent heat, but can slow overall breakdown).
Solutions:
- Add Water: Sprinkle thoroughly and mix if possible.
- Add “Greens”: Layer in materials like fresh grass clippings, kitchen scraps, or coffee grounds.
- Add More Material: If you’re building a new bed, continue layering until you have a substantial amount.
- Introduce an Activator (Optional): A shovel-full of finished compost or good garden soil can introduce a fresh population of microbes. Manure from herbivores is also a great natural activator.
Issue: Pile Smells Bad (Ammonia or Rotten Eggs)
This usually indicates a problem with aeration and/or an imbalance of greens to browns.
Causes:
- Too Wet and Anaerobic: Lack of oxygen.
- Too Many “Greens” (Nitrogen): The nitrogen is breaking down without enough carbon to balance it, producing ammonia.
Solutions:
- Add “Browns”: Generously mix in shredded cardboard, dry leaves, straw, or sawdust. This absorbs excess moisture and provides carbon.
- Aerate: While you don’t turn sheet compost, ensure subsequent layers are loosely added. If it’s in a pile form, you might need to carefully loosen the outer layers or add more porous brown material to create air channels.
- Rain Cover (if excessively wet): If persistent rain is the issue, consider covering the pile temporarily with a tarp, ensuring air can still get in.
Issue: Pile is Too Hot and Dry (Very Rare in Sheet Composting)
If you are actively managing a very large, contained sheet compost pile and it feels excessively hot and crumbly dry, it might be burning too hot and inefficiently.
Causes:
- Too Much Nitrogen: Over-reacting.
- Too Dry: Moisture is critical for microbe function, even at high temps.
Solutions:
- Add Water: Gently water the pile to bring moisture levels back up.
- Add “Browns”: Add more carbon material to absorb excess heat and provide sustenance.
- Let it Rest: Sometimes, piles that get too hot just need to cool down a bit and stabilize.
Remember, for sheet composting done in place, the focus is more on creating the right layers and letting time and the environment do their work. These temperature troubleshooting tips are more for actively managed compost piles, but understanding them helps you recognize what’s happening (or not happening) in your compost layers.
Sheet Composting vs. Hot Composting: Temperature Considerations
It’s helpful to distinguish between what we typically think of as “hot composting” and the process happening in sheet composting beds.
Hot Composting:
- Goal: Rapid decomposition, pathogen/weed seed kill, often within weeks to a few months.
- Method: Requires careful management of C:N ratio, moisture, and frequent turning (aeration) to maintain temperatures in the 131°F-160°F range consistently.
- Structure: Often done in dedicated bins, tumblers, or large static piles designed to retain heat.
- Temperature Focus: High, sustained thermophilic temperatures are the primary driver of speed.
Sheet Composting (Lasagna Gardening):
- Goal: Build soil fertility over time, creating a rich layer that breaks down to nourish plants.
- Method: Layering organic materials directly onto the garden bed, allowing slow decomposition in place. Less active management and turning.
- Structure: Integrated into the garden bed itself; no separate pile to manage.
- Temperature Focus: While the materials will undergo decomposition, achieving and sustaining high thermophilic temperatures is not the main objective and may not occur consistently or for extended periods. The process relies more on the slow, steady work of a broader range of microbes over months rather than a rapid, hot phase. A study by Dr. Elaine Ingham’s Soil Foodweb emphasizes the importance of the whole microbial community, not just thermophilic bacteria, for healthy soil ecosystems.
The “proven best” temperature for rapid decomposition is the thermophilic range. However, for the practical gardener using sheet composting, the “proven best” approach is to focus on layering correctly with the right mix of greens and browns, adequate moisture, and allowing ample time. The resulting decomposition will create a fertile layer, even if it doesn’t achieve peak hot composting temperatures.
Conclusion: Embracing the Process for Garden Gold
So, there you have it! While the idea of a “proven best” sheet composting temperature might sound intimidating, it’s really about understanding how your compost pile works. The ideal thermophilic range (131°F to 160°F) is what drives rapid breakdown, but for sheet composting, the magic also happens through slower, consistent decomposition.
Your focus should be on creating those balanced layers of greens and browns, maintaining just the right moisture, and allowing air to move through. Even if your compost pile doesn’t reach scorching temperatures, it’s still working diligently to transform waste into the rich, life-giving soil your garden craves. By paying attention to these key factors and observing the signs your compost gives you—like shrinking volume and an earthy aroma—you’re well on your way to creating fantastic garden compost, one layer at a time. Happy composting!
Frequently Asked Questions About Sheet Composting Temperature
What is the fastest way to sheet compost?
The fastest way to sheet compost involves creating ideal conditions for decomposition: a good balance of carbon (“browns”) and nitrogen (“greens”), adequate moisture (like a wrung-out sponge), and good aeration (loose layers). While not strictly necessary for sheet composting in place, if you can get your layers to heat into the thermophilic range (131-160°F or 55-71°C), decomposition will speed up significantly. For truly rapid results, consider a well-managed hot composting pile and then using the finished compost in your beds, rather than sheet composting directly.
Do I need a thermometer for sheet composting?
No, a thermometer is not essential for successful sheet composting. While it helps monitor active hot composting, sheet composting is more about building soil layers over time. You can gauge its progress by observing volume reduction, texture breakdown, and an earthy smell. Feeling for warmth in dense layers is also a good indicator of microbial activity.
What if my sheet compost pile doesn’t get hot at all?
This is very common for sheet composting done in place! It simply means the conditions are favoring mesophilic (cooler temperature) decomposition, which is slower but still effective. Ensure you have a good mix of materials, proper moisture, and don’t compact the layers too much. The materials will continue to break down over time. If you notice no decomposition after many weeks, check your moisture and C:N balance – it might be too dry or too carbon-heavy.
Can I plant directly into a sheet composted bed immediately?
It’s generally best to wait. While sheet composting builds fertility, planting directly into fresh layers might stress young plants. The decomposition process can temporarily tie up nitrogen, and the environment is still very active. Waiting a few weeks to a few months allows the materials to break down and stabilize, creating a more hospitable environment for plant roots. The longer you wait, the more the lower layers will resemble finished compost.
How deep should my sheet compost layers be?
Aim for a total depth of at least 6 to 12 inches of raw organic materials. This provides enough mass to begin the decomposition process and build significant fertility. The layers will settle considerably as they break down, so starting with this depth ensures you’ll have a good layer of amended soil by planting time.
What are the “red flags” for sheet composting temperature issues?
The main “red flags” related to decomposition (which temperature influences) are a very slow or non-existent breakdown, a persistent foul odor (like rotten eggs or ammonia), or the materials remaining completely recognizable after many months. These usually point to issues with moisture, air, or the carbon-to-nitrogen balance, rather than just a lack of high heat.
Is it safe to compost with manure in sheet composting?
Yes, composted manure is excellent for sheet composting. Manure from herbivores (cows, horses, sheep, rabbits) is rich in nitrogen and acts as a great activator. Ensure it’s well-composted or layered appropriately with carbon materials. Manure from carnivores or omnivores (dogs, cats) is generally not recommended for composting due to potential pathogen risks and its composition.

I am passionate about home engineering. I specialize in designing, installing, and maintaining heating, ventilation, and air conditioning systems. My goal is to help people stay comfortable in their homes all year long.