Ever look at your kitchen scraps and think, “There’s got to be a better way than just tossing this?” You’re not alone! Many of us want to reduce waste and maybe even grow some awesome plants, but a big yard or spacious garden just isn’t in the cards. That’s where the idea of balcony composting, specifically static pile composting, comes in. It sounds a bit technical, but I promise, it’s totally doable for anyone. Let’s break down how you can turn that food waste into garden gold right on your balcony, no matter how small your space is. We’ll cover everything you need to get started and keep it going smoothly.
What is Static Pile Composting for Balconies?
So, what’s the deal with “static pile composting” on a balcony? Don’t let the name scare you! It basically means building a compost pile and letting it do its thing without you needing to turn it constantly. Think of it as a chill, hands-off approach to composting. For balcony dwellers, this is a game-changer. Traditional composting often requires a good amount of space and regular “turning” to aerate the pile. Static pile composting on a balcony adapts this idea to smaller, more contained setups. It’s all about setting up the right environment in a bin so nature can break down your organic materials efficiently, even in a limited area.
The “static” part means the materials stay put. We’re not planning on doing the aerobic dance with a pitchfork here. Instead, we focus on getting the recipe for decomposition just right from the start. This is crucial for balcony composting because space is limited, and you want a system that’s manageable and doesn’t take up all your valuable outdoor real estate. It’s about creating a mini ecosystem that works for you, not the other way around.
Why Static Pile Composting is Perfect for Balconies
Why choose static pile composting for your balcony when there are other methods out there? It boils down to a few key advantages that really shine in urban or compact living situations:
- Space Efficiency: This method is designed to work well within a confined space. You can use specialized bins or containers that fit neatly on your balcony.
- Less Physical Effort: If the thought of turning a compost pile sounds like too much work, you’re in luck. Static pile requires minimal to no turning, saving you time and energy.
- Odor Control: When done correctly, a static pile is surprisingly odorless. The key is balancing the “greens” and “browns” and keeping the moisture just right, which this method excels at.
- Continuous Process: While some static piles are “batch” composted (fill it up, let it decompose, then empty), many balcony systems allow for continuous addition of new materials.
- Producing Rich Soil: The end goal is always nutrient-rich compost that’s fantastic for potted plants, container gardens, or even donating to local community gardens.
Think of it as a set-it-and-forget-it (mostly!) system that delivers big results without demanding a huge commitment or a sprawling backyard. It’s a practical way to embrace sustainability right where you live.
Getting Started: What You’ll Need
Before we start piling up those coffee grounds, let’s make sure you have the right gear. For static pile composting on a balcony, simplicity and functionality are key. You want tools and materials that are easy to handle, store, and manage in a smaller space.
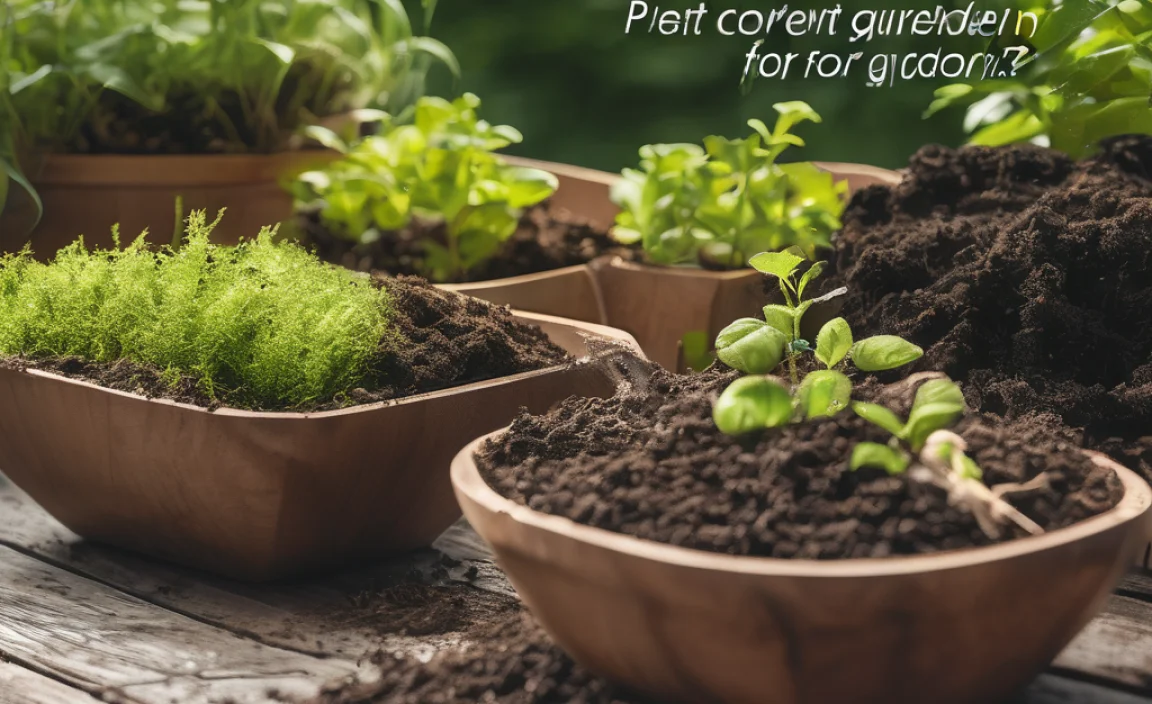
The Essential Composting Bin
This is probably the most important piece of equipment. For static pile composting on a balcony, you’ll want a bin that’s:
- Enclosed: This helps contain any potential odors, keeps pests out, and maintains the right internal conditions.
- Well-ventilated: Even though it’s static, the microbes need air. Look for bins with air holes or slots.
- Durable: It needs to withstand outdoor conditions. Plastic bins are common and work well.
- Appropriate Size: You don’t need a huge bin. A 20-30 gallon capacity is often a good starting point for balcony composting.
Some popular options include:
- Tumbler Composter: While tumblers are often for active composting, smaller, stationary ones can work for a static approach if you don’t turn them. They are usually enclosed and have good ventilation.
- Stationary Compost Bin: These are often plastic bins with lids and built-in aeration. They are typically more affordable and easier to manage than tumblers.
- DIY Bin: You could fashion a bin from a large plastic tote with holes drilled for ventilation, or even use stacked plastic crates. Ensure it’s sturdy enough to hold weight and has adequate airflow.
When choosing, consider how much kitchen waste you typically generate. A good rule of thumb is to aim for a bin that’s at least 3 feet cubed if you were doing traditional composting, but for a static balcony bin, smaller is often better managed. You’re aiming for a contained ecosystem.
Your “Greens” and “Browns” Toolkit
Composting is all about balancing two main types of materials: “greens” and “browns.”
- Greens (Nitrogen-rich): These provide nitrogen and moisture. Think:
- Fruit and vegetable scraps
- Coffee grounds and tea bags
- Grass clippings (in moderation)
- Plant trimmings
- Browns (Carbon-rich): These provide carbon and structure, allowing air to flow. Think:
- Shredded newspaper or cardboard (avoid glossy paper)
- Dry leaves
- Wood chips or sawdust (use sparingly)
- Straw or hay
Having a good stash of “browns” is essential for managing moisture and preventing the pile from becoming a stinky, slimy mess. Many city dwellers collect these by saving junk mail (non-glossy, shredded), toilet paper rolls, and keeping a small container of dry leaves or shredded cardboard handy.
Essential Tools
You don’t need much! The goal is simplicity:
- Kitchen Caddy: A small, lidded container to collect food scraps in your kitchen before taking them out to the bin.
- Gloves: For handling waste and compost.
- Small Trowel or Hand Fork: Useful for mixing in new materials or checking moisture.
- Watering Can: To add moisture if the pile gets too dry.
- Shredder (Optional but highly recommended): For breaking down cardboard and paper, which speeds up decomposition.
For a static pile, the key is to have enough materials to get the balance right from the start, or to add them in layers. This minimizes the need for constant intervention.
The Static Pile Composting Process: Step-by-Step
Now, let’s get down to building your compost pile. The static pile method on a balcony is about creating the ideal environment in your chosen bin so that the microorganisms do the hard work for you. We want to facilitate decomposition without constant stirring.
Step 1: Choose Your Location Wisely
Your balcony is your composting space! Pick a spot that gets:
- Partial Shade: Full sun can dry out your compost too quickly, while constant deep shade might keep it too wet.
- Protection from Extreme Weather: If possible, place it where it won’t be constantly battered by wind or rain.
- Easy Access: You’ll be adding kitchen scraps and potentially checking on it, so make sure it’s convenient to get to from your kitchen.
Consider the weight of the bin when filled. Ensure your balcony can safely support its load. If you’re unsure, place it on a sturdy, reinforced section if possible, or consider a lighter-weight bin.
Step 2: Prepare Your Bin
If you’re using a new plastic bin, give it a quick rinse. If you’re DIYing, make sure you’ve drilled plenty of holes for ventilation. For stationary bins or tumblers, ensure the lid fits snugly to keep pests out and moisture in. Placing a layer of coarse material like small twigs or wood chips at the bottom can help with drainage and aeration.
Step 3: Layer Your Materials (The Recipe for Success)
This is the core of static pile composting. You need a good mix of greens and browns. A common starting point is about a 2:1 or 3:1 ratio of browns to greens by volume. This ensures good airflow and helps prevent odors.
The Basic Layering Technique:
- Start with a base layer of browns: About 4-6 inches of shredded cardboard, dry leaves, or straw. This promotes drainage and airflow from the bottom.
- Add a layer of greens: About 2-3 inches of your kitchen scraps (chopped up if large).
- Cover the greens with browns: Add another layer of browns, making sure there are no kitchen scraps exposed. This is key for odor control and pest prevention.
- Moisten lightly: If your greens are very dry (like just coffee grounds), you might need to lightly mist them with water. The overall goal is for the pile to be as damp as a wrung-out sponge.
Continue adding layers as you accumulate materials. Always try to end with a layer of browns on top.
Step 4: Monitor Moisture Levels
This is where you interact with your compost. After adding materials, check the moisture. Squeeze a handful. If it’s dry and crumbles, add a little water. If water runs out freely when you squeeze, it’s too wet – add more browns and mix them in as best you can. A consistent moisture level, like a wrung-out sponge, is ideal for the decomposing microbes to thrive.
For a static pile, you’re not turning it, but you are ensuring the conditions are right. If your balcony is very humid, you might need more browns. If it’s very dry and hot, you’ll need to add water more frequently.
Step 5: “Bury” New Scraps
When you add fresh kitchen scraps, always bury them under a top layer of browns. This is a crucial step in preventing odors and deterring flies or other unwelcome visitors. You can use your trowel to push the materials to the side and then cover them.
A compact static pile on a balcony is all about containment and controlled decomposition. By burying your greens, you create an environment where aerobic bacteria (the good guys that don’t smell) can work efficiently.
Step 6: Patience and Observation
The “static” part means you don’t turn it. Decomposition will happen thanks to the microbes. Depending on the temperature, the size of your bin, and the materials you put in, it can take anywhere from a few months to a year for the compost to fully mature.
You’ll notice the materials at the bottom start to break down first. The pile will shrink in volume. You can tell it’s getting close to being ready when it has a dark, crumbly texture and smells earthy, like forest soil.
Troubleshooting Common Issues:
- Bad Odors (Ammonia/Rotten Eggs): Usually means too many greens or too much moisture, leading to anaerobic conditions. Add more browns and try to gently mix them in. Ensure good aeration through the bin’s holes.
- No Decomposition: Pile might be too dry, lack nitrogen (greens), or be too cold. Add some greens and moisture.
- Pests (Flies): Make sure you are always covering your greens with a layer of browns. Ensure your bin lid is secure.
By following these steps, you’re creating a mini composting powerhouse right on your balcony!
What to Compost and What to Avoid
Knowing what goes into your compost bin is just as important as the method itself. Getting this right is key to preventing odors and ensuring you create nutrient-rich compost, not a smelly mess.
Good to Compost (“Greens” & “Browns”)
These are your go-to materials for a balanced compost pile. Remember the goal: a good mix of nitrogen (greens) and carbon (browns).
“Greens” (Nitrogen-Rich):
- Fruit scraps (apple cores, banana peels, citrus rinds)
- Vegetable scraps (broccoli stalks, carrot peels, lettuce leaves)
- Coffee grounds and paper filters
- Tea bags (remove staples and synthetic strings)
- Fresh grass clippings (use in thin layers to avoid matting)
- Plant trimmings (non-diseased)
- Eggshells (crushed for faster breakdown)
“Browns” (Carbon-Rich):
- Shredded newspaper (black and white ink only)
- Shredded cardboard (non-glossy, remove tape)
- Dry leaves
- Straw or hay
- Sawdust or wood shavings (from untreated wood, use sparingly)
- Paper towels and napkins (if not greasy)
- Toilet paper and paper towel rolls
What to Avoid (The “No-Gos”)
These items can cause problems like odors, attract pests, or contain harmful pathogens. For balcony composting, especially static piles where you might be closer to living spaces, it’s best to steer clear.
- Meat, fish, and bones: Attract pests and cause strong odors.
- Dairy products: Attract pests and can go rancid, causing odors.
- Oily or greasy foods: Slow down decomposition and can cause odors.
- Diseased plants: Can spread diseases back into your garden or surrounding plants.
- Weeds that have gone to seed: You might end up spreading weeds.
- Pet waste (dog, cat): Can contain harmful pathogens. (Manure from herbivores like rabbits or chickens is generally okay, but less common for balcony composters.)
- Treated wood: Chemicals can leach into your compost.
- Glossy or colored paper/cardboard: Inks and coatings don’t break down well and can be toxic.
- Synthetic materials: Plastics, metals, glass – they don’t compost.
When in doubt, it’s usually safer to toss it in the trash or look for specific industrial composting programs if available in your area. Your goal is “black gold,” not a biohazard!
The Benefits of Balcony Composting
You’re putting in the effort, so let’s talk about the awesome rewards you’ll reap! Balcony composting, especially using the static pile method, offers a surprising number of advantages that go beyond just reducing your trash.
Environmental Impact
This is a big one. By composting, you’re:
- Diverting Waste from Landfills: Food scraps and yard waste make up a significant portion of household trash. Composting keeps this organic material out of landfills, where it decomposes anaerobically (without oxygen) and produces methane, a potent greenhouse gas.
- Reducing Your Carbon Footprint: Less waste going to landfills means fewer trucks hauling it, and less methane produced. It’s a small action with a global impact.
- Creating Nutrient-Rich Soil: This finished compost is a fantastic natural fertilizer, reducing the need for synthetic chemical fertilizers, which can harm ecosystems and pollute waterways.
It’s a beautiful cycle of turning what would be waste into something valuable and earth-friendly. You’re actively participating in a sustainable solution.
Gardening and Plant Health
If you have any love for plants – whether a few pots of herbs or a small balcony garden – your compost will be a treasure.
- Supercharges Your Soil: Compost improves soil structure, drainage, and aeration. It also introduces beneficial microbes and nutrients that plants need to thrive.
- Healthier Plants: Plants grown with compost are often stronger, more disease-resistant, and produce better blooms or yields.
- Saves Money: High-quality potting mix and fertilizers can be expensive. Homemade compost is free and often superior!
Imagine your basil thriving, your tomatoes producing more, or your flowers blooming brighter – all thanks to the compost you made from your kitchen scraps. It’s a deeply satisfying connection to your food and your plants.
Personal Satisfaction and Education
There’s immense satisfaction in:
- Reducing Waste: Seeing how much less trash you produce is a real motivator.
- Creating Something Useful: Transforming scraps into “black gold” is incredibly rewarding.
- Connecting with Nature: Even in a small urban space, you’re engaging with natural processes.
- Teaching Opportunity: If you have children or younger family members, it’s a fantastic way to teach them about sustainability and where food comes from.
It’s an empowering process that makes you feel more connected to your environment and your own ability to make a positive difference. Plus, it’s a great conversation starter!
Table: Comparing Balcony Composting Bins
Choosing the right bin can make all the difference for your balcony composting journey. Here’s a quick comparison of common types you might consider for a static pile approach:
| Bin Type | Best For | Pros | Cons | Balcony Suitability |
|---|---|---|---|---|
| Stationary Plastic Bin | Beginners, steady output | Affordable, easy to use, enclosed for odor/pest control, durable. | Can be heavy when full, requires careful moisture management. | Excellent. Many designs fit well on balconies. |
| DIY Tote/Container | Budget-conscious, customizable | Very affordable, easily customizable size/ventilation. | Requires holes to be drilled, aesthetic might not be for everyone, durability varies. | Good, provided it’s sturdy and well-ventilated. |
| Small Tumbler (used statically) | Those wanting a contained, elevated system | Can look tidy, elevated off the ground (good for balconies), enclosed. | Can be more expensive, static use means less aeration if not designed for it. | Good, if it’s a smaller, manageable size and you don’t intend to turn it frequently. |
For a static pile, all these bins can work, but the stationary plastic bin or a well-designed DIY version often offers the best balance of functionality, cost, and ease of management for a balcony homeowner.
Bringing it all Together: Your Balcony Compost Success
You’ve got the know-how! Static pile composting on your balcony is a truly achievable way to make a positive impact on your environment and your plants. By understanding the balance of greens and browns, managing moisture, and choosing the right bin, you’re well on your way to producing that coveted “black gold.”
Remember, it’s a journey. Don’t be discouraged if you hit a minor hiccup. The beauty of this method is its simplicity and low maintenance. You’re not wrestling with a giant pile; you’re nurturing a small, efficient ecosystem right outside your door. So, gather your scraps, your shredded cardboard, and that trusty bin. Start layering, keep it damp, and watch the magic happen. Soon enough, you’ll be enjoying the benefits of reduced waste and healthier, happier plants, all thanks to your very own balcony compost!
Frequently Asked Questions (FAQs)
Here are some common questions beginners have about static pile composting on their balconies.
Q1: How do I prevent my balcony compost from smelling bad?
The key to preventing odor is to maintain a balance of “greens” (nitrogen-rich) and “browns” (carbon-rich) materials, aiming for a ratio of roughly 1 part greens to 2-3 parts browns. Always cover fresh kitchen scraps (greens) with a layer of browns. Ensure your bin has adequate ventilation and that the moisture level is like a wrung-out sponge—not too wet and not too dry. If it smells, it usually means it’s too wet or has too many greens; add more browns.
Q2: Will composting attract pests like rats or flies to my balcony?
Properly managed composting significantly reduces the risk of pests. Always use an enclosed bin with a secure lid. Crucially, always bury your kitchen scraps (greens) completely under a layer of brown materials. This hides the food source and prevents flies from laying eggs. Avoid composting meat, dairy, and oily foods, as these are particularly attractive to pests.
Q3: How much space do I actually need for a balcony compost bin?
You don’t need much! A small 20-30 gallon enclosed compost bin is usually sufficient for most apartment dwellers’ needs. It can fit comfortably on a small to medium-sized balcony. Measure your available space, and look for bins that fit your dimensions and aesthetic preferences. The actual footprint is quite small compared to traditional composting.
Q4: How long does static pile composting take to produce finished compost?
Patience is a virtue with static pile composting! It typically takes anywhere from 4 months to over a year for the compost to fully break down and mature. This depends on factors like the temperature, the materials used, moisture levels, and bin aeration. You’ll know it’s ready when it looks dark and crumbly and smells earthy, like the forest floor.
Q5: Can I compost all my kitchen scraps? What if I have a lot of citrus peels or coffee grounds?
You can compost most fruit and vegetable scraps. Citrus peels are greens and can be composted, but in large quantities, they can make the pile slightly acidic, so balance them with plenty of alkaline browns like shredded cardboard or dry leaves. Coffee grounds are an excellent “green” material; they are rich in nitrogen and are generally beneficial for compost. Just remember to balance them with browns and bury them.
Q6: How do I know when my compost is ready to use?
Finished compost will have a dark brown, uniform, crumbly texture. It should smell earthy and pleasant, like rich soil after rain. You shouldn’t be able to identify the original food scraps that went into it. If it still smells sour, yeasty, or like rotten food, it’s not ready yet and may need more time or a slight adjustment in moisture or green/brown balance.

I am passionate about home engineering. I specialize in designing, installing, and maintaining heating, ventilation, and air conditioning systems. My goal is to help people stay comfortable in their homes all year long.