Got kitchen scraps and yard waste piling up? Wish you could turn those discards into garden gold without a fussy bin? You’re in the right spot! Trench composting, also known as “poor man’s composting” or “in-ground composting,” is a super simple method. It’s perfect for beginners or anyone who wants compost with minimal effort. We’ll walk you through every step, so stick around!
Trench Composting DIY: Your Easy, Essential Guide
Hey there, I’m Troy D Harn from TopChooser! Think of me as your friendly neighbor who enjoys tackling DIY projects and making things work. Today, we’re digging into a composting method that’s so straightforward, you’ll wonder why you didn’t start sooner. Trench composting is your secret weapon for enriching your garden soil naturally and easily. No fancy equipment, no turning piles, just simple digging and burying. It’s a fantastic way to feed your soil, boost plant growth, and reduce waste, all with a little bit of digging.
What Exactly Is Trench Composting?
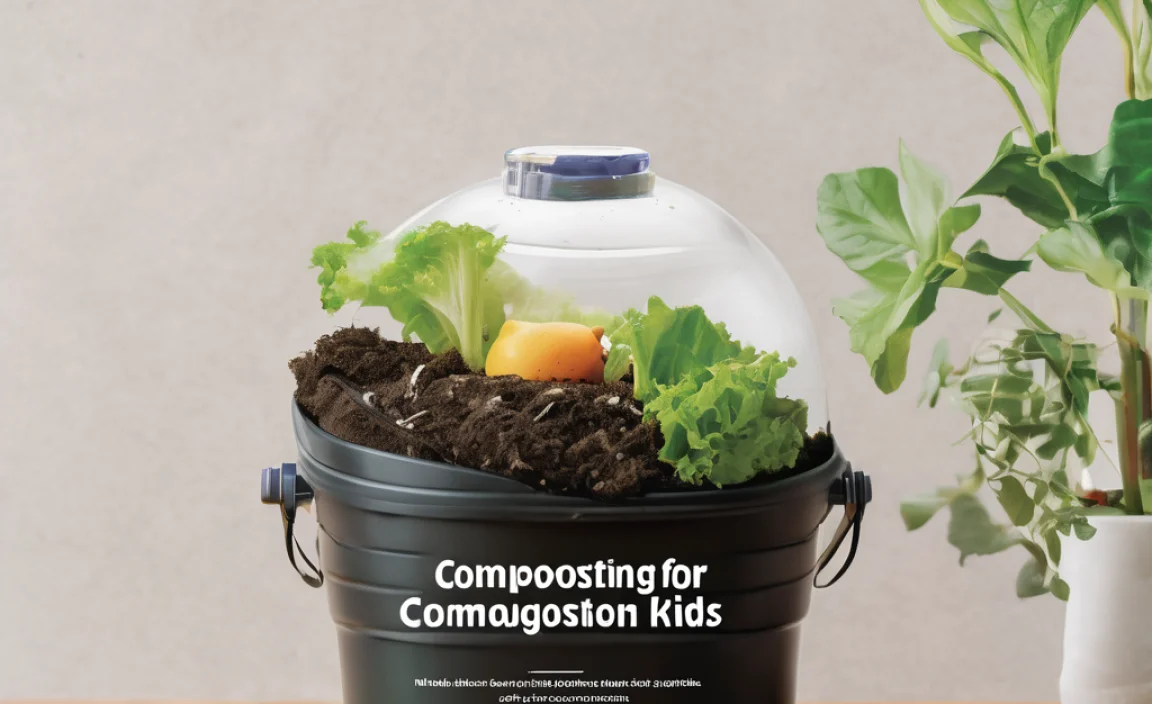
Trench composting is essentially burying your organic waste directly into the ground. Instead of collecting scraps in a bin to break down separately, you dig a trench, fill it with compostable materials, and then cover it back up with soil. Over time, the materials decompose right in the soil where your plants can benefit from the nutrients. It’s like giving your garden a direct feeding! This method is incredibly forgiving and works with what you have. It can be done in your garden beds, in a less-used area of your yard, or even in large containers if you’re an apartment dweller with a balcony.
Why Trench Composting is a Gardener’s Best Friend
There are so many reasons why trench composting is a winner, especially if you’re new to composting or live a busy life. Let’s break down the goodness:
Benefits of Trench Composting
- Super Simple: Seriously, the hardest part is digging. No special knowledge or techniques needed.
- Low Effort, High Reward: Requires no turning or monitoring like traditional composting. Just bury and forget!
- Cost-Effective: Uses materials you already have – kitchen scraps, yard waste, and your own soil. Plus, no need to buy a compost bin.
- Feeds Soil Directly: Nutrients are released right where plant roots can access them, promoting healthier, stronger plants.
- Reduces Waste: Diverts a significant amount of organic material from landfills.
- Improves Soil Structure: As materials break down, they add organic matter, improving soil’s ability to hold water and air.
- Pest-Resistant: When done correctly, burying waste helps deter pests that might be attracted to open compost piles.
- Can Be Done Anywhere: Works in garden beds, along fences, or even in large pots.
What Can You Compost in a Trench? (The Good Stuff!)
The beauty of trench composting is its versatility. Most common kitchen and yard waste can be buried. Think of it as feeding your garden a balanced meal! Here’s a quick rundown of what goes in, and what to keep out:
Approved Trench Compostables (The “Greens” and “Browns”)
Composting works best when you balance “green” materials (nitrogen-rich) and “brown” materials (carbon-rich). This helps everything break down efficiently.
Green Materials (Nitrogen-Rich):
- Fruit and vegetable scraps (peels, cores, rinds)
- Coffee grounds and tea bags (remove staples if any)
- Grass clippings (in thin layers to avoid matting)
- Plant trimmings (non-diseased)
- Eggshells (crushed)
Brown Materials (Carbon-Rich):
- Dry leaves
- Shredded newspaper and cardboard (avoid glossy or colored ink)
- Straw and hay
- Wood chips and sawdust (aged, in moderation)
- Small twigs and pruned branches (chopped up)
What NOT to Put in Your Trench Compost
Some things can cause problems, attract pests, or simply won’t break down well. It’s best to avoid these:
- Meat, bones, and dairy products (attract pests, can smell)
- Oily or greasy foods (slow decomposition, attract pests)
- Diseased plant material (can spread disease in your garden)
- Weeds that have gone to seed (you’ll just be planting them later)
- Pet waste (dog, cat feces can contain pathogens)
- Treated wood or sawdust
- Non-biodegradable materials (plastic, metal, glass)
- Large branches that will take too long to break down
Tools You’ll Need for Trench Composting
This is where the “easy” part really shines. You probably have most of these already:
- Shovel or Spade: For digging the trench. A good, sturdy shovel is key.
- Garden Fork (Optional): Useful for loosening soil or turning very large clumps.
- Gloves: To keep your hands clean and protected.
- Bucket or Container: To collect kitchen scraps and transport them to your trench.
- Watering Can or Hose: To dampen the trench fill if it’s very dry.
That’s it! No need for fancy tools or expensive bins. You’re simply utilizing what you have to create a fantastic soil amendment.
Step-by-Step: How to Trench Compost Like a Pro
Ready to get started? It’s as easy as 1, 2, 3… well, a few more steps, but still super simple! We’ll cover both the continuous method and the spot method.
Option 1: The Continuous Trench Method
This is great if you have a garden bed or a long, clear stretch of ground you want to improve over time. You’ll be digging, filling, and burying in stages.
- Choose Your Trench Location: Select an area in your garden or yard. This could be along the edge of a bed, between rows of plants, or in a dedicated composting zone. Aim for a spot that doesn’t get waterlogged. A trench that’s about 12-18 inches deep, 8-12 inches wide, and as long as you like works well.
- Dig the First Trench: Use your shovel to dig a trench of the desired dimensions. Pile the removed soil neatly to one side; you’ll need it for covering.
- Layer Your Materials: Start filling the trench with your compostable materials. Mix your “greens” and “browns.” Chop larger items into smaller pieces to speed up decomposition. Don’t overfill; leave some space for the soil cover. A good rule of thumb is to fill the trench about two-thirds to three-quarters full.
- Add Activator (Optional): If you’re worried about slow decomposition or odors, you can sprinkle a little finished compost, finished worm castings, or a balanced organic fertilizer over the layers. This introduces beneficial microbes.
- Water Lightly: If your materials are very dry, give them a light watering. The goal is damp, not soggy.
- Cover It Up: Take the soil you dug out in Step 2 and use it to completely cover the filled trench. Make sure there are no organic materials exposed. Bury it at least 6 inches deep. This is crucial for deterring pests and preventing odors.
- Wait and Let Nature Work: The magic happens underground! The organic matter will slowly break down, enriching the soil. You can plant directly over the trench after it’s covered, though it’s best to wait a few months for significant decomposition if planting close by, or choose plants with shallower roots initially.
- Dig Your Next Trench: Once you’ve filled and buried your first trench, you can start digging your next one a little further down the line. As one trench decomposes, you’ll be filling another. This creates a continuous cycle of soil enrichment in your garden.
Option 2: The Spot Composting Method (Like “Compost Pits”)
This is ideal for smaller spaces, or if you have specific areas you want to boost, like around fruit trees or in a vegetable patch.
- Choose a Spot: Find a location in your garden. You could dig a hole or a short trench, about 1-2 feet deep and 1-2 feet wide.
- Dig the Pit/Trench: Dig your hole or trench, keeping the soil nearby for refilling.
- Fill with Organics: Add your kitchen scraps and yard waste. Again, try to mix greens and browns. Smaller pieces break down faster.
- Cover Thoroughly: Use the soil you removed to completely cover the buried materials. Ensure a substantial layer of soil (at least 6 inches) separates the compostables from the surface.
- Plant Above: You can plant small plants or seeds directly above the spot once it’s covered. For larger plants or if you want to harvest the nutrients sooner, give it 3-6 months to break down more.
- Repeat as Needed: Dig another spot when you have more organic material to bury.
Important Considerations for Successful Trench Composting
While trench composting is forgiving, a few tips can make it even better:
Depth and Placement
Digging deep enough (at least 12 inches) is key to keeping critters away and ensuring the compost doesn’t interfere with surface gardening. Placing trenches a few feet away from plant roots initially is a good idea, especially for new transplants. As the compost breaks down, it will benefit nearby plants. Avoid areas that naturally collect standing water, as this can lead to anaerobic decomposition, which can smell bad and be less effective. For more on soil health, check out resources from the USDA Natural Resources Conservation Service’s Soil Health division.
Layering and Balancing
Just like with traditional composting, a good mix of “greens” (nitrogen-rich like food scraps and grass clippings) and “browns” (carbon-rich like leaves and shredded paper) helps the microorganisms do their job efficiently. If you add too much of one type, decomposition can slow down or become smelly. A general guideline is to aim for roughly equal volumes of each, or a slight bias towards browns.
Chop ‘Em Up!
Smaller pieces mean more surface area for microbes to work on, leading to faster decomposition. Take a minute to chop up those large scraps or shred that cardboard. It makes a big difference!
Cover is Key
Never leave compostable materials exposed on the surface. This is the biggest reason why people shy away from in-ground composting – fear of attracting pests. A good 6-inch layer of soil seals everything in, keeps odors down, and deters unwanted visitors. If you notice a smell, it’s usually a sign that the trench is too shallow or not properly covered.
Patience is a Virtue
Trench composting is a slow and steady process. You won’t have finished compost in weeks. It can take anywhere from a few months to a year for the materials to fully break down, depending on the materials used, the soil temperature, and moisture levels. This is perfectly fine, as the goal is to improve the soil structure and fertility over time.
Trench Composting vs. Other Composting Methods
It’s helpful to see how trench composting stacks up against popular alternatives. Each has its place, but trench composting often wins for sheer simplicity.
| Method | Pros | Cons | Best For |
|---|---|---|---|
| Trench Composting | Easiest, no special bins, minimal effort, feeds soil directly, good for small spaces to large gardens. | Slow decomposition, requires digging, not for quick compost batches, can be less controlled. | Beginners, busy gardeners, improving garden beds over time, those who want minimal fuss. |
| Traditional Bin Composting (e.g., Tumbler, Stationary Bin) | Faster decomposition if managed well, produces finished compost ready for use relatively quickly, contained. | Requires active management (turning, balancing), can be expensive to set up, requires space for a bin. | Gardeners who want a ready supply of compost, those with active gardening routines, people with space for a bin. |
| Worm Composting (Vermicomposting) | Produces nutrient-rich worm castings, can be done indoors or on balconies, efficient for kitchen scraps. | Requires specific conditions (temperature, moisture), can be sensitive to overfeeding, limited volume. | Apartment dwellers, small-scale composters, those seeking high-quality compost in smaller batches. |
| Heap Composting (Open Pile) | Can handle large volumes of material, relatively simple to start. | Can be unsightly, prone to pests if not managed, takes longer and requires turning for faster results. | Large yards, large amounts of yard waste, those with space and less concern about aesthetics or minor pest issues. |
Troubleshooting Common Trench Composting Issues
Even with its simplicity, you might run into a snag. Here are a few common issues and how to fix them:
Issue: Odor
Cause: Trench is too shallow, too much green material (like grass clippings) was added without enough browns, or it’s too wet.
Solution: Ensure your trench is at least 6 inches deep and completely covered with soil. If you’ve just added materials, cover them with more “brown” materials like dry leaves or shredded paper, then soil. Avoid adding very wet green materials in large quantities all at once. If it’s persistently smelly, it might be waterlogged, meaning you should choose a different spot or improve drainage.
Issue: Slow Decomposition
Cause: Lack of moisture, too many “browns” (carbon), or the soil is too cold.
Solution: Check moisture levels; the contents should be like a wrung-out sponge. Add a bit of water if dry. Ensure you are adding a good mix of greens. Decomposition naturally slows in cooler temperatures; it will pick up again in spring. You can sometimes introduce microbes by adding a shovelful of finished compost or good garden soil. Chop materials into smaller pieces.
Issue: Pests (Rats, Raccoons, etc.)
Cause: Exposed food scraps, trench too shallow, or the wrong materials were added.
Solution: This is almost always due to insufficient covering. Ensure you are burying your organic waste at least 6 inches deep with soil. Do NOT add meat, bones, dairy, or oily foods. Consistent, deep covering is the best deterrent.
Issue: Plants above the trench are struggling
Cause: Trench was dug too recently and the decomposition process is still very active, potentially affecting plant roots through nitrogen depletion or acidity, or the trench is too shallow.
Solution: If you’ve just dug and filled a trench, it’s best to let it sit for at least 3-6 months before planting directly over it, or plant something very tolerant of nutrient fluctuations. Avoid planting sensitive seedlings directly above a fresh trench. If the trench is old and still causing issues, ensure it’s deep enough that plant roots aren’t directly in decomposing material.
When Will My Trench Compost Be Ready?
This is the trickiest part of trench composting: there’s no set “ready” date like with a compost bin you can peek into. The organic matter decomposes slowly and directly in the soil. You won’t ever “harvest” finished compost from a trench in the traditional sense. Instead, the soil itself becomes richer over time. You’ll see the benefits in improved soil structure, better water retention, and more vibrant plant growth. If you’re curious, you can dig down into an older trench (after 6-12 months) and see how much has broken down. Ideally, you’ll never dig it up; you’ll just keep adding new trenches and letting the old ones nourish your garden. The goal is continuous soil improvement rather than discrete batches of compost.
Conclusion: Start Digging for a Healthier Garden!
There you have it! Trench composting DIY is truly one of the simplest, most effective ways to boost your garden’s health while reducing waste. You don’t need fancy equipment or a whole lot of time. Just a shovel, some organic materials, and a willingness to dig a little.
By burying your kitchen scraps and yard waste, you’re not just discarding them; you’re actively feeding your soil, improving its structure, and creating a thriving ecosystem right beneath your feet. So next time you have those coffee grounds or veggie peels, grab your shovel, dig a trench, bury them deep, and let nature do its magic. Your plants will thank you for it with abundant growth and beautiful blooms!
Frequently Asked Questions About Trench Composting
Q1: How deep should my compost trench be?
A1: Aim for a depth of about 12 to 18 inches. This depth helps ensure that the decomposition process doesn’t interfere with surface gardening and keeps pests at bay when properly covered.
Q2: Can I trench compost in raised garden beds?
A2: Yes! You can dig trenches directly into your raised beds. Just be mindful of the depth to avoid damaging any established roots of plants already in the bed. You might want to wait until the end of a planting season for this.
Q3: How long does it take for materials to break down in a trench?
A3: Decomposition can take anywhere from 3 months to over a year, depending on soil conditions, moisture, and the types of materials. The benefit is continuous soil enrichment rather than a finished product you harvest.
Q4: Will trench composting attract rodents or other pests?
A4: Properly done trench composting should not attract pests. The key is to always bury your organic materials at least 6 inches deep with soil and avoid adding meats, dairy, or oily foods, which are primarily what attract pests.
Q5: What are the “greens” and “browns” in trench composting?
A5: “Greens” are nitrogen-rich materials like fruit and vegetable scraps, coffee grounds, and grass clippings. “Browns” are carbon-rich materials like dry leaves, shredded paper, and small twigs. Mixing them helps the decomposition process.
Q6: Do I need to add anything to help the composting process?
A6: While not strictly necessary, adding a shovelful of finished compost or garden soil can introduce beneficial microbes and speed up decomposition. Ensuring proper moisture levels is also important.
Q7: Can I plant directly over a freshly filled trench?
A7: It’s generally better to wait at least 3-6 months before planting directly over a trench that has just been filled. This allows the initial breakdown to occur and prevents potential harm to young plants. For immediate benefits, consider planting along the sides of larger trenches or in a separate area.

I am passionate about home engineering. I specialize in designing, installing, and maintaining heating, ventilation, and air conditioning systems. My goal is to help people stay comfortable in their homes all year long.