Hey there, savvy home improvers and garden enthusiasts! Ever look at your kitchen scraps and think, “There’s gotta be a better way than the trash bin?” You’re not alone. Dealing with food waste can feel like a messy chore. But what if I told you there’s a simple, natural way to turn those scraps into super-rich plant food? It’s called vermicomposting, and it’s incredibly popular and effective in Asia. Stick around, and I’ll walk you through how you can do it easily right at home. We’ll cover everything you need to get started, from choosing your worms to feeding them the right stuff. Let’s get digging!
Vermicomposting in Asia: Proven & Essential
Vermicomposting, or worm composting, is a fantastic way to reduce household waste and create nutrient-dense fertilizer for your plants. In Asia, where sustainable living and optimizing resources are deeply ingrained in many cultures, vermicomposting isn’t just a trend; it’s a proven, essential practice. From bustling urban apartments to sprawling rural farms, people across Asia have embraced the power of earthworms to transform waste into gold for their gardens.
Why is it so essential? Because it tackles two big issues: waste management and soil health. Instead of sending food scraps to landfills, where they contribute to greenhouse gases, vermicomposting turns them into valuable compost that enriches the soil, helping plants grow stronger and healthier. It’s a win-win for your home and the environment.
Why Vermicomposting is a Big Deal in Asia
Asia’s diverse landscapes and populations have always found innovative ways to make the most out of what they have. Vermicomposting fits perfectly into this ethos. Here’s why it’s become so widespread and appreciated:
- Waste Reduction: With dense populations, especially in cities, managing organic waste is a significant challenge. Vermicomposting offers a decentralized, effective solution directly at the household level.
- Soil Enrichment: Many parts of Asia rely heavily on agriculture. Worm castings (worm poop!) are an exceptional natural fertilizer, improving soil structure, aeration, and water retention. This means better crop yields and healthier plants, which is vital for food security.
- Resourcefulness: It aligns with traditional values of not wasting anything and utilizing natural cycles. Local communities often share knowledge and resources, making it accessible to everyone.
- Scalability: Whether you have a small balcony or a large garden, vermicomposting can be scaled to fit your needs. This makes it suitable for everyone, from individuals to community projects.
The Magic Behind Worm Castings
Worm castings are often called “black gold” by gardeners, and for good reason! These tiny pellets are packed with essential plant nutrients like nitrogen, phosphorus, and potassium, but they also contain a host of beneficial microbes. When you add worm castings to your soil:
- Nutrients are released slowly: This prevents over-fertilizing your plants and provides a steady food source.
- Soil structure improves: The soil becomes more aerated, allowing roots to breathe and grow better.
- Water retention increases: Your soil holds onto moisture longer, meaning you water less often.
- Beneficial microbes multiply: These microbes help fight off plant diseases and pests naturally.
It’s like giving your plants a superfood smoothie that boosts their health from the ground up. And the best part? You made it yourself from materials you would have otherwise thrown away!
Getting Started with Your Own Vermicomposting System
Ready to become a worm wrangler? It’s easier than you think! The principle is simple: you provide a comfortable home for special types of composting worms, feed them your food scraps, and they, in turn, create amazing fertilizer. Let’s break down what you need and how to set it up.
Choosing Your Worm Bin
Your worm bin is your worms’ home. It needs to be the right size, allow for air circulation, and keep moisture in. Fortunately, you don’t need anything fancy!
DIY Worm Bin Options
Plastic Tubs: A common and affordable choice. You can use one or two large plastic storage bins (around 10-20 gallons). Drill numerous small holes in the lid for air and a few near the bottom for drainage. If using two bins, place one inside the other with blocks or spacers to elevate it, allowing liquid (worm tea) to drain into the bottom bin.
Wooden Bins: If you’re a bit handy, you can build a wooden bin. Use untreated wood to avoid leaching chemicals. Ensure there are gaps between the slats or drill holes for ventilation.
Commercial Bins: Many excellent pre-made worm bins are available online or at garden centers. These are often designed with stacking trays that make harvesting compost easier. They can be a bit pricier but are very convenient.
Key Features of a Good Worm Bin:
- Opaque: Worms are sensitive to light, so an opaque bin is best.
- Ventilated: Worms need to breathe!
- Durable: It should hold up to moisture and use.
- Moisture Control: It needs to retain some moisture but also allow excess liquid to drain.
For beginners, a repurposed plastic storage bin is a fantastic, budget-friendly starting point. You can usually find suitable bins at dollar stores or home goods retailers. Remember to drill plenty of holes for airflow – more than you might think!
Selecting Your Composting Worms
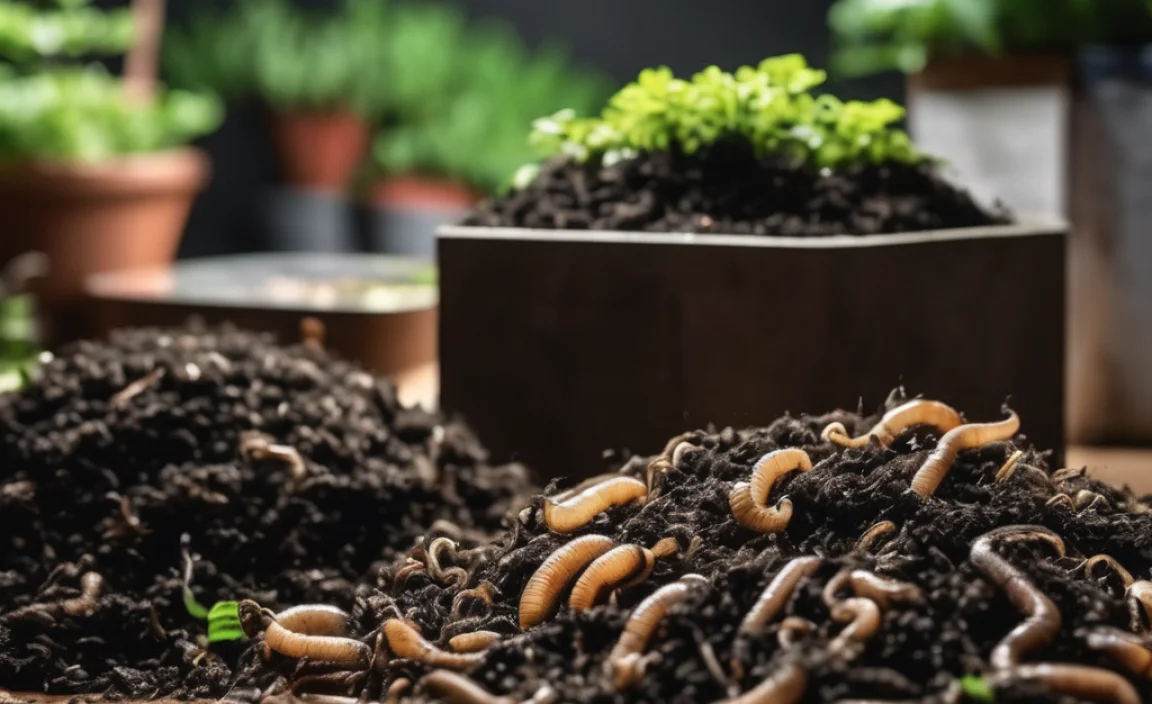
Not all worms are created equal when it comes to composting. You don’t want the earthworms from your garden; they prefer to live in the soil. For vermicomposting, you need specific “red wigglers” or “redworms.”
The most common and highly recommended species are:
- Eisenia fetida: Also known as red wigglers, tiger worms. They are very efficient composters and reproduce quickly under the right conditions.
- Eisenia andrei: Similar to E. fetida and often sold interchangeably.
You can typically buy these worms online from specialized worm farms or sometimes from local gardening suppliers. Start with about 1/4 to 1/2 pound of worms for a bin that’s 1-2 square feet in surface area. They’ll surprise you with how fast they multiply!
Creating the Perfect Bedding
Before your worms move in, you need to set up their cozy bedding. This is what they’ll live in and munch on, and it helps maintain the right moisture and air balance in the bin.
Good Bedding Materials:
- Shredded Newspaper: Black and white sections only. Avoid glossy paper.
- Cardboard: Uncoated and torn into small pieces. Like newspaper, avoid glossy prints.
- Coconut Coir: Sometimes called coir pith or husk. This is a sustainable option that holds moisture well.
- Peat Moss: Another good moisture retainer, though less sustainable than coir.
- Shredded Leaves: Dried leaves work well.
How to Prepare the Bedding:
- Take your chosen bedding material (e.g., shredded newspaper and a bit of coir).
- Put it in a separate bucket or tub and soak it thoroughly with water.
- Mix it well until it’s evenly damp, like a wrung-out sponge. It shouldn’t be dripping wet, but if you squeeze a handful, only a drop or two of water should come out.
- Fluff it up to make it airy.
- Fill your worm bin with this prepared bedding, leaving a few inches of space at the top.
- You can also add a small handful of soil or finished compost. This acts as grit for the worms, helping them digest their food.
It’s a good idea to have the bedding prepared and moist a day or two before you introduce your worms. This allows it to settle and reach a good temperature.
Introducing Your Worms to Their New Home
Once your bin is set up with moist bedding, it’s time to add the stars of the show!
- Gently place your composting worms on top of the bedding in the bin.
- Create a small indent in the bedding for them if you want.
- Leave the lid off for about 30 minutes to an hour. This allows any worms that might be near the surface to burrow down into the bedding, away from light.
- Close the lid tightly.
- Important: Do NOT feed them right away. Let them get settled for a few days to a week. They’ll start exploring and eating the bedding.
The first week is all about letting your worms acclimate to their new environment. They need time to get used to the bin, the bedding, and the temperature before they really start working and eating vigorously. Patience here pays off!
What to Feed Your Worms
Worm food can be a source of much excitement (and sometimes worry) for beginners. The key is to feed them a variety of organic materials and to do so in moderation. Overfeeding is one of the most common mistakes.
The Worms’ Favorite Foods
Composting worms love to eat pre-digested organic matter. Think of things that are already starting to break down.
Good Foods:
- Fruit Scraps: Apple cores, banana peels, melon rinds, berries. Chop larger pieces to speed up decomposition.
- Vegetable Scraps: Carrot peels, leafy greens (lettuce, spinach), cucumber ends, potato peels, broccoli stalks. Again, smaller pieces are better.
- Coffee Grounds and Filters: Worms love coffee!
- Tea Bags: Remove any staple or plastic tags.
- Crushed Eggshells: A great source of calcium. Rinse and crush them finely.
- Oatmeal/Cooked Grains: Small amounts of plain, cooked grains are fine.
- Paper Products: Plain, uninked paper scraps or small bits of plain cardboard can be added with other food.
Foods Worms Should Avoid (or Limit)
Some foods can harm your worms, make the bin smell bad, or attract pests.
- Citrus Fruits: Oranges, lemons, grapefruit. Worms can tolerate a small* amount, but too much will make the bin too acidic.
- Onions and Garlic: These can be too potent for worms.
- Spicy Foods: Peppers and other very spicy items.
- Meat, Dairy, and Oily Foods: These break down slowly, can smell bad, and attract pests like rodents and flies. It’s best to avoid them entirely in a home system.
- Sauces, Dressings, and Heavily Seasoned Foods: The oils, salts, and spices are not good for worms.
- Pet Waste: Dog or cat feces can contain pathogens.
How to Feed Your Worms
When you first start, feed sparingly. Introduce a small amount of food – about a handful or two – into one section of the bin. Bury it an inch or two under the bedding to discourage pests and flies. Your worms will find it. As they eat more, you can gradually increase the amount and frequency of feeding.
A good rule of thumb is to feed them what they can eat within a few days. If food is left over after a week, you’re feeding too much. You can tell they’re happy and eating well if you don’t see much food leftover from the previous feeding.
Tip: Chop or blend your food scraps before feeding. Smaller pieces break down faster and are easier for worms to consume. You can even make a “worm chow” by freezing scraps together in a blender with some moist shredded newspaper or coir.
Maintaining Your Worm Bin
Keeping your worm bin happy is straightforward. Think of it as providing a stable, comfortable environment for your tiny composting buddies.
Moisture Levels
This is crucial. Worms breathe through their skin, so they need a moist environment. The bedding should feel like a wrung-out sponge – damp but not soggy.
- Too Dry: If the bedding starts to dry out, add a little water. You can sprinkle some on top or mist it with a spray bottle.
- Too Wet: If it’s too wet and soggy, add more dry bedding material (like shredded newspaper or coco coir) to absorb the excess moisture. Ensure the drainage holes are not blocked.
The moisture from the food scraps will also contribute to the bin’s humidity.
Temperature
Composting worms prefer moderate temperatures, ideally between 55-77°F (13-25°C).
- Too Hot: If your bin is in direct sunlight or a very warm room (above 85°F/30°C), the worms can die. Move the bin to a cooler location, add cool, damp bedding, or even a frozen water bottle (wrapped in a cloth).
- Too Cold: If temperatures drop below 40°F (4°C), worms can become sluggish or die. Insulate the bin if kept outdoors in cooler climates, or bring it indoors.
Aeration
Worms need oxygen. Occasionally fluffing the top layer of the bedding with a garden fork or hand trowel can help ensure good airflow. Do this gently to avoid disturbing the worms too much. The holes you drilled in the bin also help with this.
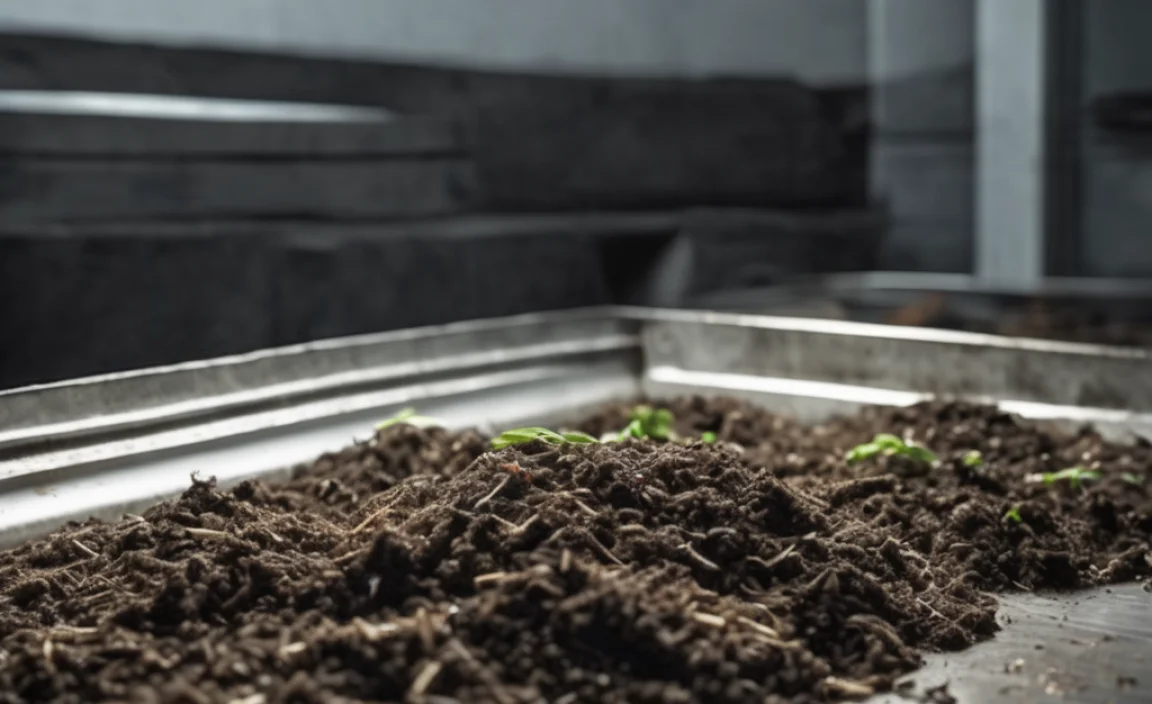
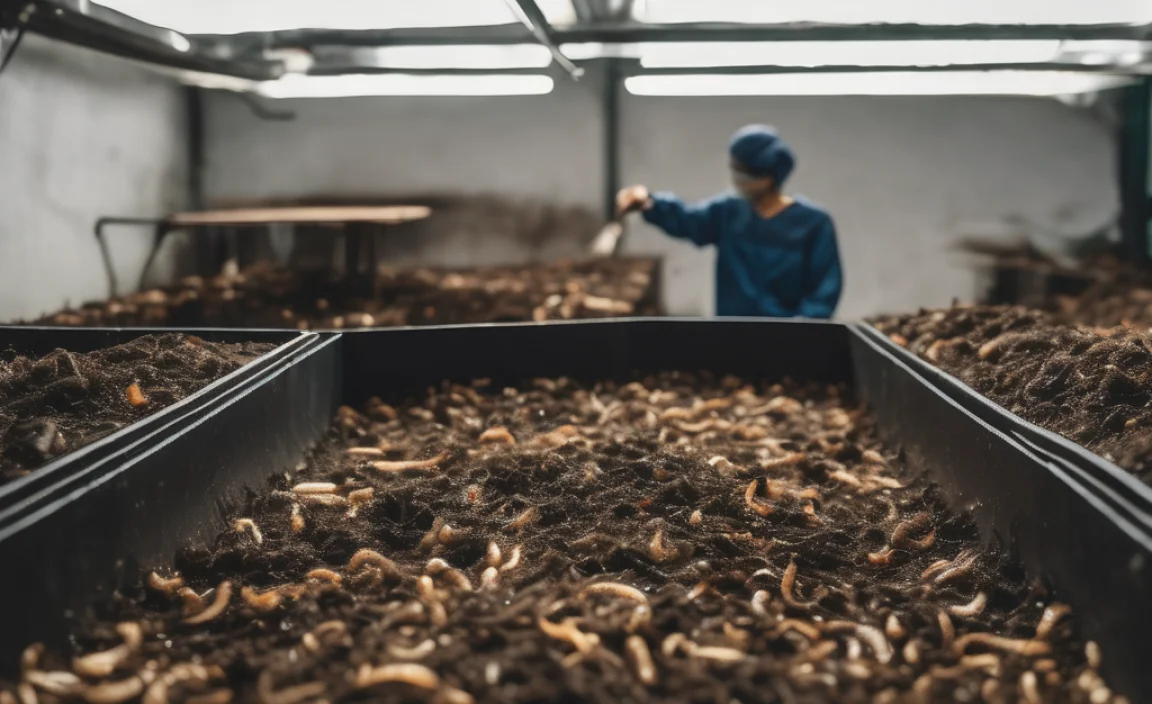
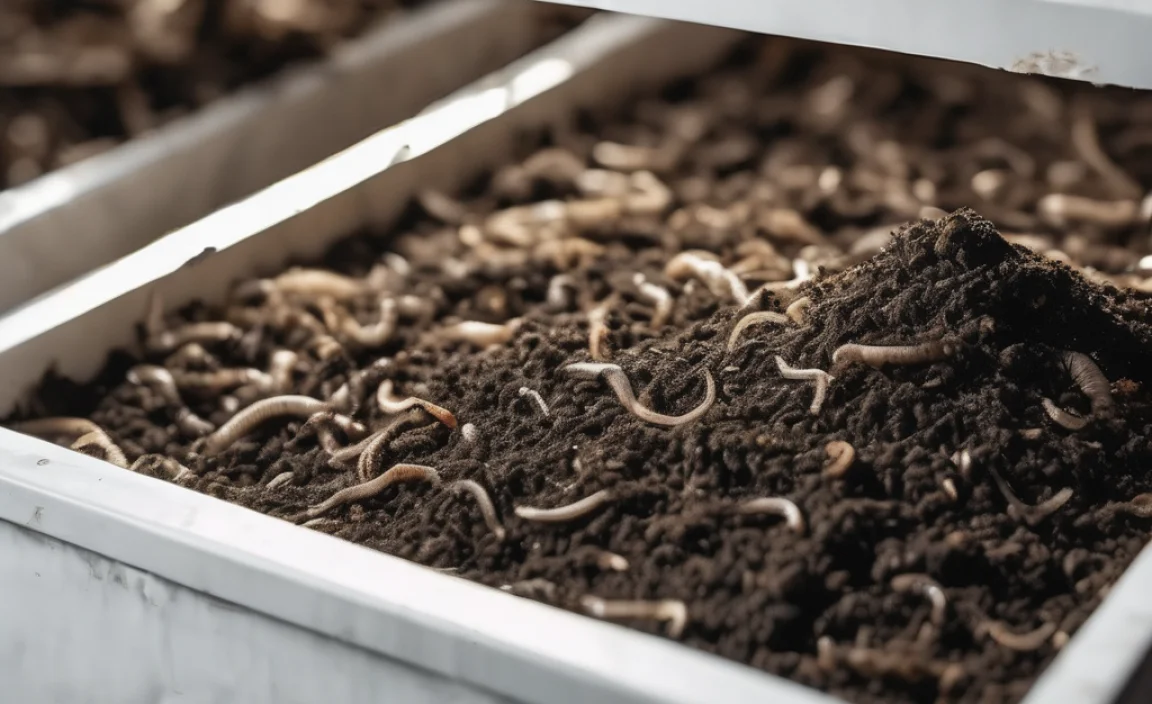
Harvesting Your Worm Castings
This is the reward! Your worm castings are ready when you see mostly dark, crumbly material with few recognizable food scraps, and the bedding looks like earth. This can take anywhere from 2 to 6 months, depending on your bin size, the number of worms, and how much you feed them.
Methods for Harvesting:
- The “Migration” Method: About a week or two before harvesting, stop adding food to the main part of the bin. Instead, place new food at one end. The worms will migrate towards the fresh food. Once most of the worms have moved, you can scoop out the finished compost from the other end. Repeat this process until most of the compost is worm-free.
- The “Light” Method: Dump the contents of your bin onto a tarp or plastic sheet under a bright light (sunlight is fine, but indoors preferred to control temperature). Worms hate light and will burrow downwards. Scrape away the top layer of compost, then wait for the worms to burrow again. Continue this, layer by layer, until you are left with a concentrated ball of worms. These can be returned to your bin.
- Sifting: If you want very fine compost, you can use a screen or sieve to sift out any larger, undigested material.
Finished worm castings can be used immediately or stored in a breathable container in a cool, dark place for later use.
Using Your Homemade Worm Castings

You’ve done it! You’ve turned food scraps into nutrient-rich compost. Now, let’s put that “black gold” to work!
How to Use Worm Castings
Worm castings can be used in several ways to boost your plants’ health:
- As a Soil Amendment: Mix castings directly into your garden soil or potting mixes. A common ratio is about 10-25% worm castings to soil. This improves soil structure, aeration, and nutrient content for all your plants.
- As a Top Dressing: Sprinkle a thin layer (about 1/2 inch) of castings on top of the soil around established plants, vegetables, and flowers. Water it in, and the nutrients will slowly leach down to the roots.
- In Seed Starting Mixes: A small amount of worm castings (5-10%) in your seed-starting mix can give young seedlings a healthy start.
- For Liquid Fertilizer (Worm Tea): You can steep worm castings in water to create a nutrient-rich liquid fertilizer, often called “worm tea.” This can be applied as a foliar spray or as a drench for the soil.
Worm Tea For Beginners: To make a simple worm tea, add about 1 cup of worm castings to 5 gallons of unchlorinated water (let tap water sit out for 24 hours to dechlorinate). Let it steep for 24 hours, stirring occasionally. You can aerate it by bubbling air through it with an aquarium pump for better microbial activity, but it’s not strictly necessary for a basic brew. Strain and use within a few days.
You can use your castings on almost any plant: houseplants, vegetables, flowers, shrubs, and even trees! Just remember, a little goes a long way.
Vermicomposting in Different Asian Climates
Vermicomposting is incredibly adaptable. Here’s how it works in various Asian settings:
| Climate Type | Considerations for Vermicomposting | Adaptations |
|---|

I am passionate about home engineering. I specialize in designing, installing, and maintaining heating, ventilation, and air conditioning systems. My goal is to help people stay comfortable in their homes all year long.
Related Posts
- Composting For Restaurants Ratio: Your Essential Guide
Compost Tea in South Africa: Proven Essential Guide- Trench Composting Solutions: Essential, Effortless Results
- Best Air Compressor For Tire Shop: Essential Choice
- **The provided keywords “best 21 gallon air compressor” and the topic “how to cancel car wash subscription” are not directly related. Therefore, I cannot create a blog title that perfectly aligns with both while meeting all your requirements.** However, I can generate a title for the education niche based on the other criteria, or a title for the car wash subscription topic if you provide a relevant keyword. **Please clarify which keyword you’d like to focus on for the title.** If you meant to ask for a title related to “how to cancel car wash subscription” with a relevant keyword, please provide that keyword. If you meant to ask for a title related to “best 21 gallon air compressor” for the education niche, please let me know.
- Top Composting Solutions: Transform Waste into Gold
How To Compost Fruit Peels: Genius Essential Guide- Best Gas Powered 24 Gallon Air Compressor: Essential Guide