Thinking about starting vermicomposting but not sure where to begin with your purchase? It’s totally natural to feel a bit overwhelmed when you’re shopping for something new, especially when you want to set yourself up for success. This guide is here to break it all down, making your vermicomposting buy a breeze. We’ll walk through what you need to consider so you can confidently pick the right setup and get those wiggles working for you!
Vermicomposting Buy: Your Essential Guide to Getting Started
Hey there, fellow home improver and garden enthusiast! Troy D Harn here from TopChooser. You know, I’ve always believed that making your own compost is one of the most rewarding things you can do for your garden and your wallet. And when it comes to composting with worms – that’s vermicomposting for you – it’s like a supercharged version! It’s a fantastic way to turn your kitchen scraps into black gold, also known as worm castings. These castings are pure garden magic, packed with nutrients that will make your plants sing. But before we get those little wrigglers busy, we need to get you geared up. Making the right purchase for your first vermicomposting setup can feel like a big step, but don’t you worry. We’re going to go through it all, nice and easy. My goal is to make sure you feel totally confident, like you’re getting advice from a neighbor who’s been there and done that. We’ll cover everything from choosing the right bin to understanding what you actually need, so you can start this composting adventure without any stress. Let’s dive in!
Why Vermicompost? The Magic of Worm Castings
So, what’s all the fuss about vermicomposting? Simply put, it’s composting using specific types of worms, like red wigglers, to break down organic waste. Unlike traditional composting that relies on heat and microbes, vermicomposting uses the digestive power of worms. The end product? Worm castings! These aren’t just worm poop; they’re a nutrient-rich, finely granulated fertilizer that plants absolutely love. Think of it as super-powered plant food, naturally produced right in your home. It improves soil structure, aeration, and water retention, leading to healthier, more vibrant plants. Plus, it’s an incredible way to reduce kitchen waste, keeping it out of landfills. For anyone with a garden, a few houseplants, or just a desire to do a little something good for the planet, vermicomposting is a win-win!
What to Consider When You Vermicomposting Buy
When you’re ready to make your vermicomposting buy, there are a few key things to think about to ensure you get a setup that works for you. It’s not just about grabbing the first worm bin you see. We’ll break down the most important factors:
1. Your Space and Scale
First off, where are you going to put your worm farm? This is a biggie. Are you living in a spacious house with a backyard, or are you in a small apartment with limited space? This will directly influence the size and type of vermicomposting system you choose.
- Apartments/Small Homes: If space is tight, a compact bin is your best bet. These can often fit under a sink, on a balcony, or in a closet. They are designed for smaller batches of food scraps but can still produce a good amount of castings.
- Larger Homes/Gardens: If you have more room, you might consider a larger bin or even a multi-tier system. This allows you to process more food waste and produce a larger volume of castings, which is great if you have a substantial garden.
Don’t underestimate how much food waste you generate. A good rule of thumb is to estimate your weekly kitchen scraps. If you’re a single person, a smaller bin might suffice. If you have a family, you’ll want something a bit more robust.
2. The Type of Vermicomposting Bin
There are several types of worm bins available, each with its own pros and cons. Understanding these will help you make a more informed vermicomposting buy.
a) DIY vs. Purchased Bins
You can absolutely build your own worm bin from scratch if you’re handy and enjoy a project. People often use plastic storage containers, wooden boxes, or even old drawers. There are tons of online tutorials. However, if you’re short on time, prefer a ready-made solution, or want something aesthetically pleasing, purchasing a bin is a great option. Purchased bins are often designed with the specific needs of composting worms in mind, featuring proper ventilation and drainage.
b) Single-Layer vs. Multi-Layer (Stacking) Bins
- Single-Layer Bins: These are the simplest. You have one container where the worms live, eat, and process scraps. Harvesting castings usually involves carefully removing the worms from the finished compost. They are generally cheaper and easier to manage for total beginners.
- Multi-Layer or Stacking Bins: These systems have multiple trays. You start with food scraps in the bottom tray, and as the worms process it, you add fresh scraps to the tray above. The worms migrate upwards towards the new food, leaving the finished castings in the lower tray, making harvesting much easier. These are often more efficient and cleaner.
c) Material of the Bin
Worm bins are typically made from plastic, wood, or fabric.
- Plastic Bins: These are durable, easy to clean, and readily available. Many commercial bins are made from recycled plastic. They’re a solid, no-fuss choice.
- Wooden Bins: These can look very attractive in an outdoor setting. Wood provides good insulation. However, they can decompose over time and are heavier. If opting for wood, make sure it’s untreated to avoid harming the worms.
- Fabric Bins (Grow Bags): These are lightweight, compostable, and offer excellent aeration. They’re a great space-saving option. However, they can dry out faster and might not be as durable as plastic or wood.
3. The Worms Themselves
This is crucial! You don’t just grab any earthworm from your garden. For vermicomposting, you need specific breeds that are surface dwellers and excellent eaters. The most common and recommended species are:
- Red Wigglers (Eisenia fetida): These are the superstars of vermicomposting. They are voracious eaters, reproduce quickly, and thrive in the conditions found in a worm bin.
- European Nightcrawlers (Eisenia hortensis) (also known as Dendrobaena veneta): While also good composters, they are a bit larger and can sometimes be slightly less prolific in bins compared to red wigglers. They can tolerate cooler temperatures better.
When you do your vermicomposting buy, ensure you’re getting these types of worms. You can usually buy them online from reputable worm farms or sometimes from local gardening supply stores. They are often sold by weight (e.g., 1/4 lb, 1/2 lb, or 1 lb).
A helpful resource for understanding different composting methods, including vermicomposting, can be found at the EPA’s composting page, which offers a broader perspective on waste reduction through composting.
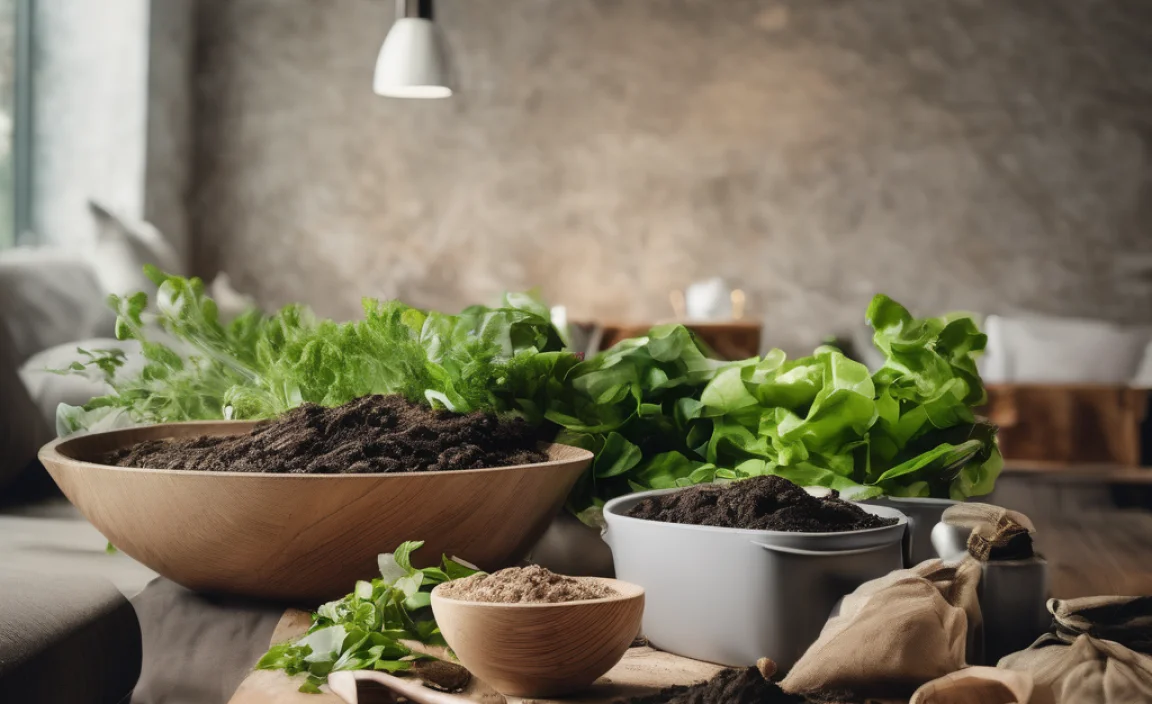
4. Bedding Material
Worms need a cozy home, and that’s where bedding comes in. Bedding provides a habitat, absorbs moisture, and helps regulate airflow. Common and effective bedding materials include:
- Shredded newspaper (avoid glossy paper)
- Shredded cardboard
- Coconut coir
- Peat moss (use sparingly as it can be acidic)
- Composted leaves
Some purchased bins come with a starter kit that includes bedding, while others expect you to source it yourself. If you’re buying worms, they often arrive packed in some of their own bedding.
5. Accessories and Add-ons
Depending on the bin you choose, you might need a few extra bits and bobs.
- Moisture Control: A spray bottle for misting the bedding to keep it damp.
- Tools: A small trowel or hand cultivator can be useful for mixing scraps into the bedding and for harvesting.
- Food Scraps: You won’t buy this, but knowing what to feed your worms (and what NOT to feed them) is part of your purchase decision.
- Compost Collections Tray/Bucket: Some bins have a built-in tray to catch any liquid that drains out (often called “worm tea,” though it’s more like leachate). You’ll want a container to collect this, which can be diluted and used as a liquid fertilizer.
Choosing Your Vermicomposting Bin: A Quick Comparison
To make your vermicomposting buy decision easier, let’s look at a comparison of common bin types:
| Bin Type | Pros | Cons | Best For |
|---|---|---|---|
| Compact Single-Layer (Plastic/Fabric) | Space-saving, affordable, easy to manage for beginners, portable. | Smaller capacity, may require more frequent manual harvesting. | Apartment dwellers, small households, starting out. |
| Multi-Layer (Stacking) System (Plastic) | High efficiency, easy harvesting (worms migrate up), good capacity, cleaner. | More expensive than single-layer, can be bulkier. | Families, those processing more food scraps, gardeners wanting prolific casting production. |
| DIY Bin (Plastic Tote/Wood) | Highly customizable, potentially cheapest option if you have materials, satisfying project. | Requires DIY skills, time, and effort; less predictable outcome for beginners. | DIY enthusiasts, budget-conscious individuals with time. |
Where to Make Your Vermicomposting Buy
You have a few good options when it comes to purchasing your vermicomposting system and worms:
- Online Retailers: Websites like Amazon, eBay, and dedicated composting supply stores offer a vast selection of bins, worm kits, and accessories. This is often the most convenient option, allowing you to compare brands and read reviews.
- Specialty Worm Farms: Many companies specialize in raising and selling composting worms. Buying directly from them ensures you get healthy, live worms. They often sell complete starter kits too. A quick search for “buy composting worms online” will yield many results.
- Local Garden Centers/Nurseries: Some larger garden centers may carry composting bins or even worm starter kits. It’s worth checking your local options, though availability can vary.
- DIY Stores: For building your own, hardware and DIY stores will have the containers and materials you need.
When buying worms, look for sellers with good reputations and clear shipping policies, especially if you’re in an area with extreme temperatures.
Step-by-Step: Setting Up Your New Worm Bin
Once you’ve made your vermicomposting buy, setting it up is straightforward. Here’s a common process for most purchased bins:
Step 1: Prepare Your Bin
Unpack your new bin. Many plastic bins come ready to go. If you’ve bought a multi-layer system, assemble the trays according to the instructions. Ensure there’s good airflow – bins usually have pre-drilled holes or mesh inserts for ventilation.
Step 2: Add Bedding
Take your chosen bedding material (shredded newspaper, coconut coir, etc.) and moisten it. You want it to be damp like a wrung-out sponge – not dripping wet, but not dry either. Fluff it up and fill your bin about halfway to two-thirds full.
Step 3: Introduce the Worms
Gently place your purchased composting worms onto the surface of the bedding. If they came in a container with bedding, you can tip that on top as well. Leave the lid off for about 30 minutes to an hour. This gives them a chance to burrow down away from the light, which they prefer.
Step 4: First Feeding (Small!)
After the worms have settled (usually after the first day or two), it’s time for their first meal. Start small! Bury a small amount of finely chopped food scraps (like vegetable peels, coffee grounds, or tea bags) into one corner of the bin. Avoid overfeeding, especially in the beginning, as too much food can rot and cause odors or attract pests.
Step 5: Close It Up and Wait
Place the lid back on your bin. Keep it in a suitable location – typically between 55-77°F (13-25°C) in a dark or dimly lit place. Avoid direct sunlight or extreme temperatures. Let your worms get acclimated for a week or two. You can add more food scraps gradually as they consume what’s available.
What to Feed Your Worms (and What Not To!)
This is super important for happy worms and good compost!
Good Foods (in moderation and chopped up):
- Vegetable scraps (peels, cuttings, wilted greens)
- Fruit scraps (avoid citrus in large quantities)
- Coffee grounds and paper filters
- Tea bags (remove staples)
- Crushed eggshells (helps with grit and pH)
- Plain cooked pasta or rice (small amounts)
- Old bread (small amounts)
Foods to Avoid:
- Meat, fish, and dairy products (attract pests and cause odors)
- Oily or greasy foods
- Spicy foods
- Citrus fruits and peels (in large quantities, can be too acidic)
- Onions and garlic (in large quantities)
- Diseased plants
- Pet waste
- Non-organic materials (plastic, metal, synthetic fibers)
If you’re unsure, it’s best to err on the side of caution and leave it out. Remember to chop food scraps into smaller pieces. This speeds up decomposition.
Maintaining Your Worm Bin
Your vermicomposting buy is just the start! Consistent, simple maintenance is key.
- Moisture: Regularly check the moisture level. It should feel like a wrung-out sponge. Too wet? Add more dry bedding. Too dry? Mist with water.
- Aeration: Gently fluff the bedding with a hand trowel every week or two to ensure good airflow.
- Feeding: Feed your worms regularly, but only when they’ve eaten the previous food. Bury food scraps in different spots to encourage worms to move around.
- Temperature: Keep the bin within the ideal temperature range. If it gets too hot, you might need to move it to a cooler location or add some frozen water bottles to the bin. If it’s too cold, insulate it or bring it inside.
- Harvesting: Learn how to harvest your worm castings. For single-layer bins, this often involves migrating the worms off the finished compost. For multi-layer systems, it’s as simple as removing the finished tray.
Troubleshooting Common Vermicomposting Issues
Even with the best purchase, you might run into a hiccup. Don’t panic!
- Odors: Usually caused by overfeeding, lack of aeration, or adding prohibited foods (like meat or dairy). Try adding more dry bedding, turning the material gently, and feeding less or more infrequently.
- Pests (Fruit Flies): These are commonly attracted to exposed food scraps. Bury food scraps completely under the bedding, avoid overfeeding, and consider a “worm moat” if your bin has one.
- Worms Escaping: This usually means the environment is unfavorable. Check moisture levels, temperature, and pH. Ensure they have enough food but aren’t drowning in waste.
- Slimy Bin: This indicates too much moisture and poor aeration. Add dry bedding and turn the contents to introduce air.
For more in-depth advice on pest and odor management, the U.S. Environmental Protection Agency (EPA) offers excellent resources on composting at home, which often cover these common issues.
Frequently Asked Questions About Your Vermicomposting Buy
Here are some common questions beginners have:
Q1: How many worms do I need to start with?
A: For a standard-sized bin (about 10-15 gallons), a starting population of 1/4 lb to 1 lb of composting worms (like red wigglers) is usually sufficient. They reproduce quickly if conditions are good.
Q2: How long does it take to get usable worm castings?
A: It typically takes 2-4 months to get your first significant harvest of worm castings, depending

I am passionate about home engineering. I specialize in designing, installing, and maintaining heating, ventilation, and air conditioning systems. My goal is to help people stay comfortable in their homes all year long.