Ever thought about turning your kitchen scraps into garden gold? It sounds fancy, but it’s actually pretty simple! Many people find composting a bit intimidating. They worry about smells or getting it wrong. But what if I told you there’s a super easy way to do it right in your home? This guide will show you exactly how to start your own vermicomposting bin. No worries, no complex steps, just pure gardening goodness.
Vermicomposting DIY: Your Easy-Peasy Essential Guide
Hey there, DIY enthusiasts and garden lovers! Troy D Harn here from TopChooser, ready to help you tackle another fantastic project. Today, we’re diving into the wonderful world of vermicomposting. If you’re looking for a simple, effective, and frankly, pretty cool way to recycle food waste and create nutrient-rich fertilizer for your plants, you’ve come to the right place. Forget those huge compost piles; vermicomposting uses the power of red wiggler worms to do the heavy lifting. It’s perfect for apartments, small yards, or anyone who wants to give their garden a superfood boost.
This isn’t about complicated machinery or chemical processes. It’s about creating a happy little ecosystem in a bin that handles your food scraps for you. And the result? Amazing worm castings, often called “black gold,” that your plants will absolutely adore. Ready to get your hands a little dirty (in a good way!) and start transforming waste into wealth for your garden? Let’s break it down, step-by-step. You’ve got this!
What Exactly is Vermicomposting?

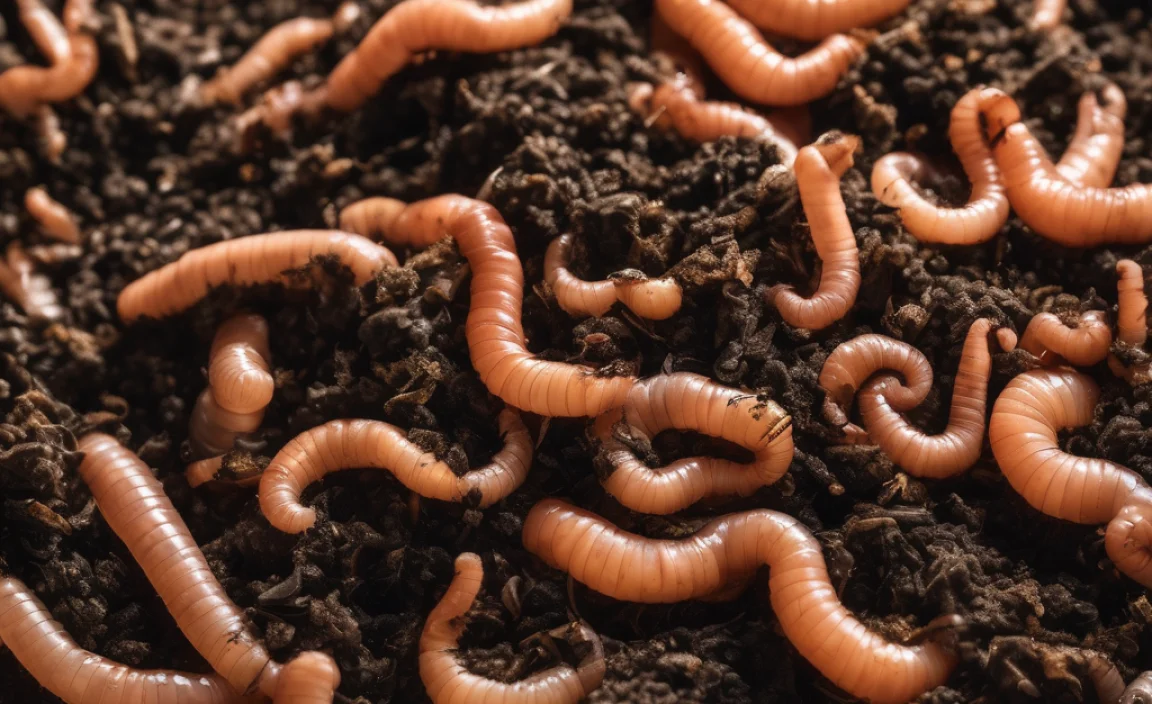
Simply put, vermicomposting is composting with worms! It’s a natural process where specific types of worms, most commonly Red Wigglers (Eisenia fetida), consume organic waste and excrete nutrient-rich castings. Think of them as tiny, super-efficient organic recyclers.
Unlike traditional composting, which often relies on heat and microbial activity, vermicomposting is a low-temperature process. This makes it ideal for indoor or small-scale use. The result is a fine, earthy material that’s packed with beneficial microbes and essential plant nutrients. It improves soil structure, water retention, and provides a slow-release source of food for your plants.
Why Vermicompost? The Top Benefits
So, why should you consider adding worms to your DIY to-do list? The reasons are pretty compelling:
- Nutrient-Rich Fertilizer: Worm castings are one of the best natural fertilizers available. They provide a balanced mix of macro and micronutrients that plants need to thrive, releasing them slowly over time.
- Waste Reduction: Vermicomposting diverts a significant amount of food scraps from landfills, reducing methane emissions and your environmental footprint.
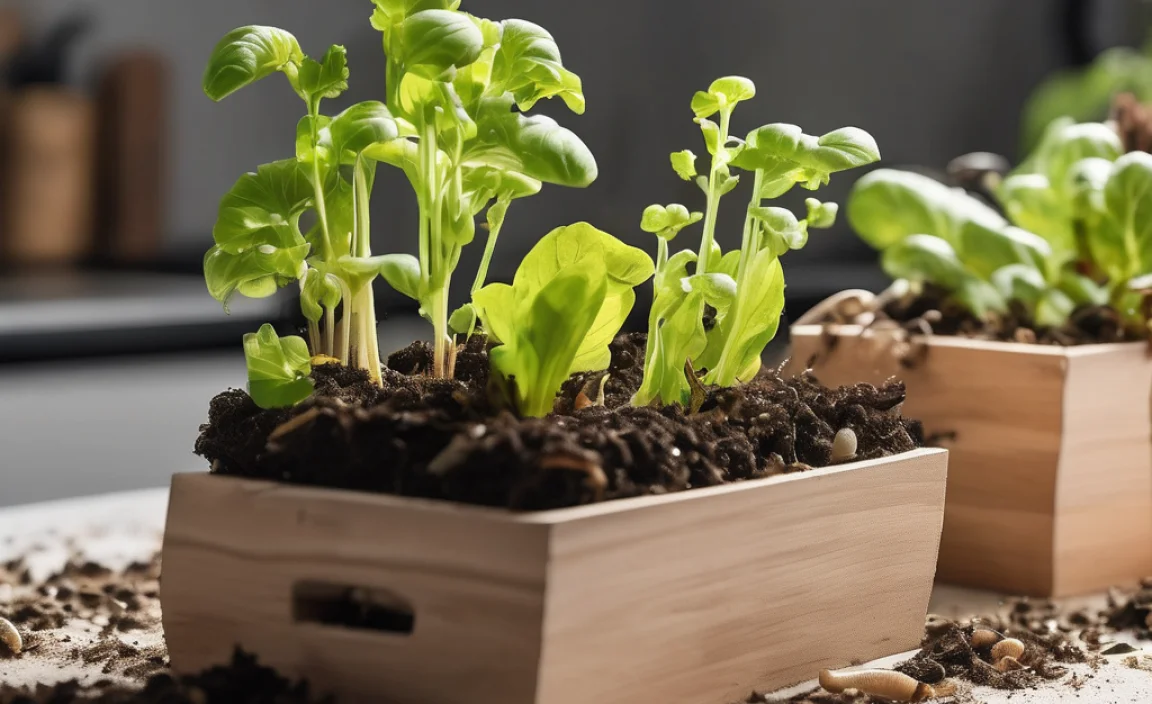
- Improves Soil Health: Adding worm castings to your soil enhances its structure, aeration, and water-holding capacity. This means healthier soil and happier plants!
- Pest-Free and Odorless (When Done Right!): A well-maintained worm bin doesn’t smell bad and won’t attract pests. It’s a clean way to handle organic waste.
- Educational and Fun: It’s a fantastic way to learn about decomposition and ecosystems, and it can be a surprisingly engaging hobby for all ages.
- Cost-Effective: Once you set up your bin and get your worms, the ongoing cost is minimal – mostly just your food scraps!
Getting Started: What You’ll Need for Your DIY Vermicompost Bin

Setting up a vermicompost system is surprisingly straightforward and budget-friendly. You don’t need fancy equipment. Here’s a breakdown of the essentials:
The Worm Bin Itself
You have a few options here, depending on your space and budget:
- DIY Plastic Storage Bin: This is the most popular and cost-effective method for beginners. You’ll need a opaque plastic storage bin with a lid (around 10-20 gallons is a good size). Opaque bins are better because worms prefer the dark. Avoid clear bins.
- Wooden Compost Bin: If you have more space and prefer a more natural look, you can build a wooden bin. Make sure it has good drainage and ventilation.
- Purchased Worm Bin: There are many excellent pre-made worm bins available online if you prefer a ready-made solution.
Essential Tools and Materials
For a basic DIY bin, you’ll need:
- Opaque Plastic Storage Bin (10-20 gallons) with a Lid: As mentioned, this is your primary container.
- Drill with Bits: Various sizes for creating air holes and drainage.
- Bedding Material: This is what your worms will live in. Good options include shredded newspaper (avoid glossy pages), shredded cardboard, coconut coir, or aged leaves.
- Water: To moisten the bedding.
- Composting Worms: Red Wigglers (Eisenia fetida) are the most common and best suited for vermicomposting. You can often buy them online or from local garden suppliers. You’ll likely need about half a pound to a pound to start.
- Food Scraps: Your kitchen waste!
- Optional: A small shovel or hand trowel for managing the contents.
- Optional: A spigot if you want to collect liquid (worm tea).
Step-by-Step Guide to Building Your Vermicompost Bin
Alright, let’s get building! This guide focuses on the popular DIY plastic bin method.
Step 1: Prepare the Bin
Your worms need air and a way for excess moisture to escape. So, we need to add holes:
- Ventilation Holes: Using a drill with a medium-sized bit (around 1/8 to 1/4 inch), drill holes in the lid and the sides of the bin. Space them out every few inches. You want plenty of airflow, but not so many that bedding can fall out.
- Drainage Holes: Drill a few slightly larger holes (around 1/4 to 3/8 inch) in the bottom of the bin. These are crucial for drainage. If you plan to collect “worm tea” (the liquid that drains out), consider drilling a hole near the bottom corner and installing a simple spigot.
Step 2: Add the Bedding
Worms need a cozy place to live before they can start eating. This bedding provides moisture, air pockets, and food.
- Shred Your Materials: Take your chosen bedding material (shredded newspaper, cardboard, coconut coir, or leaves) and chop or shred it into small strips. Aim for pieces no larger than an inch or two.
- Moisten the Bedding: This is key! The bedding should be damp, like a wrung-out sponge. Not soaking wet, not dry. Place the shredded material in a separate bucket or tub, and gradually add water, mixing it in until it reaches the right consistency. Squeeze a handful – only a few drops of water should come out.
- Fill the Bin: Place the moistened bedding into your prepared plastic bin, filling it about halfway to two-thirds full. Fluff it up a bit so it’s not compacted.
Step 3: Introduce Your Worms
Time for the stars of the show!
- Acclimate the Worms: Gently place your purchased worms on top of the bedding. Don’t bury them immediately unless the bedding is very loose, as they might get stressed.
- Let Them Settle: You can cover the top of the bedding with a damp piece of newspaper or cloth. This helps keep the moisture in and provides darkness. Leave the lid off for the first day or two, or keep the bin in a quiet, dark place, allowing the worms to acclimate to their new home. They’ll naturally burrow down into the bedding.
Tip: It’s best to add your worms when the bin contents are at room temperature. Avoid direct sunlight or extreme temperatures.
Step 4: Start Feeding Your Worms
Your worms will start eating the bedding, but their main diet will be your food scraps. Start slowly!
- Choose Your Foods Wisely: Worms love vegetable and fruit scraps, coffee grounds, tea bags (without staples or plastic wrappers), eggshells (crushed), and crushed-up paper or cardboard.
- What to Avoid: Steer clear of meat, dairy products, oily foods, citrus peels (in large quantities), onions and garlic (in large quantities), and spicy foods. These can disrupt the bin’s balance, create odors, and harm the worms.
- How to Feed: Start by burying a small handful of food scraps in one corner of the bin. As the worms consume it, you can gradually increase the amount and move the feeding spot to a different area. This encourages them to process the entire bin.
- Chop It Up: Smaller pieces break down faster. Chop or blend your food scraps for quicker consumption by the worms.
Step 5: Maintain Your Worm Bin
A little regular attention keeps your worm farm happy and productive.
- Moisture: Check the moisture level regularly. If it seems dry, lightly spray with water. If it’s too wet, add more dry bedding material and ensure drainage holes are clear.
- Temperature: Red wigglers thrive in temperatures between 55-77°F (13-25°C). Avoid extreme heat or cold. If your bin gets too hot, it might need shade or ventilation. If it gets too cold, bring it indoors.
- Aeration: Gently fluff the bedding every so often to ensure good airflow.
- Feeding Schedule: Start by feeding once or twice a week, depending on how much food waste you generate and how quickly the worms consume it. Always check if the previous food is mostly gone before adding more.
Understanding Worm Castings and “Worm Tea”

As your worms do their work, you’ll end up with two valuable products:
Worm Castings
This is the dark, crumbly material left behind by the worms. It’s incredibly rich in nutrients and beneficial microbes. You’ll harvest castings when your bin is mostly full of this material and not much original bedding is left.
How to Harvest:
- Migration Method: Stop feeding one side of the bin for a few weeks. The worms will migrate to the other side where the food is. You can then harvest the castings from the empty side.
- Light Method: Dump the bin contents onto a tarp or plastic sheet in a brightly lit area. The worms will burrow away from the light. Gently scrape off the top layer of castings, and repeat until you reach the layer of worms. Collect them and return them to the replenished bin.
Use your castings by mixing them into potting soil, sprinkling them around plants, or making a worm casting tea.
Worm Tea (Leachate)
This is the liquid that drains from the bottom of the bin. It can be nutrient-rich, but it can also contain anaerobic bacteria if the bin is too wet or compacted. It’s best to use it diluted.
How to Use: Dilute worm tea with water at a ratio of 1:10 (one part worm tea to ten parts water) before using it as a liquid fertilizer for your plants. It’s like a nutritious energy drink for them!
Common Vermicomposting Issues and How to Fix Them
Even with the best intentions, you might run into a few hiccups. Don’t worry; these are usually easy to resolve:
| Problem | Cause | Solution |
|---|---|---|
| Unpleasant Odors (Rotten Eggs, Ammonia) | Bin is too wet; too much high-nitrogen food added at once; lack of air. | Add more dry bedding (shredded newspaper/cardboard); bury food scraps less deeply; gently aerate the bin; ensure drainage holes are clear. Avoid meat, dairy, and oily foods. |
| Fruit Flies or Gnats | Exposed food scraps; bin is too wet. | Bury food scraps completely under the bedding. Reduce feeding if necessary. Add a layer of dry shredded cardboard on top. You can also add a small amount of diatomaceous earth around the area (but not directly in the bin where worms can ingest it). |
| Worms Trying to Escape | Bin is too wet, too dry, too acidic, lacks air, or has unsuitable food. | Check moisture level and adjust bedding. Ensure adequate ventilation and drainage. Check the pH balance – crushed eggshells can help neutralize acidity. Make sure you are avoiding problematic foods. |
| Worms Not Eating | Temperature too high or low; pH imbalance; too much food added at once; recent addition of worms. | Adjust temperature. Add chopped eggshells or a little garden lime to balance pH. Reduce feeding size and frequency. Give new dwellers time to adjust. |
| Mold Growth | Excess moisture; poor airflow. | Add more dry bedding material; gently aerate the bin; ensure good ventilation. Small amounts of mold are usually harmless and can be eaten by the worms. |
Worm Types: Red Wigglers vs. Earthworms
It’s important to use the right kind of worms for your composting bin. Not all worms are created equal!
- Red Wigglers (Eisenia fetida): These are the superstars of vermicomposting. They thrive in decaying organic matter and reproduce quickly in a composting environment. They are surface dwellers.
- Common Earthworms (e.g., Nightcrawlers): These worms are typically found deeper in the soil. They don’t reproduce well in compost bins and are not as efficient at consuming waste as Red Wigglers. They often try to burrow deeper or escape if placed in a bin.
So, always make sure you are purchasing or collecting Red Wigglers for your DIY vermicomposting project. You can usually find these sold specifically for composting. The U.S. Environmental Protection Agency (EPA) offers great resources on various composting methods, reinforcing the benefits of worm composting for waste reduction.
Advanced Tips for the Aspiring Vermicomposter
Once you’ve mastered the basics, you might want to try a few advanced techniques:
- Multiple Bins: Set up a rotation system with two or three bins. Start your next batch in a new bin while the first one matures, making harvesting easier and more consistent.
- Adding Paper and Cardboard: You can add shredded newspaper and cardboard directly into your bin as a carbon source, which helps balance the nitrogen from food scraps and improves aeration. Just make sure it’s moistened.
- Managing Large Volumes: If you have a lot of food scraps, you might need a larger bin or multiple bins. You can also freeze scraps to reduce their volume and make them easier to process when added to the bin.
- Worm Filter Socks: For a cleaner leachate (worm tea) collection, some people use mesh bags or “worm socks” to filter the liquid before it collects, though this adds complexity.
Conclusion
There you have it! Your proven, essential guide to DIY vermicomposting. You’ve learned what it is, why it’s fantastic for your garden and the planet, and most importantly, how to set up and maintain your very own worm bin. Remember, it’s a natural process, and your worms are working hard for you. A little patience, observation, and consistent care will reward you with high-quality compost that will make your plants sing with growth.
Don’t be afraid to get started. The beauty of vermicomposting is its simplicity and its forgiving nature. Even if you encounter a small issue, you now have the knowledge to troubleshoot it. So, grab a bin, get your bedding ready, order those Red Wigglers, and start turning your everyday kitchen scraps into garden treasure. Happy composting!
Frequently Asked Questions (FAQ)
Q1: How many worms do I need to start?
A1: For a standard 10-20 gallon bin, starting with about half a pound to a full pound of Red Wigglers is usually sufficient. They will reproduce based on the amount of food and space available.
Q2: How often should I feed my worms?
A2: This depends on how much waste you generate and how quickly the worms consume it. Start by feeding small amounts every few days, and gradually increase as you learn your worms’ habits. Always check if the previous food is mostly gone before adding more.
.lwrp.link-whisper-related-posts{
margin-top: 40px;
margin-bottom: 30px;
}
.lwrp .lwrp-title{
}.lwrp .lwrp-description{
}
.lwrp .lwrp-list-container{
}
.lwrp .lwrp-list-multi-container{
display: flex;
}
.lwrp .lwrp-list-double{
width: 48%;
}
.lwrp .lwrp-list-triple{
width: 32%;
}
.lwrp .lwrp-list-row-container{
display: flex;
justify-content: space-between;
}
.lwrp .lwrp-list-row-container .lwrp-list-item{
width: calc(25% – 20px);
}
.lwrp .lwrp-list-item:not(.lwrp-no-posts-message-item){
max-width: 150px;
}
.lwrp .lwrp-list-item img{
max-width: 100%;
height: auto;
object-fit: cover;
aspect-ratio: 1 / 1;
}
.lwrp .lwrp-list-item.lwrp-empty-list-item{
background: initial !important;
}
.lwrp .lwrp-list-item .lwrp-list-link .lwrp-list-link-title-text,
.lwrp .lwrp-list-item .lwrp-list-no-posts-message{
}@media screen and (max-width: 480px) {
.lwrp.link-whisper-related-posts{
}
.lwrp .lwrp-title{
}.lwrp .lwrp-description{
}
.lwrp .lwrp-list-multi-container{
flex-direction: column;
}
.lwrp .lwrp-list-multi-container ul.lwrp-list{
margin-top: 0px;
margin-bottom: 0px;
padding-top: 0px;
padding-bottom: 0px;
}
.lwrp .lwrp-list-double,
.lwrp .lwrp-list-triple{
width: 100%;
}
.lwrp .lwrp-list-row-container{
justify-content: initial;
flex-direction: column;
}
.lwrp .lwrp-list-row-container .lwrp-list-item{
width: 100%;
}
.lwrp .lwrp-list-item:not(.lwrp-no-posts-message-item){
max-width: initial;
}
.lwrp .lwrp-list-item .lwrp-list-link .lwrp-list-link-title-text,
.lwrp .lwrp-list-item .lwrp-list-no-posts-message{
};
}

I am passionate about home engineering. I specialize in designing, installing, and maintaining heating, ventilation, and air conditioning systems. My goal is to help people stay comfortable in their homes all year long.