Ever wanted to grow your own fresh veggies but felt overwhelmed by the whole gardening thing? Maybe you’ve heard about composting but thought it was messy or complicated. Well, I’ve got a super simple, genius idea that combines the magic of composting with the convenience of online shopping. It’s called vermicomposting, and it’s about to become your secret weapon for a thriving garden, even if you’ve never gardened a day in your life!
This easy-to-follow guide will show you exactly how to get started. We’ll break down everything, from what you need to buy (online, of course!) to how to set it up and keep your little wormy helpers happy. Get ready to boost your garden’s health and reduce waste, all with a few clicks and some wiggly friends.
What Exactly is Vermicomposting Online?
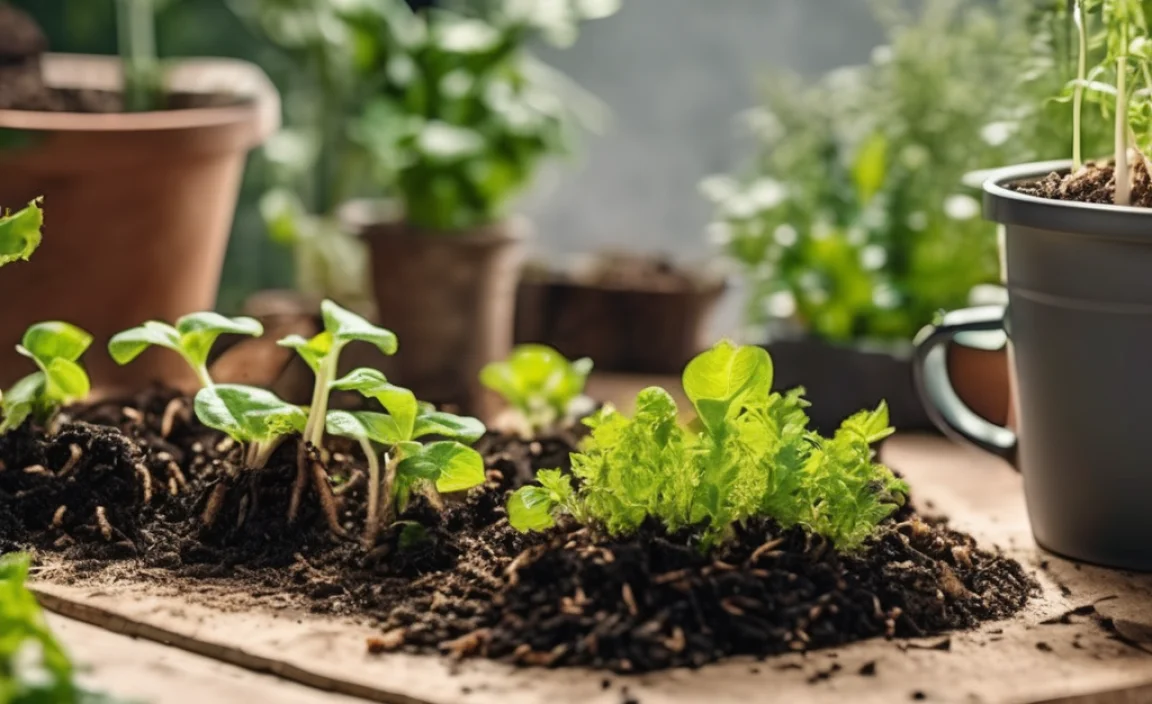
Think of vermicomposting as composting with earthworms. Instead of just piling up kitchen scraps, you add them to a special bin with hungry red wigglers (these are special composting worms, not the kind you find in your garden soil). These awesome critters munch away on your food scraps and, in return, produce amazing worm castings – a natural fertilizer that’s pure gold for your plants.
Now, the “online” part? It simply means you can get all your vermicomposting supplies delivered right to your door. This makes it incredibly easy for anyone, anywhere, to start. No need to find a special store or haul heavy bags of soil. You can get everything from the worm bin to the worms themselves, with just a few clicks.
Why Vermicompost? It’s Garden Gold!
So, why go through the trouble of setting up a worm bin? The benefits are huge, especially for beginner gardeners:
- Super Plant Food: Worm castings are packed with nutrients that plants absolutely love. They help with strong root growth, better flowering, and tastier veggies. It’s like giving your plants a superfood smoothie!
- Improves Soil: This nutrient-rich compost loosens up soil, making it easier for plant roots to grow and for water to penetrate. It also helps sandy soil hold onto moisture better.
- Reduces Waste: You’ll be amazed at how much food scrap you can divert from landfills. It’s a fantastic way to be more eco-friendly.
- Easy and Clean: Forget the image of stinky compost piles. A well-managed worm bin is odorless and surprisingly neat.
- Accessible for Everyone: You don’t need a big yard or a garden plot. A small worm bin can live on a balcony, in a garage, or even under your sink!
- Budget-Friendly: Once you have your bin, the ongoing cost is minimal – just your food scraps and a little bit of bedding for the worms.
Getting Started: Your Online Shopping List for Vermicomposting Success
The beauty of vermicomposting online is that you can gather all your supplies without leaving your comfy chair. Here’s what you’ll need:
| Item | What to Look For Online | Why You Need It |
|---|---|---|
| Worm Bin | Look for pre-made stacking bins or DIY kits. Plastic is common and easy to clean. Ensure it has ventilation holes or can be easily modified. | This is where your worms live and work their magic. It needs to hold the bedding, food scraps, and allow for air circulation. |
| Composting Worms | Order “red wigglers” (Eisenia fetida or Eisenia andrei). Reputable online suppliers will ship them directly to you. | These are the special worms that eat your food scraps and create nutrient-rich castings. They are different from regular garden earthworms. |
| Bedding Material | Shredded newspaper (black and white print only), coconut coir, or shredded corrugated cardboard are good choices. | Provides a cozy home for the worms to live in, retain moisture, and help aerate the bin. |
| Food Scraps | Gather fruit and vegetable scraps, coffee grounds, tea bags (without staples), and crushed eggshells. | This is the worms’ dinner! It provides the organic matter they need to thrive and produce compost. |
| Water (or Spray Bottle) | Tap water is usually fine; let it sit out for 24 hours if you’re concerned about chlorine. | Helps keep the bedding moist, which is crucial for the worms’ survival and activity. |
| Optional: Worm Food/Binder | Some people add a small amount of grit or specialized worm food to help the worms digest. | Can give your worms a boost, especially when they are first getting established. |
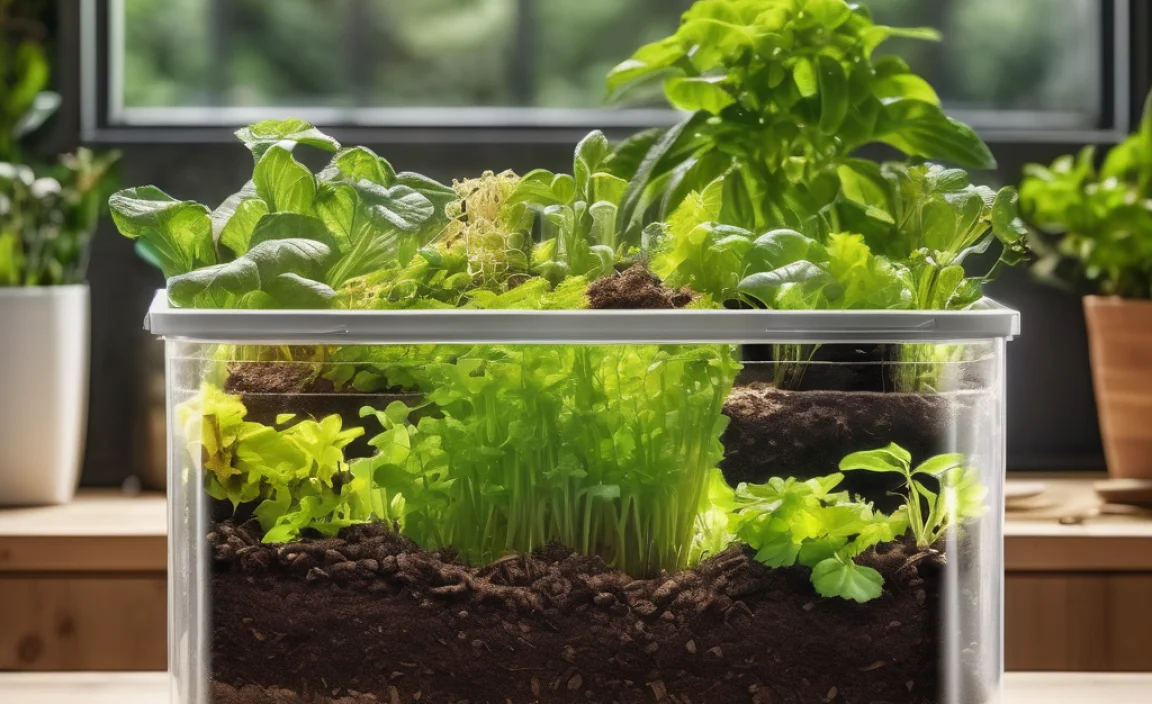
Choosing Your Worm Bin
When you’re browsing online, you’ll see a few types of worm bins:
- Stacking Systems: These bins have trays that stack on top of each other. As the worms eat the food in the lower trays, they migrate upwards to new food, making harvesting the finished compost easier.
- Single-Tray Bins: These are usually simpler and might be a good starting point if you’re on a tight budget. You’ll likely need to manually harvest the finished compost from the bottom.
- DIY Options: You can also find many tutorials online for building your own worm bin from a plastic storage tote. This is a great way to save money and customize your setup. For example, the U.S. Environmental Protection Agency (EPA) has fantastic resources on composting that can inspire DIY bin designs.
No matter which style you choose, make sure it has a lid to keep out pests and retain moisture, and some way for air to get in and out (ventilation holes).
Where to Buy Worms Online
This might sound a little strange at first, but buying live worms online is totally normal and very efficient! Look for suppliers that specialize in composting worms. They’ll inform you about the best types of worms for composting, which are typically:
- Red Wigglers (Eisenia fetida): These are the most popular and widely available composting worms. They are voracious eaters and reproduce quickly.
- Red Worms (Eisenia andrei): Very similar to red wigglers, they also do an excellent job in a worm bin.
Ensure the seller guarantees live arrival and provides clear instructions on how to acclimate the worms to their new home. You usually need to buy them by weight, and a common starting amount is about one pound (which contains thousands of baby worms!).
Setting Up Your Worm Habitat: Step-by-Step
Once your supplies arrive, it’s time to get your worm condo ready! It’s a straightforward process:
- Prepare Your Bin: If you bought a pre-made bin, it’s likely ready to go. If you’re using a DIY tote, drill several small holes (about 1/8 to 1/4 inch) in the bottom for drainage and a few on the sides and lid for ventilation. Make sure the lid fits snugly.
- Add the Bedding: Take your shredded newspaper, coconut coir, or cardboard and moisten it. The goal is for it to be damp, like a wrung-out sponge – not soaking wet. Fill your bin about halfway to two-thirds full with this moist bedding. Fluff it up to create air pockets.
- Introduce Your Worms: Gently empty the bag of worms onto the surface of the bedding. They are sensitive to light and will start to burrow down into the cozy bedding. Let them settle in for a few hours or overnight before adding food.
- Add Water (If Needed): Gently spray the bedding with water if it feels dry. You want to maintain that damp sponge consistency.
- Feed Them (The Fun Part!): Start by burying a small amount of your prepared food scraps under the bedding in one corner of the bin. This helps avoid attracting pests and lets the worms find it gradually. Don’t overfeed; start small.
Your worms will need some time to adjust to their new home, so don’t worry if they don’t seem super active at first. They are shy creatures!
What Can Worms Eat? And What Should You Avoid?
Red wigglers are enthusiastic eaters, but they do have preferences. Giving them the right diet ensures they stay healthy and produce the best compost for you.
Worm-Approved Foods:
- Vegetable scraps (most kinds)
- Fruit scraps (avoid citrus in large quantities)
- Coffee grounds and filters
- Tea bags (remove staples)
- Crushed eggshells (adds grit and calcium)
- Plain bread and pasta (in moderation)
- Cooked grains
Foods to Avoid Feeding Your Worms:
These can make your bin smelly, attract pests, or harm your worms:
- Meat and dairy products
- Oily and greasy foods
- Spicy foods
- Citrus peels (in large amounts – a little bit occasionally is usually okay for established bins)
- Onions and garlic in large quantities
- Diseased plants
- Pet waste
- Processed foods
Remember to chop or break up larger food scraps. This gives the worms a head start on digestion and speeds up the composting process. For example, instead of a whole apple core, chop it into a few pieces.
Maintaining Your Vermicomposting System
Keeping your worm bin happy and productive is easier than you might think. Here are the key things to monitor:
Moisture Levels
As we mentioned, the bedding should always feel like a wrung-out sponge. If it’s too dry, the worms can’t survive. If it’s too wet, it can become anaerobic (lack of oxygen) and smelly. How to adjust:
- Too Dry: Spray with water or add a little bit of moist bedding.
- Too Wet: Add more dry bedding material (like shredded newspaper or cardboard) to soak up excess moisture. Ensure ventilation holes aren’t blocked.
Temperature
Red wigglers prefer temperatures between 55-77°F (13-25°C).
- Too Cold: If it’s freezing outside, you’ll need to bring the bin indoors (like a garage or unheated basement) or insulate it.
- Too Hot: Avoid placing the bin in direct sunlight. If it gets too warm, you can bury frozen water bottles in the bedding or temporarily move it to a cooler spot.
Feeding Schedule
Start by feeding your worms once a week. Look at how much of the previous feeding has been eaten. If it’s all gone, you can give them a bit more. If there’s still a lot left, wait a few more days. As your worm population grows, they’ll be able to eat more.
It’s also a good idea to rotate where you bury the food scraps within the bin. This encourages the worms to move around and process the material evenly.
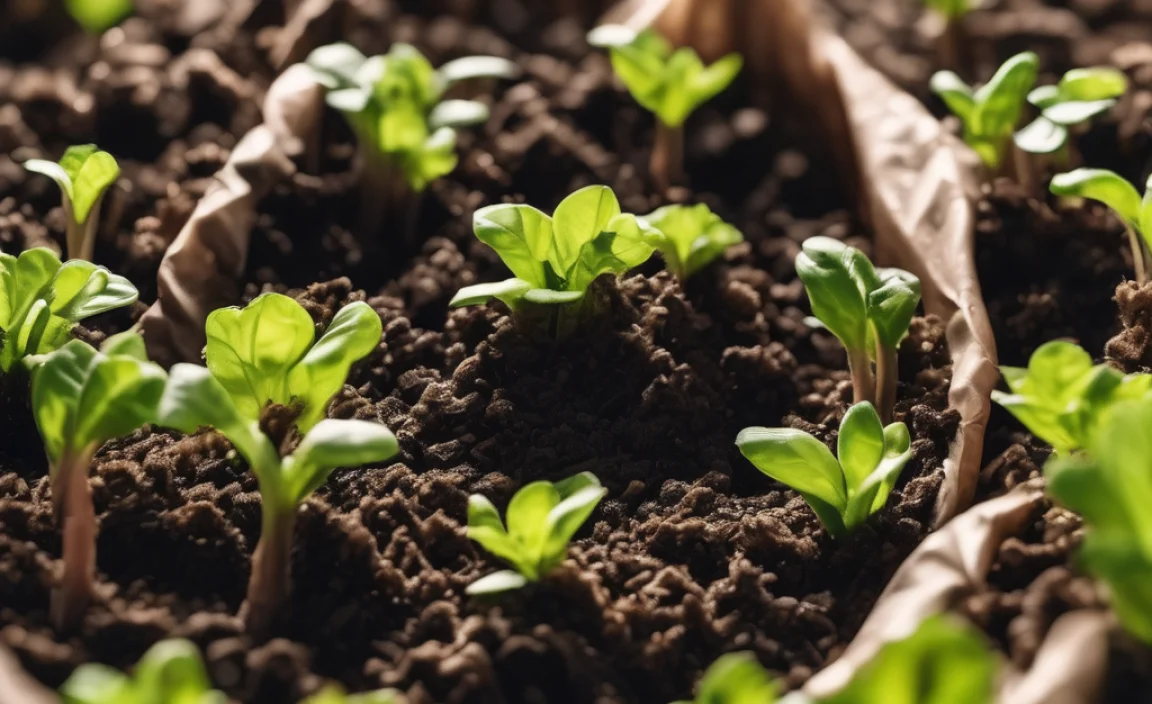
Harvesting Your Worm Castings
The goal! Worm castings are usually ready after 2-4 months. You’ll see dark, crumbly material that looks and smells like rich soil. There will be fewer original food scraps visible.
How to harvest often depends on your bin type:
- Migrating Trays: In stacking systems, the worms migrate to the freshest food in the upper trays, leaving the finished compost behind in the lower trays. You simply remove the lower trays to collect the “finished” castings, which are then ready to be used.
- Manual Separation: For single-tray bins, you can push the finished compost to one side and add fresh bedding and food to the other. The worms will migrate to the new food. Over a few weeks, you’ll have separated finished compost from dwelling worms. Another method is to dump the entire bin contents onto a tarp under a bright light. Worms dislike light and will burrow down. You can then scrape off the top layer of castings, leaving the worms clumped below.
Don’t worry if you accidentally leave a few worms in your harvested castings; they’re beneficial! You can even add them back to your bin.
Using Your Vermicompost: Feeding Your Plants
You’ve done it! You have your very own super-powered fertilizer. Here’s how to use those precious worm castings:
- Soil Amendment: Mix castings directly into your garden soil or potting mix. A ratio of 10-25% worm castings to soil is a good starting point.
- Top Dressing: Sprinkle a layer of castings around the base of plants. This slowly releases nutrients as you water.
- Compost Tea: Steep castings in water (ideally aerated with a pump) to create a liquid fertilizer. This is fantastic for a quick nutrient boost, especially for seedlings or ailing plants. You can find brewing instructions online from reputable sources like university Extension offices, such as Michigan State University Extension.
- Seed Starting Mix: Add castings to your seed-starting mix to give young plants a healthy start.
You’ll notice your plants respond with vigorous growth and great health. It’s incredibly rewarding!
Troubleshooting Common Vermicomposting Issues
Even with the best intentions, you might run into a snag now and then. Here are some common problems and how to fix them:
Issue: The bin smells bad.
Cause: Usually, this means the bin is too wet, has too much uncomposted food, or lacks air. You might be overfeeding.
Fix: Add more dry bedding material. Gently stir the contents to aerate. Bury food scraps so they are covered by bedding. Reduce the amount of food you’re adding until the bin contents are processed.
Issue: Fruit flies or gnats are buzzing around.
Cause: Exposed food scraps are a magnet for these little pests.
Fix: Make sure all food scraps are buried completely under the bedding. Avoid feeding very ripe or sweet fruits that attract them. You can also try placing a piece of apple in the bin, away from the main food, to act as a trap. Then, dispose of the apple and flies together.
Issue: My worms are trying to escape.
Cause: This is a sign that something in the bin isn’t right for them. Common reasons include the bin being too wet, too dry, too acidic (too much citrus, for example), or the temperature is uncomfortable.
Fix: Check and adjust moisture levels. Add crushed eggshells or a bit of calcium carbonate if you suspect it’s too acidic. Ensure the temperature is within the ideal range. If it’s a new bin, give them a few days to adjust; sometimes they explore briefly.
Issue: There are no signs of composting happening.
Cause: The worms might be too cold, too hot, too wet, or too dry. They might also be new and need time to acclimate.
Fix: Double-check and correct the moisture, temperature, and aeration. Be patient, especially with new worms; they need a week or two to settle in before they really get going.
Frequently Asked Questions About Vermicomposting
Q1: How many worms do I need to start?
A: A common starting point is 1/4 to 1 pound of red wigglers. This provides enough worms to begin processing your initial food scraps and will quickly multiply as they get comfortable and have plenty to eat.
Q2: Can I put any plant scraps in my worm bin?
A: Generally, yes! Most vegetable and fruit scraps are great. However, avoid diseased plants and very large amounts of citrus. Always bury the scraps to keep pests away and maintain a good environment for your worms.
Q3: How long does it take to get finished compost?
A: It typically takes 2 to 4 months to produce a harvest of worm castings, depending on the size of your bin, the number of worms, and how actively you feed them. You’ll start seeing finished compost as dark, crumbly material.
Q4: Will my worm bin attract rodents or other pests?
A: If managed correctly with a secure lid and by burying all food scraps under the bedding,
.lwrp.link-whisper-related-posts{
margin-top: 40px;
margin-bottom: 30px;
}
.lwrp .lwrp-title{
}.lwrp .lwrp-description{
}
.lwrp .lwrp-list-container{
}
.lwrp .lwrp-list-multi-container{
display: flex;
}
.lwrp .lwrp-list-double{
width: 48%;
}
.lwrp .lwrp-list-triple{
width: 32%;
}
.lwrp .lwrp-list-row-container{
display: flex;
justify-content: space-between;
}
.lwrp .lwrp-list-row-container .lwrp-list-item{
width: calc(25% – 20px);
}
.lwrp .lwrp-list-item:not(.lwrp-no-posts-message-item){
max-width: 150px;
}
.lwrp .lwrp-list-item img{
max-width: 100%;
height: auto;
object-fit: cover;
aspect-ratio: 1 / 1;
}
.lwrp .lwrp-list-item.lwrp-empty-list-item{
background: initial !important;
}
.lwrp .lwrp-list-item .lwrp-list-link .lwrp-list-link-title-text,
.lwrp .lwrp-list-item .lwrp-list-no-posts-message{
}@media screen and (max-width: 480px) {
.lwrp.link-whisper-related-posts{
}
.lwrp .lwrp-title{
}.lwrp .lwrp-description{
}
.lwrp .lwrp-list-multi-container{
flex-direction: column;
}
.lwrp .lwrp-list-multi-container ul.lwrp-list{
margin-top: 0px;
margin-bottom: 0px;
padding-top: 0px;
padding-bottom: 0px;
}
.lwrp .lwrp-list-double,
.lwrp .lwrp-list-triple{
width: 100%;
}
.lwrp .lwrp-list-row-container{
justify-content: initial;
flex-direction: column;
}
.lwrp .lwrp-list-row-container .lwrp-list-item{
width: 100%;
}
.lwrp .lwrp-list-item:not(.lwrp-no-posts-message-item){
max-width: initial;
}
.lwrp .lwrp-list-item .lwrp-list-link .lwrp-list-link-title-text,
.lwrp .lwrp-list-item .lwrp-list-no-posts-message{
};
}
Related Posts

I am passionate about home engineering. I specialize in designing, installing, and maintaining heating, ventilation, and air conditioning systems. My goal is to help people stay comfortable in their homes all year long.