Hey there! So, you’ve jumped into in-vessel composting, that’s fantastic for turning kitchen scraps into garden gold. But sometimes, things don’t go quite as smoothly as we’d hope. Maybe you’re noticing some odd smells, or your compost just isn’t breaking down. Don’t you worry! It’s totally normal when you’re starting out. We’re going to walk through these common hiccups together, step-by-step. Think of me as your friendly neighbor, here to help you get your compost bin humming along perfectly. Ready to solve those in-vessel composting problems?
In-Vessel Composting Problems: Essential Solutions
Alright, let’s talk about the bumps you might hit when using an in-vessel composter. These enclosed systems are great for keeping things tidy and deterring pests, but like any good system, they have their quirks. Understanding what can go wrong and how to fix it is key to successful composting. We’ll cover the most common issues and give you simple, practical solutions to get your compost working for you.
Why Does My In-Vessel Compost Have a Bad Smell?
A stinky compost bin is usually the first sign something’s off. The good news is, it’s almost always fixable! The culprit behind that unpleasant odor is usually a lack of oxygen, leading to anaerobic decomposition (composting without air). This creates foul smells like rotten eggs or ammonia. It’s the composting equivalent of a stuffy room – nothing good happens when air can’t move freely.
The Root Cause: Too Much Moisture or Not Enough Air
In-vessel composters can become waterlogged if you add too many wet “greens” (like fruit peels and coffee grounds) without balancing them with enough “browns” (like dry leaves or shredded cardboard). When the mix is too wet and compacted, air can’t get in. This creates an anaerobic environment where the “wrong” microbes take over and produce those stinky gases.
Solutions to Banish the Bad Smells:
- Balance Your Greens and Browns: This is the golden rule of composting. Aim for a ratio of about 2-3 parts browns to 1 part greens by volume. If your bin smells, it’s likely too many greens. Add more dry, carbon-rich brown materials. Think shredded newspaper, brown paper bags, straw, or dried leaves.
- Improve Aeration: Oxygen is vital for good composting. If your composter has a way to be turned or mixed, do it more often. If it’s a stationary bin, try poking holes in the material with a garden fork or a compost aerator tool. Some bins have vents; make sure they aren’t blocked.
- Manage Moisture: If the compost feels soggy, it’s too wet. Add more dry browns to absorb excess moisture. If it seems a bit dry, you can add a little water, but do so sparingly. The ideal moisture level is like a wrung-out sponge – damp, but not dripping.
- Avoid Problematic Items: Not all food scraps are compost-friendly. Stay away from meat, dairy, oily foods, and diseased plants, as these can attract pests and create foul odors or health risks.
Why Isn’t My In-Vessel Compost Breaking Down?
Patience is a virtue in composting, but if your bin seems like a static display of yesterday’s dinner for months on end, there are likely a few things missing. This usually boils down to the compost not having the right conditions for the microorganisms to do their work efficiently. They need food, air, water, and the right temperature.
The Root Cause: Lack of Key Ingredients or Conditions
Slow decomposition can happen because the mix is too dry, lacks essential nutrients (the right balance of greens and browns), is too cold, or simply isn’t being turned enough to distribute heat and air.
Solutions for Sluggish Composting:
- Check Moisture Levels: A compost pile that’s too dry won’t heat up or decompose. Gently moisten the material if it feels dusty or crumbly. Add a little water and mix it in. You want it to be consistently damp, not wet.
- Adjust Your Carbon-Nitrogen (Green-Brown) Ratio: If you’ve added a lot of the same type of material, the balance might be off. Too many browns (carbon) means the microbes don’t have enough nitrogen to work with. Too many greens (nitrogen) can lead to an overly wet, dense pile that also slows decomposition. Aim for that 2-3:1 brown-to-green ratio.
- Introduce More “Greens”: Nitrogen-rich “green” materials like fresh grass clippings, fruit and vegetable scraps, and coffee grounds are like fuel for the composting microbes. Ensure you’re adding a good mix.
- Chop Materials Smaller: Smaller pieces of food scraps and yard waste have more surface area for microbes to attack. Chop up larger items before putting them in the bin.
- Turn or Aerate Regularly: Just like with odor issues, oxygen is crucial. Turning the compost introduces air and distributes moisture and heat, speeding up the process. Aim to turn it at least once a week, or as often as your composter allows.
- Consider Temperature: While not always controllable in a simple in-vessel system, compost piles work best when they are warm. Hot composting (reaching temperatures of 130-160°F or 54-71°C) breaks down material much faster. Ensure your bin is in a sunny spot if possible to help it heat up. You can learn more about ideal composting temperatures from resources like the EPA’s composting page.
Why Are There Pests in My In-Vessel Composter?
Seeing uninvited guests like flies, rodents, or other critters in your compost bin can be a real turn-off. In-vessel composters are designed to prevent this, but sometimes they can still be an attraction if not managed properly. Pests are usually looking for an easy meal.
The Root Cause: Exposed Food Scraps or Attractive Materials
The primary reason pests visit is because they can smell and access food. Uncovered food scraps, or a bin that isn’t sealed properly, can be an open invitation. Certain food items, like meat and dairy, are particularly enticing.
Solutions to Keep Pests Away:
- Bury Food Scraps: Always cover fresh kitchen scraps (your “greens”) with a layer of “browns” from your bin. This helps mask the smell and makes it harder for pests to find.
- Ensure a Secure Lid: Make sure the lid of your in-vessel composter seals properly. Check for any gaps or damage that pests could exploit.
- Avoid Problematic Foods: As mentioned, steer clear of meat, bones, dairy products, fats, and oils. These are major attractants for rodents and other scavengers.
- Maintain Proper Moisture: A balanced moisture level can deter some pests. An overly wet bin might attract flies, while a very dry bin might not be appealing to some, but could still allow access.
- “Hot Compost” Strategy: If your bin can reach higher temperatures (hot composting), these temperatures can kill off some pest eggs and larvae. While difficult to maintain in smaller, passive systems, it’s a benefit of active composting.
- Regular Turning: Mixing the compost helps to bury new materials and discourages pests from settling in.
- Choose a Sturdy Bin: Invest in a well-made, durable in-vessel composter. Cheaper models might have weak points that pests can exploit. Look for bins with features designed for pest deterrence.
Why Is There Mold or Fungus Growing in My Compost?
Seeing mold or fungus on your compost is often a good sign! In fact, many types of fungi are essential decomposers. However, if you’re seeing large, fuzzy, white, or sometimes colored mold that looks concerning, or if it’s accompanied by other problems, let’s figure it out.
The Root Cause: Typical Fungal Activity or Imbalance
Most molds are beneficial. They are part of the natural decomposition process, helping to break down tough materials like lignin in woodier scraps. However, sometimes certain molds can proliferate if conditions are too wet or if there’s an imbalance.
Solutions for Mold Concerns:
- Embrace Beneficial Molds: Don’t panic if you see fuzzy white or grayish patches. This is usually mycelium, the body of friendly fungi that are breaking down your compost. It’s a sign of healthy decomposition.
- Improve Aeration: If you’re concerned about excessive mold or a specific type that seems problematic, ensure good airflow. Turning the compost regularly introduces oxygen, which helps balance the microbial community.
- Check Moisture: Standing water or a constantly soggy compost pile can encourage unwanted molds or slow down the beneficial ones. Ensure your bin drains well and that the moisture content is appropriate (like a wrung-out sponge).
- Add “Greens”: A lack of nitrogen (“greens”) can sometimes lead to the dominance of certain fungi that break down tougher materials. Adding more nitrogen-rich food scraps can help rebalance the microbial population.
- Remove Troublesome Sections (Rarely Needed): In very rare cases, if a particular section seems excessively slimy, overly moldy in a way that smells bad, or is growing something clearly concerning (which is unlikely in a typical home compost bin), you could, in theory, remove that small section. However, for most beginners, allowing the natural process to work with proper aeration and moisture management is sufficient. Always use gloves when handling compost.
Why Is My In-Vessel Compost Too Wet?
We’ve touched on this, but it’s such a common problem that it deserves its own spotlight. A waterlogged compost bin is a recipe for anaerobic conditions, which lead to smelly compost and slow decomposition. It’s like trying to dry clothes in a sealed, damp box.
The Root Cause: Excess Inflow of Water
This usually happens from adding too many high-moisture “green” materials without enough absorbent “browns” to soak it up. It can also be caused by a bin that doesn’t drain well, or by adding water when it’s not needed.
Solutions for a Soggy Bin:
- Add More Browns! This is your best defense. Shredded cardboard, paper, dry leaves, straw, or sawdust are all excellent at absorbing excess moisture. Add a good amount and mix it in thoroughly.
- Ensure Drainage: If your composter has a solid base or drainage holes that are clogged, water can accumulate. Clean out any debris blocking drainage. If your bin has no drainage, you might need to be extra diligent about moisture control and brown material.
- Reduce “Green” Additions: Temporarily hold off on adding more kitchen scraps (greens) until the moisture level improves. Focus on incorporating browns.
- Turn, Turn, Turn: Frequent turning helps to aerate the pile, allowing moisture to evaporate. It also helps distribute the wetness more evenly, making it easier for browns to absorb it.
- Cover During Heavy Rain (if applicable): If your composter is outdoors and uncovered, exceptionally heavy rain can sometimes saturate the contents. While most bins are designed to handle this, in extreme cases, a temporary cover might help. However, ensure the bin can still breathe.
Why Is My In-Vessel Compost Not Heating Up?
A compost pile that doesn’t heat up is often called “cold composting.” While it will eventually break down, it happens much slower. The heat is generated by the metabolic activity of the microbes as they consume organic matter. For a pile to heat up, it needs the right ingredients, moisture, and air.
The Root Cause: Missing Key Ingredients or Conditions for Microbial Activity
The most common reasons for a cold pile are a lack of nitrogen-rich “greens,” insufficient moisture, poor aeration, or a pile that is too small to generate and retain heat.
Solutions for a Cold Compost Pile:
- Add Nitrogen (“Greens”): Microbes need nitrogen to reproduce and work efficiently. Add more kitchen scraps, fresh grass clippings, or coffee grounds.
- Check and Adjust Moisture: Compost needs to be damp, not dry. If your pile is too dry, the microbes can’t thrive. Add water gradually while mixing.
- Increase Aeration: Turning the compost introduces oxygen, which fuels the aerobic microbes responsible for heating the pile. Turn it more frequently.
- Increase Pile Size (if possible): Smaller compost piles don’t retain heat as well. While you can’t change the size of your in-vessel composter, be aware that smaller volumes of material will compost more slowly and stay cooler. Adding more material over time within the compost process can help build up a more substantial mass.
- Balance Browns and Greens: Ensure your brown-to-green ratio is in the right ballpark (2-3:1 browns to greens by volume). Too many browns can starve the microbes of nitrogen, preventing heating.
- Consider Ambient Temperature: While in-vessel composters can work in cooler weather, they heat up best in warmer ambient temperatures. Placing the bin in a sunny location can help.
In-Vessel Composting Problems: A Quick Reference Table
Here’s a handy table to quickly identify common problems and their solutions. Think of it as your compost cheat sheet!
| Problem | Primary Cause | Key Solutions |
|---|---|---|
| Bad Smell | Lack of Oxygen (Anaerobic conditions) or Too Wet | Add Browns, Improve Aeration, Balance Moisture, Avoid Problem Foods |
| Not Breaking Down | Too Dry, Wrong Green/Brown Ratio, Lack of Air, Too Cold | Moisten, Adjust Ratio, Aerate, Add Greens, Chop Materials |
| Pests (Flies, Rodents) | Exposed Food Scraps, Insecure Lid, Unsuitable Foods (Meat/Dairy) | Bury Scraps, Secure Lid, Avoid Problem Foods, Turn Regularly |
| Excess Mold/Fungus | Often Beneficial; Sometimes Too Wet or Imbalanced | Turn Regularly, Check Moisture, Add Greens (if imbalanced) |
| Too Wet | Too Many Greens, Poor Drainage, Overwatering | Add Browns, Ensure Drainage, Reduce Greens, Turn |
| Not Heating Up | Too Dry, Lack of Nitrogen (Greens), Poor Aeration, Small Pile | Moisten, Add Greens, Aerate, Increase Material Volume |
Conclusion: Your Compost Journey Continues
So there you have it! By understanding these common in-vessel composting problems and their straightforward solutions, you’re well on your way to becoming a composting pro. Remember, composting is a living process, and a little troubleshooting is all part of the journey. Don’t get discouraged if you face a challenge; apply these tips, keep an eye on your compost’s moisture and air levels, and maintain that crucial balance of greens and browns.
With a little practice and by following these steps, you’ll soon be turning your kitchen scraps and yard waste into nutrient-rich compost that your garden will absolutely love. Happy composting!
FAQ: Your Beginner Composting Questions Answered
Here are some quick answers to common questions that pop up when you’re getting started with in-vessel composting.
Q1: How often should I turn my in-vessel composter?
A: Aim to turn or mix your compost at least once a week. More frequent turning can speed up the process, especially if you notice it getting too wet or dense. If your composter has a tumblers mechanism, a few good spins every few days is great!
Q2: What are “greens” and “browns” in composting?
A: “Greens” are nitrogen-rich materials like fruit and vegetable scraps, coffee grounds, tea bags, and fresh grass clippings. “Browns” are carbon-rich materials like dry leaves, shredded newspaper, cardboard, straw, and wood chips. A good balance is key!
Q3: Can I compost pet waste in my in-vessel composter?
A: It’s generally not recommended to compost dog or cat waste in a home compost system, especially if you plan to use the compost on food gardens. Pet waste can contain pathogens that might not be fully killed by typical home composting temperatures. Stick to kitchen scraps and yard waste.
Q4: My compost smells like ammonia. What should I do?
A: Ammonia smell means there’s too much nitrogen (too many “greens”) or not enough air. Add a generous amount of “browns” (like shredded cardboard or dry leaves) and turn the compost well to aerate it.
Q5: How do I know when my compost is ready?
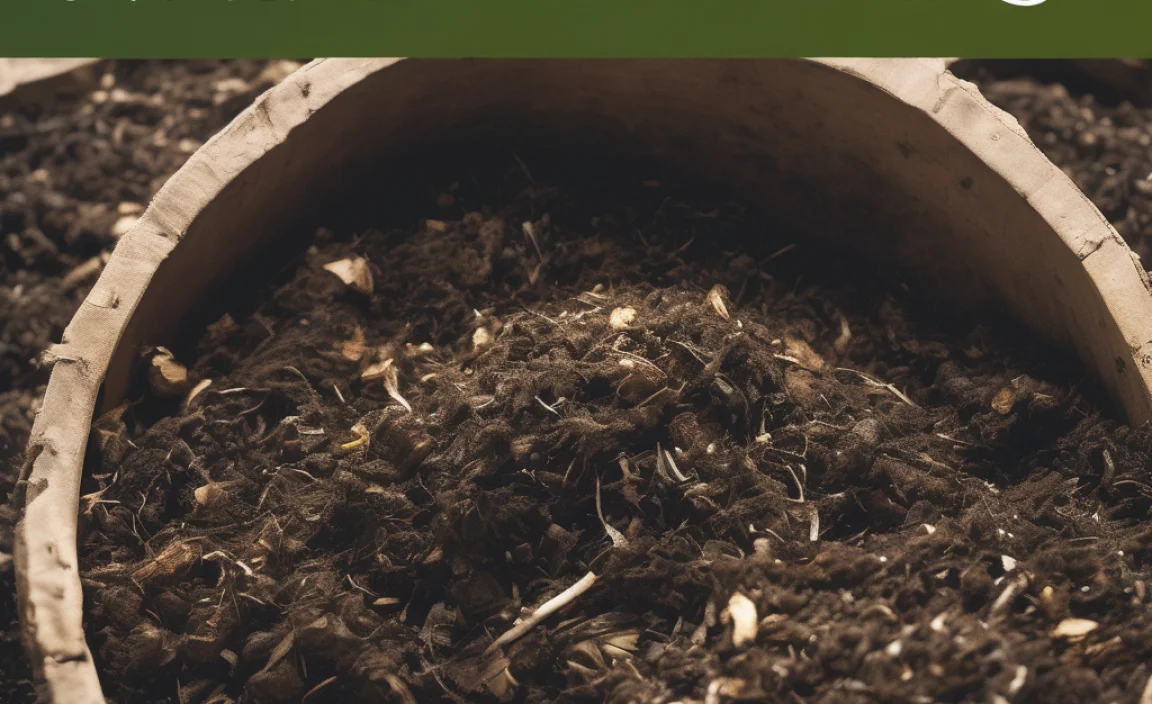
A: Finished compost is dark, crumbly, and smells earthy, like a forest floor. You shouldn’t be able to recognize the original food or yard waste. It will also have cooled down significantly.
Q6: Can I put diseased plants into my composter?
A: It’s best to avoid putting diseased plants into a home compost bin unless you are certain your composter can reach and maintain high temperatures for an extended period (hot composting), which kills pathogens. For most beginner systems, it’s safer to compost healthy plants. Consult resources on plant disease management for guidance; the Royal Horticultural Society (RHS) offers excellent advice on composting practices.

I am passionate about home engineering. I specialize in designing, installing, and maintaining heating, ventilation, and air conditioning systems. My goal is to help people stay comfortable in their homes all year long.