Have you ever seen a small drip in your bathtub? It can be annoying. Sometimes, it’s a simple fix. The O-ring might be the problem. But where is the Moen bathtub O-ring located? Let’s find out how to stop that drip!
These little rings keep water where it should be. They are important for your tub to work right. We will explore where to find them. Then, you can fix your tub easily.
Key Takeaways
- Finding the Moen bathtub O-ring location is key to stopping leaks.
- You usually find the O-ring under the handle or spout.
- Replacing the O-ring is a simple DIY plumbing fix.
- Turn off the water before you start any plumbing work.
- A plumber can help if you are not comfortable doing it yourself.
Finding The Moen Bathtub O-Ring Location
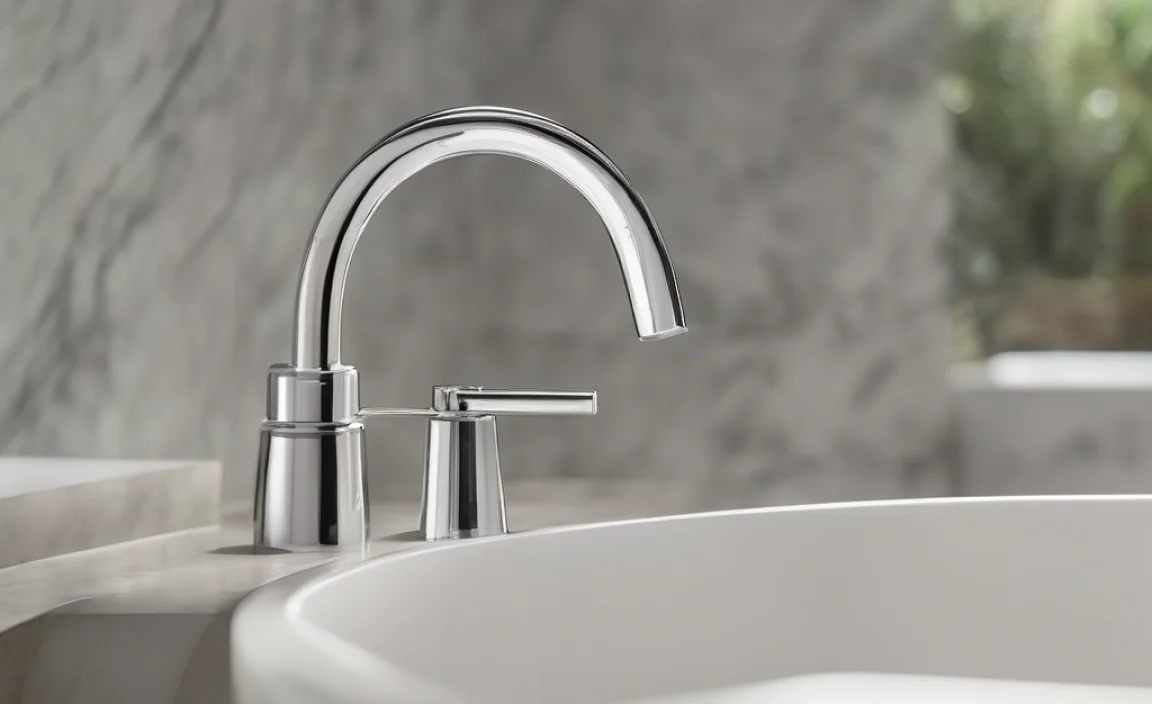
Do you know where is the Moen bathtub O-ring located? Usually, it’s hiding near the faucet handle. It can also be near the spout. The O-ring helps seal the parts together. It stops water from leaking out. When the O-ring gets old, it can crack. Then, water starts to drip. Finding the O-ring means taking apart the faucet. Be careful when you do this. You don’t want to break anything. Always turn off the water first! This stops a big mess. Look for screws or caps. These hold the handle or spout in place. The O-ring is usually right underneath. It’s a small, rubbery circle. Replacing it can stop the drip. Then you can enjoy a bath without wasting water.
- The O-ring stops water from leaking.
- It is usually near the handle.
- Turn off the water first.
- Look for screws or caps.
- The O-ring is a small, rubbery circle.
Imagine you are a detective. You are searching for a hidden clue. The O-ring is like that clue. It tells you why your tub is leaking. To find it, you need to explore. You must carefully take apart the faucet. Each piece you remove gets you closer to the answer. Remember to be gentle. Don’t force anything. If you get stuck, ask for help. A grown-up or a plumber can guide you. Once you find the O-ring, you will feel like a hero. You solved the mystery of the dripping tub. Replacing the O-ring is like giving your tub a new life. Now, you can enjoy bubble baths without any drips.
Fun Fact or Stat: A dripping faucet can waste up to 3,000 gallons of water per year! That’s like filling a small swimming pool.
Why is My Bathtub Faucet Dripping?
Have you ever wondered why your bathtub faucet is dripping? It’s a common problem. Many things can cause it. One reason is a worn-out O-ring. The O-ring is a small rubber circle. It seals the faucet parts. Over time, it can get old and crack. This lets water leak out. Another reason could be mineral buildup. Hard water has minerals in it. These minerals can stick to the faucet parts. This makes it hard for them to seal tightly. High water pressure can also cause drips. If the water pressure is too high, it can damage the faucet. This can make it leak. Checking these things can help you find the cause of the drip.
How Do I Know if It’s the O-Ring?
How can you tell if the O-ring is the problem? Look closely at the faucet. Do you see water dripping from the handle? Or maybe from where the spout meets the wall? These are signs of a bad O-ring. If the dripping is constant, it’s likely the O-ring. You can also check the faucet parts. Turn off the water first. Then, take apart the handle or spout. Look at the O-ring. Is it cracked or broken? Does it look old and worn out? If so, it’s time to replace it. Replacing the O-ring is a simple fix. It can stop the drip and save water.
What Tools Do I Need to Replace It?
To replace the O-ring, you’ll need a few tools. First, get a screwdriver. You might need a Phillips head or a flathead. It depends on your faucet. You’ll also need an adjustable wrench. This helps loosen the faucet parts. A pair of pliers can be useful too. They can help you grip small pieces. Don’t forget a new O-ring! Make sure it’s the right size for your faucet. A small container can hold the screws and parts. This way, you won’t lose them. Lastly, have a clean cloth ready. This helps you wipe up any water. With these tools, you’ll be ready to fix the drip.
Steps to Find the O-Ring in a Moen Faucet
Finding the O-ring in a Moen faucet takes patience. First, turn off the water supply. This stops any water from flowing. Next, locate the screws on the faucet handle. They might be hidden under a cap. Use a screwdriver to remove the screws. Gently pull off the handle. Now, look for the faucet cartridge. This is a plastic piece that controls the water flow. The O-ring is usually located on the cartridge. It might be at the top or bottom. Use pliers or your fingers to remove the old O-ring. Be careful not to damage the cartridge. Install the new O-ring in its place. Make sure it fits snugly. Put the faucet back together. Turn the water back on slowly. Check for any leaks. If there are no leaks, you fixed it!
- Turn off the water first.
- Remove the faucet handle.
- Find the faucet cartridge.
- The O-ring is on the cartridge.
- Replace the old O-ring.
- Put the faucet back together.
- Check for leaks.
Imagine you are building with LEGOs. Each step is important. Turning off the water is like laying the foundation. Removing the handle is like adding the first block. Finding the cartridge is like finding the right piece. Replacing the O-ring is like connecting two LEGOs. Putting the faucet back together is like finishing your build. Checking for leaks is like making sure it’s strong. If you follow each step carefully, you will succeed. You will fix the dripping faucet. You will feel proud of your work. You will become a plumbing master.
Fun Fact or Stat: Moen is a popular brand of faucets. They are known for their quality and durability.
What Does the O-Ring Look Like?
The O-ring is a small, rubbery circle. It looks like a tiny donut. It’s usually black, but it can be other colors too. The size of the O-ring depends on the faucet. Some are small, about the size of a pea. Others are larger, about the size of a dime. The O-ring is made of rubber or silicone. This makes it flexible and able to seal tightly. When you find the O-ring, it might be dirty or worn out. It might be cracked or broken. This is why it needs to be replaced. A new O-ring will be clean and smooth. It will fit snugly in its place. This will stop the leak and save water.
How Do I Remove the Old O-Ring?
Removing the old O-ring can be tricky. First, make sure the water is turned off. Then, use pliers or your fingers to grab the O-ring. Gently pull it off the faucet cartridge. Be careful not to scratch the cartridge. If the O-ring is stuck, use a small screwdriver. Gently pry it off. Don’t use too much force. You don’t want to break anything. Once the old O-ring is removed, clean the area. Wipe away any dirt or debris. This will help the new O-ring seal properly. Now you’re ready to install the new O-ring.
How Do I Install the New O-Ring?
Installing the new O-ring is easy. First, make sure you have the right size O-ring. Then, put a little bit of plumber’s grease on the O-ring. This helps it slide into place. It also protects the O-ring from wear and tear. Place the O-ring on the faucet cartridge. Gently push it into place. Make sure it fits snugly. It should sit flat and even. If it’s twisted or bunched up, it won’t seal properly. Once the O-ring is in place, put the faucet back together. Turn the water on slowly. Check for leaks. If there are no leaks, you did it right!
Tools Needed to Replace a Moen O-Ring

Replacing a Moen O-ring requires a few simple tools. A screwdriver is essential. You’ll need it to remove screws. An adjustable wrench helps loosen nuts. Pliers can grip small parts. A new O-ring of the correct size is a must. Plumber’s grease helps the O-ring seal better. A small container keeps parts organized. A clean cloth wipes up spills. Safety glasses protect your eyes. With these tools, you’re ready for the job. Remember to turn off the water first!
- Screwdriver for removing screws.
- Adjustable wrench for loosening nuts.
- Pliers for gripping small parts.
- New O-ring of the correct size.
- Plumber’s grease for better sealing.
Imagine you are a chef. You need the right tools to cook a delicious meal. A screwdriver is like your knife. It helps you cut through the faucet parts. An adjustable wrench is like your pan. It helps you loosen the tight spots. Pliers are like your tongs. They help you grab the small pieces. The new O-ring is like your main ingredient. It’s the key to fixing the leak. Plumber’s grease is like your seasoning. It makes everything work better. A small container is like your mixing bowl. It keeps everything organized. A clean cloth is like your apron. It keeps you clean. With these tools, you are ready to cook up a plumbing masterpiece.
Fun Fact or Stat: Plumber’s grease is also called silicone grease. It’s safe for use in plumbing.
What Type of Screwdriver Do I Need?
The type of screwdriver you need depends on the faucet. Some faucets use Phillips head screws. These screws have a cross-shaped head. Other faucets use flathead screws. These screws have a single slot in the head. Look closely at the screws on your faucet. If they have a cross, you need a Phillips head screwdriver. If they have a slot, you need a flathead screwdriver. Make sure the screwdriver fits the screw properly. If it’s too small, it can strip the screw. If it’s too big, it won’t fit. Using the right screwdriver makes the job easier.
Why Do I Need Plumber’s Grease?
Plumber’s grease is important for a few reasons. First, it helps the O-ring slide into place. This prevents it from getting damaged. Second, it protects the O-ring from wear and tear. This makes it last longer. Third, it helps the O-ring seal better. This stops leaks and saves water. Plumber’s grease is safe for use in plumbing. It won’t damage the faucet parts. A small amount of plumber’s grease can make a big difference. It helps ensure a successful repair.
What Size O-Ring Do I Need?
Getting the right size O-ring is crucial. If it’s too small, it won’t seal properly. If it’s too big, it won’t fit. The best way to find the right size is to take the old O-ring with you to the store. Compare it to the new O-rings. Look for one that is the same size and thickness. If you don’t have the old O-ring, check the faucet’s manual. It might list the size of the O-ring. You can also measure the space where the O-ring goes. Use a ruler or measuring tape. This will help you find the right size.
Troubleshooting Common O-Ring Problems
Sometimes, replacing the O-ring doesn’t fix the problem. You might still have a leak. This could be due to a few reasons. The new O-ring might be the wrong size. It might not be sealing properly. The faucet cartridge might be damaged. This can prevent the O-ring from sealing. There might be mineral buildup on the faucet parts. This can interfere with the seal. The water pressure might be too high. This can cause leaks even with a new O-ring. Check these things to troubleshoot the problem. If you can’t fix it yourself, call a plumber.
- New O-ring might be the wrong size.
- Faucet cartridge might be damaged.
- Mineral buildup on faucet parts.
- Water pressure might be too high.
- The faucet seat may be damaged.
Imagine you are a doctor. You are trying to diagnose a patient. Replacing the O-ring is like giving them medicine. But sometimes, the medicine doesn’t work. You need to look for other problems. The wrong size O-ring is like giving the wrong dose. A damaged cartridge is like having another illness. Mineral buildup is like having a blockage. High water pressure is like having a fever. You need to check everything to find the real problem. If you can’t figure it out, you need to call a specialist. A plumber is like a specialist for plumbing problems.
Fun Fact or Stat: Hard water affects over 85% of homes in the United States.
What if the New O-Ring Still Leaks?
If the new O-ring still leaks, don’t give up. First, double-check the size. Make sure it’s the right fit. Second, make sure it’s installed correctly. It should be snug and even. Third, check the faucet cartridge. Is it cracked or damaged? If so, you might need to replace it. Fourth, clean the faucet parts. Remove any mineral buildup. Fifth, check the water pressure. If it’s too high, install a pressure regulator. If you’ve tried all these things and it still leaks, call a plumber.
How Do I Clean Mineral Buildup?
Mineral buildup can be tough to remove. But there are a few ways to do it. First, try vinegar. Soak the faucet parts in vinegar for a few hours. The vinegar will dissolve the minerals. Second, use a scrub brush. Scrub the parts to remove any remaining buildup. Third, use a commercial cleaner. There are cleaners specifically designed for removing mineral buildup. Follow the instructions on the cleaner. Be careful not to damage the faucet parts. Rinse everything thoroughly with water. This will remove any cleaner residue.
When Should I Call a Plumber?
Sometimes, plumbing problems are too difficult to handle yourself. If you’re not comfortable working with plumbing, call a plumber. If you’ve tried replacing the O-ring and it still leaks, call a plumber. If you suspect a more serious problem, like a damaged pipe, call a plumber. Plumbers have the tools and expertise to fix complex plumbing issues. They can also help prevent future problems. Don’t hesitate to call a plumber if you’re unsure what to do.
Preventative Maintenance for Moen Faucets
Taking care of your Moen faucets can prevent problems. Clean them regularly with a soft cloth. This removes dirt and grime. Avoid using harsh chemicals. They can damage the finish. Check for leaks regularly. Fix them promptly. Replace worn-out O-rings and cartridges. Install a water softener. This reduces mineral buildup. Lower your water pressure. This prevents stress on the faucet parts. These steps can extend the life of your faucets.
- Clean faucets regularly with a soft cloth.
- Avoid harsh chemicals that can damage the finish.
- Check for leaks and fix them promptly.
- Replace worn-out O-rings and cartridges.
- Install a water softener to reduce mineral buildup.
- Lower water pressure to prevent stress.
Imagine you have a pet. You need to take care of it to keep it healthy. Cleaning your faucets is like grooming your pet. Checking for leaks is like checking for injuries. Replacing O-rings is like giving it medicine. Installing a water softener is like feeding it healthy food. Lowering water pressure is like giving it a comfortable home. If you take good care of your faucets, they will last longer. They will work better. You will save money on repairs.
Fun Fact or Stat: Regular faucet maintenance can save you hundreds of dollars in plumbing repairs.
How Often Should I Clean My Faucets?
You should clean your faucets at least once a month. This removes dirt and grime. It also prevents mineral buildup. If you have hard water, clean them more often. Use a soft cloth and mild soap. Avoid using abrasive cleaners. They can scratch the finish. Rinse the faucets thoroughly with water. Dry them with a clean cloth. This will keep them looking shiny and new. Regular cleaning will also help prevent leaks.
How Can I Prevent Mineral Buildup?
Preventing mineral buildup is important. It can damage your faucets. Install a water softener. This removes minerals from the water. Use a faucet filter. This also removes minerals. Clean your faucets regularly with vinegar. This dissolves mineral buildup. Wipe down your faucets after each use. This prevents minerals from drying on the surface. These steps can help keep your faucets clean and working properly.
What Water Pressure is Too High?
High water pressure can damage your plumbing. It can cause leaks and burst pipes. The ideal water pressure is between 40 and 60 PSI. If your water pressure is above 80 PSI, it’s too high. You should install a pressure regulator. This will lower the water pressure. It will protect your plumbing. You can buy a pressure gauge at a hardware store. Use it to check your water pressure. If it’s too high, take action.
Cost of Replacing a Moen Bathtub O-Ring
Replacing a Moen bathtub O-ring is usually cheap. The O-ring itself costs only a few dollars. If you do it yourself, you only pay for the part. If you hire a plumber, you’ll pay for labor too. The cost of labor varies. It depends on the plumber’s rates. It also depends on the complexity of the job. On average, a plumber might charge $100 to $200 to replace an O-ring. Doing it yourself can save you money. But if you’re not comfortable, hire a professional.
| Item | Cost |
|---|---|
| O-Ring | $2 – $5 |
| Plumber’s Tape | $3 – $7 |
| DIY Tools (if needed) | $10 – $30 |
| Plumber Labor | $100 – $200 |
- The O-ring costs only a few dollars.
- DIY saves on labor costs.
- Plumber labor costs $100 to $200.
- Total cost depends on DIY or plumber.
- Consider your comfort level.
Imagine you are buying a new toy. The O-ring is like a small accessory. It doesn’t cost much. Doing it yourself is like building the toy yourself. You save money on assembly. Hiring a plumber is like paying someone to build it for you. It costs more, but it’s easier. The total cost depends on how you choose to do it. Think about your skills. Think about your budget. Choose the option that works best for you. Fixing the leak will make your bathtub happy.
Fun Fact or Stat: DIY plumbing repairs can save homeowners an average of $500 per year.
Is It Cheaper to DIY or Hire a Plumber?
It’s usually cheaper to DIY plumbing repairs. You only pay for the parts. You don’t pay for labor. However, DIY repairs can be risky. If you make a mistake, it could cost more in the long run. Hiring a plumber ensures the job is done right. They have the experience and tools to handle complex problems. Consider your skills and comfort level. If you’re confident, DIY can save money. If you’re not, hire a plumber.
How Much Does a Plumber Charge Per Hour?
Plumber’s rates vary. They depend on their experience and location. On average, plumbers charge $50 to $100 per hour. Some plumbers charge a flat fee for small jobs. Replacing an O-ring might be a flat fee. Always ask for an estimate before hiring a plumber. This will help you avoid surprises. Get multiple estimates to compare prices. Choose a plumber who is licensed and insured.
What Are the Benefits of Hiring a Plumber?
Hiring a plumber has many benefits. They have the expertise to diagnose problems. They have the tools to fix them. They can ensure the job is done right. They can prevent future problems. They can save you time and stress. They are licensed and insured. This protects you from liability. If you’re not comfortable with plumbing, hire a plumber. It’s worth the investment.
What to Do After Replacing The O-Ring
After replacing the O-ring, check for leaks. Turn on the water slowly. Watch for drips around the handle and spout. If you see any leaks, turn off the water. Tighten the connections. Make sure the O-ring is seated properly. If the leaks persist, call a plumber. If there are no leaks, congratulations! You fixed the problem. Clean up your work area. Put away your tools. Enjoy your drip-free bathtub.
- Check for leaks after replacing the O-ring.
- Turn on the water slowly.
- Watch for drips around the handle and spout.
- Tighten connections if you see leaks.
- Clean up your work area.
Imagine you are baking a cake. Replacing the O-ring is like putting on the frosting. But you need to make sure it looks good. Checking for leaks is like checking for cracks in the frosting. If you see any cracks, you need to fix them. Tightening the connections is like smoothing out the frosting. If there are no cracks, you did a good job. Cleaning up your work area is like cleaning up the kitchen. Now you can enjoy your beautiful cake. And you can enjoy your drip-free bathtub.
Fun Fact or Stat: A properly installed O-ring can last for 10 years or more.
How Do I Check for Leaks?
Checking for leaks is easy. Turn on the water slowly. Watch for drips around the handle. Watch for drips around the spout. Feel for moisture with your hand. If you see or feel any water, there’s a leak. Turn off the water immediately. Tighten the connections. Check the O-ring. Make sure it’s seated properly. Repeat the process until there are no leaks.
What If I Still See Leaks?
If you still see leaks, don’t panic. First, double-check the O-ring. Make sure it’s the right size. Make sure it’s installed correctly. Second, check the faucet cartridge. Is it damaged? If so, replace it. Third, check the water pressure. Is it too high? If so, install a pressure regulator. Fourth, clean the faucet parts. Remove any mineral buildup. If you’ve tried all these things and it still leaks, call a plumber.
How Do I Clean Up My Work Area?
Cleaning up your work area is important. It prevents accidents. It keeps your bathroom tidy. Put away your tools. Wipe up any spills. Dispose of any old parts. Sweep or vacuum the floor. Wash your hands. A clean work area is a safe work area. It’s also a sign of a job well done.
Summary
Finding where is the Moen bathtub O-ring located is important for fixing leaks. The O-ring is usually under the handle or spout. You need to turn off the water first. Then, take apart the faucet. Look for the O-ring on the cartridge. Replace the old O-ring with a new one. Use the right tools. Plumber’s grease helps it seal better. Check for leaks after replacing it. Clean your faucets regularly. This prevents future problems. If you can’t fix it yourself, call a plumber. This will help you stop that annoying drip.
Conclusion
Fixing a leaky bathtub faucet is not hard. Finding where is the Moen bathtub O-ring located is the first step. With a few tools, you can replace it yourself. This saves water and money. Remember to turn off the water first. Be careful when taking apart the faucet. If you are not sure, call a plumber. A little effort can stop that drip. You can enjoy your bathtub again.
Frequently Asked Questions
Question No 1: Where exactly will I find the O-ring on my Moen bathtub faucet?
Answer: The O-ring is often found near the faucet handle or spout. It is a small, rubbery ring. It helps seal the parts together to prevent leaks. To find it, you’ll need to turn off the water. Then, take apart the faucet handle or spout. The O-ring is usually located on the faucet cartridge or valve stem. Look for a small, black ring that might be cracked or worn out. This is the O-ring that needs replacing. Replacing it can stop your leaky faucet.
Question No 2: Can I replace the Moen bathtub O-ring myself, or do I need a plumber?
Answer: You can often replace the Moen bathtub O-ring yourself. It is a simple DIY plumbing fix. First, turn off the water. Then, remove the faucet handle. Locate the O-ring. Replace it with a new one. You’ll need a few tools, like a screwdriver and wrench. If you’re not comfortable with plumbing, hire a plumber. A plumber can quickly replace the O-ring. They can also check for other problems. If you’re handy, try it yourself. If not, a plumber is a good choice.
Question No 3: What tools do I need to replace a Moen bathtub O-ring?
Answer: To replace a Moen bathtub O-ring, you’ll need a few tools. A screwdriver is important. Use it to remove the faucet handle. An adjustable wrench helps loosen the faucet parts. Pliers can help you grip small pieces. You’ll also need a new O-ring of the correct size. Plumber’s grease helps the O-ring seal better. A small container can hold the screws and parts. A clean cloth helps wipe up any spills. With these tools, you’re ready to fix the leak.
Question No 4: How do I know what size O-ring to buy for my Moen bathtub faucet?
Answer: To find the right size O-ring, you can check the faucet’s manual. The manual should list the correct size. If you don’t have the manual, remove the old O-ring. Take it to a hardware store. Compare it to the new O-rings. Look for one that is the same size. You can also measure the space where the O-ring goes. Use a ruler or measuring tape. This will help you find the right size. Getting the right size is important for a good seal.
Question No 5: What can happen if I don’t replace a worn-out Moen bathtub O-ring?
Answer: If you don’t replace a worn-out Moen bathtub O-ring, you’ll have a leak. The leak will waste water. This can increase your water bill. The dripping water can also damage your bathtub. It can cause rust or stains. Over time, the leak can get worse. This can lead to more serious problems. Replacing the O-ring is a simple fix. It can prevent these problems and save you money.
Question No 6: After I replace the O-ring, how do I make sure there are no more leaks?
Answer: After replacing the O-ring, check for leaks. Turn on the water slowly. Watch for drips around the handle and spout. Feel for moisture with your hand. If you see or feel any water, there’s a leak. Turn off the water immediately. Tighten the connections. Check the O-ring. Make sure it’s seated properly. Repeat the process until there are no leaks. If the leaks persist, call a plumber. They can help you find the problem and fix it.
Related Posts
- Does Manic Panic Stain Bathtub? Quick Fixes Here!
- Best Air Compressor For Tire Shop: Essential Choice

Organic Compost Temperature: Genius Best Practices- What is the Source of Nitrogenous Compounds in Urine? Powerful Answer