Ever looked at your yard waste or kitchen scraps and thought, “There’s got to be a better way than just throwing this away”? You’re not alone! Composting is a fantastic way to turn “trash” into treasure for your garden. But sometimes, figuring out where to start feels a bit overwhelming. Let’s break down windrow composting – a super effective method that’s easier than you might think. We’ll walk through it step-by-step, so you can start making amazing compost for your plants. Get ready to transform your garden!
What is Windrow Composting?
Windrow composting is a method where organic materials are piled into long, narrow heaps called “windrows.” These windrows are typically arranged in rows in an open area, like a field or a large backyard. It’s a very popular method for larger-scale composting, whether you’re a community garden, a farm, or even a homeowner with a good amount of space to manage. Think of it as a more organized, efficient way to build a big pile of compost.
The beauty of windrow composting is its simplicity and scalability. It allows for good airflow and easy turning, which are key ingredients for healthy, rapid decomposition. Plus, it’s a tried-and-true eco-friendly solution that reduces waste and enriches your soil naturally.
Why Choose Windrow Composting?
Windrow composting offers several great benefits, making it a popular choice for many. Here are a few reasons why it might be the right composting solution for you:
- Efficient Management: The long, linear shape of windrows makes it easier to manage large volumes of organic waste.
- Good Aeration: The shape and potential for turning allow for excellent oxygen flow, which speeds up the composting process.
- Scalability: You can easily adjust the size and number of windrows to suit the amount of material you have.
- Reduced Odor: Properly managed windrows, with good aeration and the right balance of materials, tend to have fewer odor issues compared to stagnant piles.
- Cost-Effective: It requires minimal specialized equipment, especially for smaller-scale operations.
- Environmentally Friendly: It diverts waste from landfills and creates nutrient-rich soil amendment.
Getting Started with Windrow Composting: The Basics
Before you start building mountains of compost, let’s cover the essentials. Successful windrow composting relies on a few key ingredients and principles:
1. The “Greens” and “Browns” Ratio
This is the golden rule of composting! You need a good mix of nitrogen-rich materials (“greens”) and carbon-rich materials (“browns”).
- Greens (Nitrogen-rich): These materials are typically moist and provide nitrogen, which helps the microbes that break down the compost.
- Fruit and vegetable scraps
- Coffee grounds and tea bags
- Grass clippings (in moderation)
- Plant trimmings
- Manure (from herbivores like cows, horses, chickens)
- Browns (Carbon-rich): These materials are usually dry and provide carbon, which is the energy source for the microbes.
- Dried leaves
- Straw and hay
- Shredded newspaper and cardboard (avoid glossy or colored inks)
- Wood chips or sawdust (use in moderation and can take longer to break down)
- Twigs and small branches
A general guideline for the ideal ratio is about 25-30 parts carbon (browns) to 1 part nitrogen (greens) by weight. In simpler terms, aim for a lot more brown material than green material. Too much green can lead to a slimy, smelly pile; too much brown will slow down decomposition.
2. Moisture Level
Your compost pile should be as moist as a wrung-out sponge. Too dry, and the decomposition process will halt. Too wet, and it can become anaerobic (lacking oxygen) and start to smell bad. You should be able to Squeeze a handful of material and get just a few drops of water. If it’s dripping heavily, it’s too wet. If it feels dry and crumbly, it’s too dry.
3. Aeration (Oxygen!)
Microorganisms that break down organic matter need oxygen to survive and do their work efficiently. This is where turning the compost comes in. Good airflow prevents the pile from becoming a smelly, anaerobic mess and speeds up the composting process dramatically. Turning also helps distribute moisture and heat throughout the pile.
4. Size and Location
Size: For effective heat generation (which kills pathogens and weed seeds), windrows should ideally be at least 3 feet wide and 3 feet high. The length can vary depending on how much material you have. Longer windrows are easier to turn with machinery, but for home use, any manageable length works. A common size for home gardeners might be 4 feet wide, 4 feet high, and 8-10 feet long.
Location: Choose a spot that is:**
- Level and well-drained.
- Partially shaded is ideal to prevent it from drying out too quickly in hot sun, but full sun is also acceptable if you manage moisture well.
- Accessible for adding materials and for turning.
- Away from structures that could be damaged by moisture or prolonged heat.
Step-by-Step: Building Your First Windrow
Ready to get your hands dirty? Here’s how to build your first windrow compost pile:
Step 1: Gather Your Materials
Start collecting your “greens” and “browns.” It’s helpful to have a good quantity of both before you begin building the windrow, especially browns, as they are often the bulk of the pile.
Step 2: Prepare Your Base
Clear a level area. You can lay down a thin layer of coarse brown material, like small twigs or straw, to help with initial drainage and aeration at the very bottom. This isn’t strictly necessary but can be a good practice.
Step 3: Start Layering
Begin layering your green and brown materials. A good starting point is to make a base layer of brown materials, followed by a layer of green materials, and then more brown materials. The goal is to create the desired ratio throughout the pile. Think of it like making a giant, compostable lasagna.
Pro Tip: If you have access to aged manure or finished compost, adding a small layer of this into your new windrow can inoculate it with beneficial microbes, helping to kickstart the decomposition process.
Step 4: Build Up the Windrow
Continue layering until you reach your desired height, aiming for a minimum of 3 feet. Ensure you’re mixing the greens and browns as you go, or layering them in a way that they will naturally mix as the materials settle and decompose. Try to avoid large clumps of any single material, especially grass clippings, as they can mat down and prevent airflow.
Step 5: Add Water
As you build, or once the windrow is built, lightly moisten the materials. You can use a garden hose with a spray nozzle. Remember, you want it to be like a wrung-out sponge, not soaking wet.
Step 6: Initial Turning (Optional but Recommended)
Some people like to give the windrow an initial turn or mix after it’s built to ensure good initial contact between materials and even moisture distribution. This isn’t a strict rule, but it can help get things off to a good start.
Managing Your Windrow: The Key to Great Compost
Building the windrow is just the first part. The real magic happens with ongoing management. This is where you ensure your compost breaks down efficiently and healthily.
Turning Your Windrow
Turning is crucial for aeration, temperature control, and ensuring even decomposition. The frequency of turning depends on how quickly you want your compost to be ready and the method you choose.
- Hot Composting (Faster, kills pathogens): This method involves turning the pile regularly – typically every 4-10 days. The goal is to keep the internal temperature between 131°F (55°C) and 160°F (70°C). This high temperature helps to kill weed seeds and pathogens. You’ll need a compost thermometer to monitor this.
- Cold Composting (Slower, less effort): If you’re not in a hurry, you can turn your windrow less often, perhaps every 4-8 weeks, or even just a few times a year. The compost will still break down, but it will take longer, and it might not reach temperatures high enough to kill all weed seeds.
How to Turn: If you have a small home windrow, a pitchfork or compost aerator can work. You move the outer material to the center and the inner material to the outside. For larger windrows, a front-end loader or a dedicated compost turner machine is used.
You can find more information on compost management best practices from resources like the U.S. Environmental Protection Agency (EPA).
Monitoring Moisture
Regularly check the moisture level. If it feels dry, water it. If it feels too wet, try to add more brown materials and turn it to help it dry out. Covering your windrow with a tarp during heavy rain can also help manage moisture levels.
Temperature Management
As mentioned, for hot composting, monitor the temperature. If the pile isn’t heating up, it might be too dry, too wet, or lack enough nitrogen. If it gets too hot (above 160°F/70°C), it can kill beneficial microbes; in this case, turn it to cool it down and introduce more oxygen.
Tools for Windrow Composting
While you can get by with minimal tools, a few can make the process much easier and more effective.
Essential Tools:
- Pitchfork or Compost Aerator: For turning smaller windrows and ensuring aeration.
- Shovel: For moving and shaping materials.
- Garden Hose with Spray Nozzle: For adding moisture.
Helpful Additions:
- Compost Thermometer: Essential for hot composting to monitor internal temperatures.
- Gloves: To keep your hands clean and protected.
- Wheelbarrow: For transporting materials to the windrow.
- Tarp: To cover the windrow during heavy rain or extreme sun.
- Shredder/Chipper: For breaking down bulkier brown materials like branches.
Troubleshooting Common Windrow Composting Problems
Even with the best intentions, you might run into a few hiccups. Here are some common issues and how to fix them:
Problem: The Composting Process is Too Slow
- Possible Causes:
- Too many browns (lack of nitrogen).
- Pile is too dry.
- Pile is too small to generate its own heat.
- Lack of aeration.
- Solutions:
- Add more green materials.
- Add water and turn.
- If the pile is too small, mix existing compost with new materials to make a larger pile.
- Turn the pile to add oxygen.
Problem: The Compost Smells Bad (Ammonia or Rotten Eggs)
- Possible Causes:
- Too many green materials (excess nitrogen).
- Pile is too wet and not getting enough air (anaerobic conditions).
- Solutions:
- Turn the pile and add a generous amount of brown materials (like shredded newspaper or dried leaves).
- Turn the pile thoroughly to introduce oxygen. If it’s very wet, add dry brown materials.
Problem: Ants or Other Pests are Present
- Possible Causes:
- Pile is too dry.
- Certain materials are attractive to pests (e.g., meat, dairy, oily foods).
- Solutions:
- Moisten the pile. Ants often indicate a dry environment.
- Avoid adding meat, dairy, and greasy foods to your compost pile. These are generally not recommended for home composting anyway, as they can attract pests and create odors.
- Ensure your windrow is hot enough, as high temperatures deter many pests.
By understanding these potential issues, you can quickly get your compost back on track. For more detailed information on composting, the Alabama Cooperative Extension System offers excellent resources.
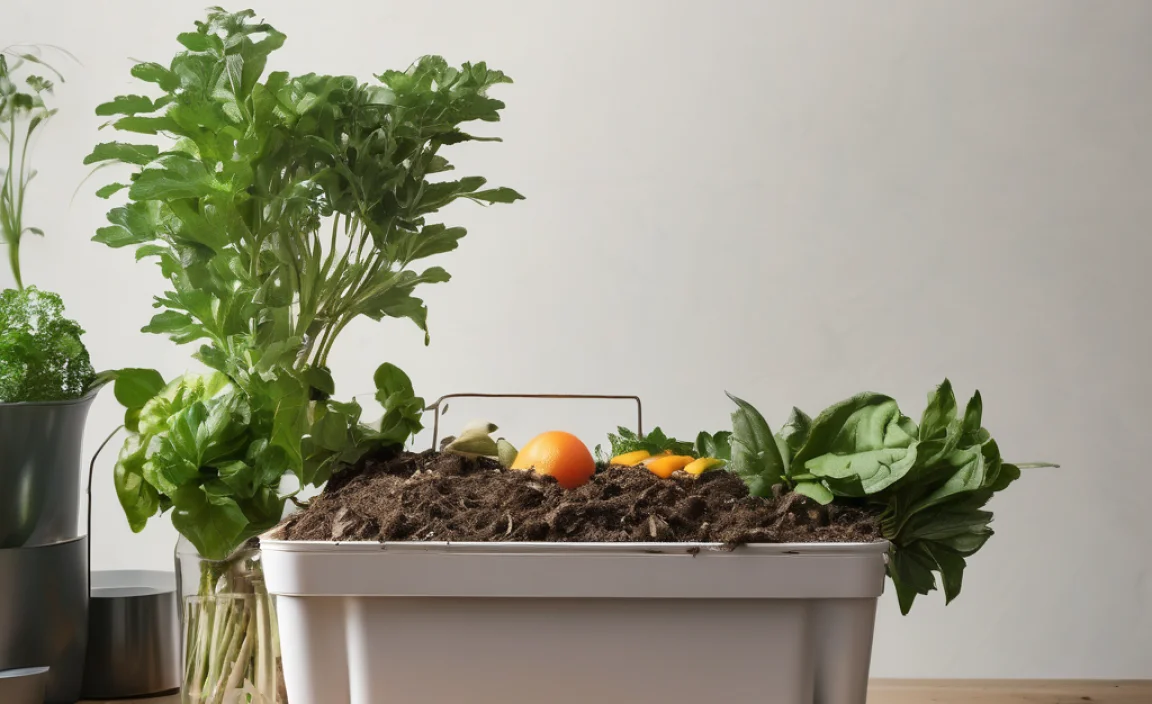
What Can You Compost?
Here’s a quick rundown of common compostable materials to help you sort your scraps:
Good to Compost:
- All fruit and vegetable scraps
- Coffee grounds and filters
- Tea bags
- Eggshells (crushed)
- Grass clippings (in thin layers to prevent matting)
- Leaves
- Straw and hay
- Shredded newspaper and plain cardboard
- Sawdust and wood chips (from untreated wood)
- Garden trimmings (non-diseased)
- Hair and fur
- Cotton and wool scraps
- Manure from herbivores (cow, horse, rabbit, chicken)
Avoid Composting:
- Meat, fish, and bones
- Dairy products
- Oily or greasy foods
- Diseased plants
- Weeds that have gone to seed
- Pet waste (from dogs and cats)
- Treated wood
- Coal or charcoal ash
- Glossy or coated paper/cardboard
- Synthetic materials
When in doubt, it’s often best to leave questionable items out to avoid potential problems.
When is Compost Ready?
You’ll know your compost is ready when it has transformed into a dark, crumbly, earthy-smelling material that resembles rich soil. You shouldn’t be able to identify the original materials anymore.
The time it takes varies greatly depending on the method (hot vs. cold composting), turning frequency, and the materials used. Hot composting can yield finished compost in as little as 1-3 months, while cold composting can take 6 months to over a year.
Tests for Readiness:
- Appearance: Dark brown, uniform texture, no recognizable original materials.
- Smell: Pleasant, earthy aroma, no sour or ammonia smells.
- Temperature: Cooled down to ambient temperature means the microbial activity has significantly slowed.
- “Shrinkage”: The finished compost will be significantly smaller than the original windrow.
Using Your Finished Compost
Once your compost is ready, you’ve got a fantastic, nutrient-rich amendment for your garden! Here are some ways to use it:
- Soil Amendment: Mix it into garden beds before planting to improve soil structure, water retention, and nutrient availability.
- Top Dressing: Spread a layer around existing plants, shrubs, and trees.
- Potting Mix: Combine it with other ingredients like perlite or coir to create a rich potting mix for containers.
- Compost Tea: Steep compost in water to create a nutrient-rich liquid fertilizer.
Using your own compost is incredibly rewarding, giving your plants a healthy boost while closing the loop on organic waste.
FAQs About Windrow Composting
What’s the biggest mistake beginners make with windrow composting?
Often, it’s not having enough brown materials relative to green materials. This leads to a wet, smelly, unproductive pile. Getting the “greens” and “browns” ratio right is key!
How big does my windrow need to be?
For effective composting, especially hot composting, aim for a minimum width and height of about 3 feet. For larger-scale operations, 4-5 feet wide and high is common. The length can vary based on your available material and space.
Do I really need to turn my compost pile?
Yes, turning is essential for good aeration, which speeds up decomposition and prevents odors. If you’re practicing “hot composting,” regular turning is a must to maintain high temperatures. Even for “cold composting,” occasional turning helps.
Can I compost all my kitchen scraps?
You can compost most kitchen scraps that are organic, like fruit and vegetable peels, coffee grounds,

I am passionate about home engineering. I specialize in designing, installing, and maintaining heating, ventilation, and air conditioning systems. My goal is to help people stay comfortable in their homes all year long.