Installing motion sensors for lighting is a smart and convenient way to enhance the safety and efficiency of your home or business. Motion sensors can automatically turn on lights when someone enters a room or passes by, saving energy and providing a hands-free option for illumination.
However, wiring a motion sensor to multiple lights may seem like a daunting task, especially for those who are not familiar with electrical work. Here, we will guide you on how to wire a motion sensor to multiple lights, ensuring a safe and effective installation.
Whether you want to upgrade your existing lighting system or add motion-activated lights to a new space, we will provide you with the necessary knowledge and skills to complete the project. So without further ado, let’s dive into the details.
Tools Needed
- A motion detector
- A 4-in-1 screwdriver
- A voltage tester
- Some wire connectors
- An electrical tape
- Some wire strippers or Pliers
- Hammer
- Jigsaw
- Safety glasses
- Some extension cords
Materials Needed:
- 14-2/ 14-3 cable
- Junction boxes
- A motion sensor
How To Wire A Motion Sensor To Multiple Lights – In 6 Effective Steps
Wiring a motion sensor to multiple lights can be a cost-effective and convenient way to enhance the security and functionality of your outdoor lighting. Motion sensor wire is a crucial component in the world of home security systems.
Designed to detect movement and trigger an alarm, motion sensors rely on a reliable and efficient wiring system to function properly. Here are six effective steps on how to wire a motion sensor to multiple lights. By following these steps, you can effectively wire a motion sensor to multiple lights, providing added security and convenience to your outdoor lighting setup.
Step 1 – Safety First
When wiring a motion sensor to multiple lights, it is important to prioritize safety. Before beginning any electrical project work, turn off the power to the circuit you will work on at the breaker box. This will help prevent any accidental shocks or injuries while handling the neutral wires.
Additionally, it is a good idea to use a voltage tester to double-check that the power is indeed turned off before proceeding with the installation. Taking these safety precautions will help ensure a smooth and accident-free installation process.
Step 2 – Installing Junction Box
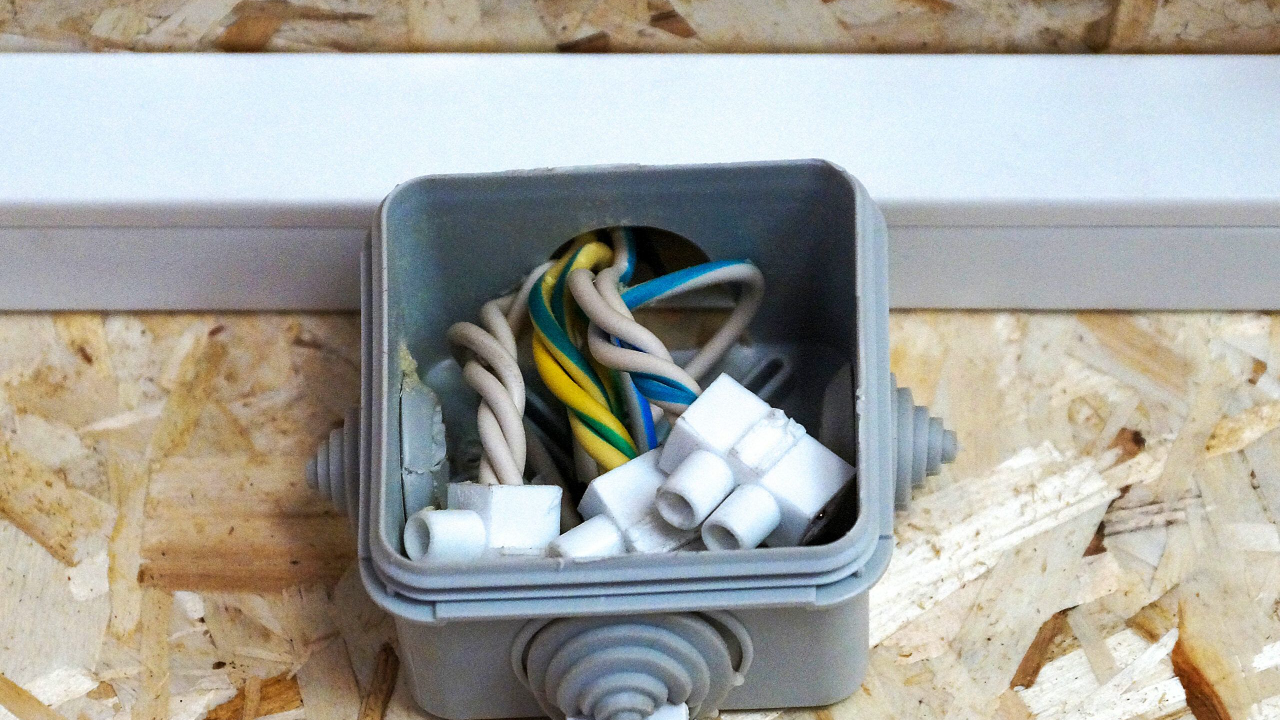
First, you have to cut holes in your wall for junction boxes. Motion sensors and light fixtures need electrical boxes set into the wall. You can install new junction boxes or rewire boxes at the existing fixtures. You have to place your motion sensor where it can see intruders or visitors clearly when they come near your home. The motion detector will work best if you place it above 6-10 ft of ground level.
To install junction boxes, hold them against the wall and trace the parameter with a pencil. Do not place those boxes directly on the framing. Now, on a stucco or brick, drill a bunch of knockout holes around it. With a chisel, break the middle of the stucco. Lastly, cut the sheathing with the help of a jigsaw.
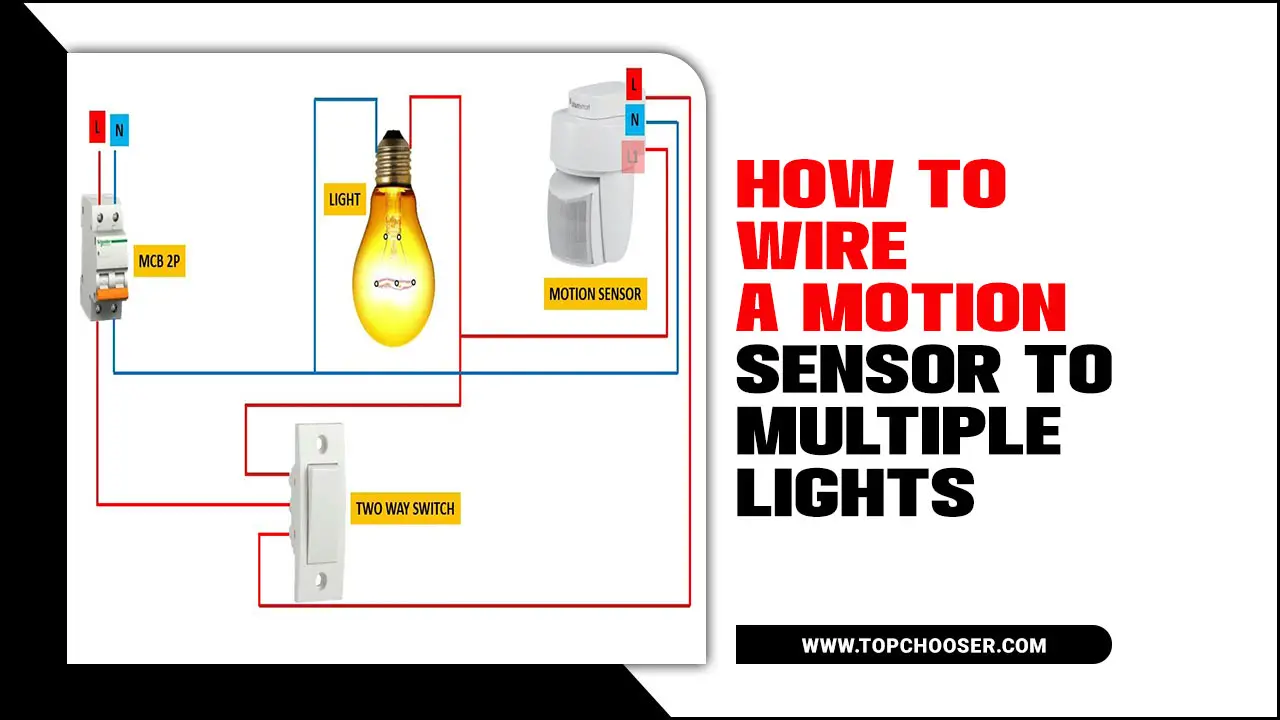
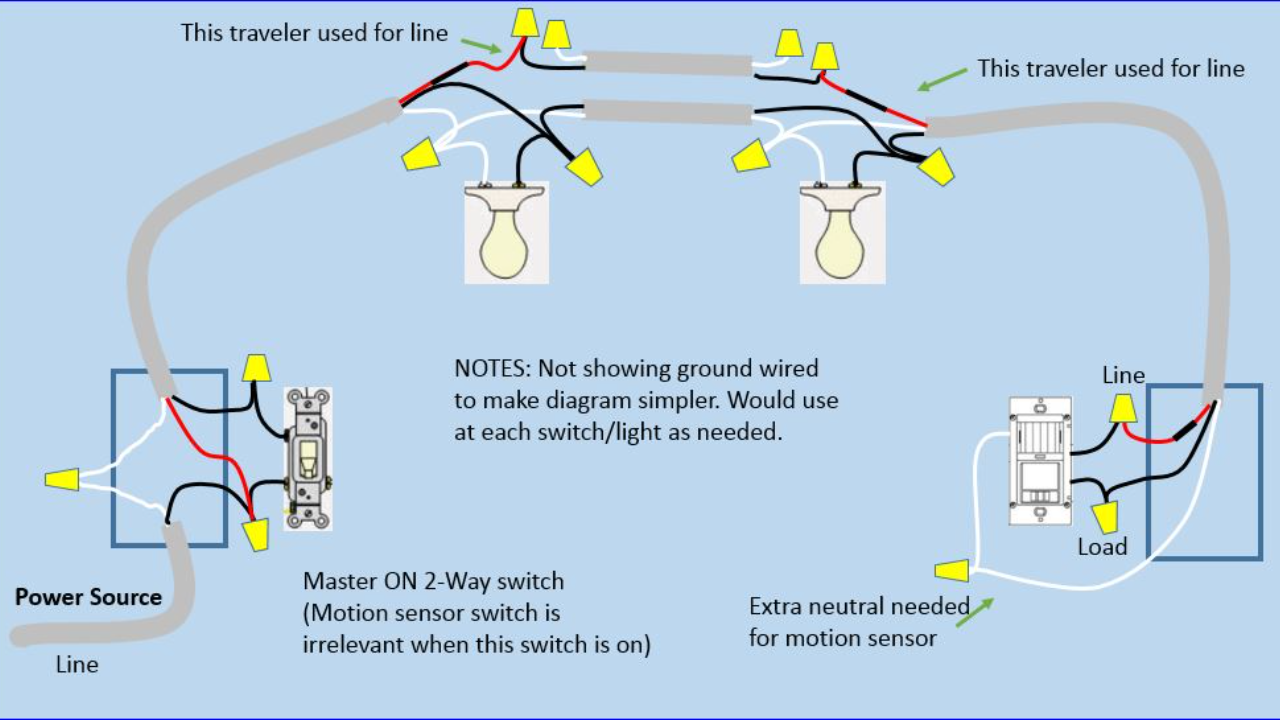
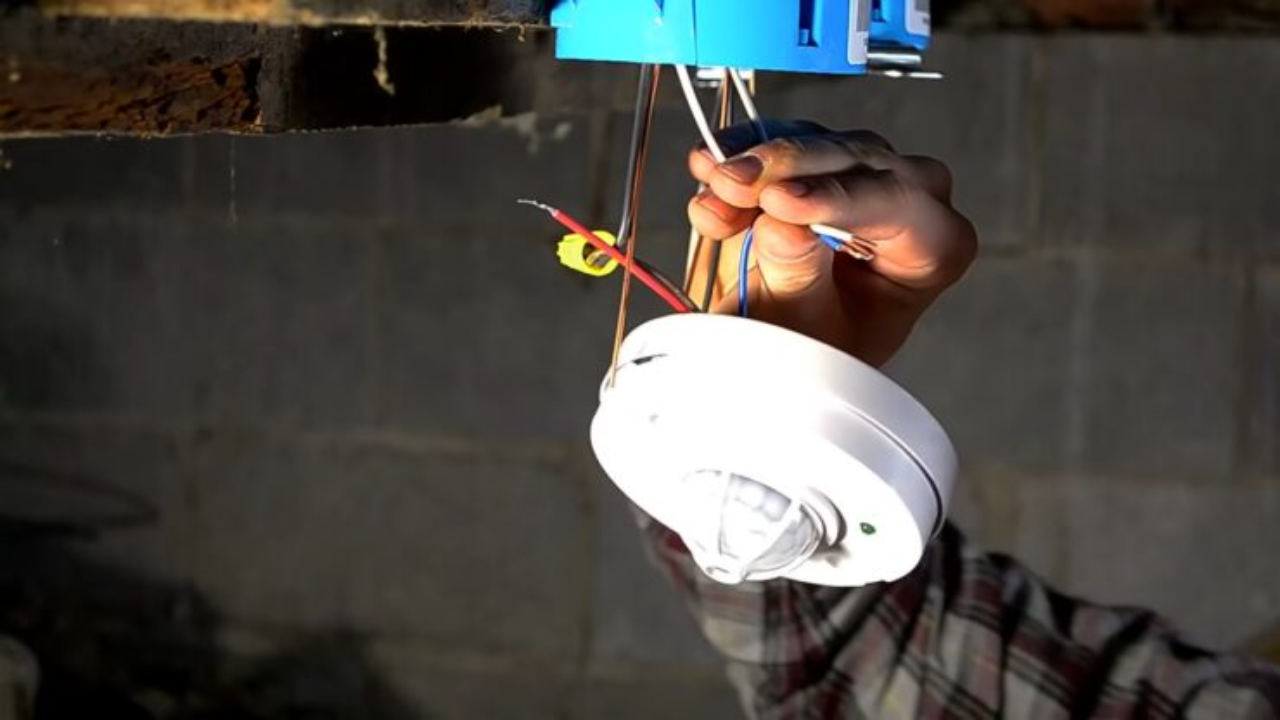
Step 3 – Wiring
Wiring multiple lights to a motion sensor can be tricky, but you’ll have it done quickly with the right instructions. In the process is wiring the lights to the motion sensor. Locate the wires coming from the motion sensor and the wires going to the lights.
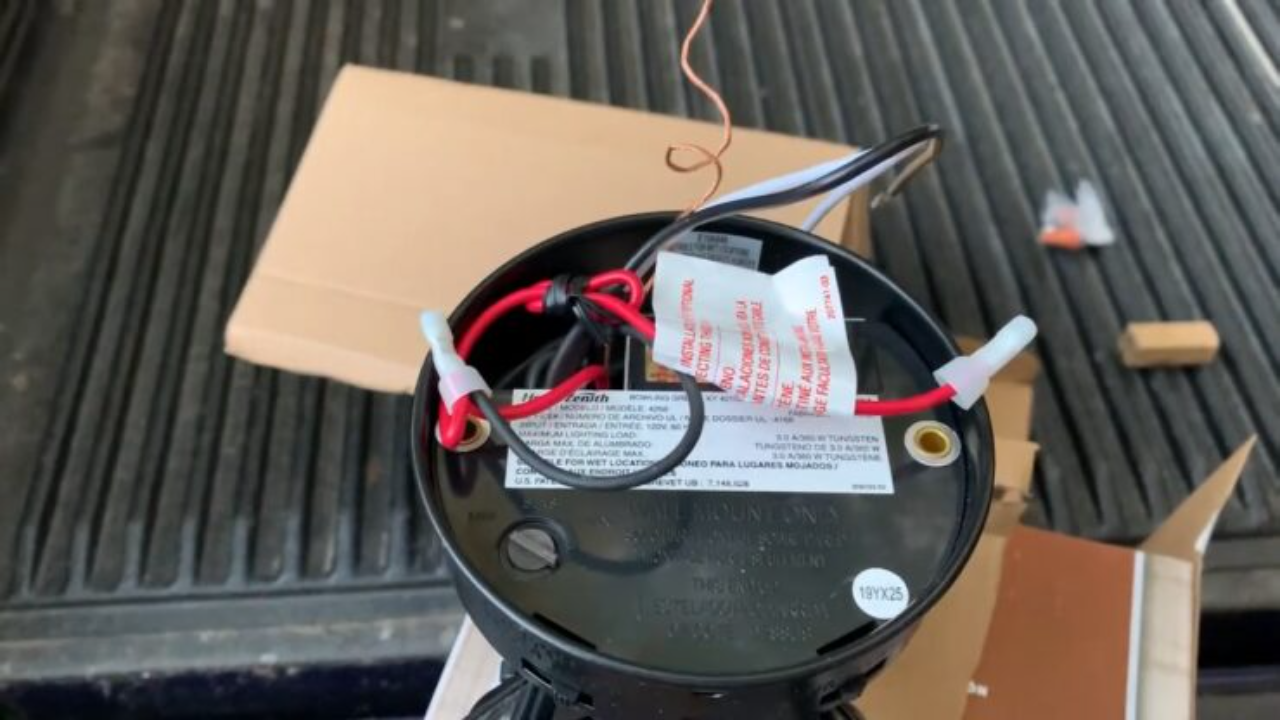
Strip about 1/2 inch of insulation from each wire. Connect the black wire from the motion sensor to the black wire going to the first light using a wire nut. Repeat this process for each light, connecting their respective black wires with a wire nut.
Connect all of the white wires in a similar fashion using a wire nut. Finally, connect all ground wires and secure them with a wire nut. Once all the connections are made, carefully tuck them into an electrical box and secure them closed.
Step 4 – Running Cables
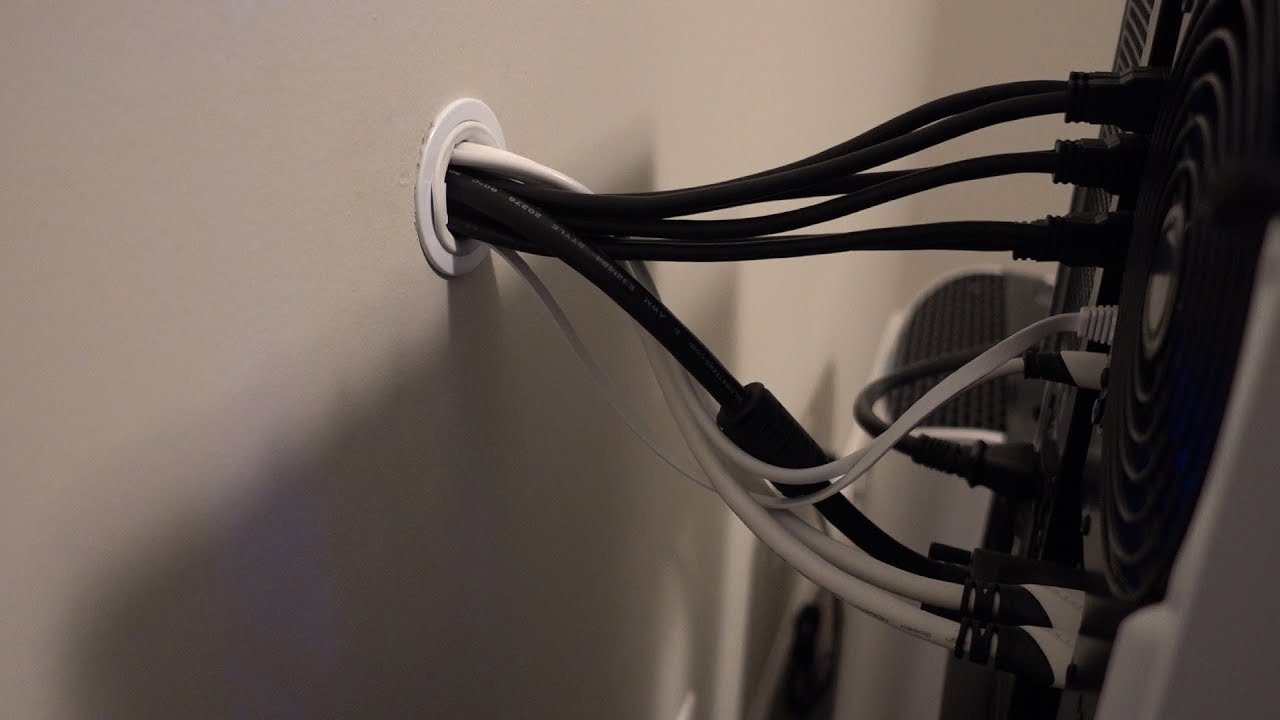
At first, you have to create a path for the cables. You have to drill 5-8-inch holes in the middle of the wall framing. After that, run them between your junction boxes. You can fasten them to the wall framing with some cable staples.
After choosing a wiring diagrams system, you must run the cables between junction boxes. You can power the sensor and lights with existing cables. Remember to buy cables with the same gauge amount as the existing cable. While planning for the paths of the cables, do not go for the shortest route. And avoid paths that will make you drill holes in heavy framing members.
The wires need to be high in the wall where they will be less dangerous. If you have completed creating paths for the cables, run them from one box to another. Then, fasten the cable to your wall framing with some plastic cable staples. Place a staple within 8 inches of each junction box, and do not keep them more than 4 ft 6 inches apart.
Step 5 – Prepare The Bulbs
Once you have wired the motion sensor to multiple lights, it’s time to prepare the bulbs. Before installing them, ensure they are compatible with the motion sensor and suitable for outdoor use if you’re setting up an outdoor lighting system.
Check the wattage of the bulbs to ensure they do not exceed the maximum load capacity of the motion sensor. Additionally, consider using energy-efficient LED bulbs, as they can help save electricity and last longer than traditional incandescent bulbs. Finally, double-check that all bulbs are in working condition before proceeding with the installation process, as this will save you time and effort later on.
Costs Of Wiring Motion Sensors To Multiple Lights
Wiring motion sensors to multiple lights can be a cost-effective way to enhance the security and convenience of your home. The estimated cost for this project typically ranges from $50 to $100, depending on factors such as the number of lights you want to connect and the specific equipment you choose.
It’s important to note that this estimate only includes the materials needed for wiring the motion sensors. It does not account for any additional costs, such as hiring an electrician for professional installation. However, with some basic electrical knowledge and DIY skills, you may be able to save on labor costs by tackling the project yourself.
How To Choosing The Right Motion Sensor And Lights For Your Setup
When wiring a motion sensor to multiple lights, it is important to choose the right motion sensor and lights for your setup. The type of motion sensor you select will depend on the specific needs of your space, such as the size of the area you want to cover and whether you prefer a wired or wireless system.
Additionally, when selecting lights, consider factors such as brightness, energy efficiency, and durability. LED lights are a popular choice for motion sensor setups due to their long lifespan and low energy consumption.
It is also important to ensure that the motion sensor and lights are compatible with each other in terms of voltage requirements and wiring green wire connections. Taking the time to choose the right components for your setup carefully will help ensure a reliable and effective motion-activated lighting system.
Potential Problems From Wiring A Motion Sensor To Multiple Lights
Wiring a motion sensor to multiple lights can be a convenient way to enhance the security and functionality of your outdoor lighting system. However, there are some potential problems that you may encounter when undertaking this project. Here are four common issues to be aware of:
- Diminished Brightness: When multiple lights are connected to a single motion sensor, the overall brightness of each light may be reduced. This is because the electrical current is divided among all the connected light bulbs, resulting in a lower light intensity.
- Inconsistent Activation: Depending on the placement and sensitivity of the motion sensor, some lights can activate while others remain off. This can create dark spots in your outdoor area and compromise the effectiveness of your security lighting.
- False Triggers: Wiring multiple lights to a single motion sensor can increase the likelihood of false triggers. Factors such as nearby trees or animals can cause the sensor to activate unnecessarily, leading to frequent and unnecessary illumination.
- Complicated Wiring: Connecting multiple lights to a motion sensor requires careful planning and wiring expertise. Ensuring that the electrical connections are properly made and all components are compatible is important.
By being aware of these potential problems, you can take appropriate measures to address them and ensure your motion sensor lighting system functions optimally. Consider consulting with a professional electrician for guidance and assistance with installation to avoid these issues altogether.
How Many Led Lights Can You Wire Together?
When wiring a motion sensor to multiple lights. It is important to consider the number of LED lights that can be wired together. The maximum number of LED lights that can be wired together will depend on several factors, including the wattage of the LED lights and the capacity of the motion sensor.
It is recommended to consult the manufacturer’s specifications for both the LED lights and the motion sensor to determine the maximum load that can be supported. Additionally, it may be necessary to install a relay or additional wiring components to ensure proper functionality and prevent overload.
Types Of Motion Sensors

Motion sensors are an essential component of many security systems and automation technologies. Several types of motion sensors are available, each with unique features and benefits. Passive infrared (PIR) sensors are one of the most common types and detect changes in infrared energy, such as body heat. Microwave sensors emit microwave pulses and measure the reflections to detect movement.
- Passive Infrared (PIR) motion sensors
- Microwave motion sensors
- Ultrasonic motion sensors
- Dual technology motion sensors
- Area reflective sensors
- Active infrared (AIR) motion sensors
Understanding the different types of motion sensors can help you choose the right one for your specific needs and ensure optimal performance for your security system or automation setup.
Final Words
Knowing how to wire a motion sensor to multiple lights will help you along the way so that you do not mess up the whole process and add security to your loving home. As crimes are increasing daily, a motion detector is a great way to increase the security of you and your loved ones.
You can install motion sensors in your home as well as outside of your home. They will not only alert you when someone is within the range of the sensor. But when there is no activity, they stay off.
That improves your security while preventing lights from remaining on all night and draining your electricity bill. If you do not know about electrical work, you might want to leave this job to the professionals. But if you are confident enough in your electrical skills, you can do it in your home within a day.
FAQs
Can 2 Motion Sensor Lights Be On The Same Switch?
Yes, 2 motion sensor lights can be connected to the same switch. This can be done by wiring both outdoor motion sensor lights in parallel to the switch.
How Many Wires Does A Motion Sensor Need?
A motion sensor typically needs two wires – one for power supply (usually 120V AC) and one for signal transmission (usually low voltage). The power wire provides electrical energy to the sensor, while the signal wire carries the sensor’s output to a control panel or device.
Can You Link 2 PIR Lights Together?
Yes, it is possible to link two PIR lights together. This can be done by connecting the output of one PIR sensor to the input of the other, creating a chain of sensors that will activate both lights simultaneously when motion is detected.
Can Two Light Switches Control One Light?
Yes, two light switches can control one light by using a wiring setup called a “three-way switch.” This allows the light to be turned on or off from either switch. One switch is connected to the power source, while the other switch is connected to the light.
Can You Wire A Motion Sensor To An Existing Light?
Yes, it is possible to wire a motion sensor to an existing light. This can be done by replacing the existing light switch with a motion sensor switch or by wiring the motion sensor in parallel with the existing light switch.

I am passionate about home engineering. I specialize in designing, installing, and maintaining heating, ventilation, and air conditioning systems. My goal is to help people stay comfortable in their homes all year long.