Ever look at your food scraps and think, “There must be a better way than the landfill?” You’re right! Worm composting, or vermicomposting, is the awesome answer. It turns kitchen waste into amazing fertilizer for your plants. Don’t worry if it sounds a bit tricky; we’ll walk through it together, step-by-step. Get ready to create “black gold” for your garden!
Worm Composting Course: Your Path to Genius Soil Solutions
Hey there, gardening enthusiasts and eco-conscious homebodies! Troy D Harn here, your friendly guide from TopChooser. Today, we’re diving into something super cool and incredibly beneficial for your plants and the planet: worm composting. If you’ve got food scraps piling up and a desire for richer, healthier soil, this is for you. We’re going to break down the “worm composting course” you never knew you needed, making it simple, straightforward, and surprisingly easy.
Think of your kitchen waste not as trash, but as treasure waiting to be transformed. Worm composting is a brilliant way to do just that. It’s a natural process that uses specific types of worms to break down organic materials, creating a nutrient-rich substance called worm castings. These castings are pure gold for your garden, improving soil structure, boosting plant growth, and even helping to suppress diseases. Forget expensive fertilizers; you can make your own right at home!
This isn’t some complicated science experiment. We’re talking about a practical, hands-on approach that anyone can master. Whether you have a sprawling garden or just a few potted plants on a balcony, worm composting offers genius soil solutions. Let’s get started on this journey to a more sustainable and fertile future for your green spaces.
What is Worm Composting (Vermicomposting)?
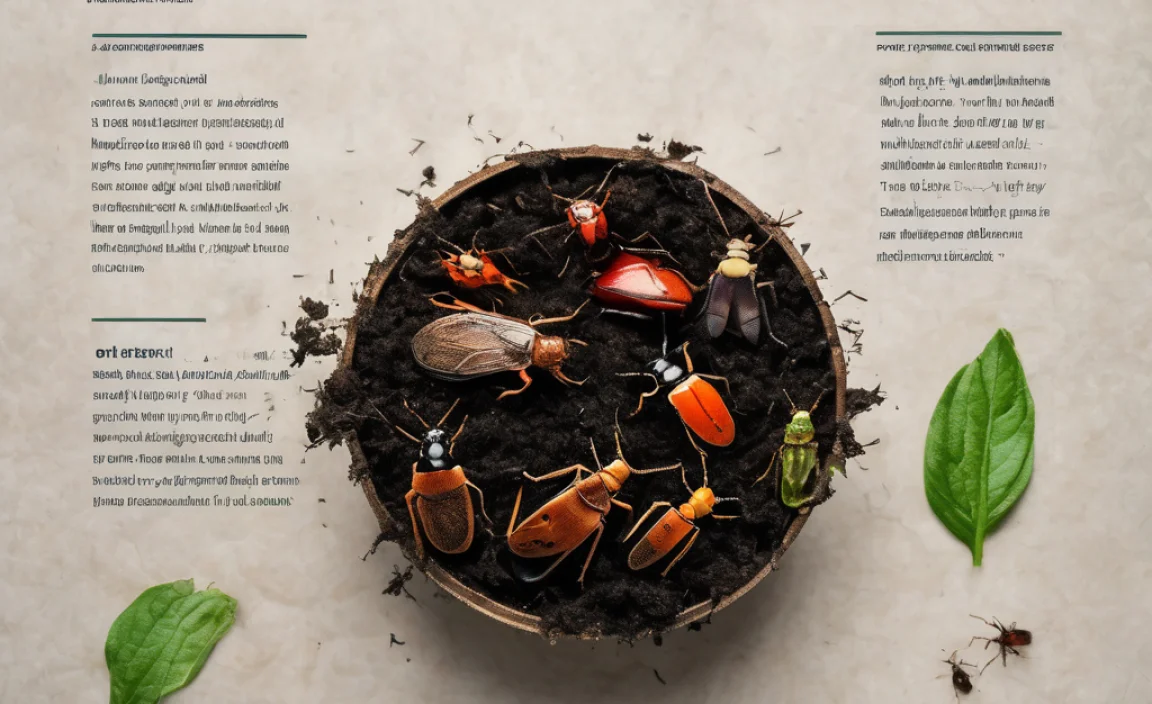
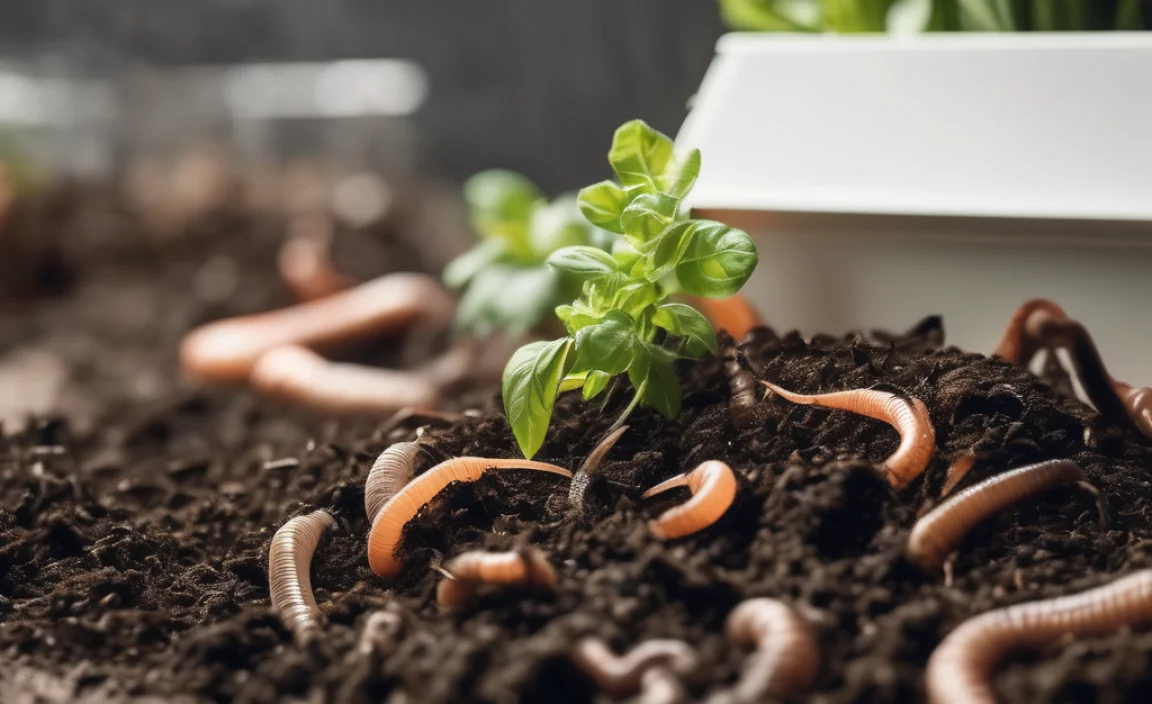
At its heart, worm composting is a way to speed up the natural decomposition process using earthworms. Unlike traditional composting, which often involves a large pile of organic material that breaks down thanks to bacteria and fungi, vermicomposting specifically relies on the tireless work of certain worm species. These aren’t your garden-variety earthworms, though. We’re talking about special compost worms, with red wigglers (Eisenia fetida) being the most popular choice. These little critters munch their way through food scraps and bedding materials, leaving behind nutrient-rich castings.
This method is fantastic because it can be done in a relatively small space, making it perfect for urban dwellers, apartment residents, or anyone with limited outdoor room. It’s also a much faster process than traditional composting, and the end product is incredibly potent and beneficial for plant life.
Why Choose Worm Composting? The Genius Benefits
So, why should you consider embarking on a “worm composting course”? The benefits are pretty compelling, offering smart solutions for your home and garden:
- Revolutionary Soil Enrichment: Worm castings are packed with essential nutrients that plants love. They act as a slow-release fertilizer, feeding your plants over time.
- Improved Soil Structure: Adding worm castings to your soil helps to aerate it, improve drainage, and increase its water-holding capacity. This means healthier roots and stronger plants.
- Reduced Waste: You’ll be diverting a significant amount of organic waste from landfills, which is great for the environment. Less trash means a happier planet!
- Cost Savings: Say goodbye to expensive store-bought fertilizers and soil amendments. Your worm bin will provide you with a continuous supply of high-quality compost for free.
- Faster Composting: Compared to traditional methods, vermicomposting can produce usable compost in a matter of months, not years.
- Odor-Free Operation (When Done Right): Contrary to what some might think, a well-maintained worm bin doesn’t smell bad. In fact, it often smells earthy and pleasant.
- Wonderful Educational Opportunity: It’s a fascinating way to learn about decomposition and the natural cycle of life, especially for kids (and adults!).
Getting Started: Your Worm Composting Starter Kit
Embarking on your worm composting journey is easier than you think. You don’t need fancy gadgets or a huge backyard. Here’s a breakdown of what you’ll need, keeping it simple and budget-friendly:
1. The Worm Bin: Your Worms’ Happy Home
This is where your composting crew will live. You have a few options:
- DIY Bin: This is the most budget-friendly route. You can use plastic storage totes (around 10-20 gallons are ideal), opaque ones are best as worms prefer darkness. You’ll need to drill some holes for ventilation and drainage. Aim for a few holes on the sides near the top and bottom, and some on the lid. You can find plenty of helpful guides by searching for “DIY worm bin instructions” from reputable sources like university extension offices (e.g., University of Maryland Extension).
- Commercial Worm Bin: These are pre-made systems that are often stackable and designed for optimal airflow and drainage. They can be a bit more expensive but offer convenience.
- Other Options: Even a simple plastic laundry basket can work if you add drainage and a tray to catch leaway! The key is containment, airflow, and drainage.
2. The Bedding: Comfy Digs for Your Worms
Worms need a cozy place to live, and that’s what bedding provides. It also helps absorb moisture and provides a food source. Great bedding materials include:
- Shredded newspaper or cardboard (avoid glossy paper)
- Coconut coir (often sold as “coir bricks”)
- Shredded burlap or jute
- Some dried leaves
Pro Tip: Always shred your materials. The finer the shred, the better they absorb moisture and break down. Aim for a fluffy, damp consistency – like a wrung-out sponge. A good starting mix is about 50% shredded newspaper and 50% coconut coir.
3. The Worm Food: What Worms Love to Eat
These guys are gourmet eaters! They thrive on a diet of organic waste. Here’s what to feed your wormy friends:
- Fruit and vegetable scraps (peels, cores, rinds – chop larger items into smaller pieces)
- Coffee grounds and tea bags (remove staples, string)
- Crushed eggshells (helps with grit for digestion and neutralizes acidity)
- Bread and pasta (in moderation; avoid greasy or cheesy versions)
- Old or spoiled fruits and vegetables
What to Avoid:
Some things can harm your worms or make your bin smell. Steer clear of:
- Meat, fish, and dairy products (attract pests and smell)
- Oily or greasy foods
- Spicy foods
- Citrus peels (in large quantities; a little is usually okay)
- Anything chemically treated or processed
Tip: Bury food scraps under the bedding to prevent fruit flies and odors. Rotate where you bury the food in the bin.
4. The Worms: Your Underrated Workforce
You can’t compost without worms! As mentioned, red wigglers (Eisenia fetida) are the stars of the show. You can typically buy them online from reputable worm farms or sometimes from local gardening stores. Start with about a pound (approx. 1000 worms) for a standard 10-20 gallon bin. They’ll multiply as your bin matures.
Setting Up Your Worm Bin: Step-by-Step
Ready to build your worm’s home? It’s straightforward and rewarding! Follow these steps:
- Prepare Your Bin: If you’re DIYing, drill those ventilation and drainage holes. If you bought a commercial bin, assemble it according to the instructions.
- Add Bedding: Moisten your chosen bedding materials until they feel like a damp sponge. It shouldn’t be dripping wet. Fill your bin about halfway to two-thirds full with this moist bedding. Fluff it up to allow for airflow.
- Introduce the Worms: Gently add your red wigglers to the top of the bedding. You can place them in a small pile in the center. They will naturally burrow down into the bedding to escape the light.
- Feed Them (Lightly at First): Add a small amount of your prepared food scraps to the bin. You can either bury it under a layer of bedding or place it on top.
- Add a Top Layer: Cover the food scraps with more moist bedding to help with moisture retention and odor control.
- Moisture Check: The bedding should remain consistently damp. If it seems dry, lightly mist it with water. If it’s too wet, add more dry bedding material.
- Ventilation: Ensure the lid is on, but not airtight, to allow for airflow. If your bin doesn’t have a lid, you can use a piece of cardboard or burlap.
- Placement: Find a good spot for your worm bin. It should be out of direct sunlight and protected from extreme temperatures (both hot and cold). A basement, garage, or shaded area under a deck often works well. Ideal temperatures for red wigglers are between 55-77°F (13-25°C).
Feeding Your Worms: What and How Much?
This is where the magic happens. Your worms will convert your food scraps into valuable compost. But how much should you feed them?
A good rule of thumb is to feed your worms about half their weight in food scraps per day, once they are established and actively composting. For a pound of worms, this would be about half a pound of food scraps daily. However, it’s best to start slow and monitor their consumption.
Beginner Feeding Strategy:
- Week 1: Feed sparingly. Give them a small handful of scraps buried in one corner.
- Week 2: If the first feeding is mostly gone, add another small amount, perhaps in a different area.
- Ongoing: Gradually increase the amount of food as the worms multiply and their population grows. You’ll learn to read their cues. If food is disappearing quickly, you can feed more. If food is sitting there and getting mushy, you’re feeding too much.
Important Considerations for Feeding:
- Chop It Up: Smaller pieces of food break down faster.
- Balance Their Diet: Offer a variety of fruits, vegetables, coffee grounds, and eggshells.
- Avoid Overfeeding: This is one of the most common beginner mistakes and can lead to a wet, smelly bin and attracting pests.
- Check Moisture Levels: Add food only when the bin is not already too wet.
Harvesting Your Worm Castings: The Black Gold!
After a few months, you’ll start seeing a beautiful, dark, crumbly material building up at the bottom of your bin. This is your worm castings – nature’s finest soil conditioner! Here are a few common methods for harvesting:
| Harvesting Method | How it Works | Best For |
|---|---|---|
| The Migration Method (or Light Method) | When you want to harvest, stop adding new food. Spread the contents of your bin onto a tarp or plastic sheet in a bright light. The worms will migrate away from the light and collect at the bottom edges. You can then carefully scrape off the top layers of castings. Repeat this process until you’ve collected most of the castings and the worms are concentrated in one area. | Beginners, or when you can spread the contents out. |
| The “Push to One Side” Method | Simply stop feeding one side of the bin for a week or two. All the new food will be added to the other side. Once most of the material on the unused side has been processed and the worms have moved to where the food is, you can remove the castings from the “empty” side. | Bins with distinct sections or when you don’t want to disturb the whole bin. |
| Sifting | You can use a screen (like a window screen or a specialized compost sieve) to sift the castings. This separates the fine castings from any uncomposted material or larger worms. You’ll need to return the larger material and worms to the bin. | Getting very fine castings, or for larger-scale operations. |
Once harvested, your worm castings are ready to use! You can mix them directly into your potting soil or garden beds, sprinkle them around the base of plants, or even make a worm tea (a liquid fertilizer) by steeping the castings in water.
Troubleshooting Common Worm Composting Issues
Even with the best intentions, you might run into a few hiccups. Don’t get discouraged! Most problems are easily fixed:
Problem: The Bin Smells Bad (Rotten or Ammonia Smell)
Cause: Usually overfeeding, too much moisture, or not enough airflow. You might be adding too much food, or the food isn’t breaking down properly because it’s too wet.
Solution:
- Stop feeding for a week or two.
- Add more dry bedding material (shredded newspaper or cardboard) to absorb excess moisture and balance the carbon-to-nitrogen ratio.
- Ensure good airflow (more holes or a looser lid).
- Bury food scraps instead of leaving them on top.
- For ammonia smells, it’s often a nitrogen imbalance. Add more carbon-rich bedding like shredded cardboard.
Problem: Fruit Flies or Other Pests
Cause: Exposed food scraps are an open invitation to pests.
Solution:
- Always bury food scraps completely under the bedding.
- Avoid feeding overly sweet or mushy food scraps.
- A layer of shredded newspaper or cardboard on top can help.
- If you have a severe infestation, you can try placing a shallow dish of apple cider vinegar near the bin; the flies will be attracted to it and drown.
Problem: Worms Trying to Escape
Cause: The bin conditions are unfavorable. This could be too wet, too dry, too acidic, too hot, too cold, or there’s an ammonia buildup from food not being eaten.
Solution:
- Check moisture levels and adjust accordingly.
- Ensure the bin is at a suitable temperature.
- Check for overfeeding or lack of airflow.
- Add crushed eggshells to help buffer acidity.
- Make sure your bedding provides enough carbon.
Problem: The Bin is Too Wet
Cause: Added too much water, or food scraps are releasing a lot of liquid. The bin lacks proper drainage or airflow.
Solution:
- Add plenty of dry shredded newspaper, cardboard, or coconut coir to absorb the excess moisture.
- Check that your drainage holes are not blocked.
- Increase ventilation by ensuring there are enough holes, especially near the bottom.
- If using a solid bin with a tray, empty the tray of leachate regularly.
Using Your Worm Castings: Supercharging Your Plants
Congratulations, you’ve made “black gold”! Now, how do you use these amazing worm castings to benefit your plants?
- Potting Mix Amendment: Mix about 10-25% worm castings into your regular potting soil. This significantly boosts nutrient content and beneficial microbes.
- Top Dressing: Scatter about a quarter to half an inch of castings around the base of established plants (both indoor and outdoor). Gently scratch it into the top layer of soil.
- Seed Starting: For seed-starting mixes, use about 25% worm castings. It provides nutrients for seedlings as they begin to grow.
- Compost Tea: This is like a vitamin drink for your plants. You can make it by soaking castings in unchlorinated water for 24 hours, ideally with an aquarium air pump to aerate it. Dilute the tea until it’s the color of weak tea and use it to water your plants or as a foliar spray. For more detailed instructions on worm tea, resources from the EPA on composting often mention home-based methods.
- Lawn Care: Aerate your lawn and then spread a thin layer (about ¼ inch) of worm castings. Water it in. It’s a fantastic way to green up your lawn naturally.
The beauty of worm castings is their
.lwrp.link-whisper-related-posts{
margin-top: 40px;
margin-bottom: 30px;
}
.lwrp .lwrp-title{
}.lwrp .lwrp-description{
}
.lwrp .lwrp-list-container{
}
.lwrp .lwrp-list-multi-container{
display: flex;
}
.lwrp .lwrp-list-double{
width: 48%;
}
.lwrp .lwrp-list-triple{
width: 32%;
}
.lwrp .lwrp-list-row-container{
display: flex;
justify-content: space-between;
}
.lwrp .lwrp-list-row-container .lwrp-list-item{
width: calc(25% – 20px);
}
.lwrp .lwrp-list-item:not(.lwrp-no-posts-message-item){
max-width: 150px;
}
.lwrp .lwrp-list-item img{
max-width: 100%;
height: auto;
object-fit: cover;
aspect-ratio: 1 / 1;
}
.lwrp .lwrp-list-item.lwrp-empty-list-item{
background: initial !important;
}
.lwrp .lwrp-list-item .lwrp-list-link .lwrp-list-link-title-text,
.lwrp .lwrp-list-item .lwrp-list-no-posts-message{
}@media screen and (max-width: 480px) {
.lwrp.link-whisper-related-posts{
}
.lwrp .lwrp-title{
}.lwrp .lwrp-description{
}
.lwrp .lwrp-list-multi-container{
flex-direction: column;
}
.lwrp .lwrp-list-multi-container ul.lwrp-list{
margin-top: 0px;
margin-bottom: 0px;
padding-top: 0px;
padding-bottom: 0px;
}
.lwrp .lwrp-list-double,
.lwrp .lwrp-list-triple{
width: 100%;
}
.lwrp .lwrp-list-row-container{
justify-content: initial;
flex-direction: column;
}
.lwrp .lwrp-list-row-container .lwrp-list-item{
width: 100%;
}
.lwrp .lwrp-list-item:not(.lwrp-no-posts-message-item){
max-width: initial;
}
.lwrp .lwrp-list-item .lwrp-list-link .lwrp-list-link-title-text,
.lwrp .lwrp-list-item .lwrp-list-no-posts-message{
};
}

I am passionate about home engineering. I specialize in designing, installing, and maintaining heating, ventilation, and air conditioning systems. My goal is to help people stay comfortable in their homes all year long.