Ever feel like your kitchen scraps are just… going to waste? It’s a bummer, right? Especially when you love your garden. But what if I told you there’s a super simple, eco-friendly way to turn that trash into garden treasure? It’s called worm composting, or vermicomposting. And trust me, it’s a lot easier than you might think. We’ll walk through it together, step-by-step, so you can start making your own amazing fertilizer in no time.
Worm Composting Process: Genius Eco Solutions for a Greener Garden
Hey there, neighbor! Troy D Harn here, your go-to guy for making home and garden projects totally doable. Forget complicated setups and stinky piles. We’re diving into worm composting today, the smart, clean, and surprisingly easy way to create nutrient-rich compost right in your home or backyard. Think of it as a tiny, industrious crew of worms working for you, transforming your food scraps into black gold for your plants. If you’ve ever felt a pang of guilt tossing those veggie peels or wondered how to give your garden soil a serious boost without harsh chemicals, you’re in the right place. This guide is all about demystifying the worm composting process. We’ll break down exactly what you need, how to get it all set up, and how to keep your wiggly workers happy and productive. Ready to turn waste into wonder? Let’s get started!
What is Worm Composting (Vermicomposting)?
So, what exactly is worm composting? Simply put, it’s a method of decomposition using specific types of earthworms to break down organic matter. Unlike traditional composting in a big pile, vermicomposting uses worms to chew through food scraps and other organic materials, speeding up the process and producing an incredibly fertile end product called “worm castings” or “vermicast.” These castings are packed with nutrients and beneficial microbes that are fantastic for your plants. It’s a natural, sustainable way to manage waste and enrich your soil, all without the need for a large outdoor space or the intense heat required for hot composting.
Think of it as a partnership: you provide the food (your scraps), and the worms provide the incredible fertilizer. It’s a genius eco-solution because it diverts organic waste from landfills, reduces the need for synthetic fertilizers, and creates a rich soil amendment that dramatically improves plant health and growth. Plus, it’s a fantastic way to teach kids (or yourself!) about the cycles of nature.
Why Choose Worm Composting? The Benefits Are Blooming!
Why should you consider getting into worm composting? The advantages are pretty compelling, whether you’ve got a sprawling garden or a few potted plants on a balcony. Let’s dig into why it’s such a smart choice:
- Amazing Fertilizer: Worm castings are like a superfood for your plants. They are rich in essential nutrients, improve soil structure, enhance water retention, and introduce beneficial microbes that help plants fight off diseases.
- Waste Reduction: A significant portion of household waste is organic matter that can be composted. Worm composting diverts this from landfills, reducing methane gas emissions and saving you money on trash disposal.
- Suitable for Small Spaces: You don’t need acres of land! A worm bin can easily fit under your sink, in a closet, on a balcony, or in a corner of your garage.
- Faster Results (Compared to Some Methods): While not as rapid as hot composting, worm composting is generally quicker than cold composting, and the quality of the output is exceptional.
- Odor-Free (When Done Right): A properly managed worm bin shouldn’t smell bad. In fact, it often smells earthy and fresh, like a forest floor.
- Educational & Rewarding: It’s a hands-on way to connect with nature, understand decomposition, and produce something valuable from what you would otherwise throw away.
Getting Started: Your Worm Composting 101
Ready to get your hands dirty (but not too dirty)? Setting up a worm bin is straightforward. The key is to create a hospitable environment for your composting worms. Here’s what you’ll need:
Essential Gear for Your Worm Farm
You don’t need a lot of fancy equipment. The most important thing is a container, or “bin,” to house your worms and their food. You can buy a specialized worm bin, or make your own. Here are the basics:
- The Bin: This can be a plastic storage tote (opaque is best, as worms prefer darkness), a wooden bin, or a commercially made worm farm. It needs to be at least 8-12 inches deep. If you’re making your own from a plastic tote, get one that’s about 10-15 gallons.
- Drainage and Aeration Holes: This is crucial! Worms need air, and they don’t like soggy feet. Drill several small holes (about 1/4 inch) in the bottom of the bin for drainage and a few more along the top and sides for ventilation.
- Bedding Material: This is what your worms will live in and eat initially. Good options include shredded newspaper (black and white ink only, no glossy pages), shredded cardboard, coconut coir (often sold for reptile bedding), or aged leaves. You want something fluffy and absorbent.
- Composting Worms: This is super important! You can’t just grab any earthworm from your garden. You need specific types of worms that are adapted to living in compost and eating decaying organic matter. The most common and recommended are Red Wigglers (Eisenia fetida) and European Nightcrawlers (Eisenia hortensis). You can buy them online from reputable worm farms or sometimes from local gardening stores. A pound of worms is a good starting point for a typical bin.
- Food Scraps: Your worms’ buffet! This includes fruit and vegetable scraps, coffee grounds and filters, tea bags (staples removed), crushed eggshells, and even small amounts of bread or pasta (though go easy on these, as they can attract pests if not managed well).
- A Scraper or Trowel: For digging and burying food scraps.
Step-by-Step: Setting Up Your Worm Bin
Let’s get this little ecosystem rolling!
- Prepare the Bin: If you’re using a plastic tote, drill those drainage and ventilation holes as mentioned above. Make sure the bin can sit in a tray or has a lid to prevent escapees.
- Add Bedding: Moisten your chosen bedding material. It should be damp like a wrung-out sponge – not dripping wet, but not dry either. Fill the bin about half to two-thirds full with the moistened bedding. Fluff it up so there are plenty of air pockets.
- Introduce the Worms: Gently place your composting worms on top of the bedding. They will automatically burrow down to escape the light.
- Feed Them (Lightly at First): You can add a small amount of food scraps on the first day, burying it under the bedding in one corner. This gives them something to munch on as they settle in.
- Put on the Lid: Place the lid on the bin. If it’s a solid lid, ensure enough ventilation holes are present.
- Find a Location: Worm bins like a stable temperature, ideally between 55-77°F (13-25°C). They don’t like extreme heat or cold. A basement, garage, or shaded outdoor spot (depending on your climate) works well.
The Worm Composting Process: What Happens Inside
Once your bin is set up and your worms have moved in, the magic begins. The worm composting process is fascinatingly simple:
Feeding Your Worms: The Do’s and Don’ts
Worms are not picky eaters, but there are definitely some food preferences and things to avoid to keep your bin healthy and pest-free.
What Worms LOVE:
- Fruit and vegetable scraps (peels, cores, rinds, leafy greens)
- Coffee grounds and paper filters
- Tea bags (remove staples and plastic tags)
- Crushed eggshells (provide grit and calcium)
- Bread and pasta (in moderation – break into small pieces)
- Cooked grains (plain, no salt or oil)
- Corn cobs (break into small pieces)
- Small amounts of yard waste like grass clippings (dried first is better)
What to AVOID (or use sparingly):
- Meat, dairy, and oily foods: These can attract pests, go rancid, and create foul odors.
- Citrus and onions in large quantities: While they can eat them, too much can make the bin too acidic for the worms.
- Spicy foods: Worms don’t like the heat!
- Salt and processed foods: These are generally bad for worms.
- Diseased plants: Avoid adding anything that might have plant diseases.
- Pet waste: Unless specifically tested and recommended for composting, avoid dog and cat feces due to potential pathogens.
- Glossy paper or colored inks: These can contain toxins.
Tip: Chop or blend larger scraps into smaller pieces. This gives the worms more surface area to eat and speeds up decomposition.
How to Feed Your Worms
When you add food scraps, bury them in a different spot in the bin each time. This encourages the worms to move around and prevents large amounts of food from becoming anaerobic (stinky and rotten) before they can eat it. Start by feeding your worms a small amount every few days, and as they multiply and consume more, you can increase the feeding frequency and quantity.
A good rule of thumb is to feed your worms about half their weight in food scraps per day once they are established. For a pound of worms, this might mean about half a pound of food scraps daily. But it’s better to underfeed than overfeed, especially when you’re starting out.
Monitoring Your Worm Bin: Keeping Your Crew Happy
A healthy worm bin is a happy bin! Here’s what to look for:
- Moisture Level: Check the moisture regularly. The bedding should always feel like a damp sponge. If it’s too dry, mist it with water. If it’s too wet, add more dry bedding material and check that your drainage holes aren’t blocked.
- Temperature: Keep an eye on the temperature. If it gets too hot, you might need to move the bin to a cooler location or add some frozen water bottles (sealed, of course!) to the bin temporarily. If it’s too cold, insulate the bin or move it inside.
- Smell: A healthy worm bin should smell earthy and pleasant. If it smells sour, rotten, or like ammonia, it’s a sign of something imbalanced. This usually means there’s too much food, the food is too wet, or there’s not enough air. Try adding dry bedding and stirring gently.
- Pests: Fruit flies can be a nuisance. Burying food scraps deeply and avoiding overfeeding usually prevents them. If they appear, you can try a simple trap like a small dish of apple cider vinegar with a few drops of dish soap. Small white mites are usually harmless decomposers, but large numbers might indicate too much moisture.
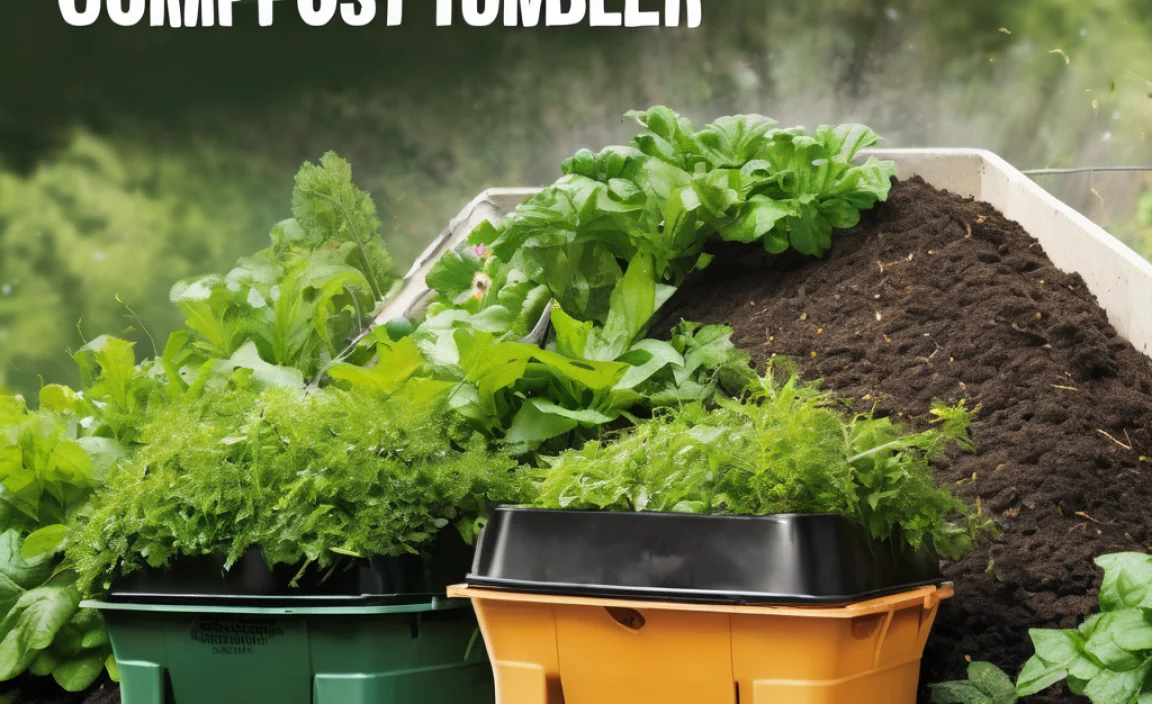
Harvesting Your Worm Castings: The Black Gold
After a few months, you’ll start to see a darker, finer material accumulating at the bottom of your bin – these are your prized worm castings! Harvesting them is the most rewarding part. There are a few methods:
Harvesting Method 1: The “Migration” Method
This is a popular and simple method:
- Stop Feeding: About a week or two before you plan to harvest, stop adding fresh food scraps to the bin.
- Add New Bedding & Food: On one side of the bin, add a fresh layer of moist bedding and a generous amount of new food scraps.
- Wait for the Worms: The worms, attracted by the fresh food, will migrate to that side of the bin.
- Harvest from the Other Side: After a couple of weeks, most of the worms should have moved to the new food source. You can then carefully scrape the castings from the original side of the bin, leaving behind most of the worms.
- Continue the Cycle: Once you’ve harvested, you can add new bedding to the empty side and start the feeding process again, alternating sides each time.
Harvesting Method 2: The “Dump and Sort” Method
This is best for smaller bins or when you can’t wait for migration.
- Empty the Bin: Gently dump the contents of your worm bin onto a tarp or a large plastic sheet in a brightly lit area (worms dislike bright light).
- Separate: The castings will be dark and crumbly. The worms will try to burrow away from the light. You can either wait for them to burrow, then scoop the top layer of castings, or manually pick out the worms and any uncomposted material.
- Return Worms: Place the harvested worms back into the cleaned bin with fresh bedding.
What to do with the Castings:
- Soil Amendment: Mix the castings directly into your garden soil or potting mixes at a rate of about 10-20%.
- Compost Tea: Steep castings in water (aerated with an aquarium pump is best, but not essential for beginners) to create a nutrient-rich liquid fertilizer.
- Top Dressing: Sprinkle a thin layer around the base of plants.
Troubleshooting Common Worm Composting Issues
Even the best worm farmers run into a snag now and then. Here’s how to tackle some common problems:
| Problem | Possible Cause | Solution |
|---|---|---|
| Foul Odor (Rotten Egg, Ammonia) | Overfeeding, too much moisture, lack of aeration. | Add dry bedding (newspaper, cardboard), gently stir, reduce feeding, check drainage holes. |
| Fruit Flies or Gnats | Food scraps exposed, bin too wet. | Bury food scraps deeply, reduce moisture, add dry bedding, use a simple vinegar trap. |
| Worms Trying to Escape | Bin too wet, too dry, too acidic, unfavorably hot/cold, insufficient bedding. | Adjust moisture (add dry/wet material), check temperature, ensure adequate bedding, bury food scraps. |
| Slow Decomposition | Worms are too cold, not enough food, worms are new and haven’t established. | Check temperature, ensure consistent feeding (but don’t overfeed), ensure you have the right type of worms. |
| White Mites (in large numbers) | Bin too wet, too much food. | Add dry bedding, reduce feeding, ensure good airflow. Small numbers of mites are fine. |
Advanced Worm Composting Tips (Once You’re Comfy!)
As you get more experienced, you might want to tweak your worm composting process. Here are a few ideas:
- Worm Bin Systems: Explore different bin designs. Stacking systems allow for easier harvesting as leachate drains to a lower tray, and finished compost can be easily separated.
- Worm Tea Brewing: For a truly potent liquid fertilizer, invest in a proper worm tea brewer that uses an air pump to oxygenate the mixture, cultivating beneficial aerobic microbes. This external guide from University of Illinois Extension offers more insights into vermicomposting.
- Adding Different Materials: Once you have a good handle on the basics, you can experiment with adding small amounts of other organic materials like shredded leaves, finely ground yard waste, or even small amounts of plain cardboard. Remember to always research and introduce new materials gradually.
- Managing Larger Volumes: If you find yourself with more food scraps than your indoor bin can handle, consider building a larger, outdoor worm bin or expanding to multiple bins. Outdoor bins might allow for a broader range of “food” sources, but temperature management becomes more critical.
Conclusion: A Step Towards a Sustainable Home
There you have it! The worm composting process, broken down into manageable steps. Starting a worm bin might seem a little peculiar at first – inviting a bunch of worms into your home to eat your leftovers – but it’s one of the most effective and rewarding ways to reduce waste and create an incredible resource for your plants. You’ve learned what you need, how to set it up, how to feed your wiggly friends, and how to harvest that precious black gold.
Remember, patience and observation are your best tools. Don’t be afraid to experiment a little, and when in doubt, err on the side of caution – underfeeding is always better than overfeeding. By embracing worm composting, you’re not just making fertilizer; you’re making a conscious choice for a more sustainable lifestyle, turning everyday kitchen waste into a powerhouse for your garden. Happy worm farming!
Frequently Asked Questions About Worm Composting
- Q1: What are the best worms for composting?
- The best worms are Red Wigglers (Eisenia fetida) and European Nightcrawlers (Eisenia hortensis). They are voracious eaters and thrive in compost environments. Regular garden earthworms are not suitable.
- Q2: How much food can a pound of worms eat?
- Once established, a pound of worms can eat about half their weight in food scraps per day. This translates to roughly 0.5 to 1 pound of food daily for a starting worm population. It’s always better to start slow and increase as you learn your worms’ appetite.
- Q3: How often should I feed my worms?
- When you’re starting out, feed them every few days. As your worm colony grows and consumes more, you can feed them more frequently, perhaps every 1-3 days, depending on how quickly the food disappears. Always bury the food and avoid overfeeding.
- Q4: Can I put citrus peels in my worm bin?
- Yes, but in moderation. Worms can handle citrus, but large quantities can make the bin too acidic and irritating for them. Chop them up and bury them along with other scraps.
- Q5: What is the “worm tea” I hear about?
- Worm tea is a liquid fertilizer produced by steeping worm castings in water. It’s rich in nutrients and beneficial microbes that boost plant health. It can be used as a soil drench or foliar spray.
- Q6: Do I need to add anything to the bin besides bedding and food?
- Crushed eggshells are highly recommended. They provide grit for the worms’ digestion and add calcium to the compost. Other than that, the bedding and food scraps are the main components.
- Q7: How long until I get compost?
- It typically takes 2-4 months to harvest significant amounts of worm castings from a new bin, depending on the size of your bin, the amount of food you add, and the population of your worms. You can start harvesting smaller amounts sooner.

I am passionate about home engineering. I specialize in designing, installing, and maintaining heating, ventilation, and air conditioning systems. My goal is to help people stay comfortable in their homes all year long.